


How To Create A Gorgeous Pansy Outdoor Planter In Four Easy Steps
I have to admit that I previously never paid attention to the pansy flower. I am not sure why. I guess it was because it never seemed to be showy enough compared to all of the other beautiful annuals available.
But something has happened to the lovely pansy flower in the past years in the gardening world. There seem to be new kinds that last longer throughout the growing season and they can tolerate the chillier weather. The pansy now seems to come in more brilliant colours with bigger and bolder petals. They also come in different varieties that were not available before making them very versatile.
But something has happened to the lovely pansy flower in the past years in the gardening world. There seem to be new kinds that last longer throughout the growing season and they can tolerate the chillier weather. The pansy now seems to come in more brilliant colours with bigger and bolder petals. They also come in different varieties that were not available before making them very versatile.
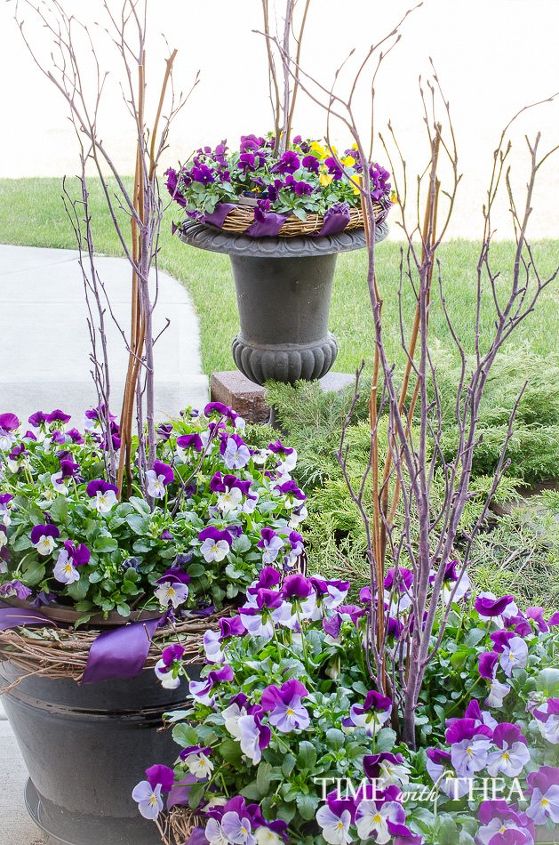
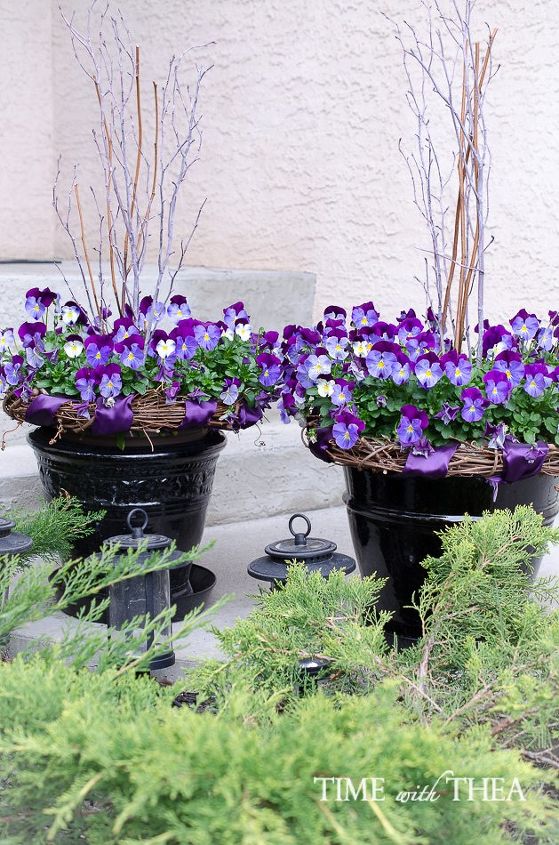
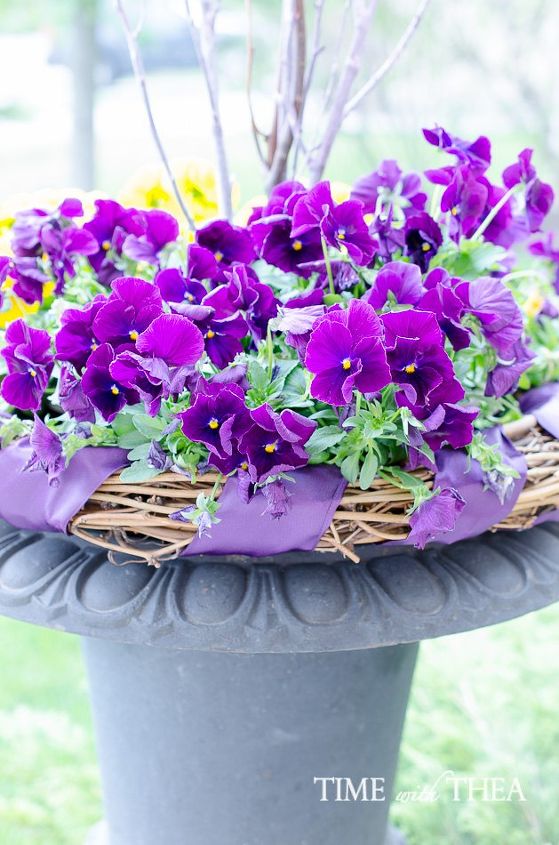
I live in a Zone 3 area for gardening. That means that we can still get frost and yes… even snow into the middle of May. I love to garden and wanted to get my outdoor planters started for the front walkway even though it was still the beginning of April. I came across some hanging planters at Costco filled with trailing pansies. I decided to give them a try. When I brought them home and placed them in the black outdoor planters they looked lovely. But I felt they needed something more to make them look gorgeous. This is what I did….
Step 1
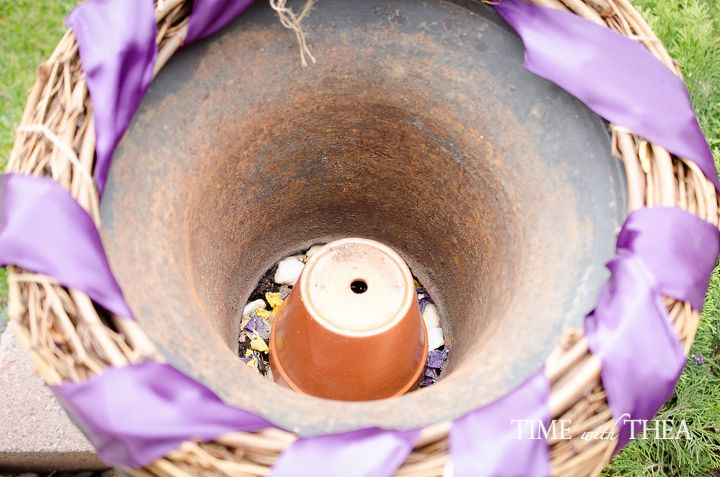
Step 2
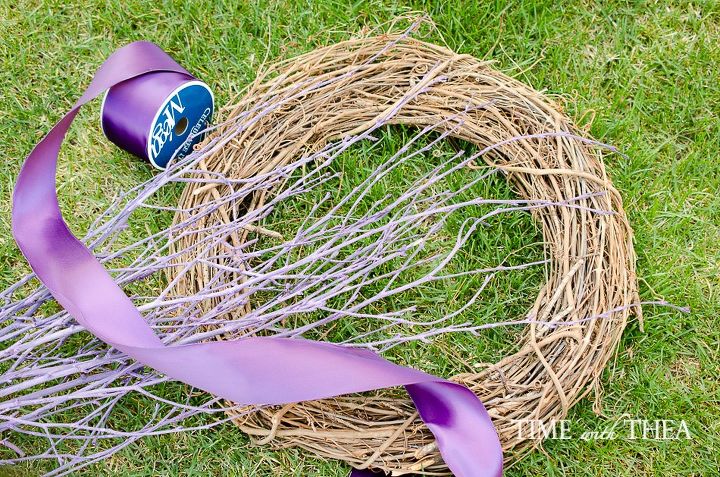
Step 3
Step 4
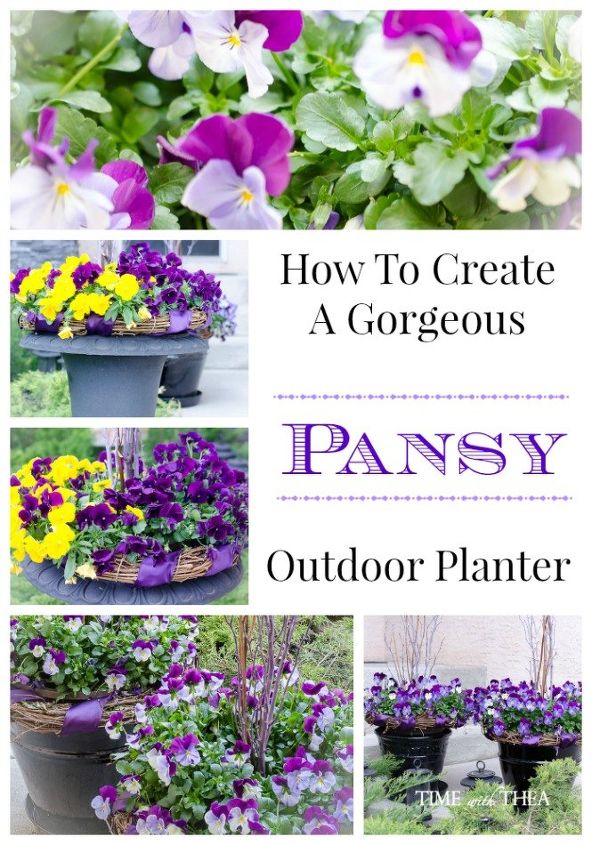
Now a pretty Cool Wave® pansy planter was made even more gorgeous just by adding some embellishments.

Want more details about this and other DIY projects? Check out my blog post!
Comments
Join the conversation
2 of 114 comments
-
What a wonderful, beautiful job you.
Thumbs Up.
-
Purple faced pansies/violas paired with white alyssum is stunning!


Frequently asked questions
Have a question about this project?