


Living Room Makeover

by
Robert C
This was the living room before. Quite simple with a small electric fireplace. My home needed a ton of work when I bought it 8 years ago. The living room was painted with new flooring and window treatments and sat this way for the last 7 years so I decided to freshen it up and give it a new, warmer look.
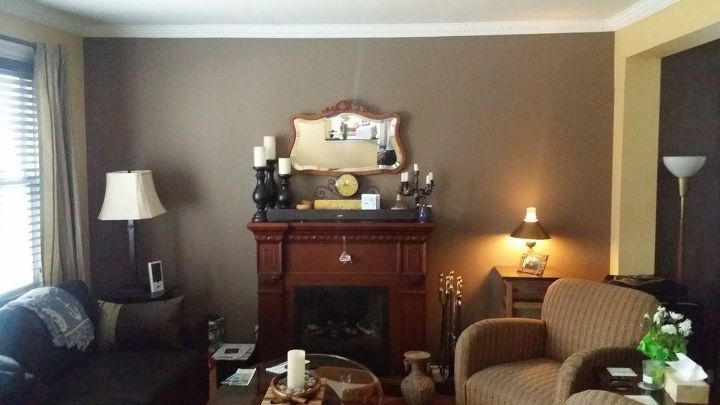
Fireplace wall before.

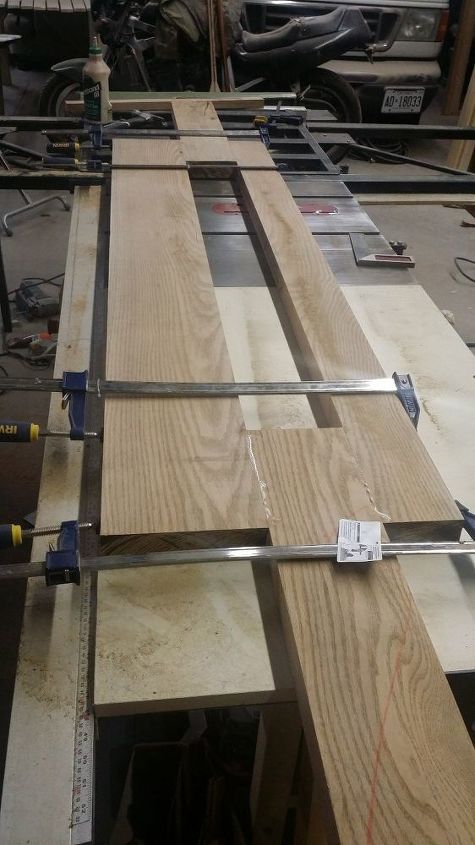
Barn board (reclaimed wood)
A friend gave me a Super deal on some reclaimed lumber so I took it all. I did not know what I was going to do with the boards but I absolutely planned on using every bit of it somewhere around the house.

Fireplace Box for TV
To start this project, I built a hollow wooden box out of 2X4s and plywood to resemble a fire place. And then attached a quality Slim Line Series Napoleon electric fireplace to the front. If you look just beyond the fireplace, you will notice the tv lift (that I ordered online) inside of the cabinet.

Cover With Stacked Stone
I love the narural feeling, warmth and texture of stacked stone so I cut and attached the stone over the whole base of the fireplace. You can get this at any major hardware store.
Oak Mantle Opening for TV
I got this huge piece of oak on Craigslist for 50 dollars but it was not wide enough. I also needed an opening for the TV to raise out of so I cut it to size length wise and straight down the middle, then used the extra wood to create spacers on either side. Perfect for the opening. A ledge was routered around the entire inner edge for a thinner piece of oak to sit in with hinges. This makes it so the mantle top closes flush when the tv is down and raises out of the cavity when the TV raises up.
Stretching Wood to its Max :)
There was not enough reclaimed wood to cover the entire wall so I skinned each side to take advantage of the amazing patina which saved a ton of wood. I also did this so the wood did not stick or beyond the crown molding. Essentially is a thin layer of paneling on the wall to create the illusion of full boards over the wall. I had to do 4 passes of this wood through the table saw because the blade only raises about 3.5 inches. Patience are needed here!

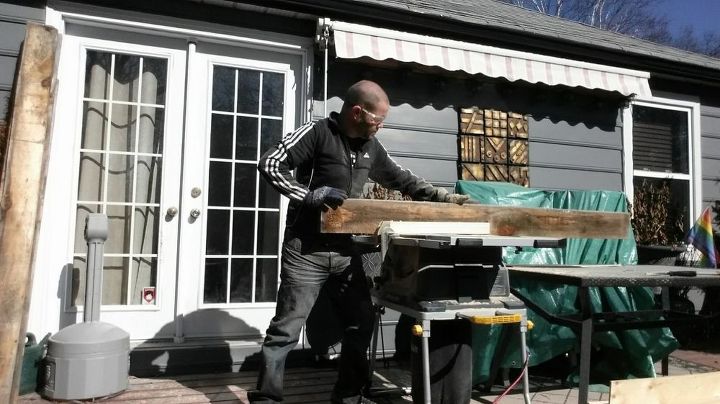
Instalation
I attached the wood to the wall with construction adhesive and 100 plus year old nails to with the wide heads made by a black smith to give it a unique, antique look.
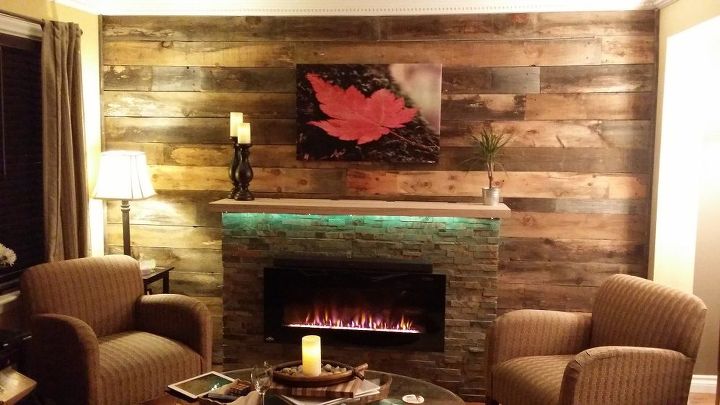
Finished Wall - Added L.E.D. Strip Lighting
This was just after the wall was complete. I wanted the stone to pop out more so I routered out a cavity under the oak to put a strip of L.E.D lights to shine down. It's fairly inexpensive and can be changed to all different colours with a remote. (Even pre programmed disco lighting or a setting to fade to each colour slowly).
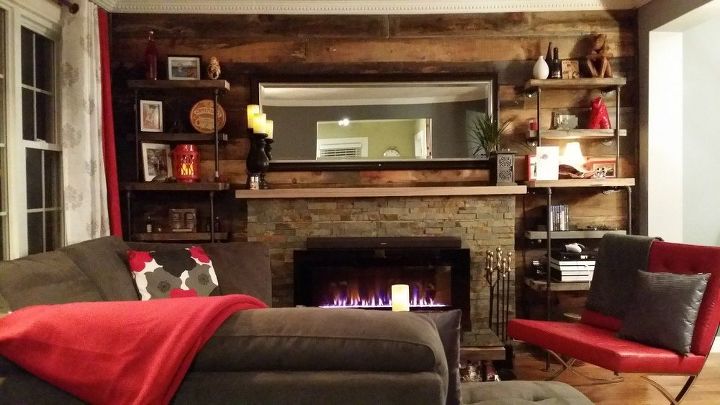
Finished Fireplace Wall
This is the front view of the Fireplace Wall. Please note: the mantle still needs to be stained and varnished. (this weekend's project).
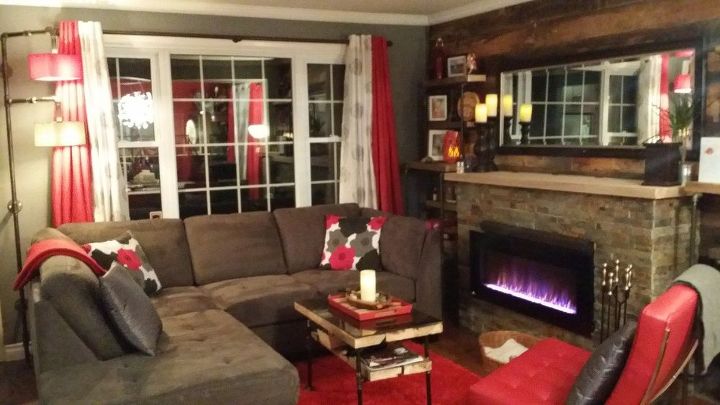
Side View of Living Room
I wanted the room to look warm and inviting. Painting the walls in 2 tones of gray and all the wood certainly accomplished this. I decided to add in the red accents to make a pop of colour throughout the space.
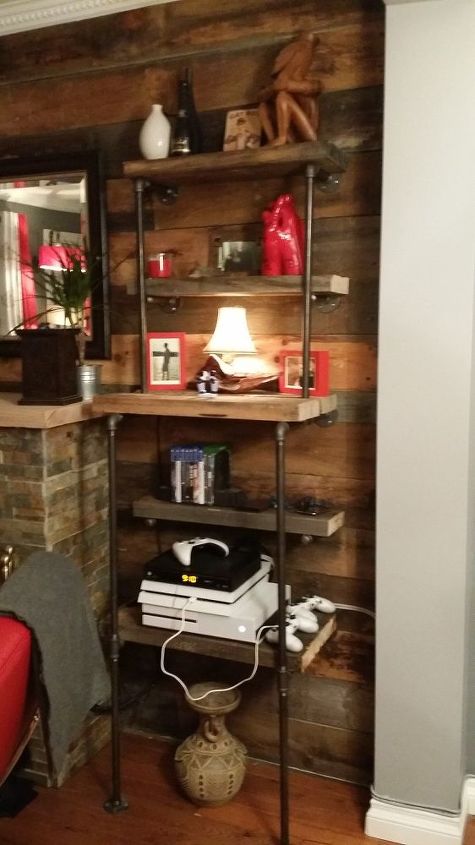
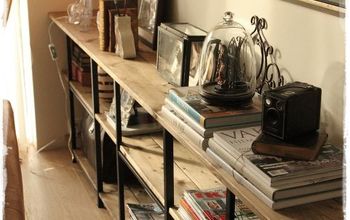
Shelving with leftover wood
These shelves cost me around 100 dollars each. I went to the Home Depot and got all the needed industrial pipe and screwed it together to create a tall shelf on either side of the fireplace. This was perfect for using up the extra reclaimed wood. This is an easy project but can cause several trips to the hardware store. The pipe fittings are very specific.
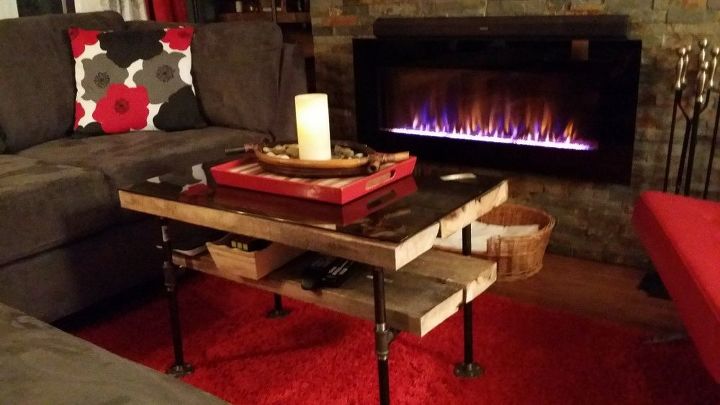
Industrial Pipe Coffee Table
The shelves on either side of the fireplace inspired me to build the coffee table out of the same materials and use up the very last of reclaimed wood. I cut the table to fit a piece of glass from a dresser top from ikea. I think it worked out well.
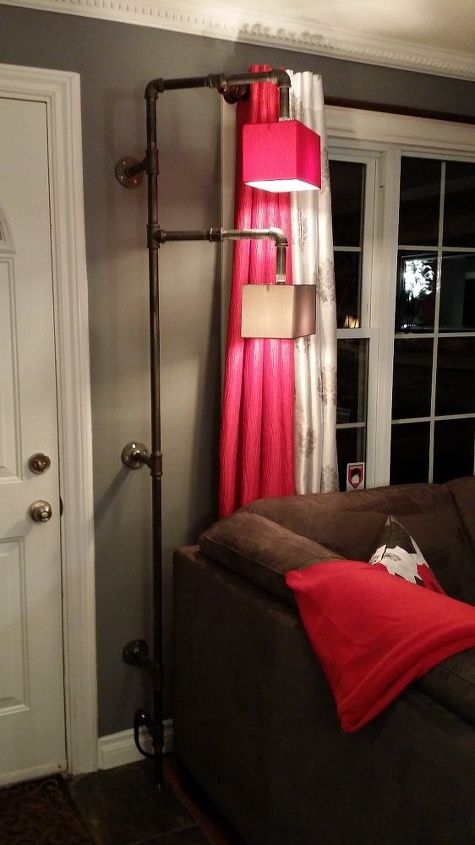
Industrial Pipe Lamp
I needed lighting on the other side of the room so i just kept going with the industrial pipe and wired it up through the pipes and attached it to the wall. When I was out sourcing lamps, tables and shelving I found them all to be quite expensive and generic looking. For a fraction of the cost, I created my own unique look. I'm pleased with how the living space turned out. :)
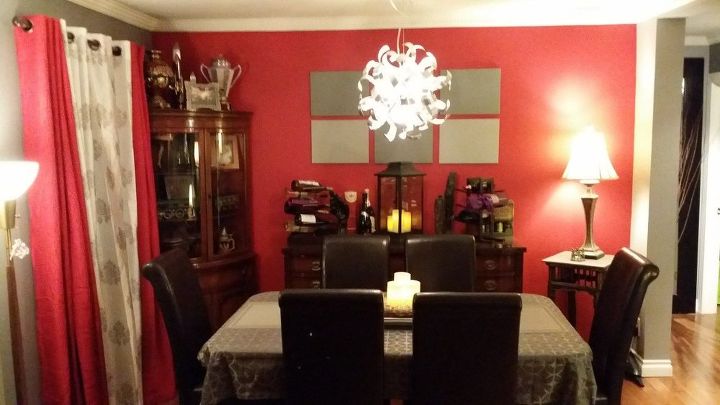
Dinning Room
I added a red wall, curtains and accents to the dinning room to tie in each room. I used the two tones of gray paint on dollar store canvas for the wall and a new modern looking light fixture ( I may replace the fixture with an industrial fixture that I will create.
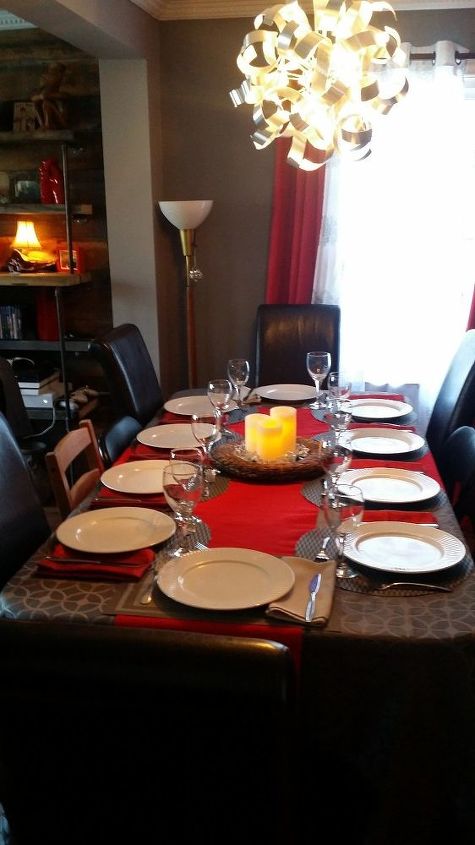
Dinner Party Setting
The dining room is the perfect setting to have guests over for a dinner party. I hope you like my makeover :) It took about 2 months to complete. I would have liked to of shared a couple of more pics of the tv raised out of the fireplace but you get the idea. Thank you!
Comments
Join the conversation
2 of 190 comments
-
I love it all . OMG the coffee table is fabulous as well as everything else. It is absolutely beautiful. I really love all of it.
-
Beautiful makeover! Love the industrial look! I’m going to have to try to make lighting like that!


Frequently asked questions
Have a question about this project?
My question is, where do I find a doctor who can make my jaw close because my chin is on the floor. Lol. Your ideas, design, craftsmanship...everything! I'm just in awe. Beautiful doesn't describe what you've done. Come decorate my home ANYTIME. Wow