


Turn a Bare Wall in to a Tree Mural With a Stencil. It's Easy!

I love murals. They make us think, they make us dream and they can be found in some of the most upscale homes in the world.
They can add such beauty to any room, becoming a focal point or just softly adding a feeling of the outdoors to the space. Don't let creating a mural intimidate you! Instead, let me show you how easy it is with a stencil and just blobs of paint.
They can add such beauty to any room, becoming a focal point or just softly adding a feeling of the outdoors to the space. Don't let creating a mural intimidate you! Instead, let me show you how easy it is with a stencil and just blobs of paint.

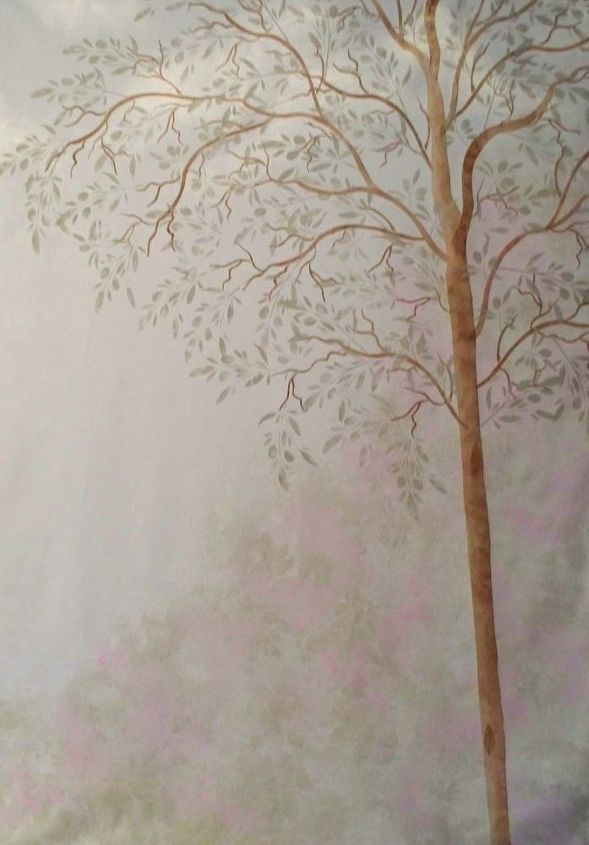
First, create a background for your design. I painted the area pale blue and then on just one side, to create a deeper background, I sponged medium gray paint and lavender paint. This creates a fuller, richer background for your mural. Blend heavily so there is little variation. A soft background is desired.
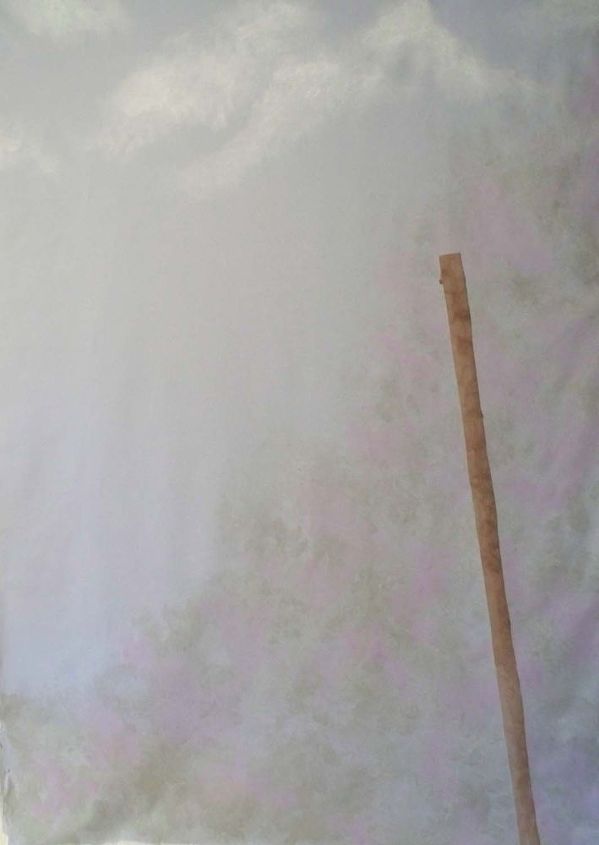
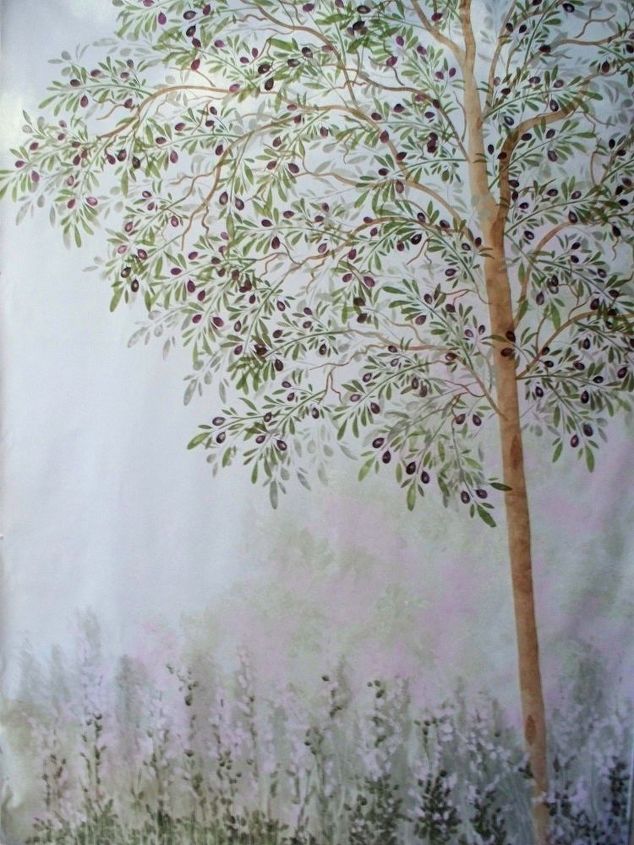
Tree stencils are repeatable and typically have a trunk, side branches and leafy branches in the set. Begin with the repeatable trunk stencil and start at the base board level then stencil it, repeating upward to within about 2 feet of where you want the top of your tree to end.
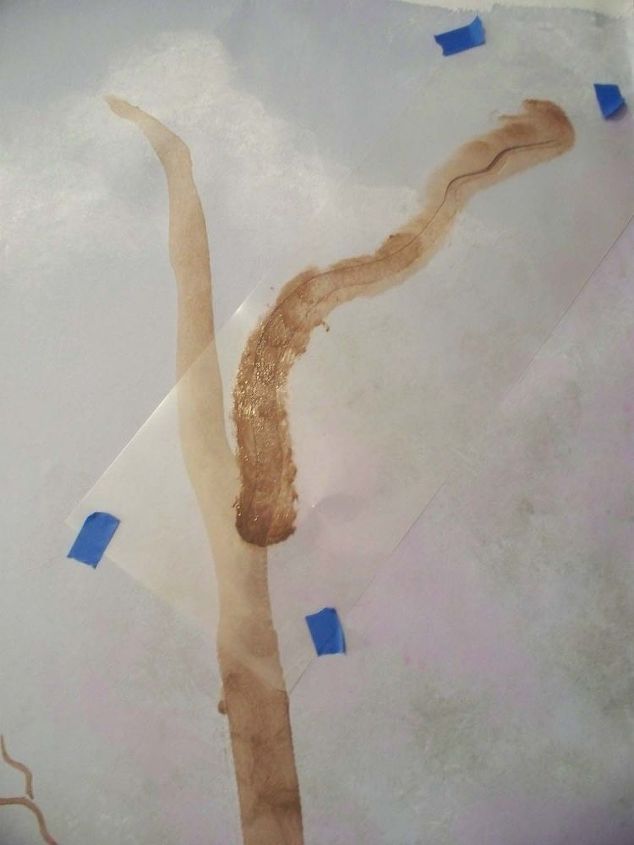
Begin adding side branches by taping the bottom edge of of the branch stencil opening up against the trunk. Avoid making even branches on either side of the tree trunk, but rather, off-set them like a real tree.
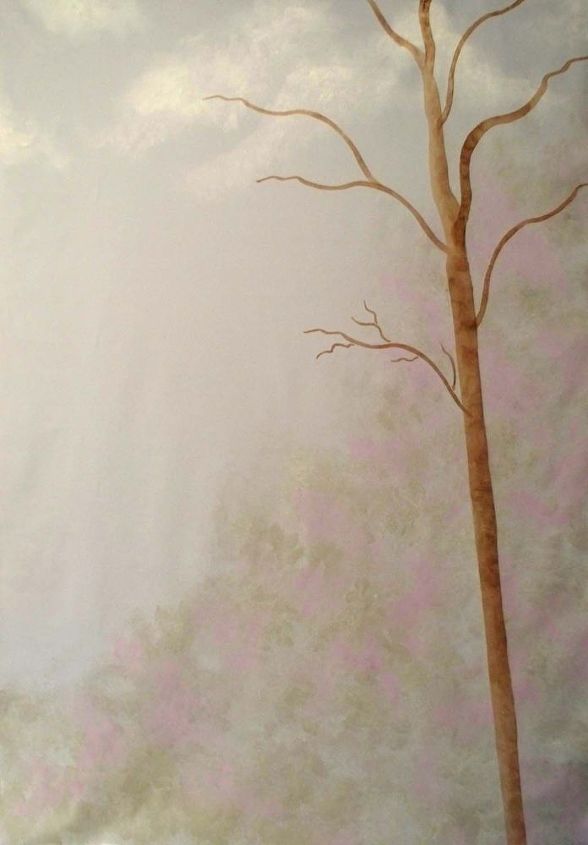
Side branches act as the foundation for adding leafy branches. Feel free to use those side branches for the top of the tree as well.
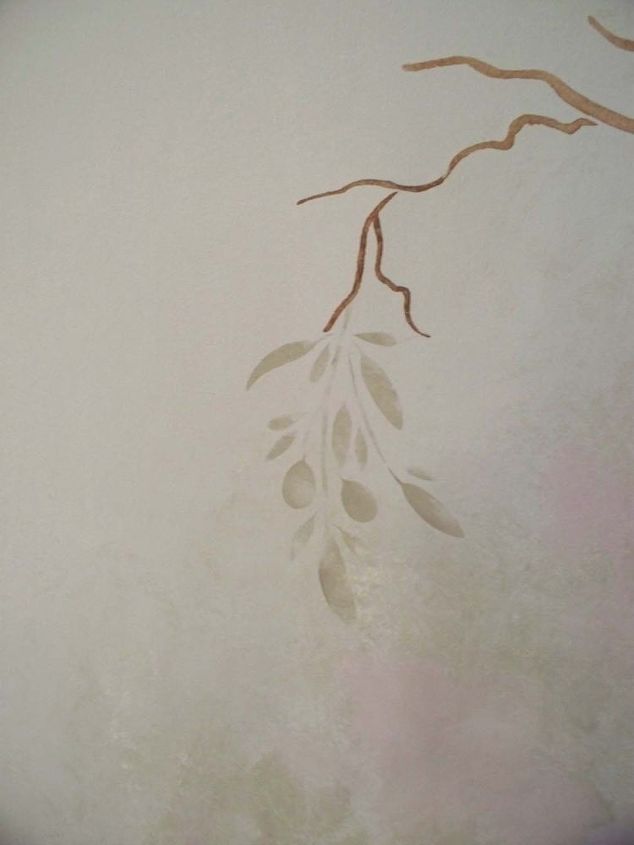
Now, add some "shadow" leaves by using the leaf stencil with gray paint to create background leaves. This creates more depth to your tree mural. Making it seem that leaves are behind the colored leaves you will do next.
Stencil gray leaves attached to each branch of your tree. See how the background is beginning to take shape?
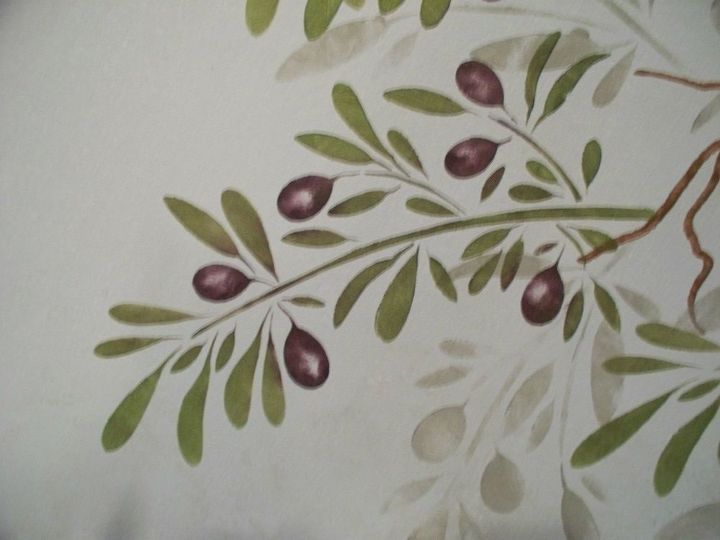
Now, start adding colored leaves right over the top of the gray leaves. Off-set the stencil slightly to allow the gray leaves to show through. I used our Olive Tree Stencil so you will see that I've stenciled the leaves in an olive green color then used purple for the olives themselves. By stenciling all the way around the outside edge of the olive and then leaving the center completely un-painted makes it look like the olives have a shiny highlight. These instructions will work for any tree stencil you find.
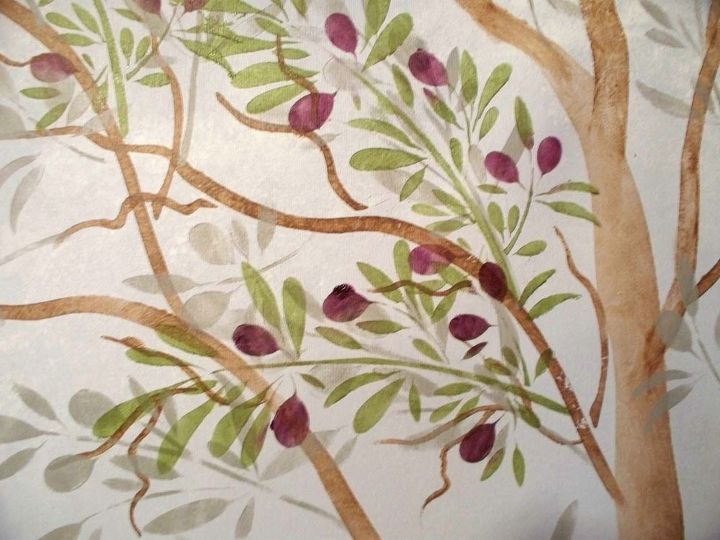
The tree really starts to come together as I add more and more colored leaves to the branches.
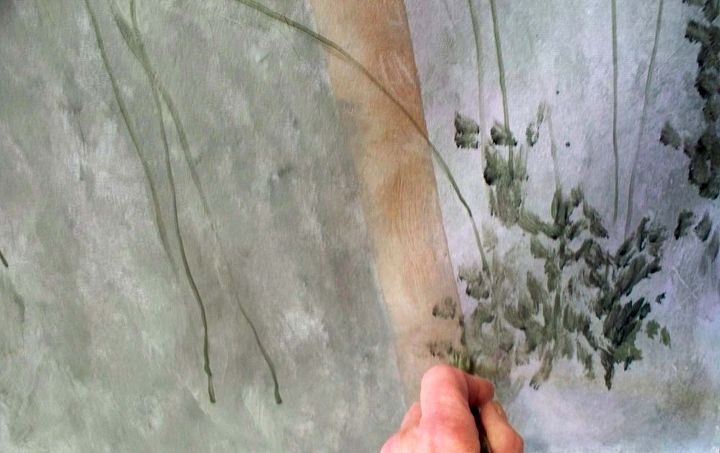
Add blooming plants in the foreground by creating long, skinny strokes of green paint to create "stems", then simply adding blobs of paint to the lower stem by blotting with green paint at the base. It's that simple. Just dot, dot, dot, and you will begin to see the form of a plant taking place.
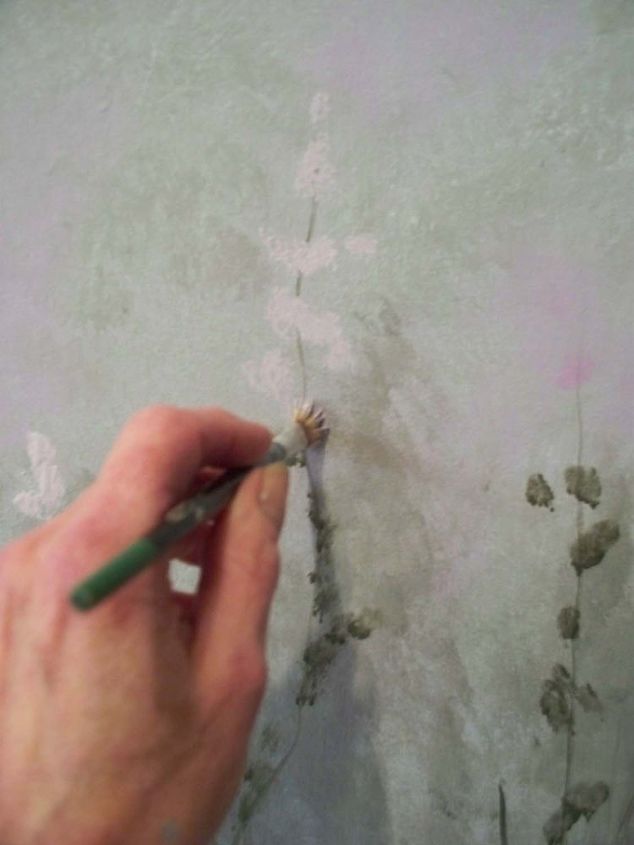
On the tops of the stems, add dots of lavender paint (or whatever color you choose). This will create flowers. Add various colors of pink, red, yellow and even deeper blue if you want a more colorful garden. You're not trying to create a plant that looks realistic, but more just the "idea" or "impression" of a plant.
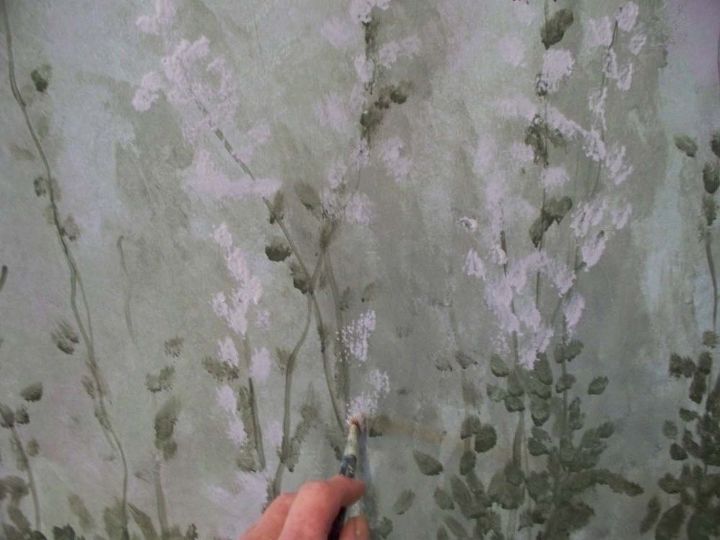
There's no exact science. Just dot away to your hearts content!
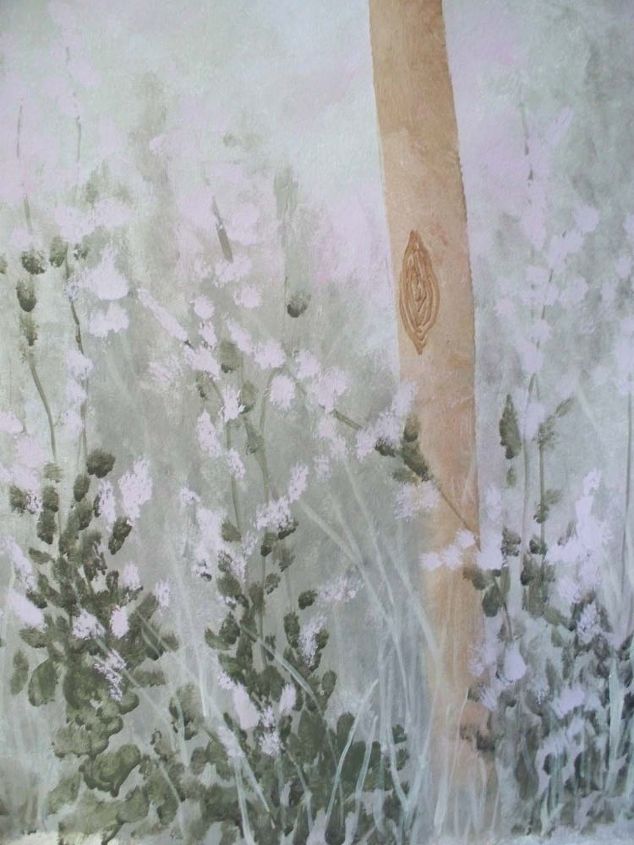
The flowers can actually cover portions of the trunk to create more depth.
Finish your mural by standing back, raising your cup and toasting your great work!
Comments
Join the conversation
2 of 32 comments
-
Can't wait to try it thanks for the tips and idea.
-
You are an inspiration! Wonderful encouragement, demonstrations and clear visions on "how to". Thank you.
Zippy1


Frequently asked questions
Have a question about this project?