


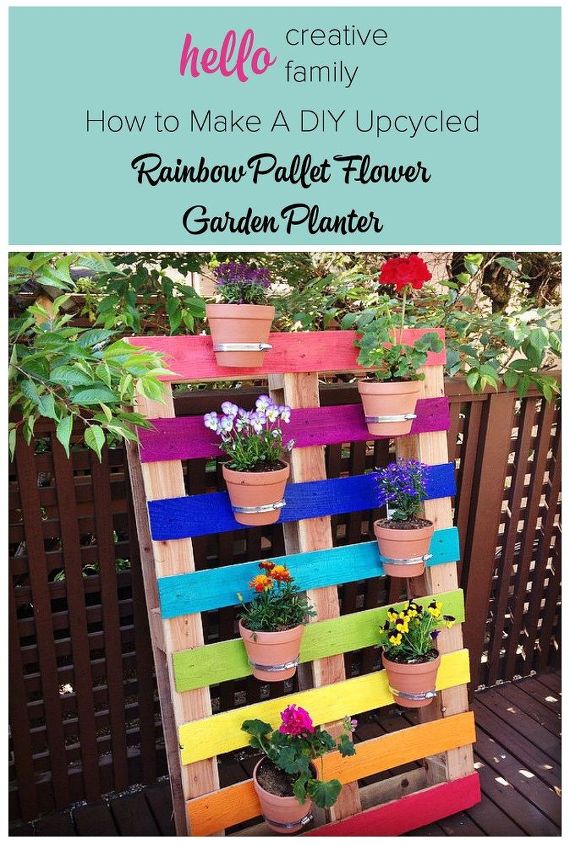
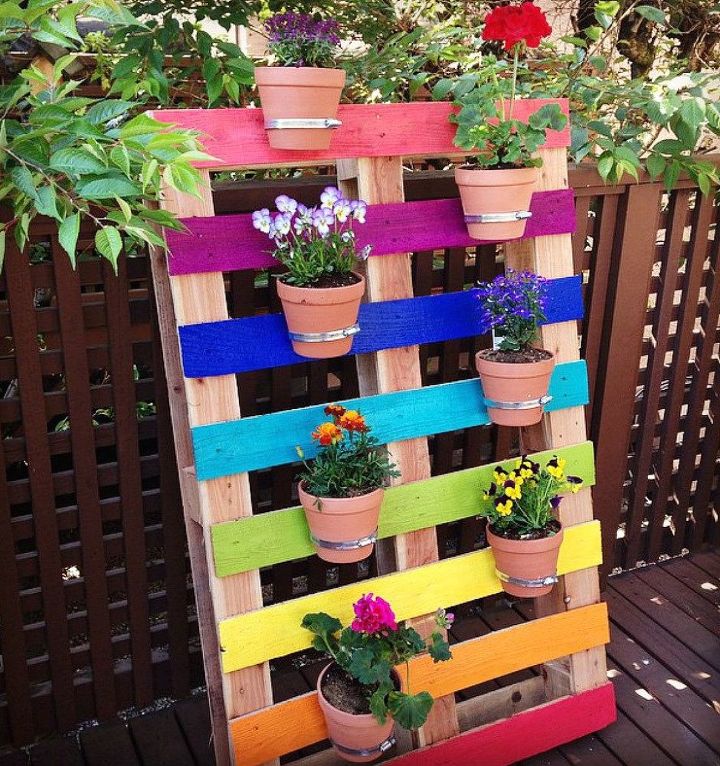
DIY Upcycled Pallet Rainbow Flower Garden

Comments
Join the conversation
-
For those asking about the mason jars, here is the link for that pallet. A-SHOP-APP-UWRoZHp6RnozbTJPZjJPdytzM3cwUGpsSHluV21iVGlmMHdaTUJXeUlrVkxLQmVTYUJtT2lESTM2M3hELzZyZ2tsMWNRRUZYWkpSZGpZV0xtU0RONHFCWU16cklGMWk4aUdxNjF1SkFsejFYdVptNTJFTElxYU9pbjZHYnhDdnVOUnJFTDZKMW1WcG0rS0dRTkExK0JOS2N0ME9NNVNuQUNuSEkvYUJvSUdlUDdVVEJxTHErcmJrQ1FZdFFRSy8vN1hHQnN0SUEvbGpiTloxdnFQUTBMYU4vNFYvQ1F5dWU1ZWMzYlM0NmlOa3d4SzBOSjZQK25zWVVhYjNyMUVObzVTMVN4cDR6N25yZVl1Z3ZWQ1J2OG5ya01pYmIvTWVnRXNOZXBtcWFGRnFPc2JQUnJ1Sm9lZ1VTdWRmTVB4SXotLVgzNFM1Y0lHRU1NZ3JEOHdNdWRCbWc9PQ==--b62d57d9a4a97d6cc43261b8b43abc7a8bd3daa7,6c001d34-3f9b-4e21-8d65-6d5e415a54ac,order_status_page
-
Going to do this but I am going to use colored pots like I saw in another post last year. I just got my pallets two weeks ago.


Frequently asked questions
Have a question about this project?
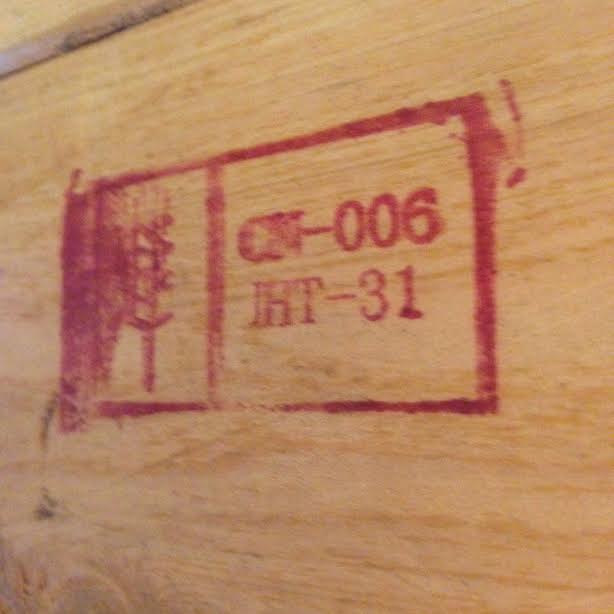
looks so fun...but what is the difference between Heat Treated and Chemical?
Is one 'safer' to use for plants etc/furniture
Am I missing somethin? I don't see mason jars.
Why can’t you use chem treated pallets?