


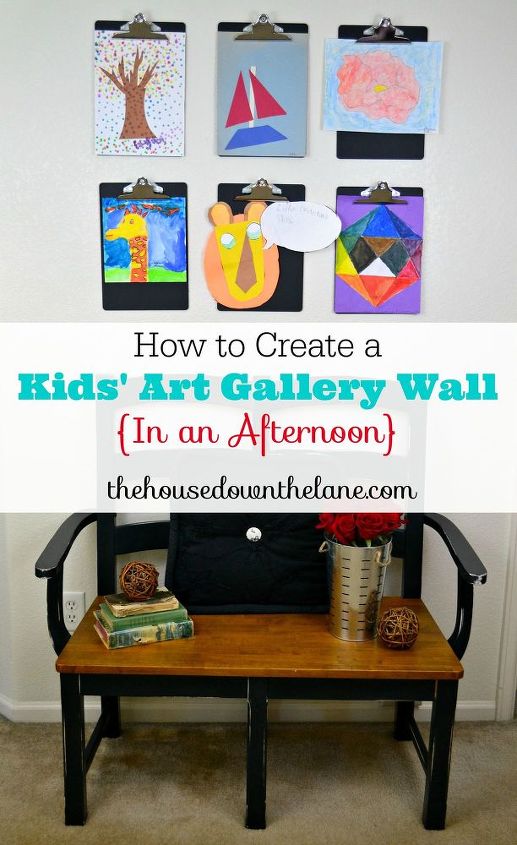
How to Create a Kids' Art Gallery Wall {In an Afternoon}
$25.00
4 Hours
Easy
Remember the days when your house was overflowing with kids’ papers and art projects?
Or maybe you’re still knee-deep in those days?
The days of school papers and art projects have come and gone at our house. My kids are teenagers {I rarely see papers unless it’s parent-teacher conference time}! And as overwhelmed by the piles of school papers and projects as I was in those early days, I find myself missing the kids’ artwork.
So, what’s a nostalgic mom to do? Dig out a bunch of artwork, of course. And find a simple DIY way to display them, too!
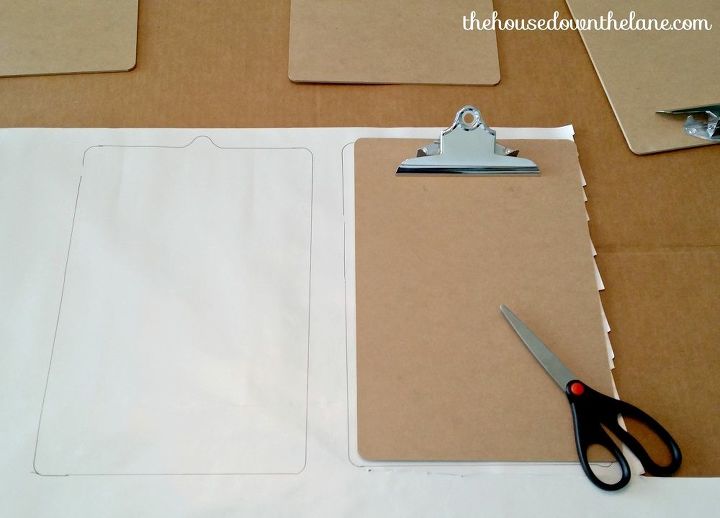
First, I traced my clipboards, so that I had templates to use to create the layout.
I wanted the clipboards to be "chalkboard clipboards," so I painted them with chalkboard paint. TIP: Use zip ties to hold the clip open and make it easier and faster to paint!
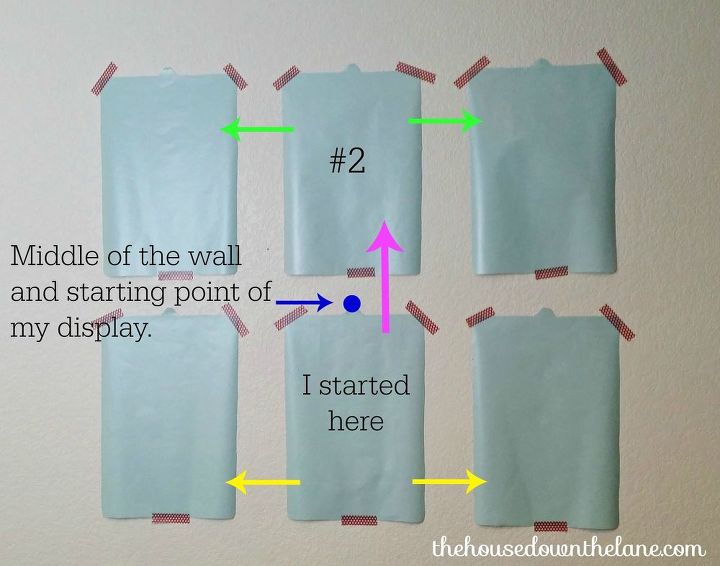
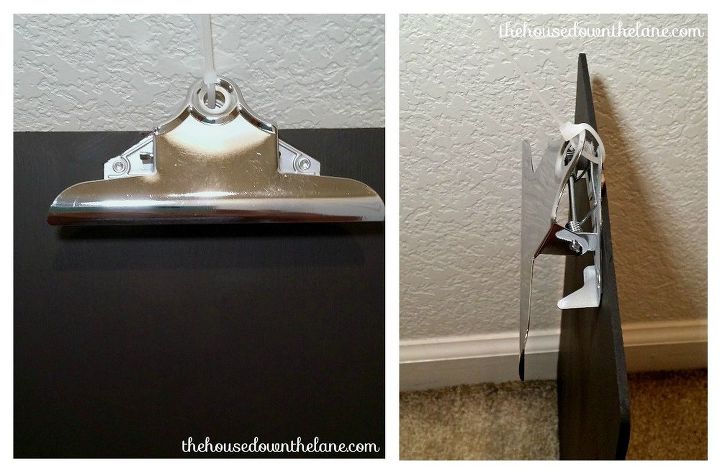
Next, I found the center of the wall and the height at which I wanted my first clipboard. I attached my first template to the wall with washi tape. Then I measured 3 inches up from the top of the it and attached the second template. Finally, I measured 3 inches to each side of the first two templates in order to position the remaining four templates in three columns of two. I had marked where I wanted my nails to go on the templates, so when I was ready to start nailing, I just nailed right through my templates!
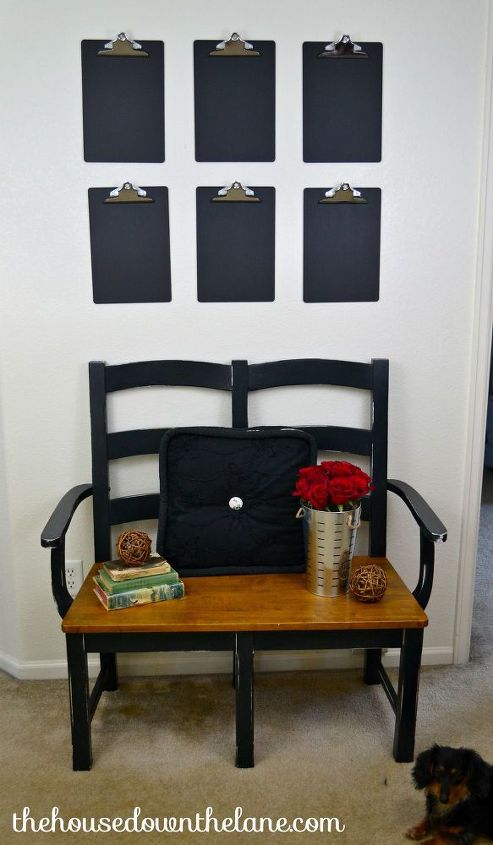
Here’s the wall fully staged before I added the art.
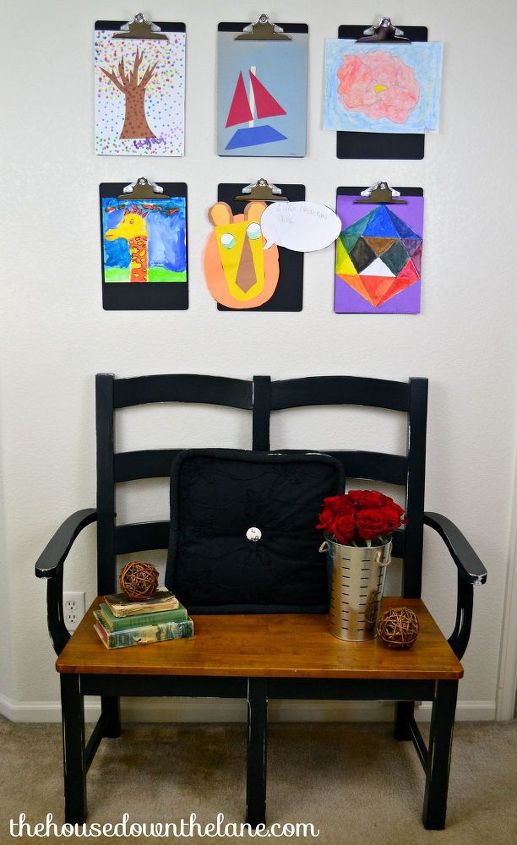
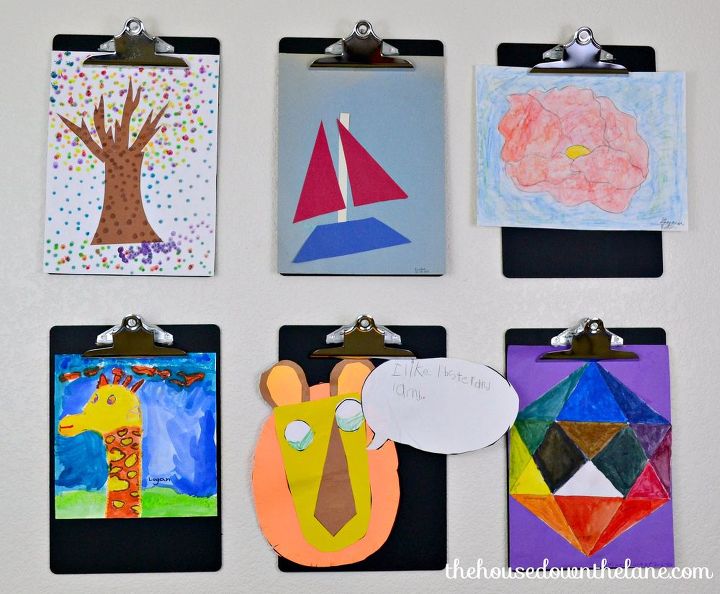
And finally, I added my kids' artwork! Now, I love walking up the stairs and being greeted by the bright colors and memories.

Want more details about this and other DIY projects? Check out my blog post!
Comments
Join the conversation
2 of 50 comments
-
Great idea! I will do this with my grandkids artwork. 😊
-
Perfect way to display seasonal artwork. Always looking for ways to bring out my son’s and his daughters’ art during the holidays.


Frequently asked questions
Have a question about this project?