


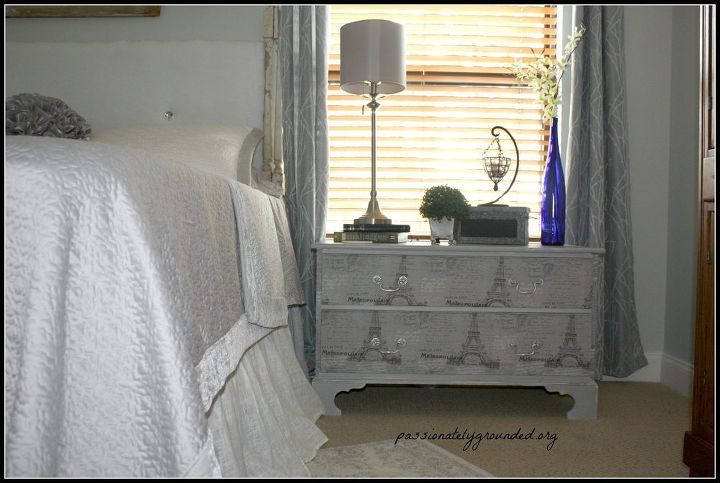
Dressing This Side Dresser With Fabric
$52
Easy
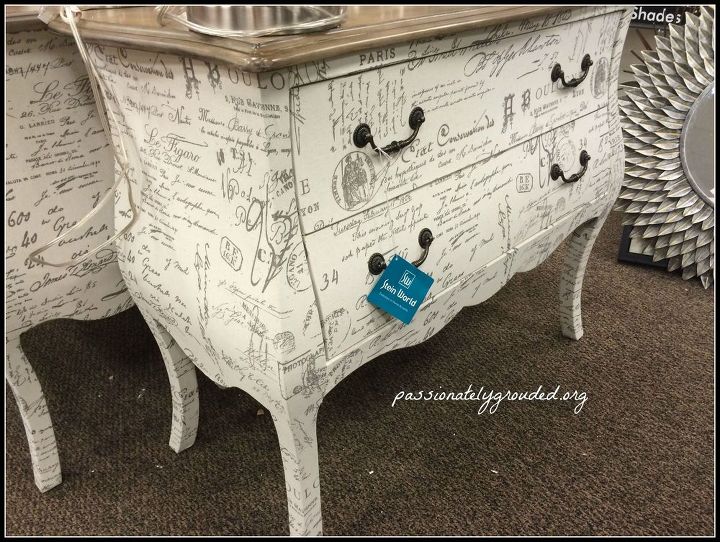
So, this is my inspiration piece. Just under $300. Just out of my price range! ;)
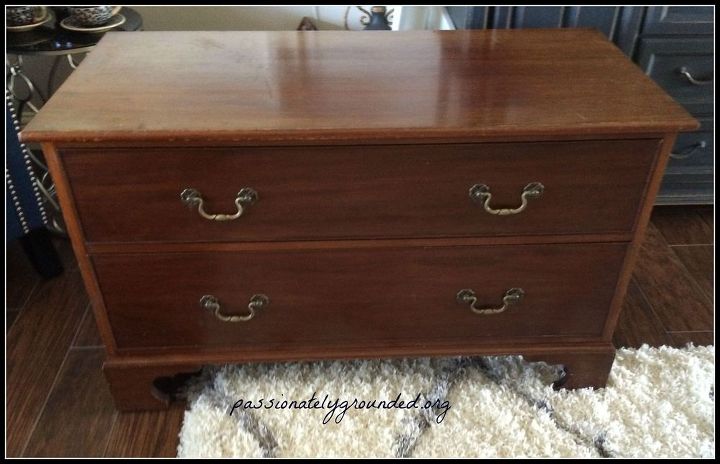
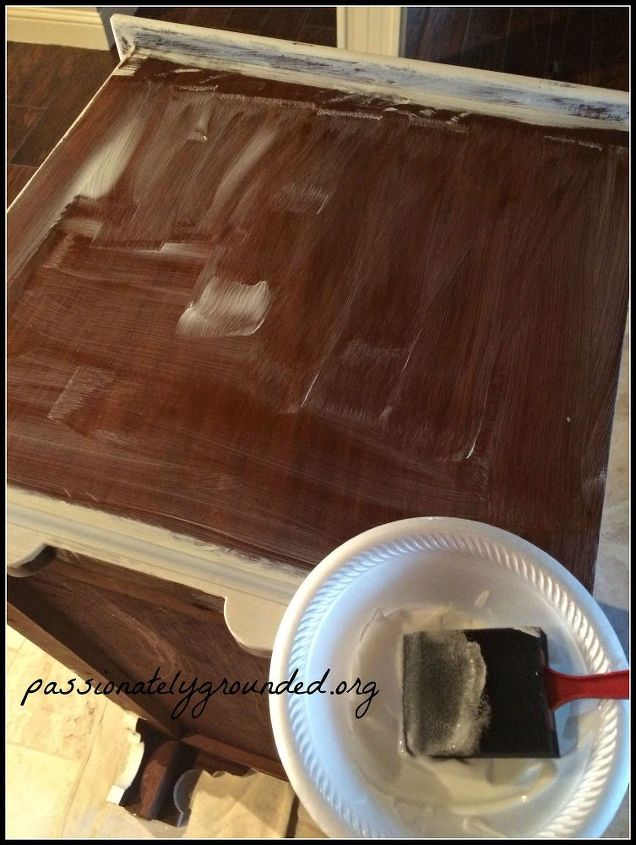
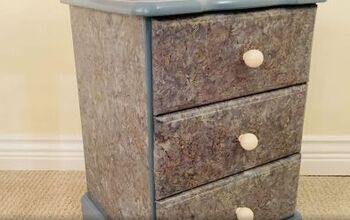
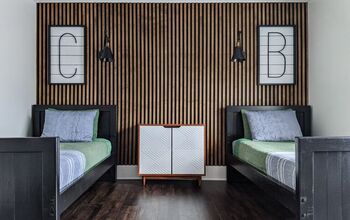
Because our windows in our new guest room (my daughter at college is going on her 3rd year away - so it is officially a guest room) ;) are low, I really didn't want something quite as high as the inspiration piece since it would cover up the view of the lake. I needed to improvise. I found this on a local garage sale site for $40 and it seemed the perfect size. Overall in good working shape - a little gouged on the top - but will work great.
This is one of those projects - and it happens occasionally... that didn't quite turn out as it did in my head.
I also painted out the inside of the bottom drawer area. I wanted to find some baskets to place in there rather than the drawer.
I then grabbed my fabric. This is where you can get creative! I really loved the old letter looking fabric on the inspiration piece but could not find that anywhere. I had been to Paris a couple of times and bought some of their pretty scarf wraps - unfortunately not one in the color I was doing this room. It does make me wish I would have picked up some miscellaneous fabrics from my travels. If you have, think about what kind of project you could do that would showcase it, and get it out of your linen closet! Anyway, I did find something with writing - and it did have to do with Paris.... Thank you my one stop shop!
I placed the fabric on turning the edge under the bottom (using a wooden skewer). I also cut it so it would just wrap around to inside of the drawer about an inch or 2. There was no science here - I was truly winging it....
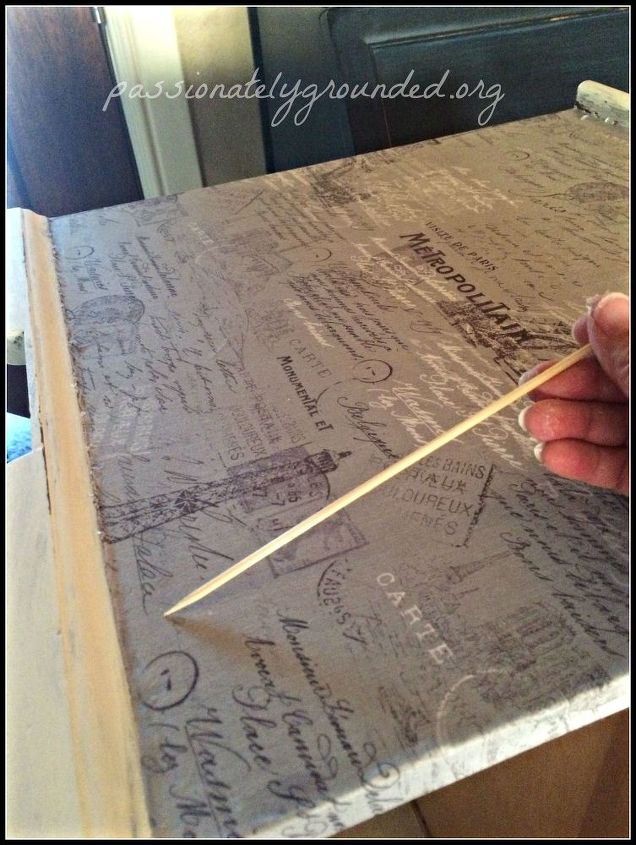
It looks pretty good. I like the inside of the bottom painted out. Once I finished the other side, I used one solid piece to go over the drawer (easy) and just poked some holes where the hardware handles fit in. I then tried to put the drawer in. Clearing throat... I then tried to put my drawer in.... It would not fit with the fabric wrapped in to the inside. I've had some old dressers like this in my life and I know they were never that tight fitting! I would need to trim back that fabric so I could get the drawer back in. Oh boy. This is how we learn - that is the ONLY reason I'm sharing this with you all!
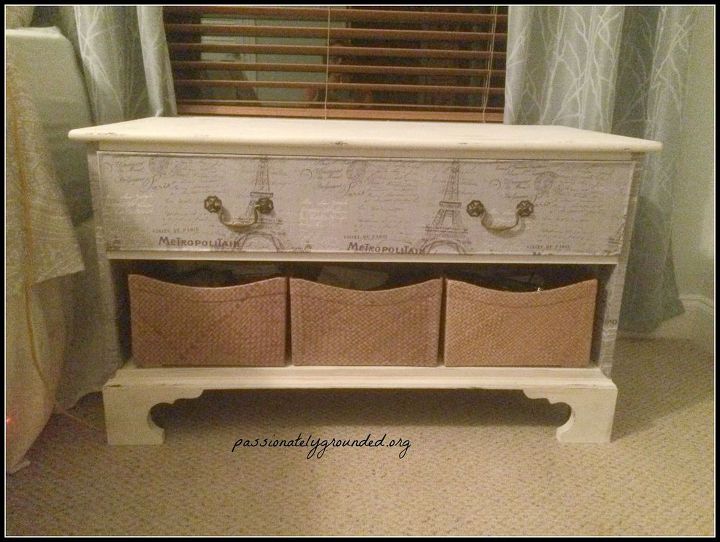
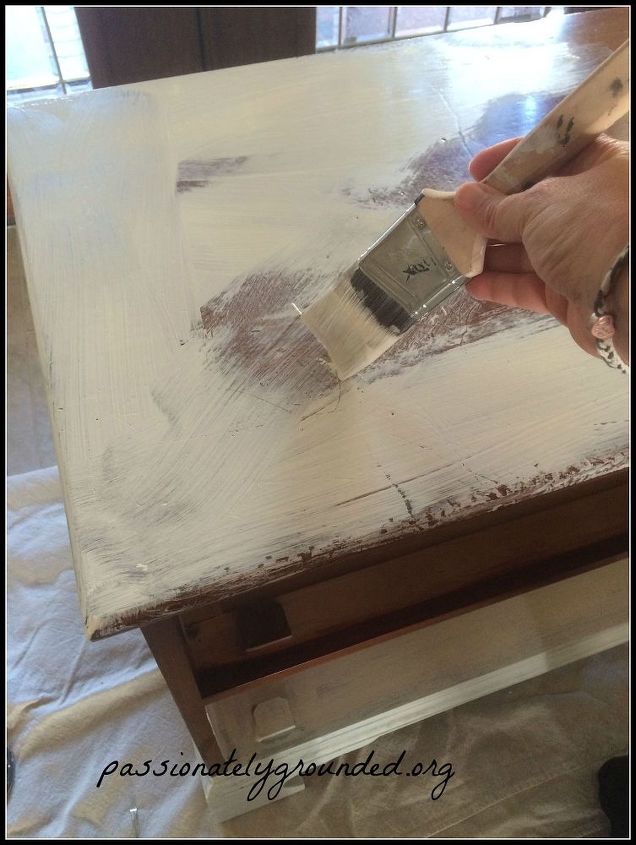
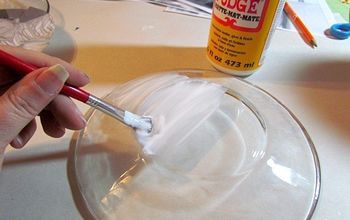
First thing - I needed to make it Gray. I was also having no luck finding baskets. The perfectly good drawer was screaming at me from the closet to put her to good use... Alright already! ~So I did.
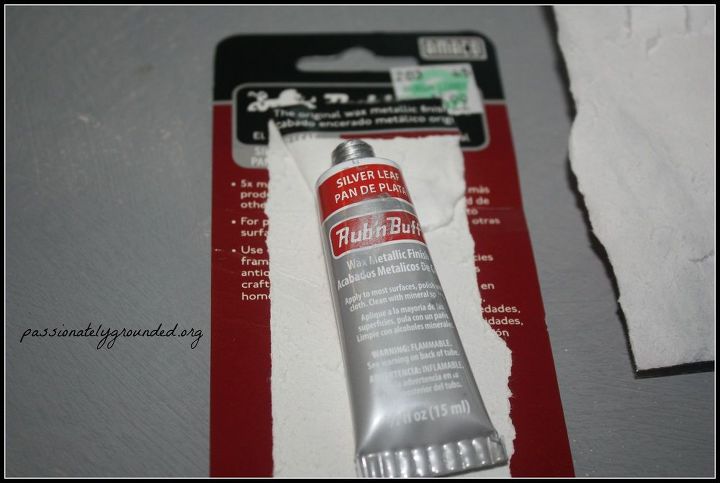
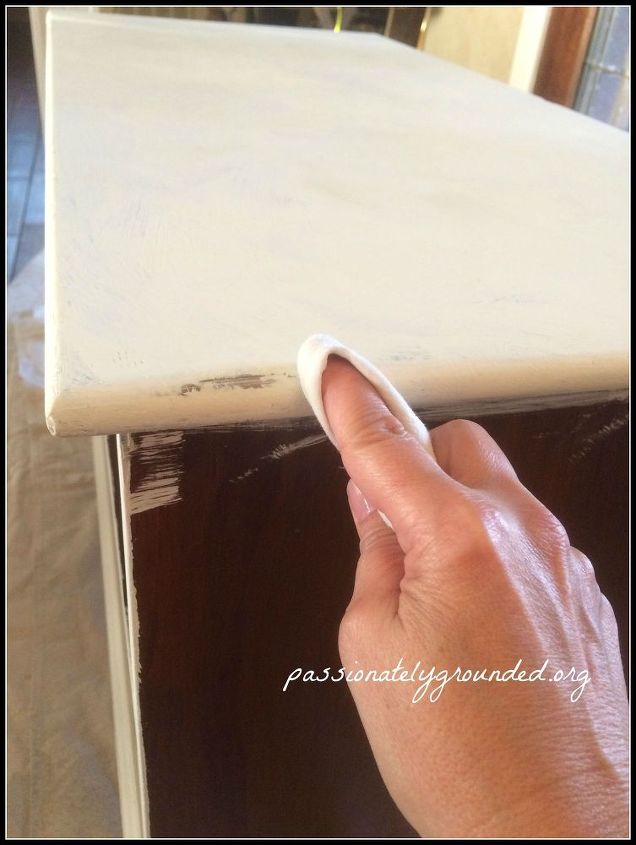
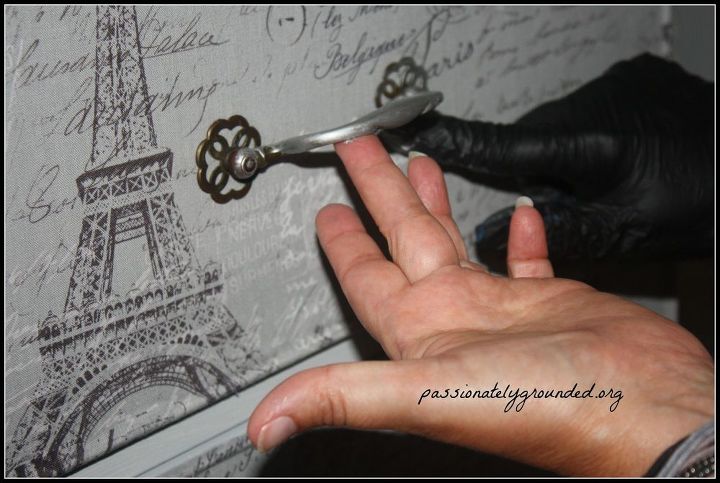
I put on a glove - but literally just squeezed a little on my finger and rubbed it on the handle. Yes, even while attached.
It is in a happy place in my heart right now.... I wanted to try something new, but add something soft and interesting ~ other than just another painted piece of furniture. The project turned out to be about $52 with the side table, fabric and the silver leaf for the handles. I had the rest.
I hope you enjoyed this little trial and error adventure with me. When you are a DIY'er, believe me.... it does not always turn out perfectly. What you do is forge ahead. Make adjustments. Come up with a new plan. It's only paint... or fabric.

Want more details about this and other DIY projects? Check out my blog post!
Comments
Join the conversation
4 of 7 comments
-
That is so beautiful. So, did you repaint over the AS cream with grey paint and did you buy more material in grey? If I missed that, I'm sorry. I really love it. I think the baskets were great too, yes, wrong colour but really flattering shape.
-
@Passionately Grounded It turned out terrific even with the misadventures! Great job, thanks for sharing!


Frequently asked questions
Have a question about this project?