


DIY Fabric Flower Bouquet!
$10
1.5 Hours
Easy
...Or, alternatively, how I made all my wedding bouquets for less than $60 (though, clearly, I did not pay myself for my time - that becomes a less economical proposition). Now, in the post-wedding period, I've made more fabric flower arrangements for home decorations.
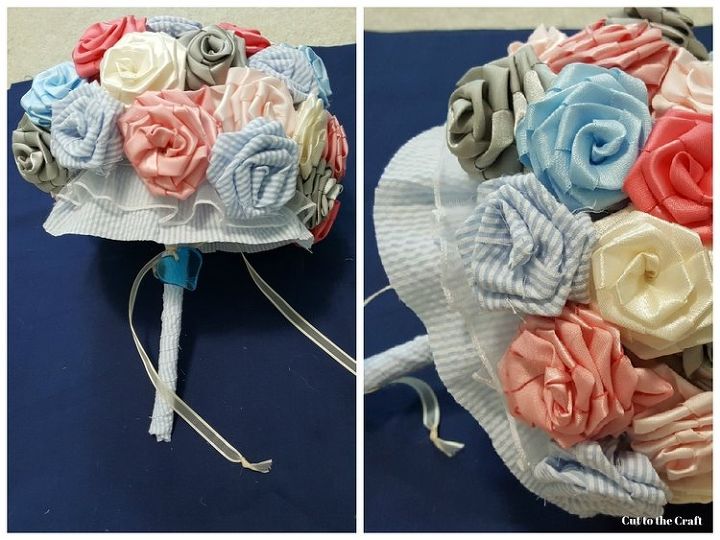
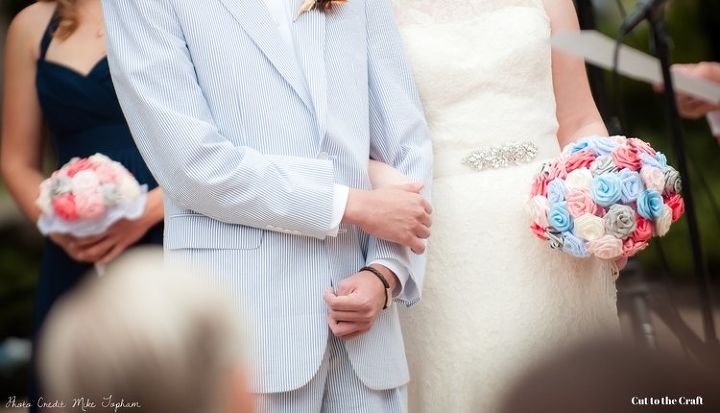
This tutorial builds a lovely wedding bouquet (shown below) with the fabric flowers constructed here:
http://www.cuttothecraft.com/blog/2015/7/4/diy-fabric-wedding-flower-tutorial
I opted for fabric flowers for a lot of reasons (cost, keepsake value, lack of seersucker in nature, etc.), and I'm pretty thrilled with how all my bouquets turned out.
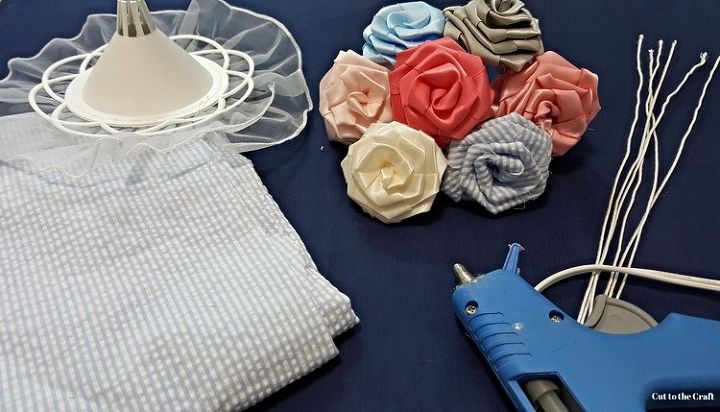
Materials:
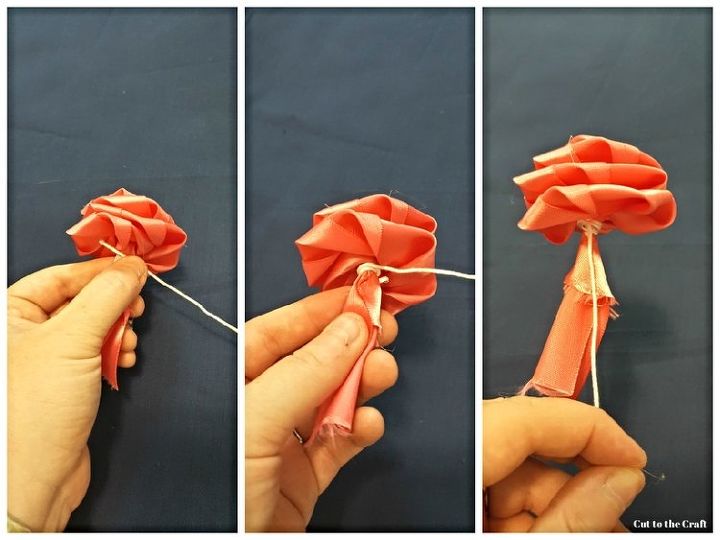
Step one is to attach the stems to the flowers. This can be done by tightly wrapping the wire around the "tail" of each flower. Most of mine are wrapped three-ish times - just be careful not to stab yourself with the end of the wire!
Once you've attached wire to all of your flowers, it's time to do a rough assembly of the bouquet. Start with a few flowers that will be in the center of the bouquet, and build outward. As you do, hold the stems all together ~4" from the base of the flowers. This means that some of the wires will need to be bent, so that they can all stay together and form a dome shape. The pictures below show approximately what I did for my "toss" bouquet - seven flowers, no collar, with the wires trimmed to a shorter length.
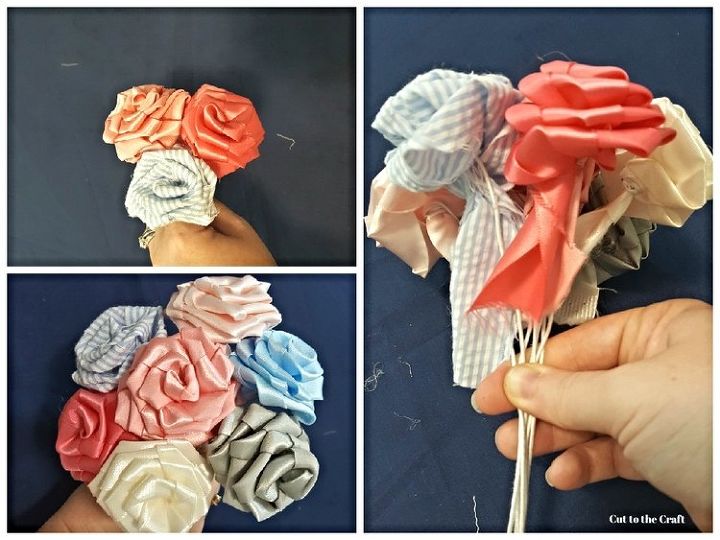
And keep building out for the bridesmaid/bridal bouquet. Just worry about getting flowers in roughly the right place. Once the collar is on and the stems and gathered better, you have a better opportunity to be fussy with how close the flowers are to each other and whatnot.
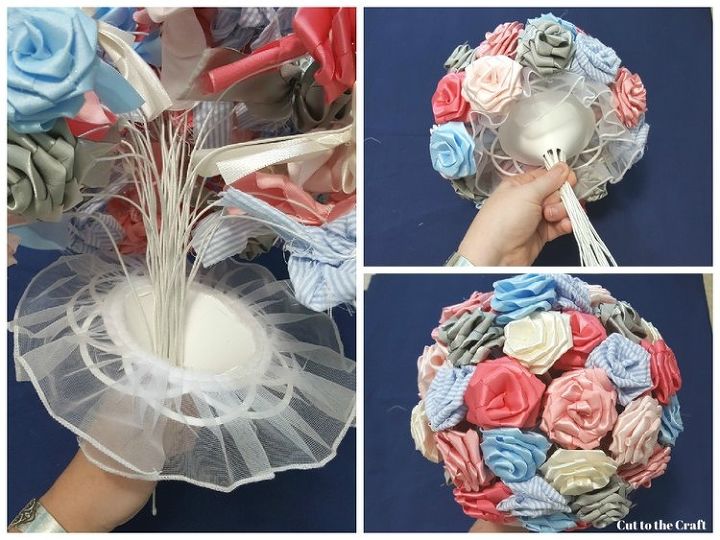
Use another piece of floral wire to secure the stems under the collar.
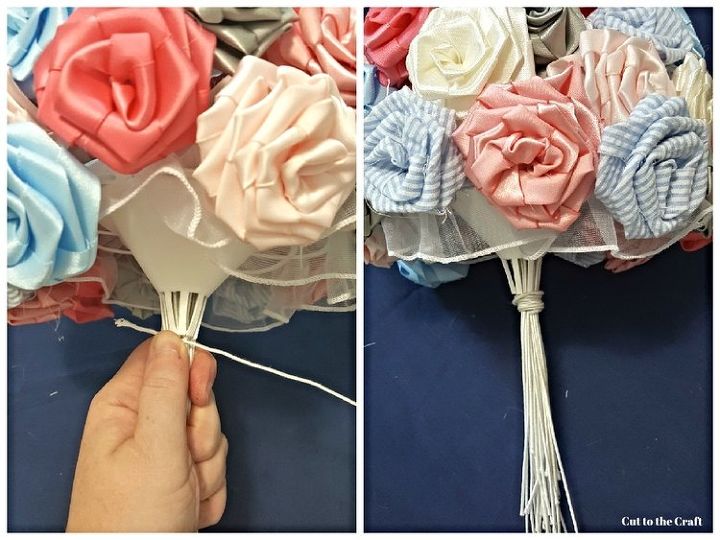
Now is your opportunity to shape the bouquet - wires should still slide relatively easily through the collar/securing wire, so you should be able to shape the dome, adjust how close the flowers are to one another, etc.

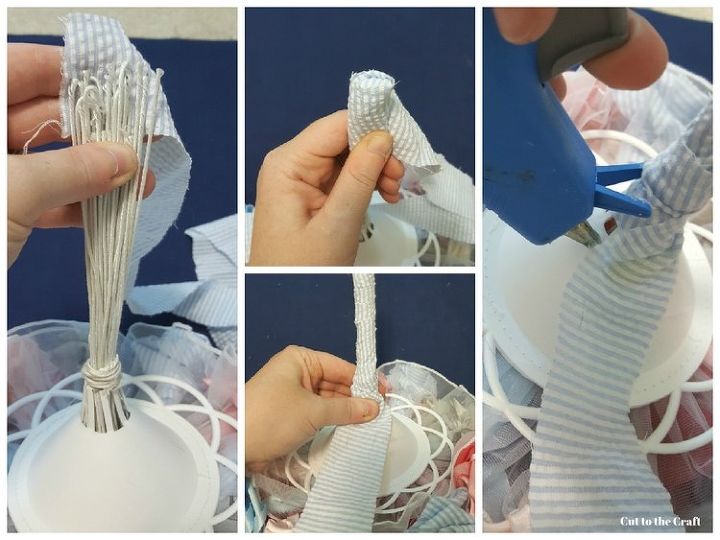
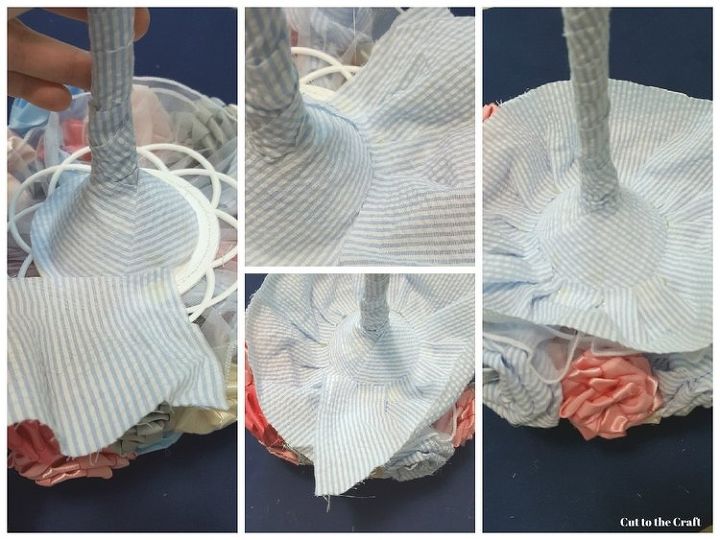
As you can see, seersucker, being a loosely woven fabric, frays like crazy. My measurements take that into account, and leave a little room to trim once everything is together. Start with the 1.5" strip. Fold one end long-ways over the tips of the stems, and wrap the stems to the base of the collar. I found that I didn't need to use glue until I got to the base. Glue the fabric to the plastic, and trim any excess.
Next, take your mostly-circle, and wrap that around the cone, covering the end of the fabric you used over the stems. Glue that in place. Don't worry if this isn't too precise - it gets covered up too.
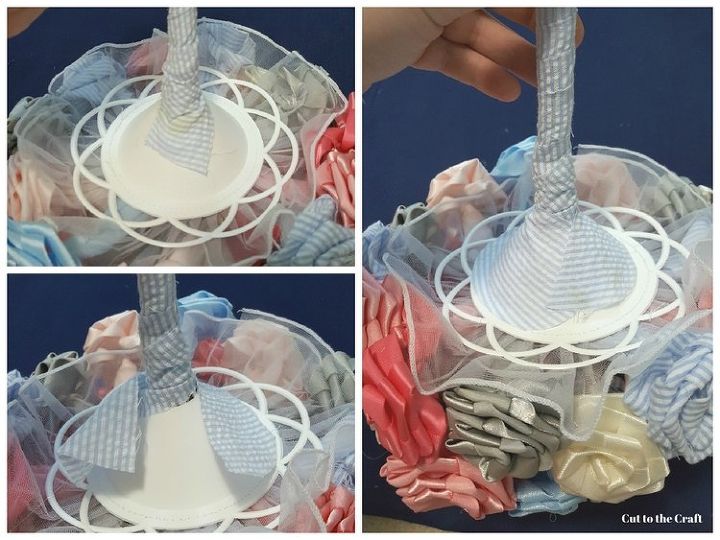
Finally, take your 4" strip and glue it to the base of the cone. You'll work your way around the circle and pleat as you go, which will cause the fabric to curve upward and provide a nice base for your flowers. Trim any excess at the end (I also trimmed the outermost edges at the end, because of the fraying - this meant that the actual strip I used was only around 3.5").
And you're done! Here's one of my flowers-in-action photos (taken by the fabulous Mike Topham). For more process photos and information, check out my blog!

Want more details about this and other DIY projects? Check out my blog post!
Comments
Join the conversation
2 of 10 comments
-
I like this idea a lot. very cost effective also.
-
Very pretty!


Frequently asked questions
Have a question about this project?