


What Happens When A Project Doesn't Work Out As Planned AKA My Scrap
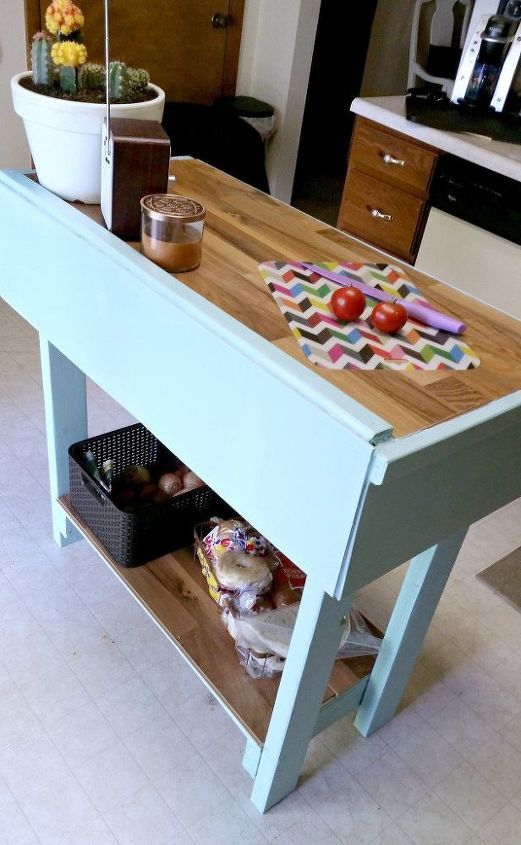
Our current rental has a lack of cabinet and counter space, so attempting to make dinner and find room for food has become quite the activity in our home.
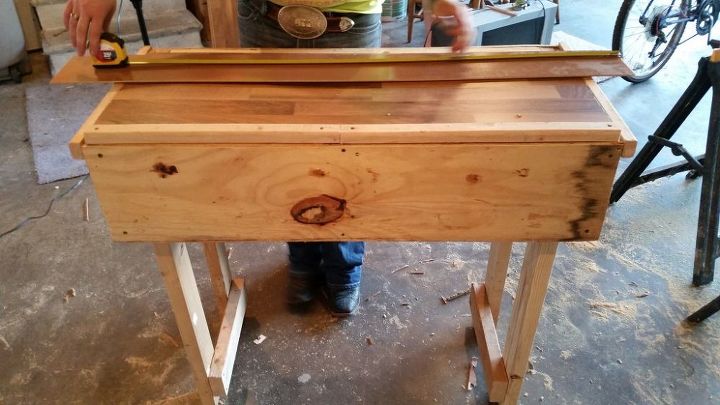
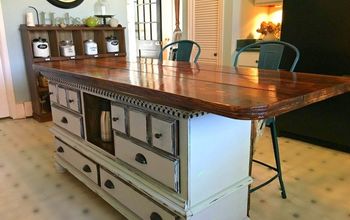
I will start of by admitting that this project was originally not intended to be a kitchen island, it just kind of happened! I've wanted a side table for my couch for quite a while, and my dad and I had made one for under my living room window a while ago, so I had thought that we could easily make one slightly bigger to put next to my couch. Well, instead of slightly bigger, it was a LOT bigger.
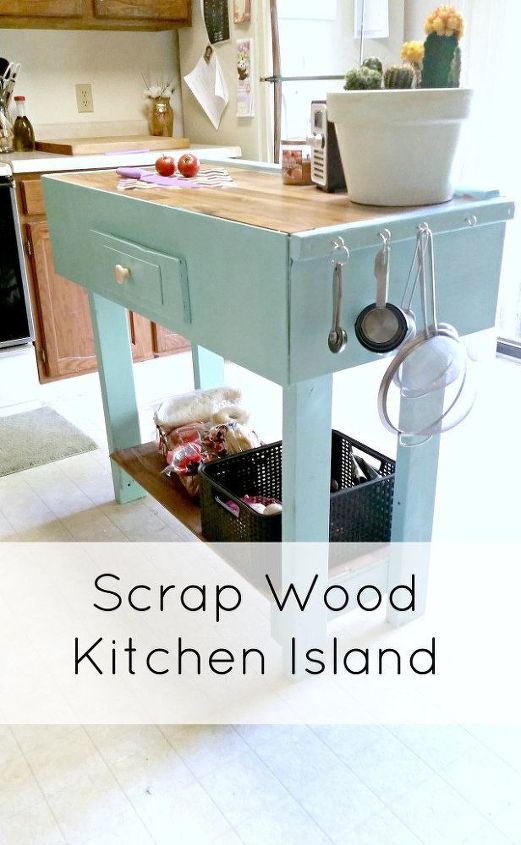
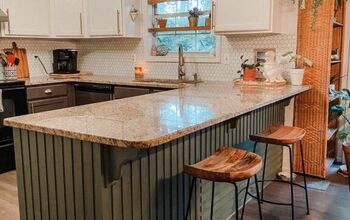
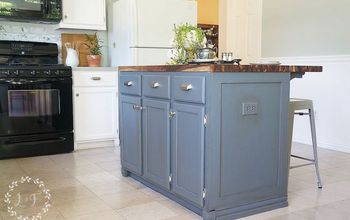
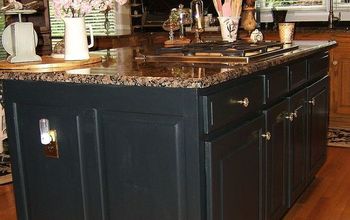
Working with scrap wood and attempting to figure out how to build something out of them comes with lots of unpredictability. By the time this table was almost done I was really concerned over this project until my mom told me that this table would be perfect for my kitchen. And thus, my kitchen island was born.
I would love to provide exact measurements and some building plans, but we just kind of "winged it" when we were building it. But if you'd like, here is what we used as a guideline to build the table.
I will start of by admitting that this project was originally not intended to be a kitchen island, it just kind of happened! I've wanted a side table for my couch for quite a while, and my dad and I had made one for under my living room window a while ago, so I had thought that we could easily make one slightly bigger to put next to my couch. Well, instead of slightly bigger, it was a LOT bigger.
Working with scrap wood and attempting to figure out how to build something out of them comes with lots of unpredictability. By the time this table was almost done I was really concerned over this project until my mom told me that this table would be perfect for my kitchen. And thus, my kitchen island was born.
I would love to provide exact measurements and some building plans, but we just kind of "winged it" when we were building it. But if you'd like, here is what we used as a guideline to build the table.

We started off by cutting four 2x4s into three foot legs and pre-drilled two holes on both ends of the legs.
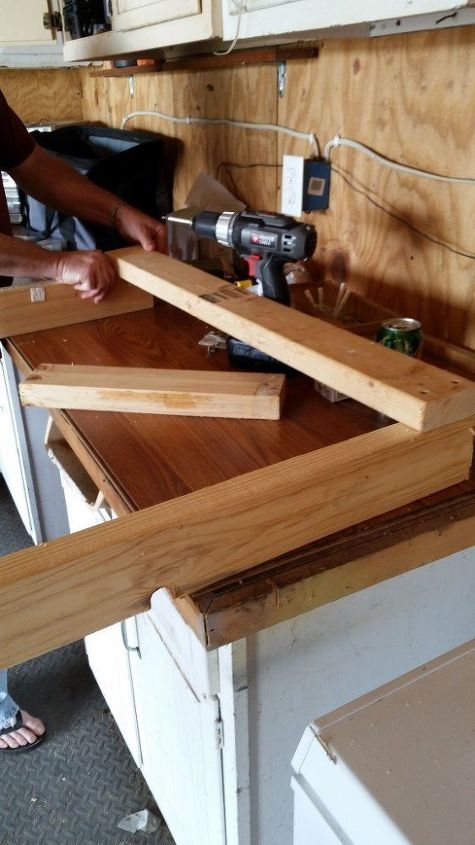
We then discussed how big I wanted the table, and being terrible at math, I gave my dad ridiculous too-large-for-a-side- table measurements. We cut two more 2x4s the same size as the legs and then cut two more 2x4s to measure 20 inches. These four additional pieces became the start of the frame to the top of the island.
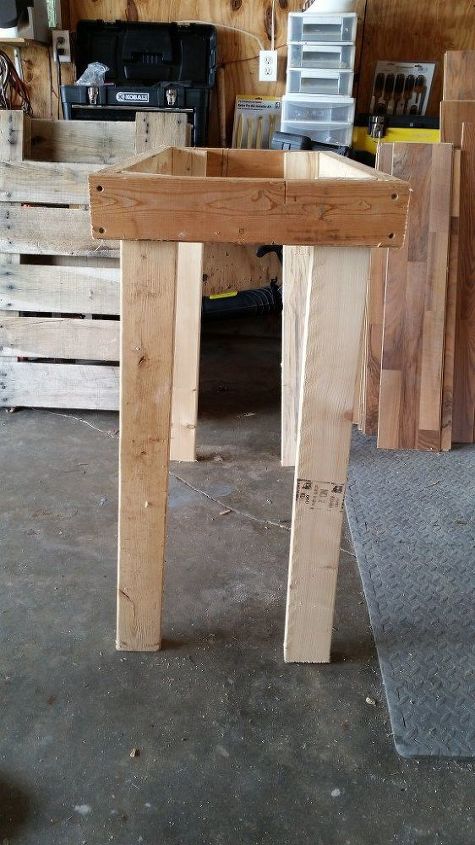
We then took both pairs of legs and attached them together with two of the 20 inch size pieces.
Check out the link below to see the rest of the tutorial!

Want more details about this and other DIY projects? Check out my blog post!
Comments
Join the conversation
2 of 9 comments
-
Kudos Kristina! You have inspired me to quit procrastinating and talking about building my own island and to JUST DO IT ALREADY! You did a great job explaining and showing that one doesn't necessarily HAVE to drill "pocket holes" in order to attach anything! Lol, I really had to mention pocket holes. Oh! And a Kreg Jig. I honestly have no idea what one is! Lol, bottom line, thank you for sharing with all us lame folks!
-
I need space in my kitchen too. I picked up a table off of the app Offer Up. I was going to put it behind my couch. Not anymore. It will be easy to convert it into an island. Thanks so much for posting.


Frequently asked questions
Have a question about this project?