


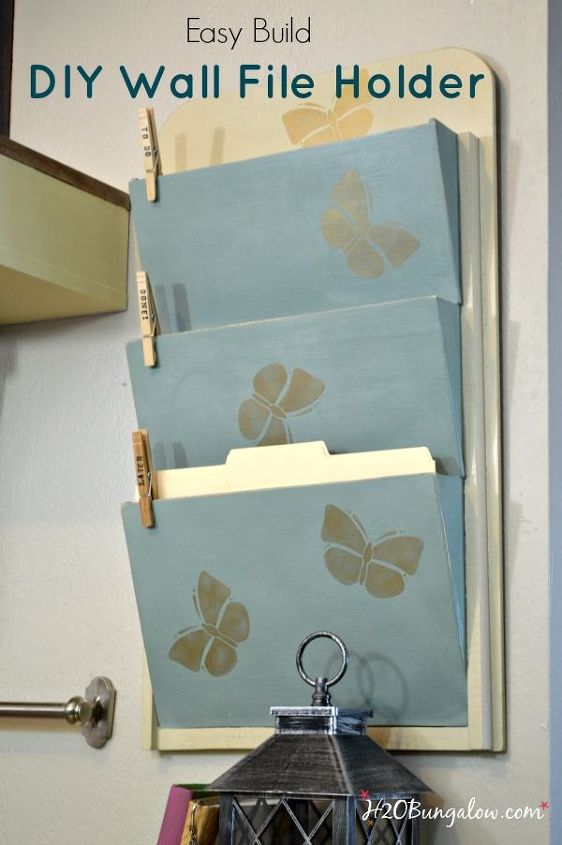
Easy Build DIY Wall File Organizer
I belong to a group of super creative tool loving bloggers who get together and challenge each other to build something awesome with a power tool. This month's tool is the jigsaw. It got a little more challenging when we added a back to school theme. I remember how huge the back to school paperwork stacks could be when my kids were little. I built a super project that's great for back to school, a family who battles paperwork, or someone like me. Who can't grow a houseplant, but I can sure grow a stack of paper on my desktop really well.
Supply list to make this DIY wall file organizer project.
Cut list for DIY wall file organizer.

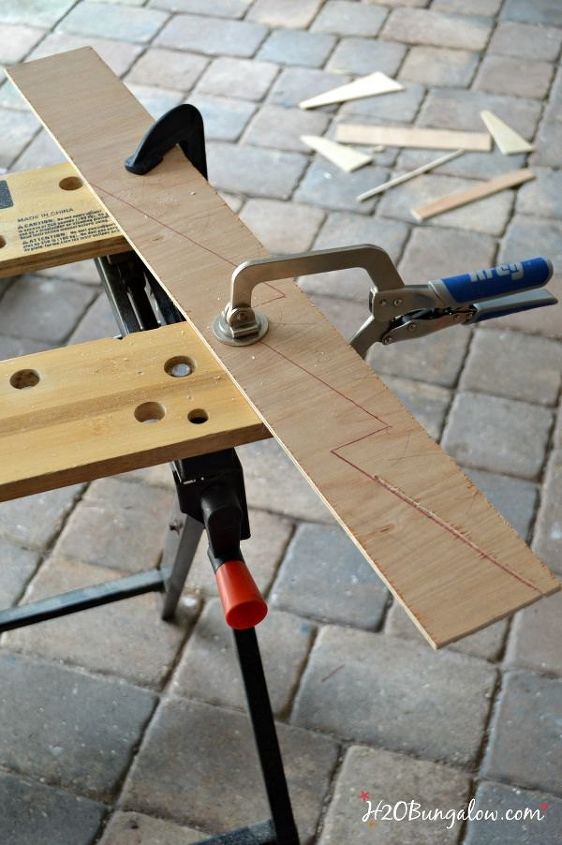
Sometimes it's a little tough to get a perfectly straight line with a jigsaw. Line up both sides to be sure they are even. Run a pen or pencil over the edge to mark where you'll need to sand down an area to even it up.
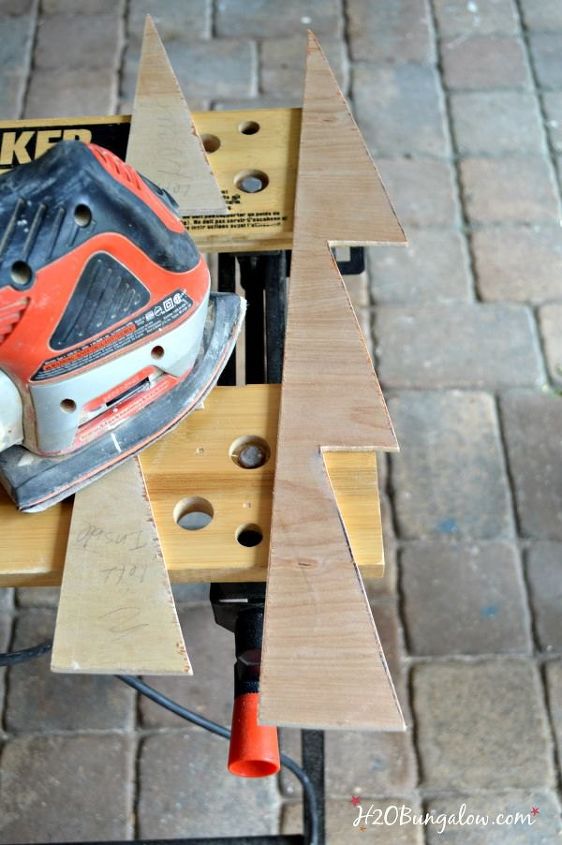
Sand the edges.
Fit the parts together to test that everything lines up well. Make any minor adjustments if needed.
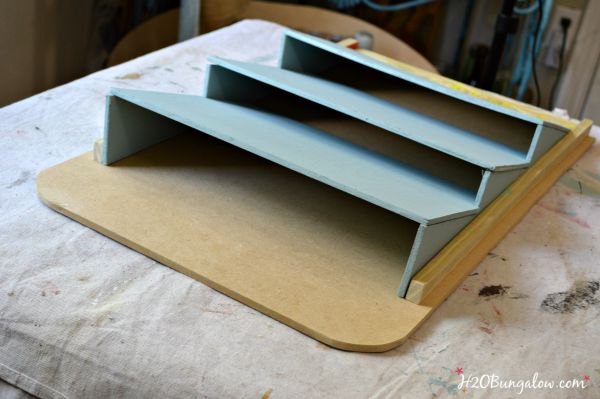
Cut the trim to go along the sides the length of the side supports. They will extend all the way to the bottom of the back board. Cut another one for the bottom that will inside the two side supports. This one will butt up against the bottom of the file folder pockets.
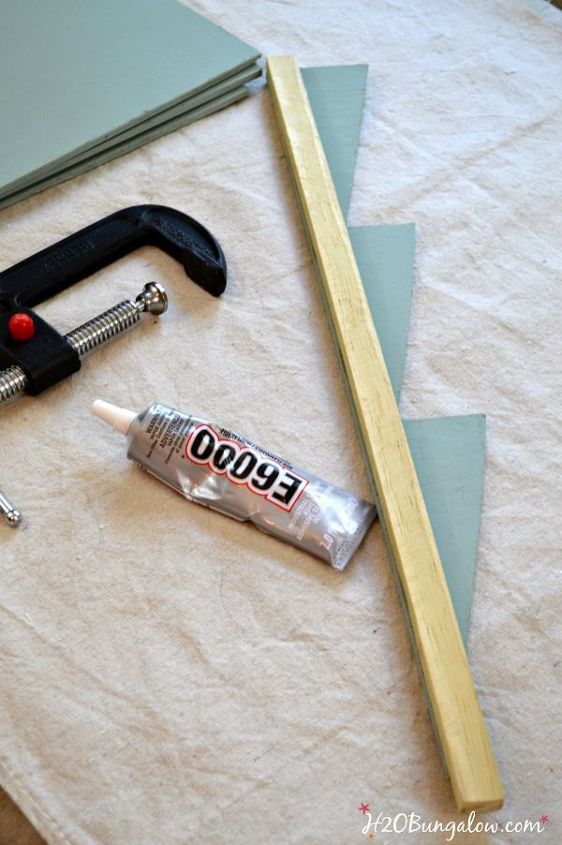
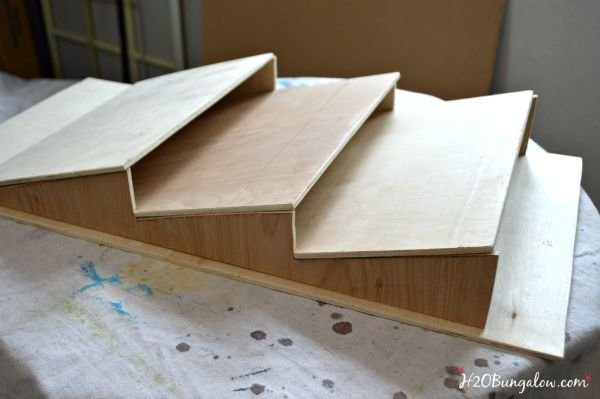
Now it's time to assemble your DIY wall file organizer. Start by gluing the side file folder pieces to the side trim. Hold them together with your clamps. I let these sit several hours before moving on to the next step.
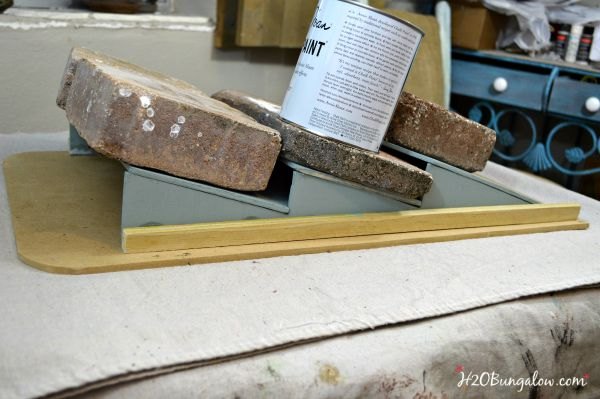
Next, glue the file folder tops onto the sides. Glue and add the center pocket front piece first, next add the top and then the bottom front last. Weigh down with a solid high-tech gadget like a few bricks, bags of rice or a paint can:). I let these sit overnight.
Add the hanging hardware onto the back board before the next step! I forgot and had DH holding it with the top edge on a flat surface so I could tap in the little screws last..it was a pain :(
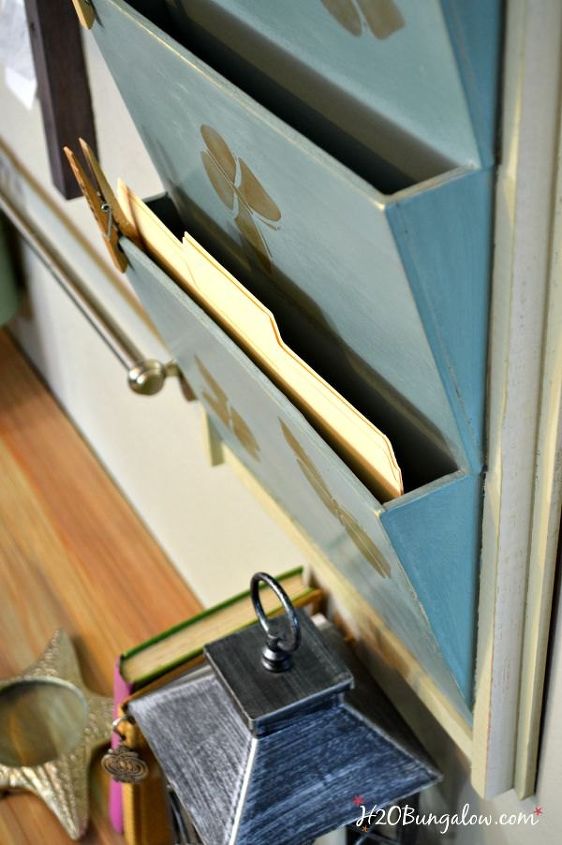
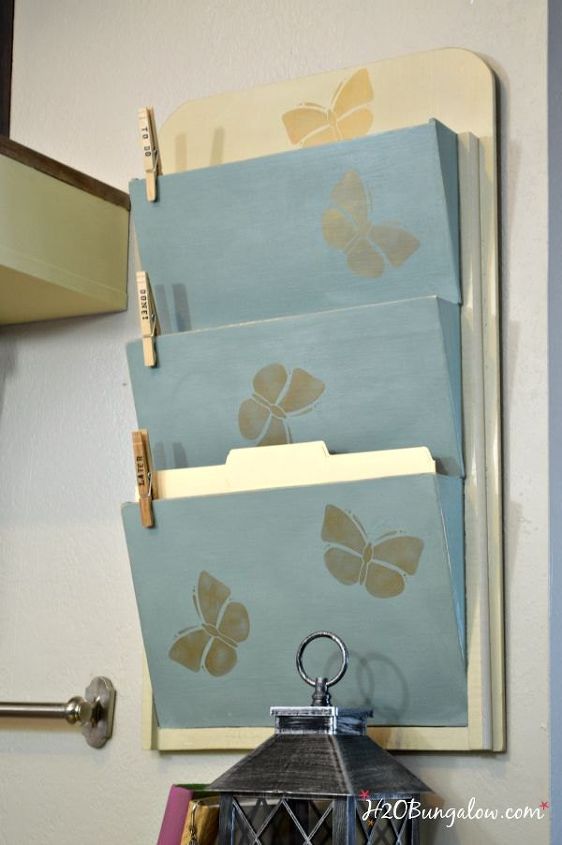
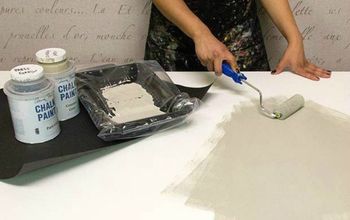
I gave it a pretty coat of paint & added a few butterfly stencils. I'm not sure yet if I'll add labels to the front or not. In the meantime I added a few of my Clothespin Word Noteclips.

Want more details about this and other DIY projects? Check out my blog post!
Comments
Join the conversation
3 comments
-
A great way to stay organized! Love it.
-
Pretty and practical! My favourite attributes.


Frequently asked questions
Have a question about this project?