442 Views
How To: DIY Embroidery Hoop Art

by
The Sweetest Digs
(IC: blogger)
2 Materials
$40
2 Hours
Easy
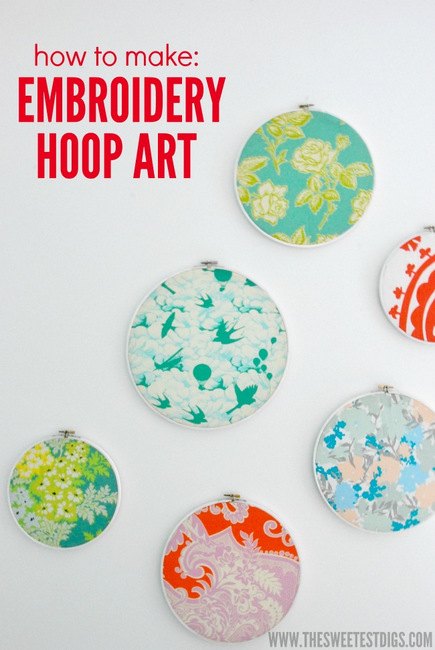
Time to dive in to some of the projects you spotted in Maya's nursery reveal. First up? DIY embroidery hoop art. I have been wanting to do this project for AGES, and finally had the perfect spot - a corner of Maya's nursery dying for a little colour and pattern.
Here is what you need:
-white paint + paintbrush (if you choose to paint the hoops like I did)
-fabric scraps
-scissors
-wooden embroidery hoops of various sizes (buy them at your local craft store, keep your eye peeled for them in the thrift store, or order online - here are some from amazon that are a great deal!)
It's a super straightforward project. I wanted a bright and crisp look to mine, so I decided to paint my hoops white rather than leaving them wood. I used basic white acrylic paint - two coats. And remember - the smaller hoop will be hidden behind the fabric, so you just need to paint the bigger one. Once they had dried, it was time for the fabric. I had pulled out all of my favourite fabric scraps in the colours that I knew would work in the room, and then narrowed it down to a collection that felt cohesive. These were either remnants from other projects, or fat quarters that I had purchased.
The rest of the steps are super simple and all available in the full post here!
Enjoyed the project?
Suggested materials:
- Fabric (Michaels)
- Wood hoop (Michaels)

Want more details about this and other DIY projects? Check out my blog post!
Published August 25th, 2015 2:02 PM
Comments
Join the conversation
2 of 12 comments
-
We have Hobby LObby, Michael's, and AC Moore
 Polly Zieper
on Sep 07, 2015
-
-
So fun! I love that embroidery hoops are finally getting so much love from the interior design community! They add such whimsy to a space!
 Lindsey McCord
on Sep 27, 2016
-










Frequently asked questions
Have a question about this project?