


Stacking Tables Renewed

by
Mary
4 Materials
$15.00
4 Hours
Easy
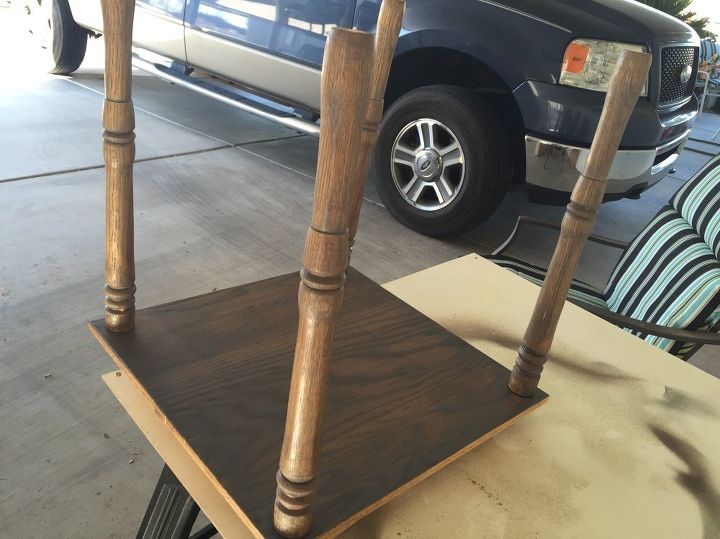
After viewing all of the amazing projects on Hometalk, I was inspired to get going with some of my own projects! Thanks to all of the creative people on here who offer such great ideas and hints on some products I'd never heard of before! I wanted to tackle a china hutch first, but decided to get moving on a smaller project first. I gave new life to some old oak stacking tables I brought with us from Minnesota. Poor things were used and abused well back there, as plant tables and snack tables and whatever else we needed them for. And once we got to Mesa, they were Steve's "saw horses" and grill tables. They were dried out, stained, had gotten wet and painted on! He wanted to throw them away when he finally got "real" saw horses, but as usual, I said, "No, I have a plan!"

Here is the final restored look! It was a long process to get to this point, but I'm so happy with the end result.
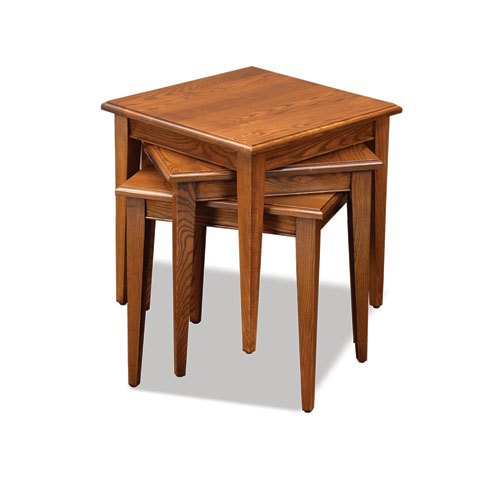
This is a representation of what the tables were like when new. They had turned legs and no apron, but I completely forgot to take a "before" picture.
After stripping the tables with Citristrip Stripping Gel....which I loved using because it was so easy to clean up!...I stained all of the bottoms and legs of the tables with Minwax Wood Finish Penetrating Stain in Gray. I wiped it on and then off again, just so we'd have some finish on those legs and undersides.
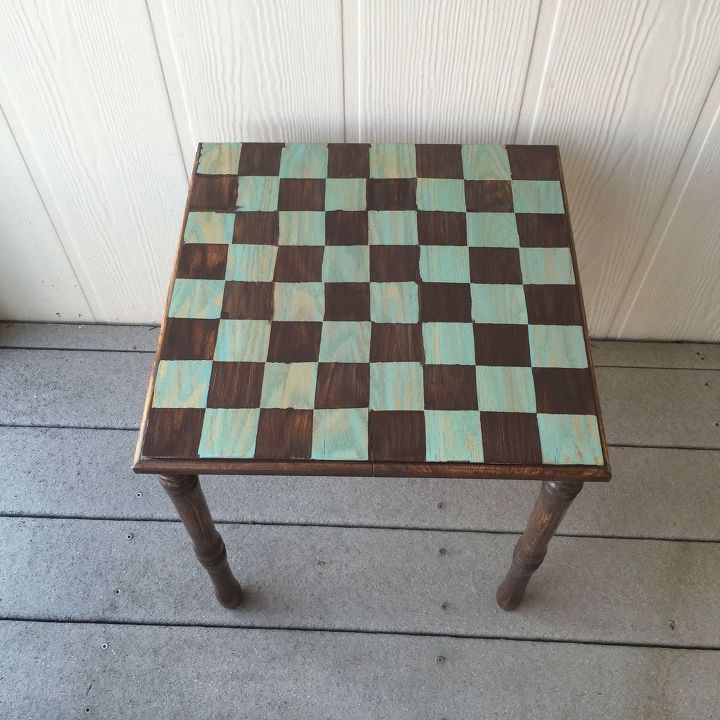
After a long time of trying to decide how to make these tables "fun", I decided they'd be activity tables, so my first one was made into a checkerboard. We can play checkers or chess on this board. First I took Unicorn Spit in Zia Teal and stained the whole top using a sponge brush. After it was dry, I cut 2" pieces of painters tape (2 " wide tape) and put the squares of tape every two inches, alternating each row, so when I stained with the Rustic Reality Spit, there would be squares of Zia Teal remaining. Our home has a lot of this muted teal color, along with some brown furniture, so these were perfect colors for us! After I stained with Rustic Reality, I pulled off the squares of tape and ended up with the checkerboard pattern seen here! Sealed with Formby's Tung Oil Finish, which brings out the wood grain so well, and then a few coats of polyurethane.
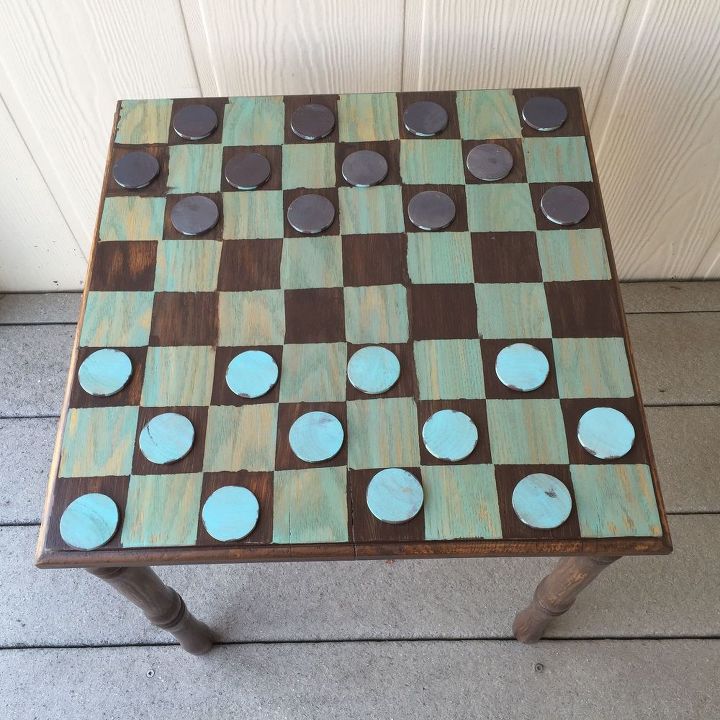
The next thing was to figure out what to do for checkers. I purchased some wood discs (1 1/2" Wooden Nickels) at Hobby Lobby, brought them home and stained them with Zia Teal mixed with White Ning on one side and Rustic Reality on the other side. Sprayed poly sealer on both sides of these checkers. No chess pieces yet, but we've forgotten how to play chess anyway, so no hurry!
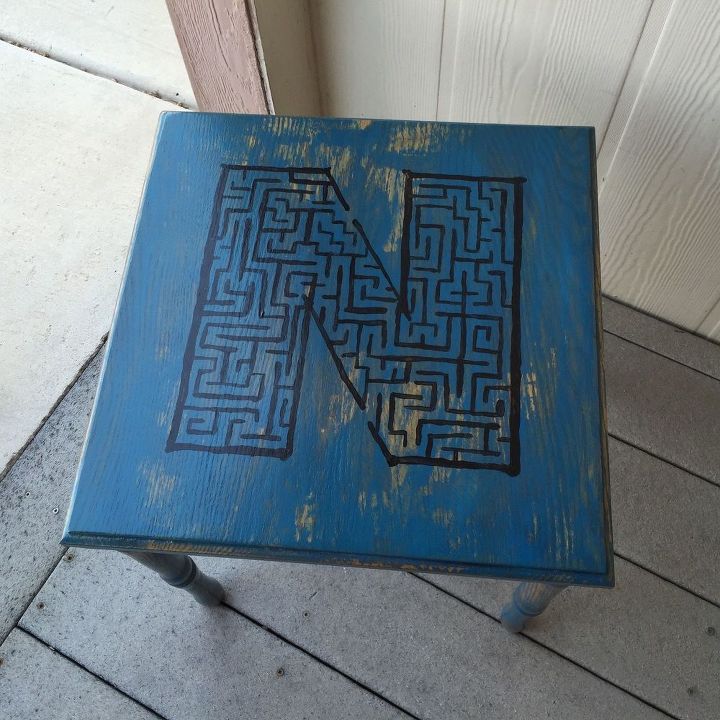
For the next table I tried doing a technique that the Unicorn Spitters do, called aura blast, but it didn't work for me. Now I could have wiped it off and tried again, but I decided I loved the color I got and the wood grain showed through, which we love, so I left it alone! It's a mixture of Zia Teal, Blue Thunder and White Ning. Once it was dry, I also sanded off spots to weather it a little. Next I went hunting online for mazes and found a site that had mazes using the alphabet! LOVE! So I copied the "N", took it to a local copy place and had it blown up 150% and transferred the image onto the table top using Martha Stewart Transfer Paper that I purchased at Michael's. I then used Midnight Blackness Unicorn Spit and a small artist's brush and painted all of the lines into the maze. Sealed with Formby's Tung Oil Finish and then with Minwax Fast-Drying Polyurethane. On this table I used about 5 coats of poly because I wanted to be able to use a dry erase marker on it if someone wanted to try the maze. It works great!
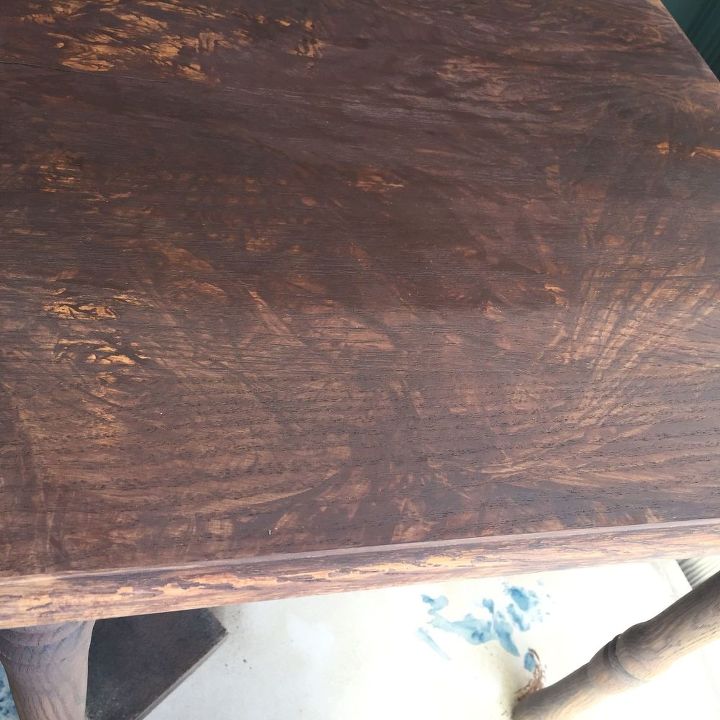
For the final table I was a little stumped as to what "fun" theme it would have. Finally I decided to just put a stain on it and see what I could do with it after. I sprayed the table top with water and then used White Ning, Rustic Reality, Squirrel and Weathered Daydream laid in a circular pattern, hoping to try again for the aura blast look I've seen so often on the Unicorn Spit Facebook page and here on Hometalk. This time I tried using the plastic, watered down the spit again, put thin plastic over the top and moved the spit around, twisting and smoothing as I went. Well, it didn't come out in a "blast", but there was something about it that I liked! The top of the photo shows the area finished with tung oil finish, the bottom shows the stain only. You can see the wood grain, some original oak, gray and browns. It's the perfect blend for our rustic decor! But now what to do with it?! Sealed the stain with tung oil finish.
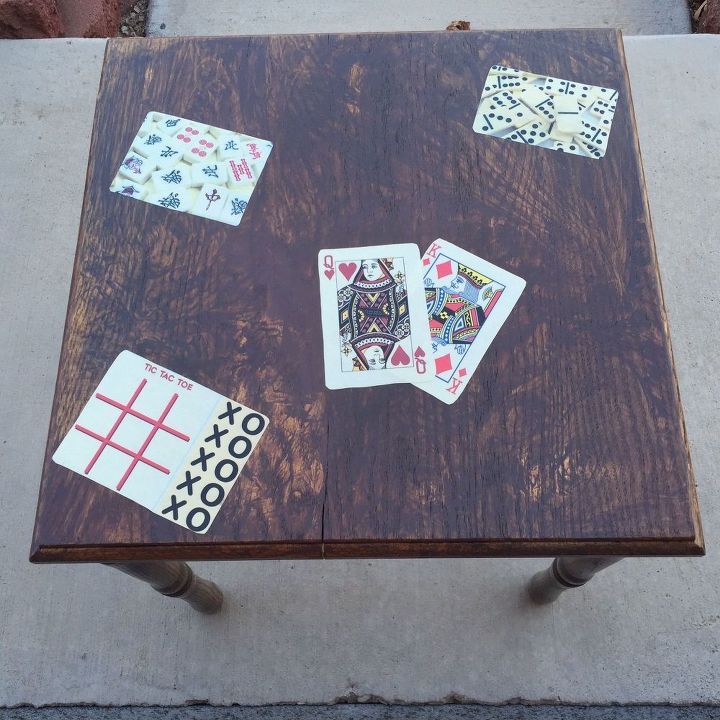
I finally decided on some fun activity images that I found on Google images. Cards, Tic-Tac-Toe, Mahjong and Dominoes are all games for two or more and perfect reminders for us to have some fun together! I printed the images on heavy paper and then used Mod Podge to lay the images out, leaving the best grains to show on the table top! So far I only have one coat of polyurethane on, will likely give it a couple more to seal it up well.
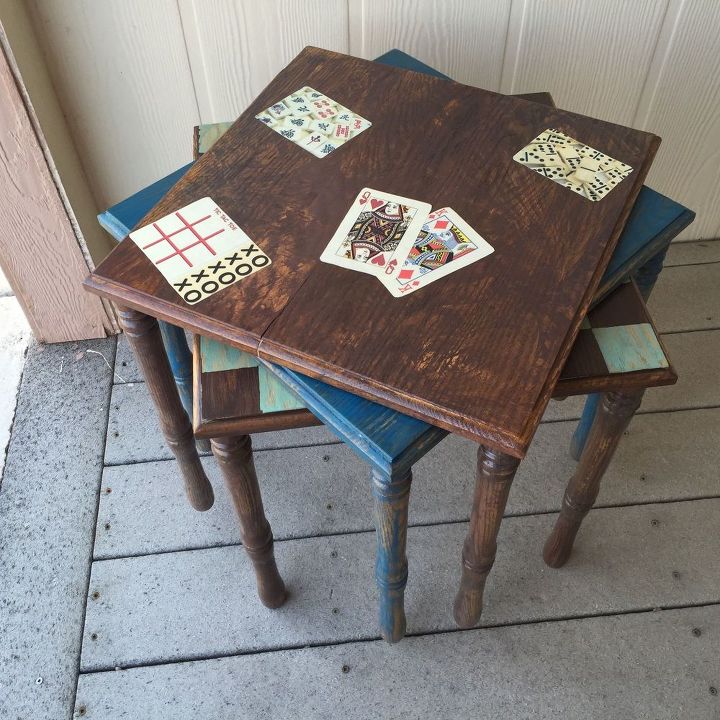
And here are the three tables stacked together. On each table I did use whatever color stain I did the top with on the legs, too. All are distressed/weathered-looking. As I said, for our home this is perfect with how we decorate. I apologize for the lack of "before" and "during" pictures....so many projects, so little time and a little bit of forgetfulness makes me a haphazard poster, I guess! but this was super-fun and I loved using the Unicorn Spit stain, it's so easy to clean up and probably the lesson I learned the most from this first attempt is to let the stain and the piece decide what it will be. I could have used paint, too, and had more control, but I probably needed this lesson anyway! :) I'm saying this cost about $15 because although I used a lot of products and tools, it was either stuff I had or will have now to use on other projects that I have yet to work on.
Comments
Join the conversation
3 of 49 comments
-
Thank you. There are some really creative projects using this gel stain that have been showcased on HomeTalk. I can't seem to get the Unicorn Spit website to come up, but there is one at unicornspit.com. And there's a Facebook group with lots of projects and questions and answers posted. It is also available from local vendors in some areas, I think you might be able to find that if you do get on the website. You can find it on Pinterest and Youtube, too....it's become quite popular! Hope you get to "play"!
-
I really like this idea. So many times, people take what I think is a lovely piece and butcher it. Different strokes and all that...but this is truly inspiring.


Frequently asked questions
Have a question about this project?