


Unused Closet to Awesome Wine Cellar Conversion

Have an unused closet you’d like to do something cool with? Have you ever thought about your own closet to wine cellar conversion but don’t know how it would look?
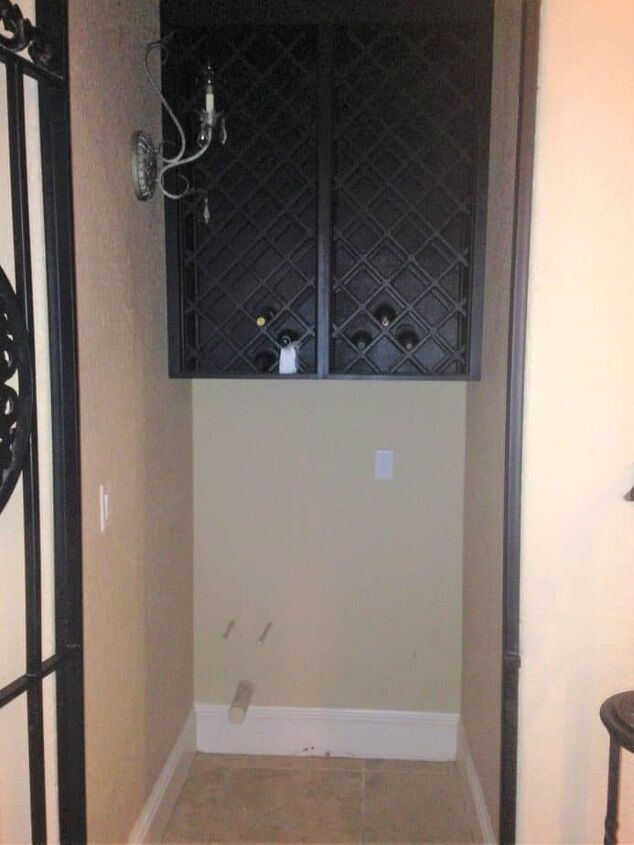
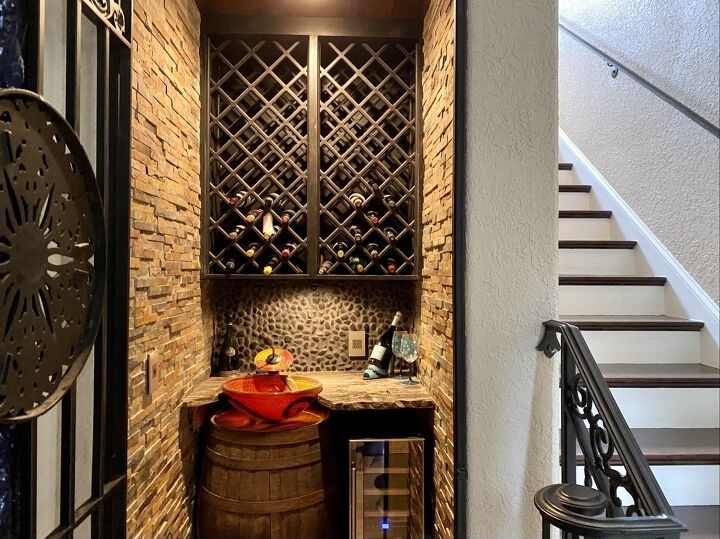
I’ve been striving to stick to a “one room at a time” project throughout my own home. My first remodeled spot was a small closet under the stairs. I wanted to start with a small, manageable space that could have a big impact. This type of space works great as a wine cellar and as you can see I was fortunate enough to have already had the shelving for the wine and the wrought iron door that worked perfectly as a wine cellar door.
My goal is to make the room unique and special and elegant looking all at once, while still retaining the element of fun. Here’s the starting point:
Supplies to build a wine cellar in your closet
Looking through some online sites, I came across the great idea of a wine barrel sink. However, pricing is upwards of $1000 for this type of sink. Now, if you have that kind of budget for a small room, here’s a link to one on Amazon. As an Amazon affiliate I earn from qualifying purchases. So, if you’re sporting that kind of budget feel free to click on the Wine Cellar products photo on my Amazon shopping page!
However, that’s not the budget I wanted for my closet to wine cellar conversion, so, I decided that there must be a way to build one for much less.
Buying the items separately, I can make my own wine barrel sink for a fraction of the cost.
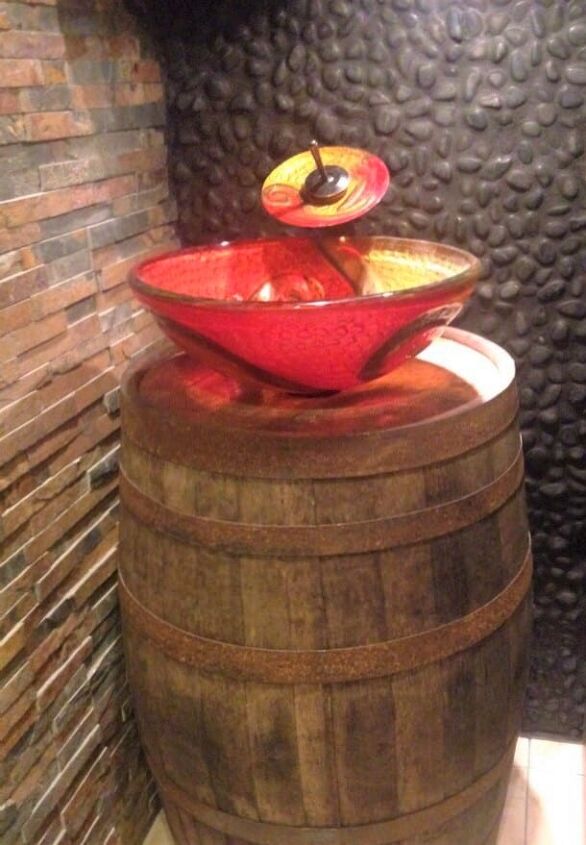
The sink is from faucetsdirect.com for approximately $200, but there are also some great options on Amazon that are actually less expensive and more colorful than mine.
The wine barrel is from from our local winery, which is called Lakeridge winery. The barrel was approximately $120.
Luckily, there’s plumbing already running along the back of my closet, so this makes installation and plumbing easy.
Creating the “look” of your DIY wine cellar
For the workmanship, I called on professionals. At that time I didn’t think there was any way that my husband John and I would be able to tile these walls and have it come out the way I wanted. Now that we’re much more experienced in home flipping and renovations (click to view projects we've done and tutorials), I feel like we can actually take on the tile installation, especially the pebbles in the back since they’re so free form and come in sheets.
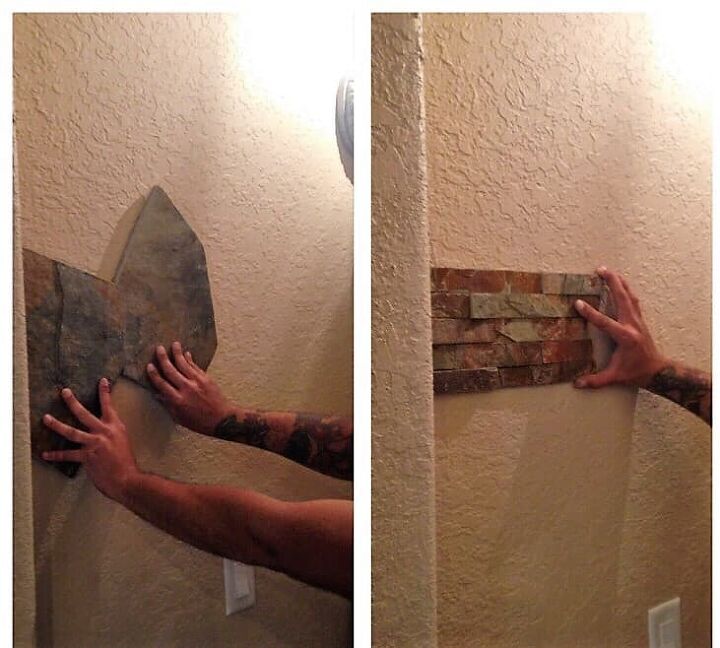
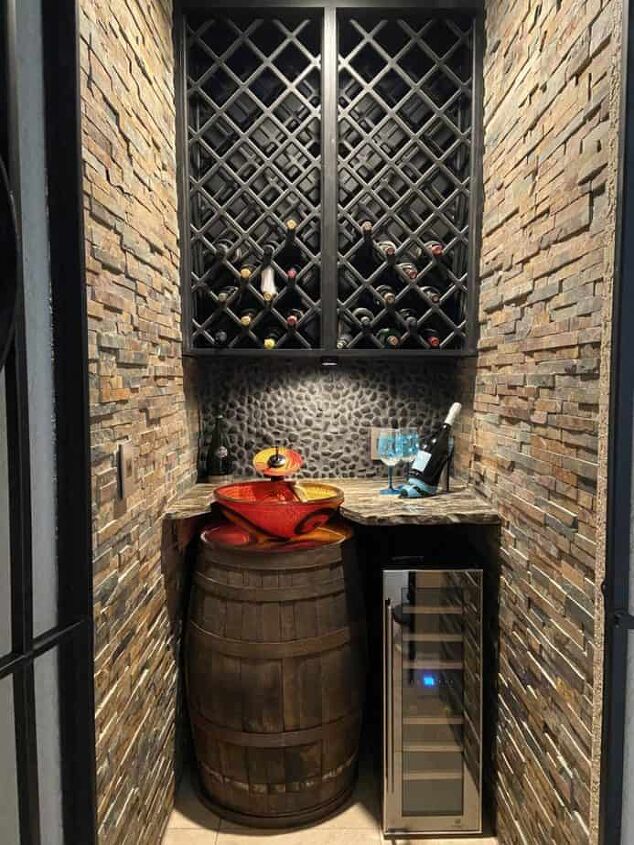
We looked at some samples before the project began, and decided on a stacked stone rock type tile along the walls, the pebble rock tile with black grout along the back wall, and wood along the ceiling to give it a rich finish. By the way, this ceiling detail really made a world of difference in finishing off the space.
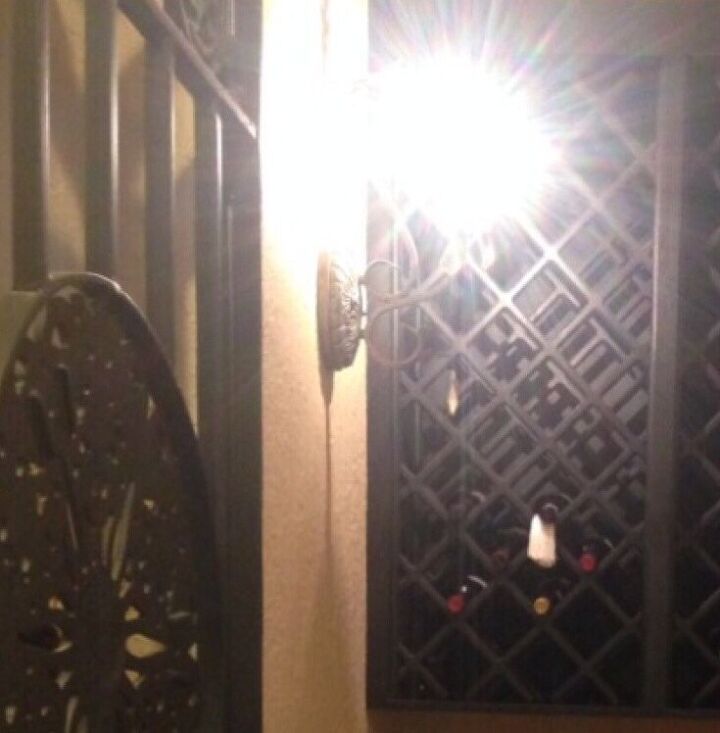
Before tiling the walls, it was important to remove the wall sconce. This sconce looks terrible and takes up space and breaks up the look of the room. Don't feel like you have to keep a fixture "just because it's there". It's your room, remove whatever doesn't add to your vision.

Check out how nice the ceiling and walls look. It really makes it feel like a completed and cozy wine cellar space, and removing the unnecessary wall sconce made the walls look much better:
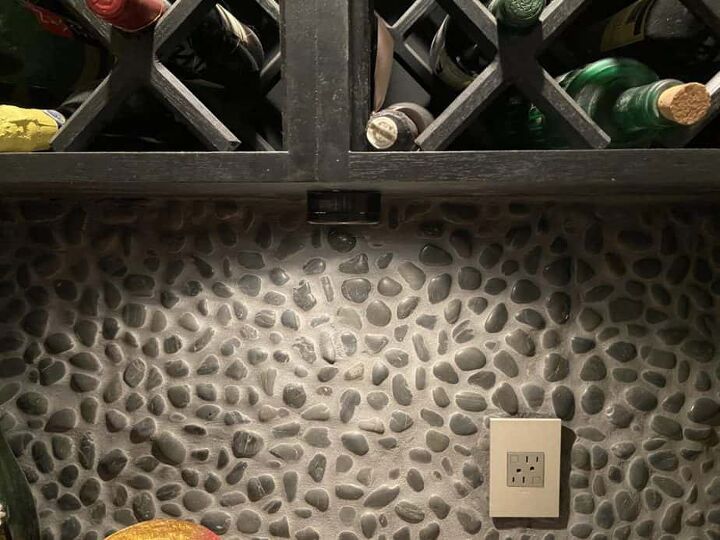
Installing a puck light under the wine rack made a big difference. It focused light where we wanted it to be.
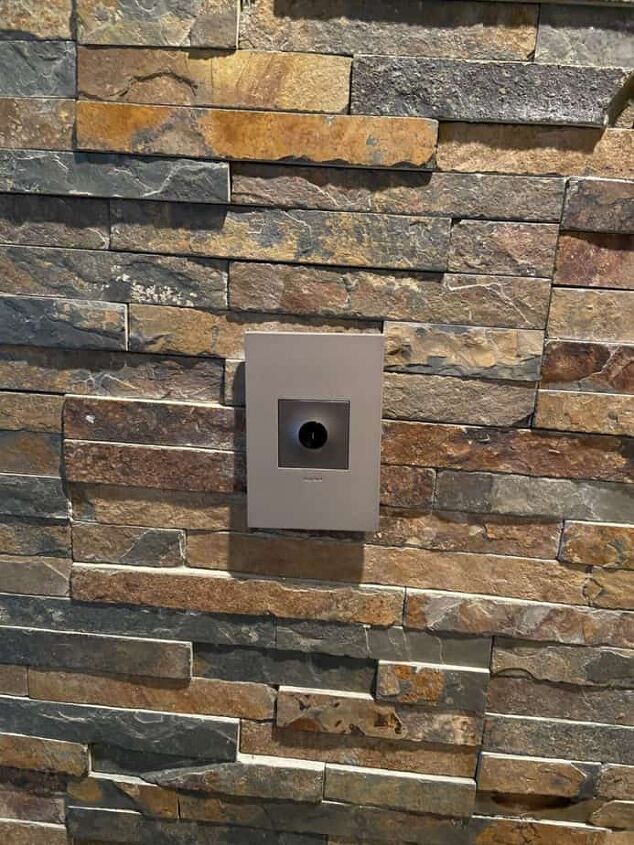
One thing I have noticed about beautifully decorated homes is the attention to details and how modern things are. So, I the installation of some new designer Legrand light switches really upgraded the look. The light switch turns on with a wave of your hand. I think it makes the entire space feel modern and cool.
We also often install upgraded light switches in homes we remodel, adding switches with USB ports and smart home features. Here’s a link to some of them if you need it and can benefit from them:
Adding the wine refrigerator to our homemade wine cellar
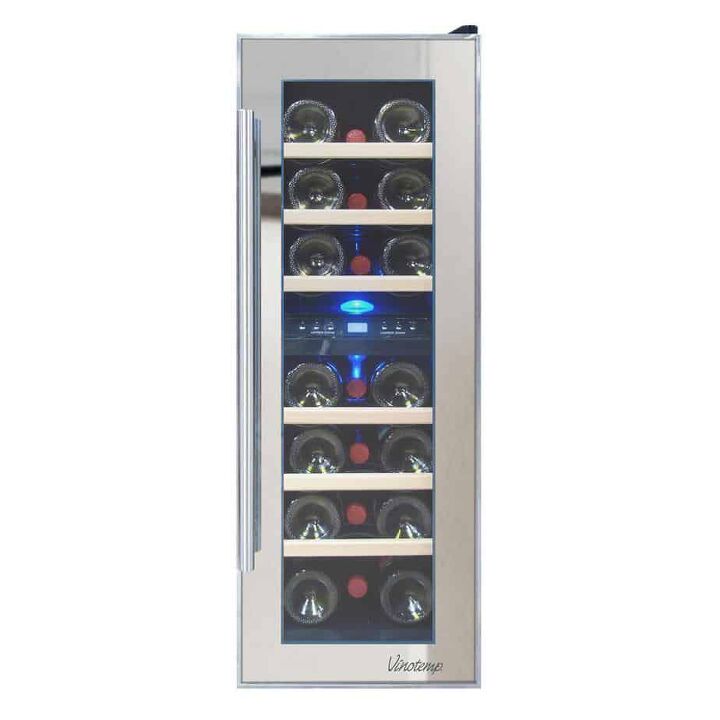
The next step is the addition of a wine refrigerator to keep the chilled wines in our wine cellar. I am so proud of myself for comparison shopping on this one. On the Lowe’s website, this beautiful wine cooler is for sale currently for $521. However, a look at the Home Depot site has that exact same one for $359! I don’t usually find a difference like that between the two stores but it definitely pays to cost-compare because sometimes you will find a huge difference.
Lastly, the finishing touch is to add granite to the room! The amount of granite needed is small. A granite installer will likely have this size available as a scrap left over from another project. So, this is a very inexpensive addition. Going and speaking with an installer from a granite yard is definitely worthwhile and less expensive than you’d think.
Here’s the finished project, what do you think of our wine cellar? If you transform your closet, I hope you’ll also leave a picture of your closet to wine cellar conversion!
Wine Accessories and Gifts
Finishing off the room, wine accessories really make it your own. I love this cute shoe wine holder and glasses.

That’s it! The wine cellar is complete. As it is, I love it and feel like our first room makeover is a success!
Want to view other projects we’ve done? Visit all our posts at marciasocas.com.
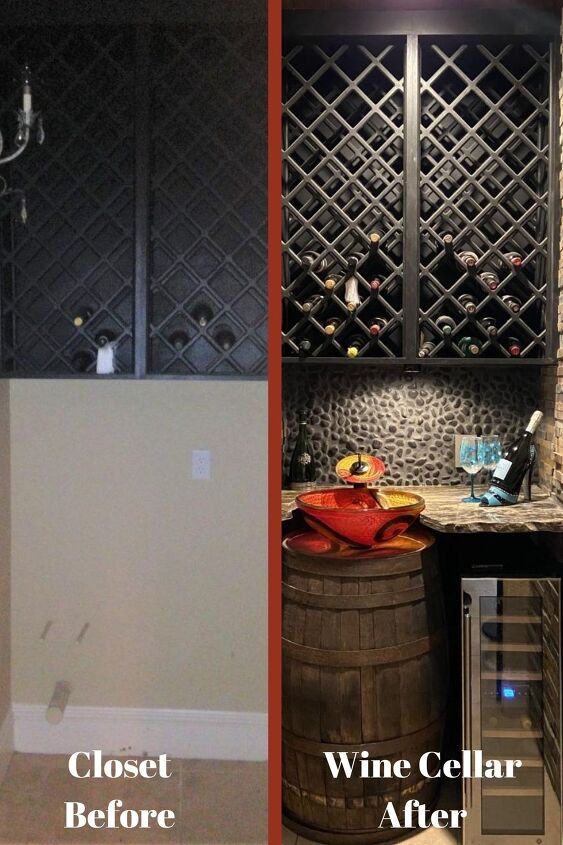
Before and After Photo.


Frequently asked questions
Have a question about this project?