


Creating a High Contrast Bathroom

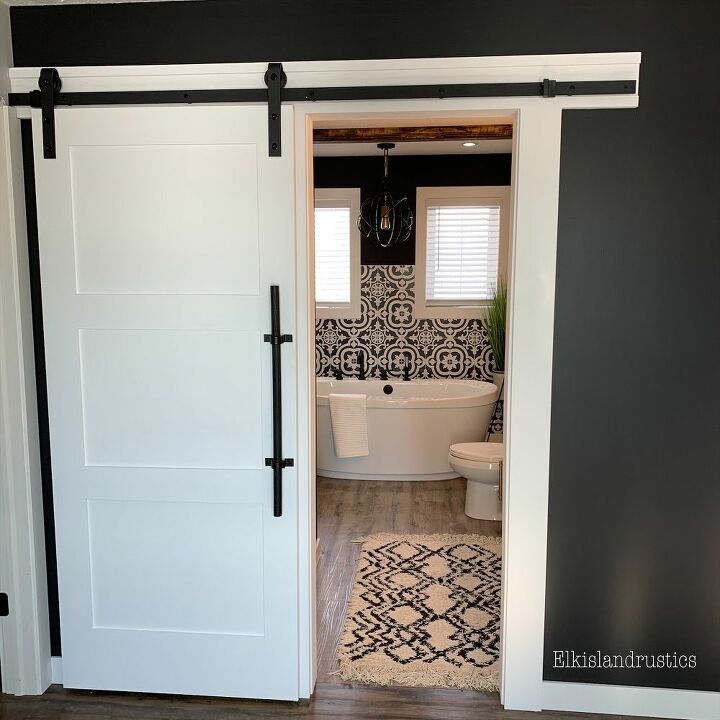
When I first decided that this bathroom was going to get a makeover, I knew I wanted black and white. If you follow along with me on Instagram, you will already know that I have developed a small obsession with black walls. So, clearly it only made sense to incorporate a black wall into this space.
But black walls in a bathroom? I asked myself this question many times. Was it not "allowed"? would people think I was crazy for doing this? so many questions I had to figure out.
Follow along with me and find out my thought process as I created this high contrast black and white space.
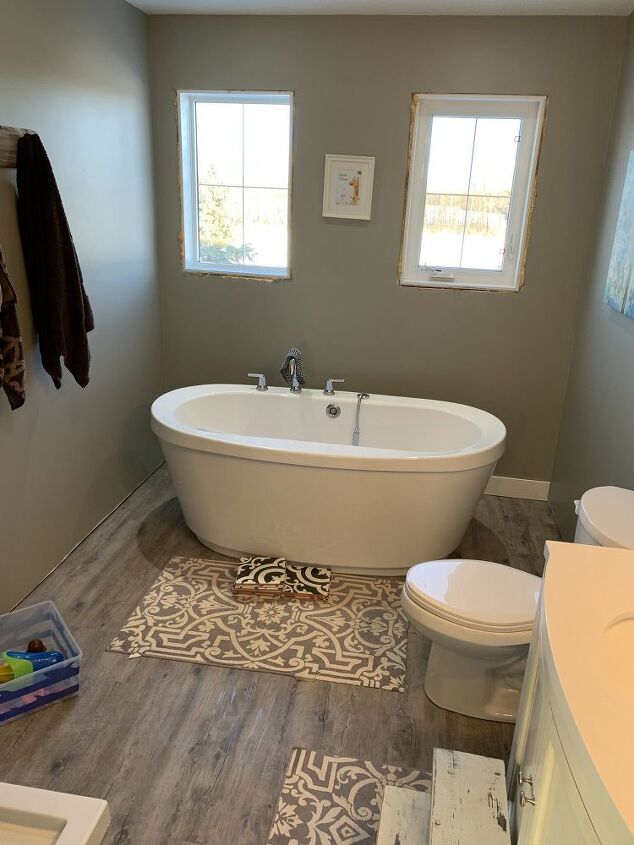
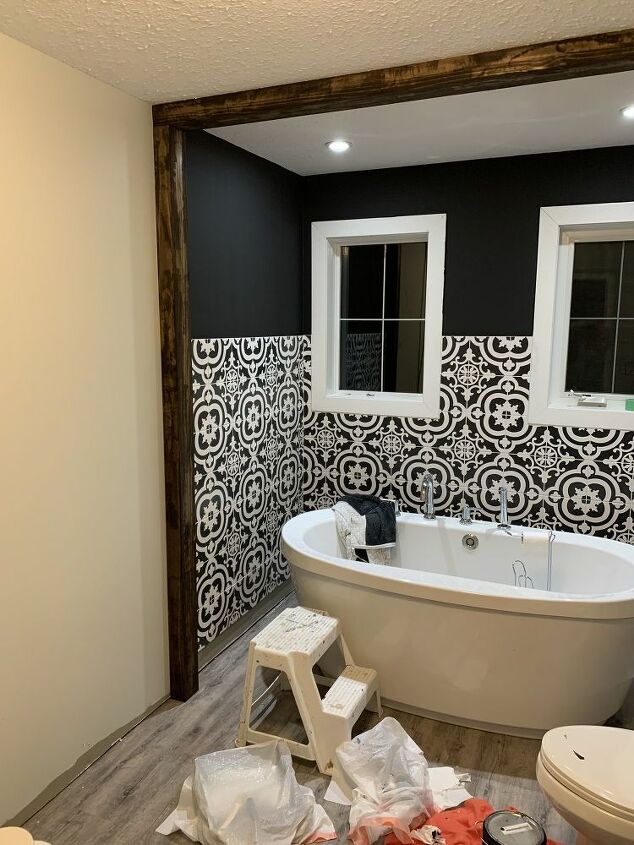
Wow, I cringe when I look at these before pictures. But these before pictures, also brings me a sense of joy and pride knowing that I was able to transform this space into something that I now swoon over and want to show off.
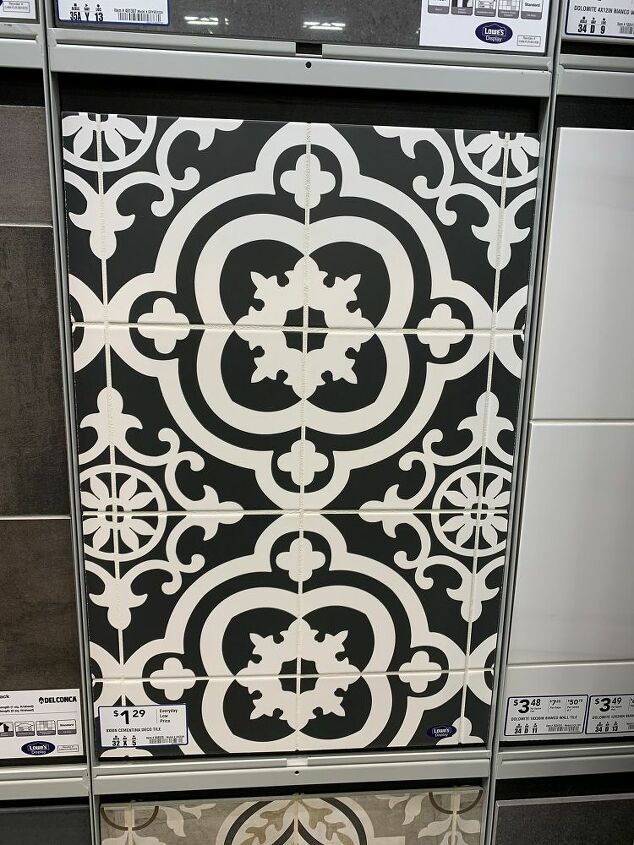
There was one thing I knew for sure. I wanted tile on the walls around the bathtub. So, I felt this was a good place to start. My original plan was to do white subway tile. My husband and I went to Lowes to get tile, and almost settled on the subway tile, and then this gorgeous black and white tile caught my eye. It was love at first sight. The subway tile wasn't even a thought anymore, it wasn't even a close runner up, it was out the window and this tile moved into my heart and into first place for tile choice. I loved how bold this tile was. I knew it was the one, but there was still that thought it my mind, "is it to much for a wall?" "will I regret this decision?'
It bothered me that I had so many questions about my choices. why was I concerned with what others would think. It was my bathroom, a space in my home. I had to live with it. So, if I loved it instantly it was clearly meant to be.
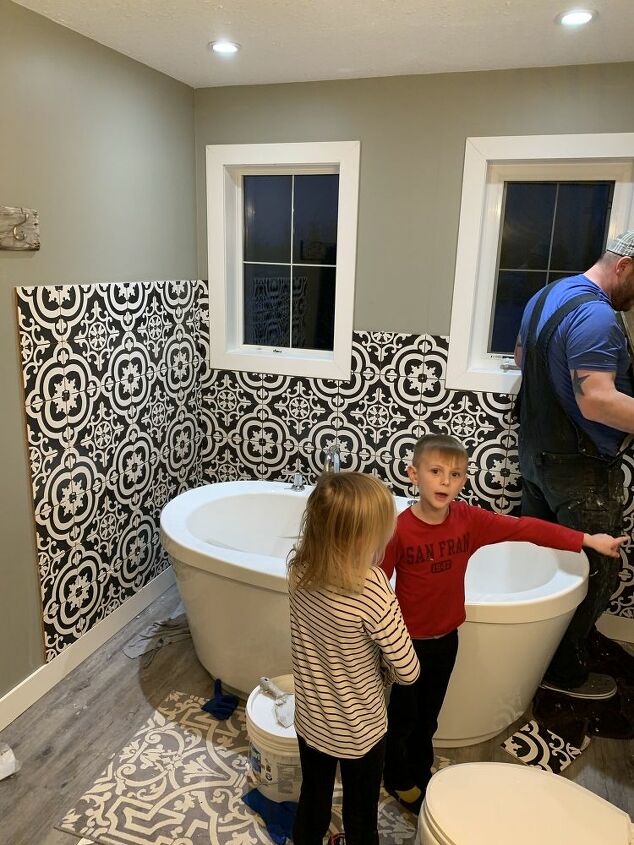
I was going to originally do the tile all the way up, but liked the idea of stopping 3/4 of the way up so that's what We did. I felt by stopping the tile 3/4 of the way up the wall, it would create a nice line break for your eyes when focusing on the bathtub. If I would have went all the way up on all three sides, your eyes would get lost in the busy tile and not focus at all on the gorgeous stand alone tub.
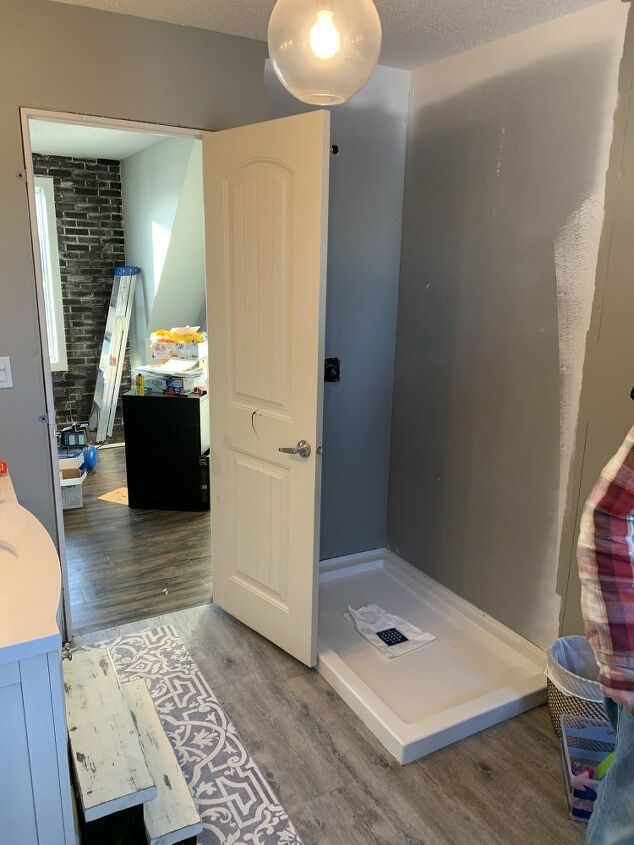
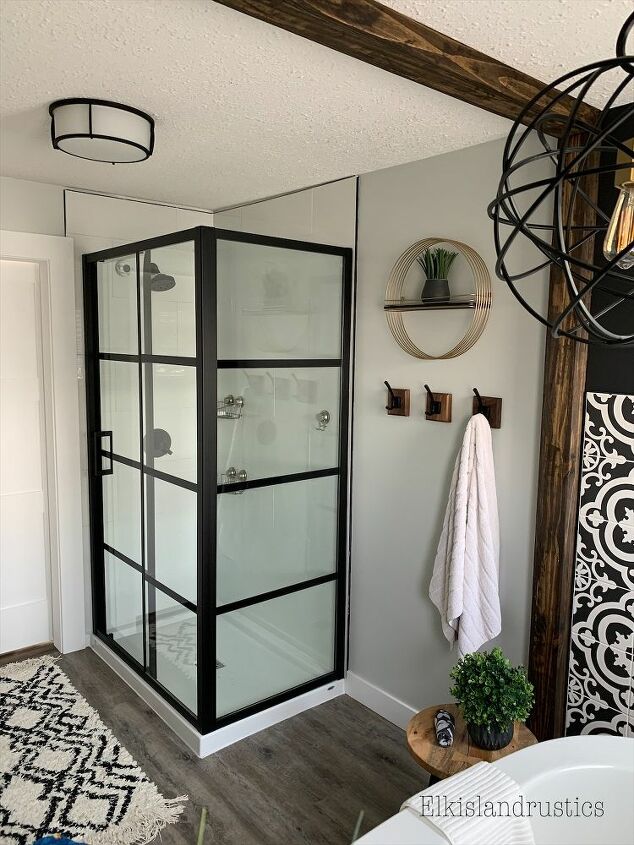
Once the tile was complete behind the tub, next thing to tile was the shower. For the shower I chose a simple white tile. I didn't want to make the space to busy with a patterned tile for the shower, since the tub surround was so busy already.

I decided to go with white grout as well, I would have went with black, however, the shower doors I chose had black lines on the glass so I didn't want to many lines for your eyes to follow. ( tile in the picture is not grouted)

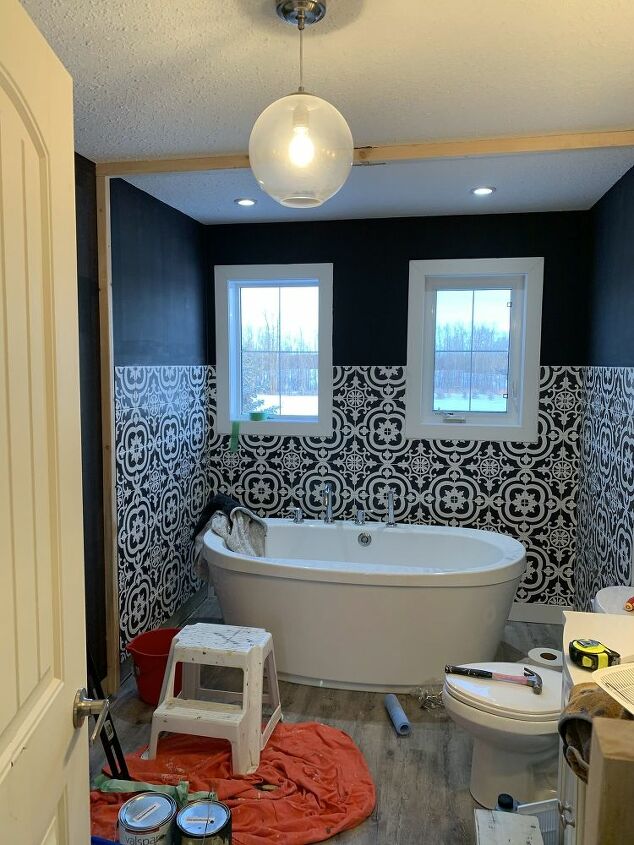
Painting and the colour choice was the most challenging for me for this project. I stressed over it for so long. I knew I wanted black somewhere. so I painted the walls black.
I loved the black, but it was to much darkness for a bathroom I felt. I wanted to create a moody elegant high contrast bathroom, not a dark dungeon bathroom.
The challenge now was "how do I create that look while still having black walls in the space?"
I decided then, that I needed to "separate" the tub area from the rest of the space. So, I decided to incorporate a floor to ceiling faux wood beam into the area.
To create this look, I secured 2x3 lumber to the walls and ceiling. Then I made a beam that was open on one edge that would slide over the 2X3 lumber. (similar concept to a floating shelf)
I installed the beam on the ceiling first and secured it to the supports with brad nails and some wood glue. Then I installed the wall pieces.
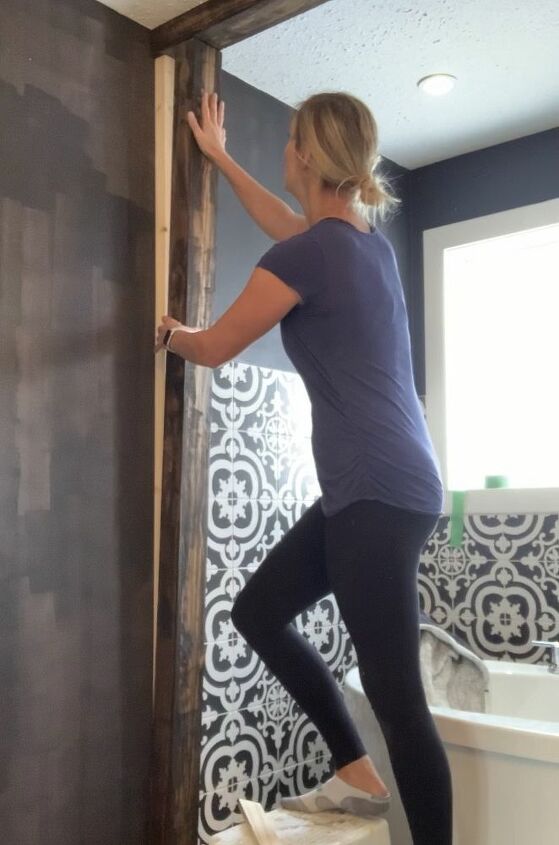
Once the beam was up, I could now paint the rest of the bathroom a light grey.
I absolutely loved how this was looking. I could still have black walls but also have a bright light bathroom.
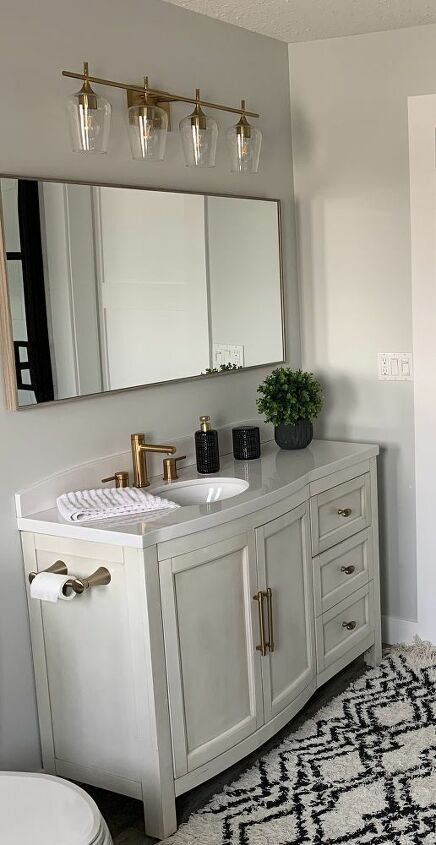
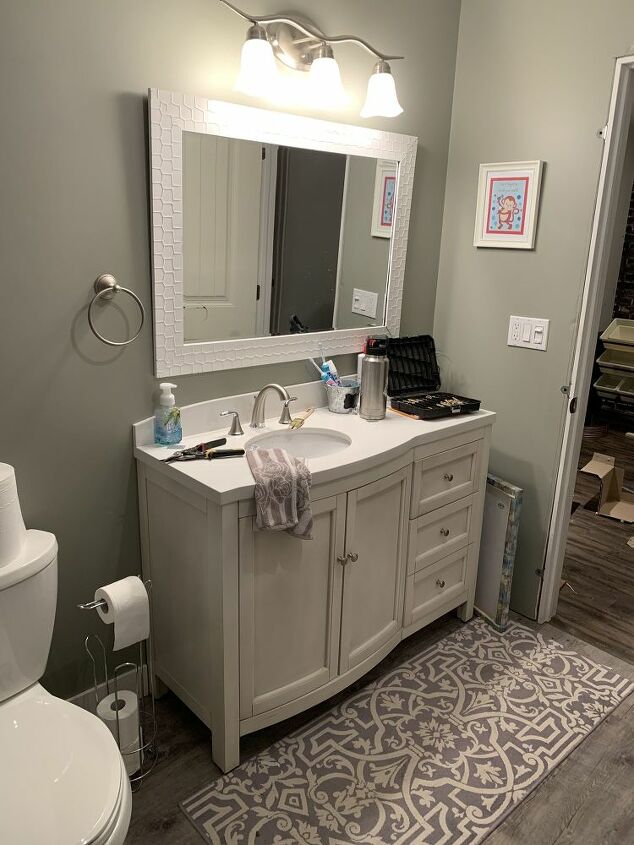
My next challenge was my vanity. I would have bought a new one in a heart beat but, since had to buy shower doors and taps, I didn't want to spend anymore money then needed. My original plan was to .... wait for it.... paint it black.
But in the end, I decided to simply change the hardware and the faucets. I'm happy I didn't paint it. It is so crazy what a hardware change can do to a piece. To the surprise of some, the hardware isn't black. I went with a brass color.
In my option, you do not need to stick with one or two colours for the whole room. I chose have the light fixture and the vanity hardware be brass, and then I tied in that brass to other small parts of the room.
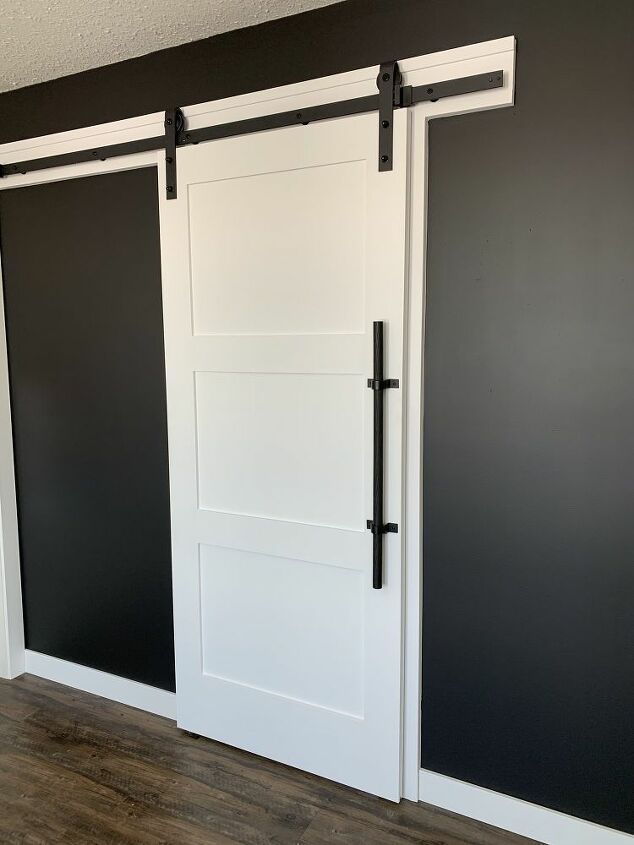
I chose to go with a classic modern white barn door. I painted the wall it sits on black to create that gorgeous high contrast look.
Black hardware, and an oversized black door handle makes this door drool worthy.
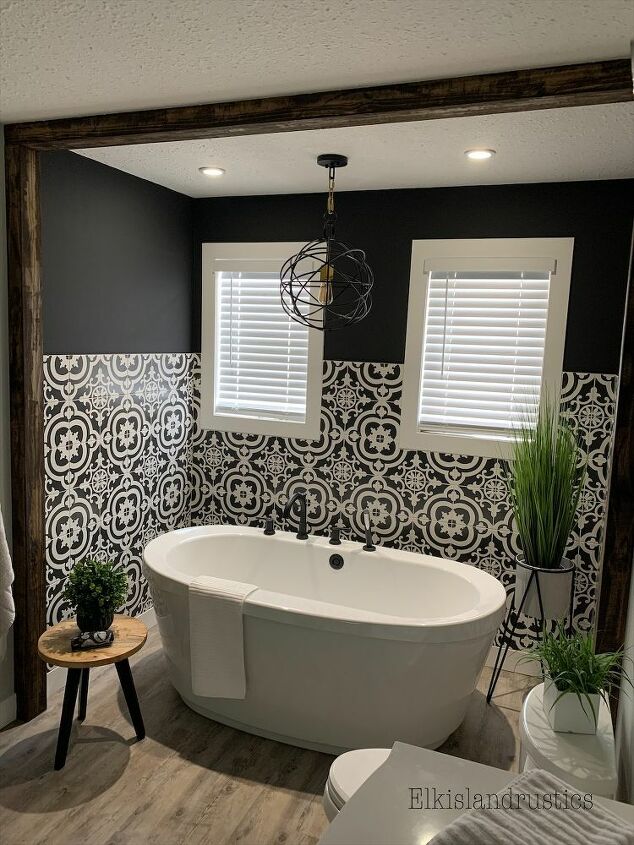
The only thing left to do was to add some decor pieces to this space. The black and white high contrast bathroom was everything I wanted in the space. moody, bright, welcoming and elegant, all at the same time.
Adding greenery helps to break up with black and white and also helps to bring a softness to the space.
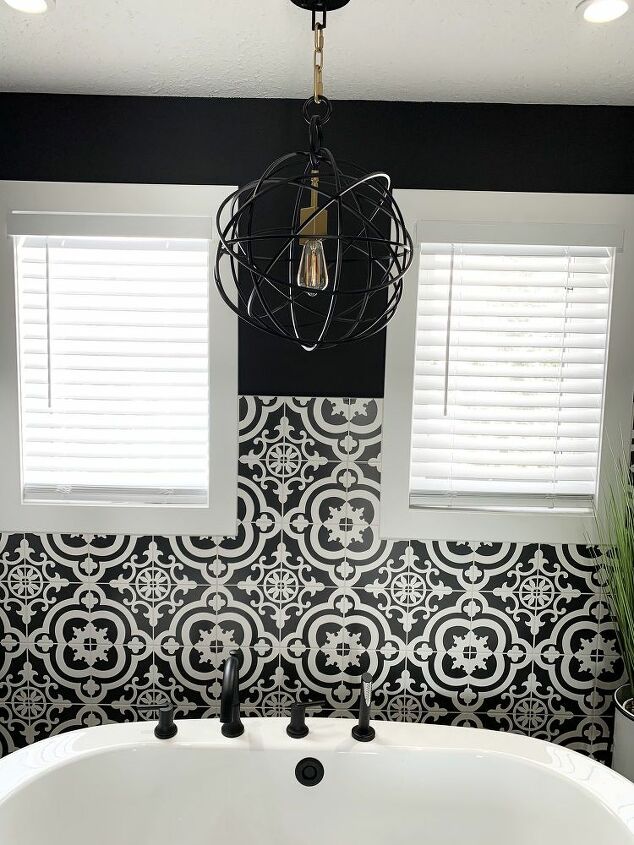
One last thing that I added, was this globe light above the tub.
I have a little secret about this, it is non functioning. It is just for show. Pot lights are above the tub space already, so I didn't need any more light, I just wanted this to help bring the entire space together.
The light, also has a small amount of brass on it, so it ties in well with the vanity space.

I am so incredibly pleased with how this space turned out.
my advice to you, is,. don't be afraid to use bold tiles and high contrast colours.
If you look at something and fall in love with it, it was meant to be. If you have to think about if you love it, simply, don't chose that tile or that color. Chose what makes you happy and brings joy to you when you look at it.
I hope you enjoyed following along with me and my high contrast bathroom transformation.
If you have any questions, please feel free to ask.
can't wait for our next DIY together
XO
Amber
Resources for this project:
See all materials


Comments
Join the conversation
-
I love your bathroom! I'm not brave enough to do black walls in my very tiny bathroom, but I am using the same pattern of black and white tile by Floor Pops (vinyl stick on 12" squares) to cover over an olive green tiled floor. They will be the basis for redoing an olive green room to black and white. You can't go wrong with black and white; always elegant, always in style.
-
Since this is a 3 yr old post, maybe I wrote before! I'd suggest topping the beautiful tile with a small white trim. It looks a little unfinished.


Frequently asked questions
Have a question about this project?