


Mirror Mirror on the Wall

4 Materials
$15
2 Days
Easy
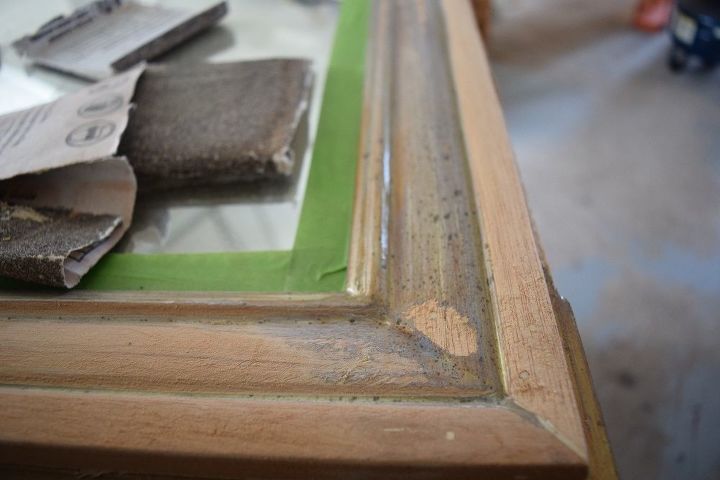
The plastic retro coating had to go!!
- Using a hand sander (and alot of elbow grease) I sanded the whole mirror. It had a weird 80's plastic sort of coating on the mirror. It was hard to come off.
- Once fully sanded I decided where in the house it would go and also how I wanted to finish it. It was decided that this mirror will adorn my bathroom wall and have a more shabby chic look to it.
- I painted the first two coats a beautiful satin white paint. The third coat, I decided that I would give it a darker grey paint. I let this dry completely.Again...over top of the grey coat, I added one more white coat. I layered the paint colors for a reason.
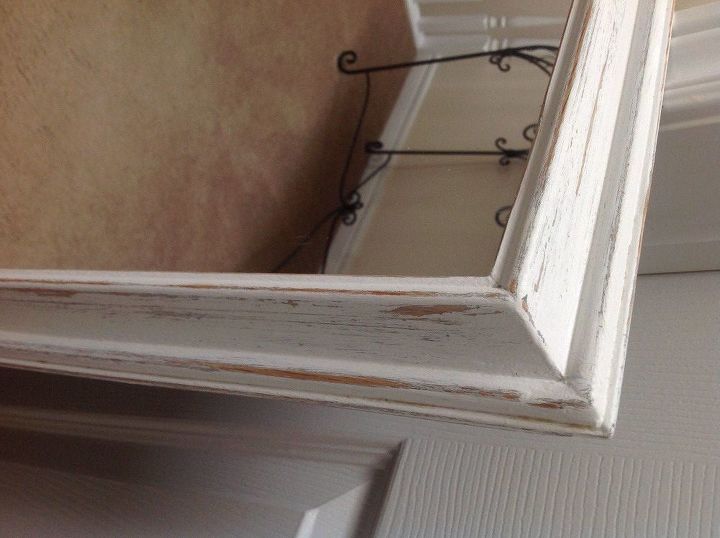
- Once all of the paint was dry (I left for a day) I used some sandpaper to rough up some of the paint. Using this technique shows the colors under neath and adds a rustic look to the finish.
- I sanded some random areas where I thought would be of interest. I let my artistic side take over. When all of the spots were completely finished I used a Bees Wax to coat the frame and seal it, seeing as it will be in a bathroom with some damp conditions.
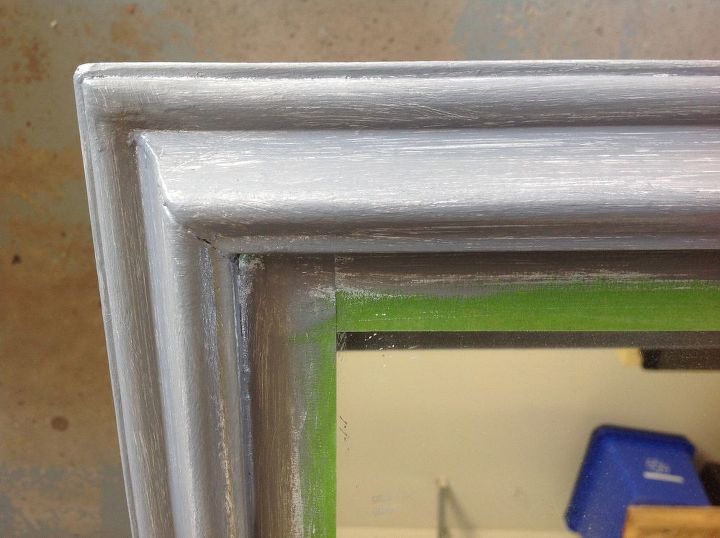
Going grey
Layered grey over first base of white then back to white again. Longer process but worth the outcome.
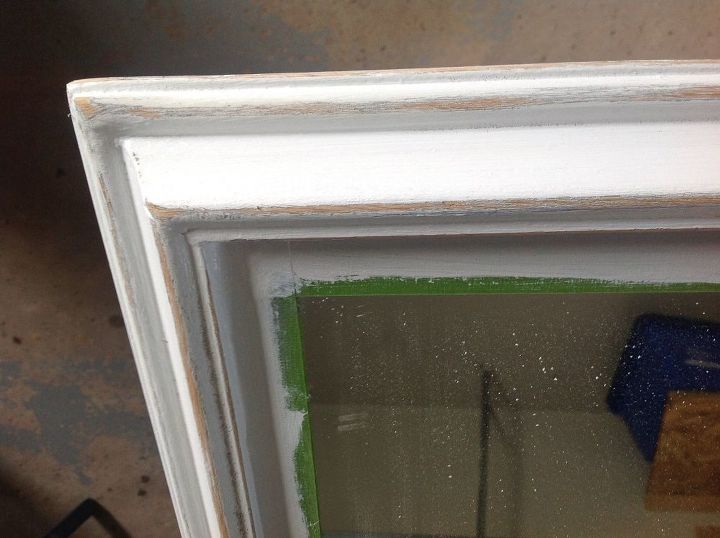
Back to white (final coat)
Started to rough up the paint.
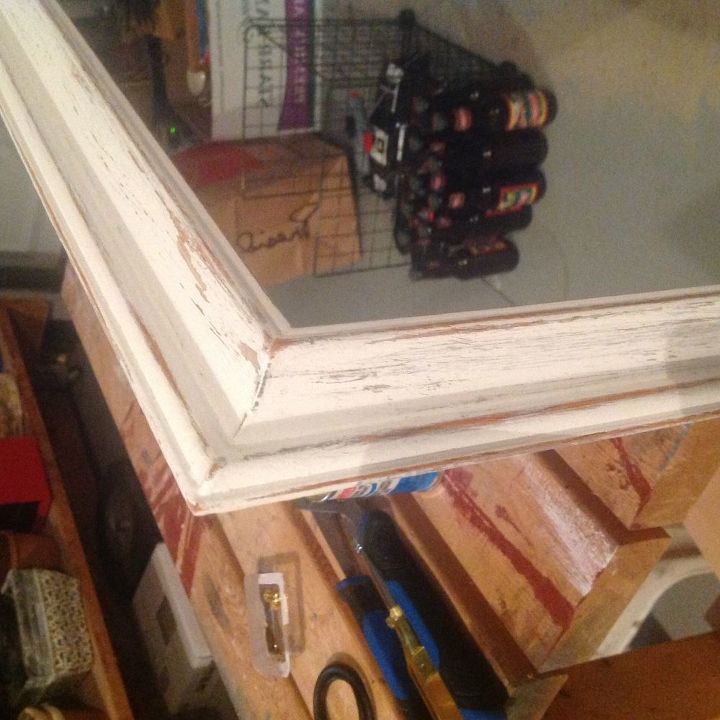
Almost done!
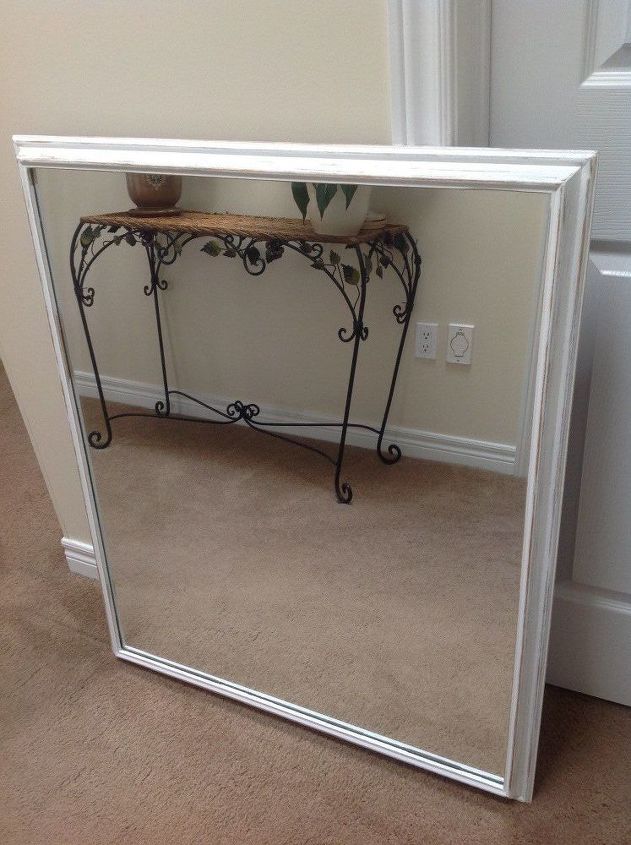
- After done sanding I quickly used a Bees Wax to do a light coat of protection seeing as it's going to be in a bathroom where moisture can get to the paint.
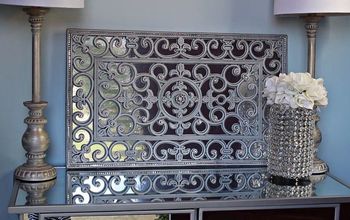
Beautiful rustic look
She's the fairest of them all!
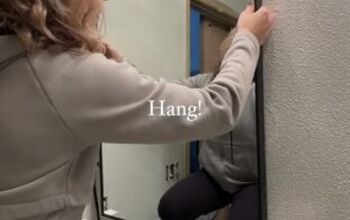
Ready for hanging!

Completes the bathroom
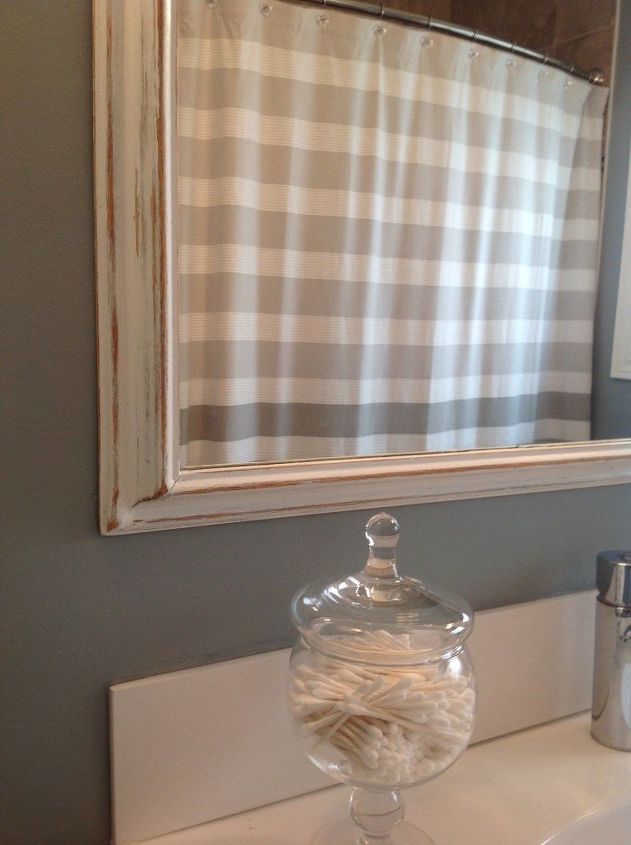
I love the rustic look it gives the bathroom.
Comments
Join the conversation
2 of 7 comments
-
Really good.
-
Great job


Frequently asked questions
Have a question about this project?