


Bathroom Organizer – Get Rid Of The Clutter!

by
Wet & Forget
14 Materials
2 Hours
Easy
Keeping your bathroom clean can be a struggle. With toothbrushes, combs, Q-tips, and a variety of other hygiene products, making sure that everything is kept tidy is a headache. We made a bathroom organizer using mason jars that you can make at home to alleviate your bathroom headaches. This bathroom organizer is very easy to make and will keep your bathroom neat and double as a nice decoration piece for any bathroom.
Bathroom Organizer Part 1: Mason Jar Holder
There are two separate parts to making your own bathroom organizer. Start by making the mason jar holder with the instructions below.
Step 1: Materials
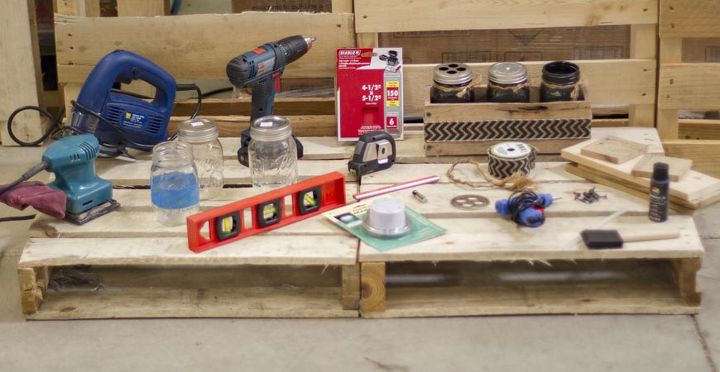
Before tackling this part of the DIY project, you’re going to need to gather a few things first:
- Wood planks (we used wood from a pallet)
- Screws and screwdriver
- Decorative ribbon
- Jigsaw
- Sander and sand paper
- Tape measure
- Hot glue gun and glue
Step 2: Measurements
In this step, you’ll be measuring out the wood planks to make your mason jar holder. You’ll need to measure out the four walls of the rectangle and a bottom piece. For our holder, the longer sides are 11.5 in. long and 3.5 in. wide. The shorter sides measured out to be 3.25 in. long and 3.5 in. wide. For the base of our holder, our pallet board is 10 in. long and 3 in. wide.
Step 3: Cut the Boards
Next cut the boards to size of the measurements you’ve just marked. We used a jigsaw to make smooth cuts for our mason jar holder. The good rule of, “Measure twice, cut once”, applies well here, so double check to make sure everything is the correct size. Then, cut the boards precisely so you don’t have to do anything over again.
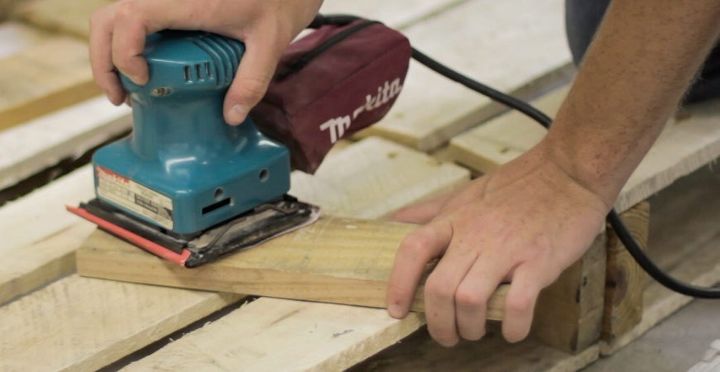
Step 4: Sanding the boards
After you have cut the boards of the mason jar holder to size, it’s time to sand it down. We used a hand sander and 150 grit sandpaper to smooth out our boards. We made sure the edges of the board were smoothed down first, then moved on to the rest of the board.
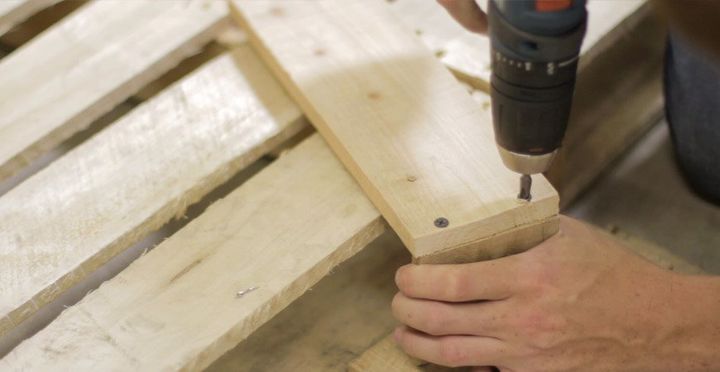
Step 5: Construct the holder
Now that everything is sanded, the next step is to create the mason jar holder. To do this, screw all the pieces that form the walls together on the corners, then screw in the base. We went for a roughed-up appearance and didn’t pre-drill holes which caused some cracks in the wood giving us the look we wanted. For a more clean look, pre-dill the holes to avoid cracks in your boards.
Step 6: Decorate the holder
Finishing off your mason jar holder by decorating it. We used hot glue and a decorative ribbon around the entire holder to decorate it. You could also use paint or a combination of the two to really make it your own.
Bathroom Organizer Part 2: Mason Jars
The second part for your bathroom organizer will involve using mason jars to make them suitable for bathroom storage.

Step 1: Materials
Collect all these items before you start on the final part to your bathroom organizer.
- Mason jars (3)
- Acrylic paint
- Paint brush
- Mason jar toothbrush holder
- Mason jar light
- Twine
- Painters tape
Step 2: Painting the jars
The first step is to paint your mason jars. For our jars, we used black acrylic paint, but you can use a different color if you would like to. Painting the jars was as simple as putting your hand in the jar and spinning it around to cover the whole jar with paint. We liked how the jars looked when the bottoms weren’t painted, so we avoided painting that area. For one of our jars, we made a clear stripe in the middle by using painters tape. We did this because this jar was going to be used as a light, so we wanted some light to shine through the jar.
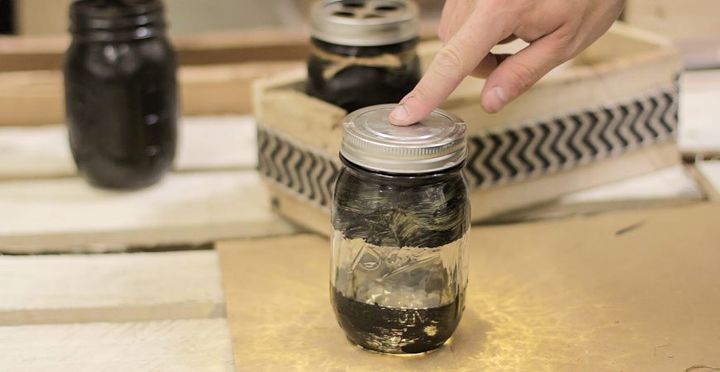
Step 3: Accessorize the jars
Once the paint on the jars has dried, you can use lid accessories to make them bathroom ready. We used lid that had holes drilled into it to hold toothbrushes, as well as a lid that had a light on it. You can find both at Hobby Lobby near the mason jars. For our third mason jar we left it open so you could put anything you want into it, but you can also buy a soap dispenser lid if that interests you.
Step 4: Finishing touches
The final step for your mason jars is to add some finishing touches. We decided that the best way to do this was to tie some twine around the top of the jars. The twine is perfect for our jar holder, as it matches with the color of the wood.
Both parts of the bathroom organizer are now complete, and you are ready to show it off in your bathroom. Place the mason jar holder wherever you see fit on your vanity and then place your jars into it. This bathroom organizer is sure to keep your bathroom space clean and decorated.
Don’t miss out on our Wet & Forget BIG Shower Giveaway! Enter weekly for a chance to win many bathroom and shower related products as well as Wet & Forget Shower product! Come back each week to improve your chances towards the grand prize at the end of the giveaway!


Frequently asked questions
Have a question about this project?
Did you cure your painted mason jars in the oven to set the paint? It will last much longer without chipping or peeling. I did this with a painted jar that I have by my kitchen sink that I keep dish brushes in. I knew it would often get wet and I wanted the paint to last. So far so good.