


HOW TO COVER UGLY BATHROOM TILE UNDER $15

How to cover ugly bathroom tile with contact paper.
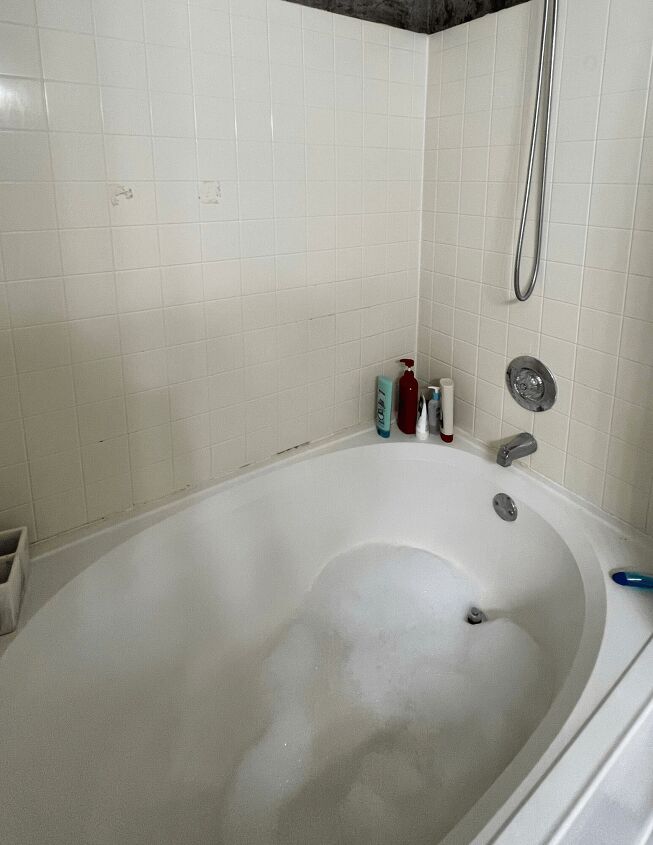
When you’re renting, the bathroom is not the most exciting room of the house but it can definitely look and feel welcoming if you put some renter friendly DIYS behind it. All bathrooms are not created equal so I decided to upgrade my bathroom with some Dollar Tree contact paper. Yes you heard that right.
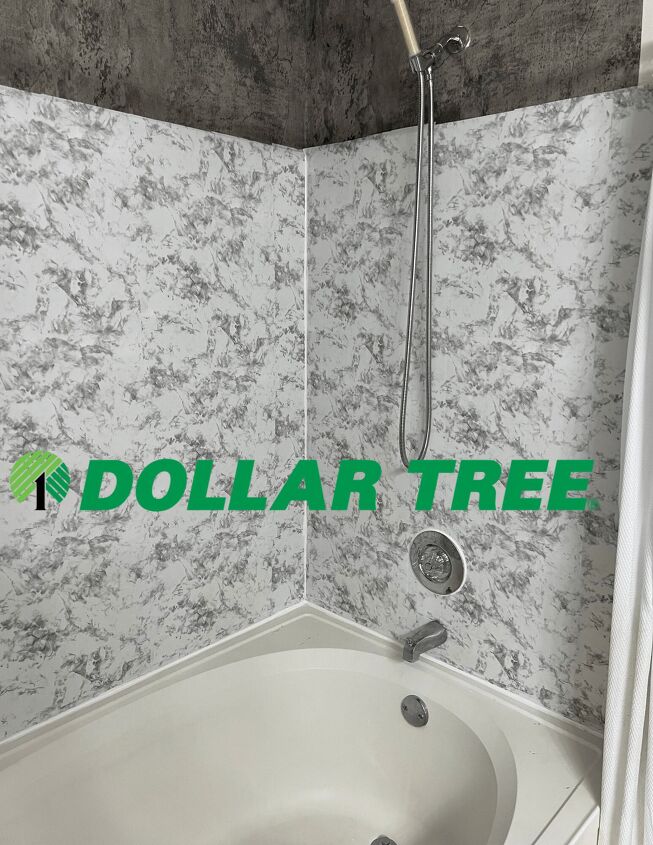
It cost me a total of $15 to change the look of my old outdated plastic tub. The Dollar Tree contact paper is easy to put on and comes off easily, so you will never have any issues with it. Do you like marble? Here is your chance to have it in your rental with out doing a major renovation. The contact paper is water proof and with the perfect amount of water and steam from the shower gives the contact paper the perfect elasticity leaving no residue or peeling.
MATERIALS:
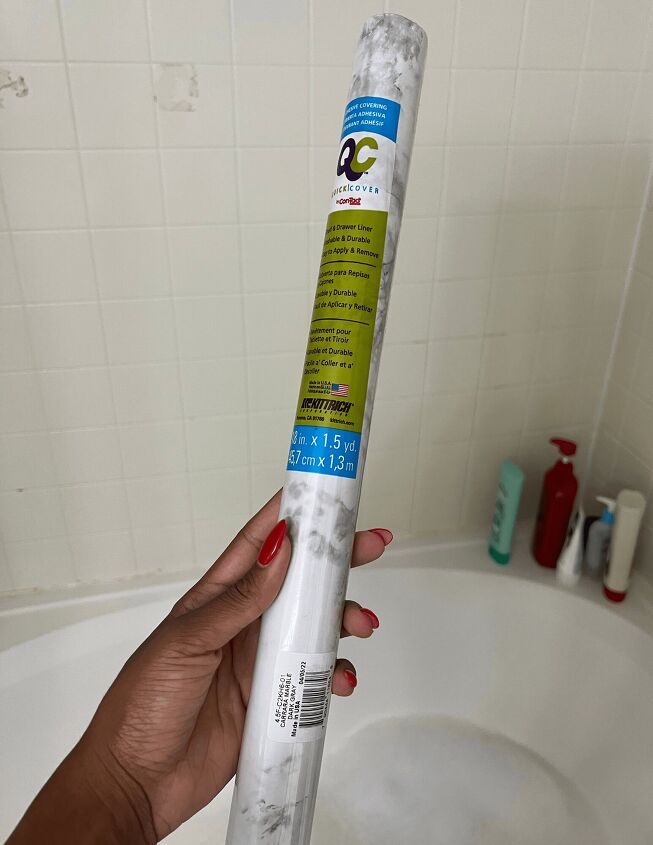
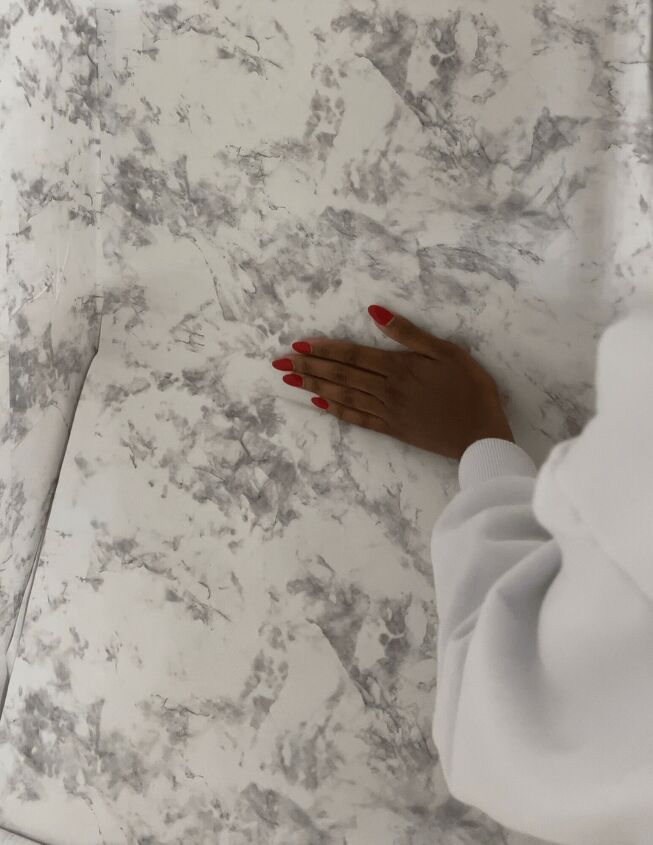
- Dollar Tree Marble Contact paper
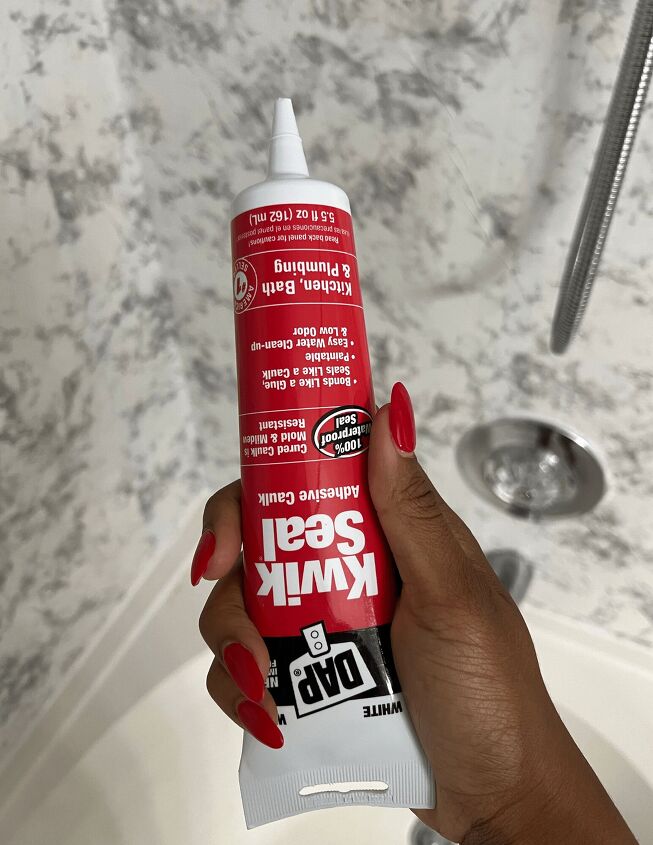
- Kwik Seal (white)
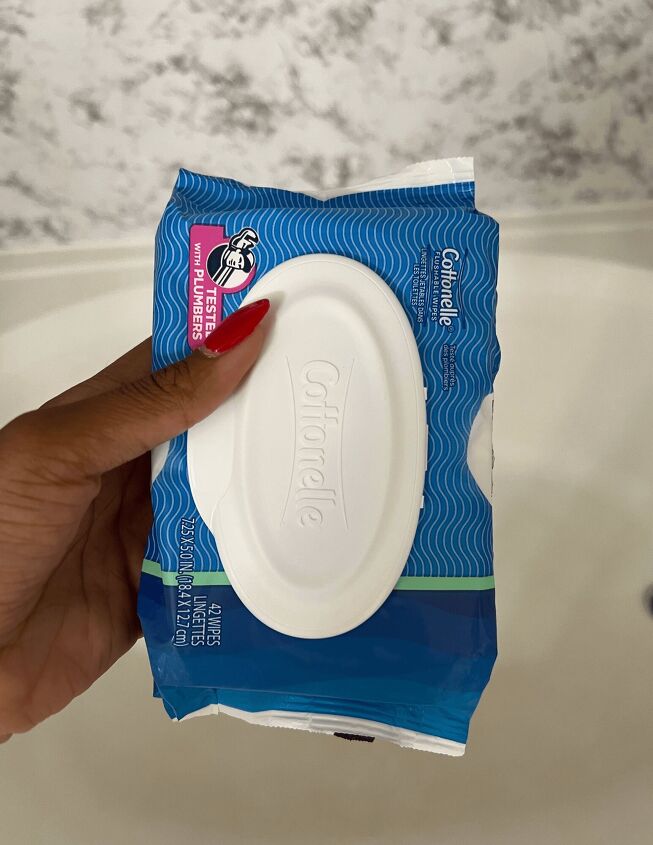
- Flushable Wet Weipes (Cottonelle)
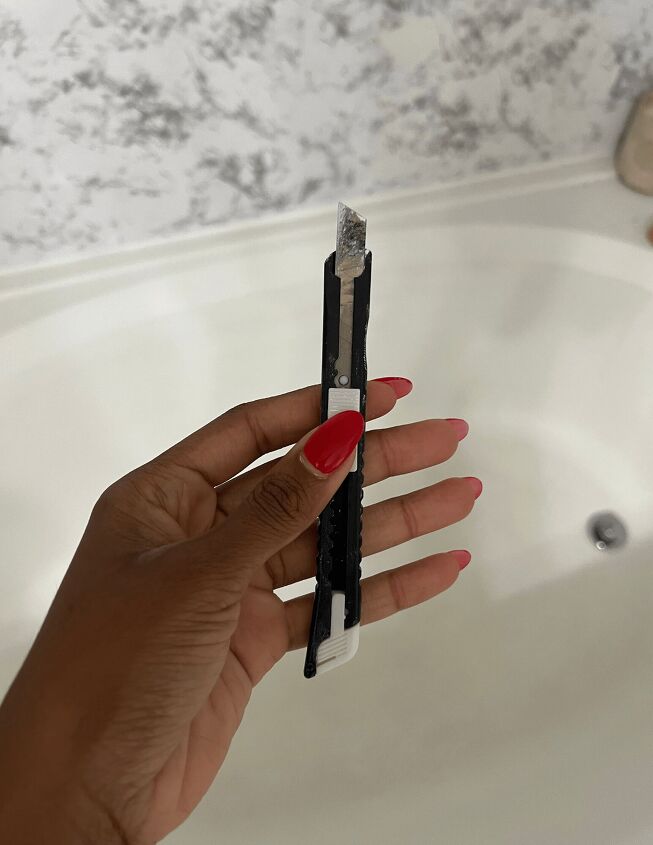
- X-acto knife
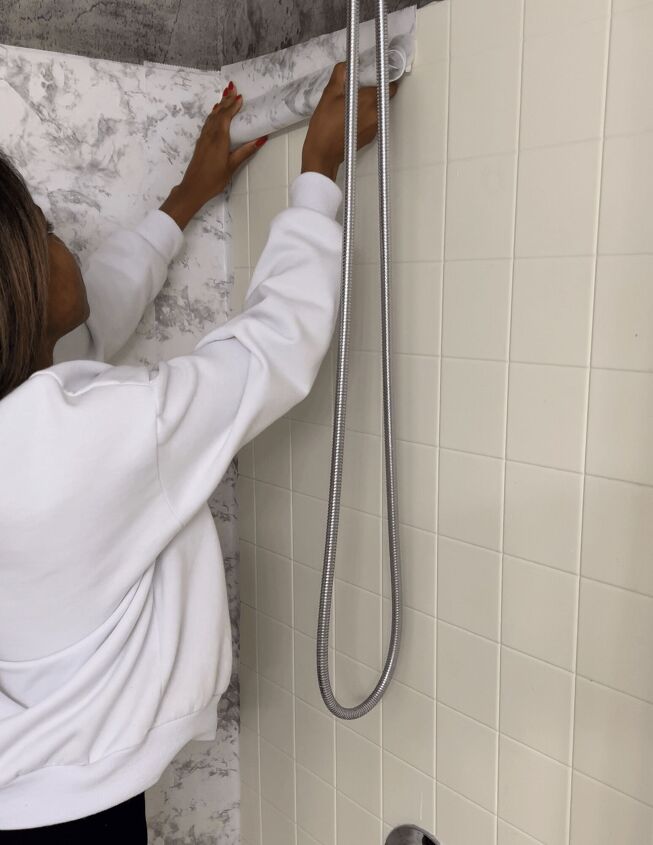
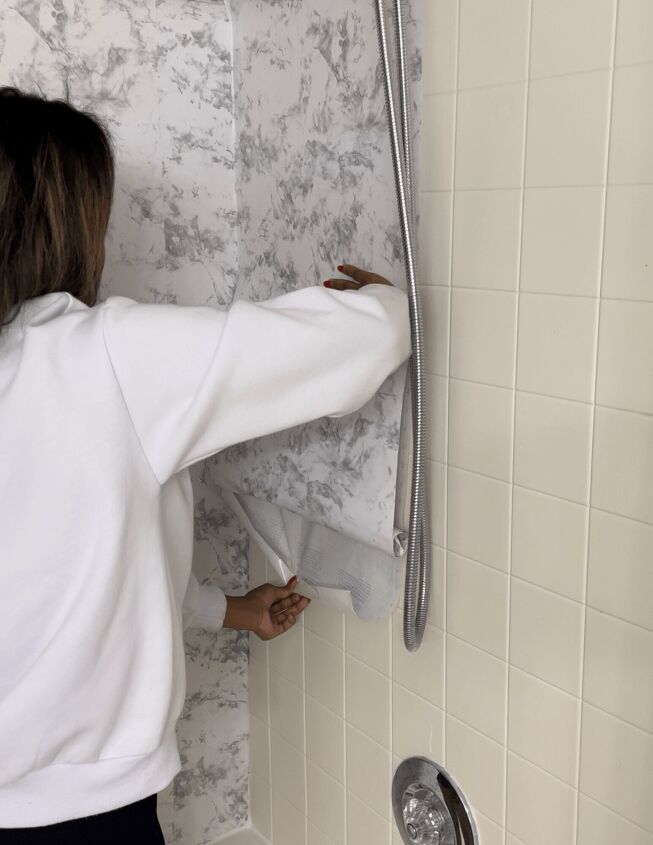
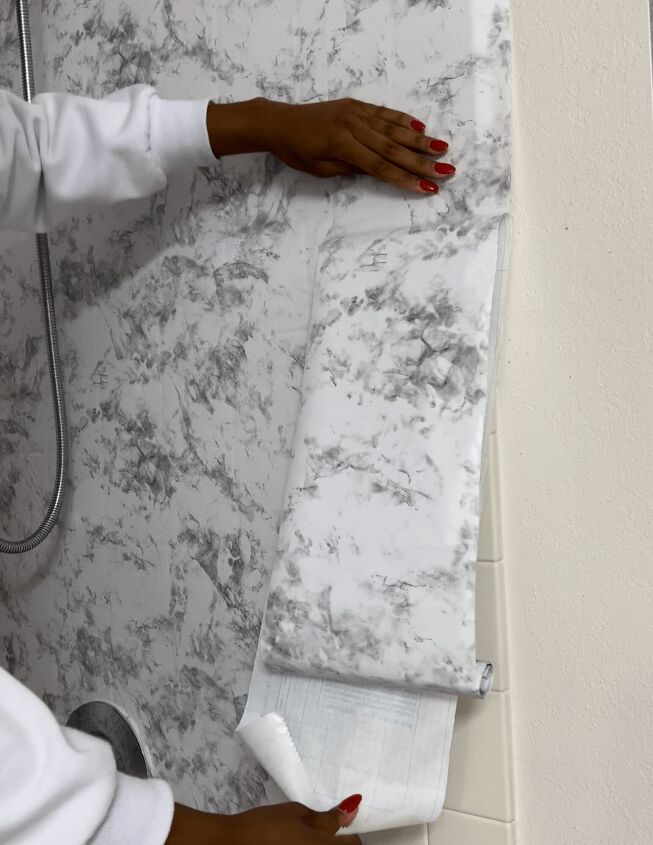
Clean the shower thoroughly with a cleaner meant for the plastic tiles and let completely dry. Peel back only the first two inches of the adhesive liner on the back of the contact paper, and line up the exposed contact paper carefully at the top of the shower, and press it firmly in place. I know you are skeptical about putting contact paper in your shower however, the results do differ (recommended for plastic tub).
Tip: use a smoothing tool and work in small sections to avoid air bubbles.
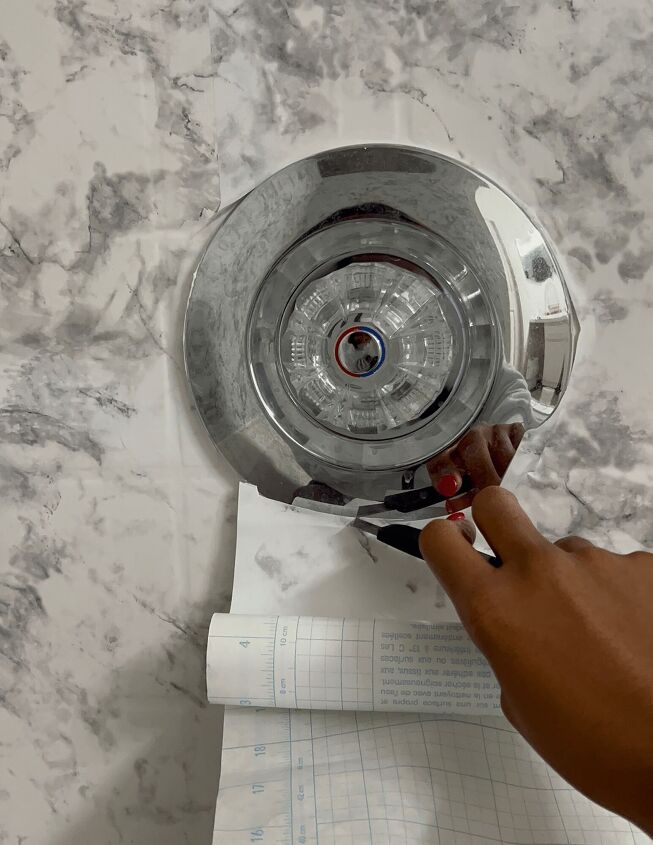
When you get to tough areas, such as around the faucet, I found it easier to install the contact paper right over top and covering it completely. I rolled the contact paper and carefully cut around the faucet with an X-acto knife to remove the paper. Smooth the contact paper around the faucet, and then continue rolling the paper across the rest of the shower.
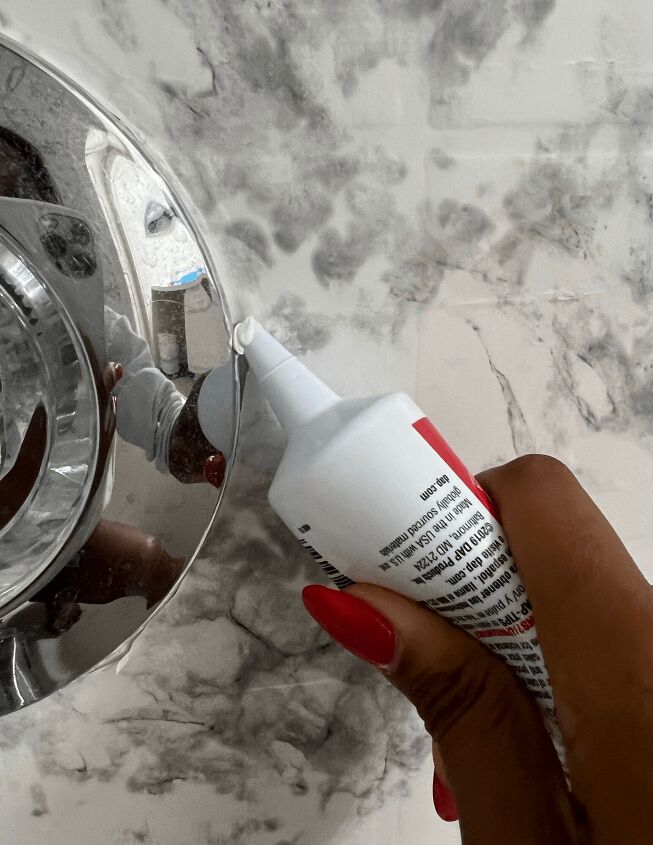
Sometimes really good quality contact paper works well in the shower. As long as you can ensure that water and steam do not get through to the adhesive, it can work well. I recommend sealing aroud the faucet caulk and the corners where the shower meets. Adding caulk helps avoid risk of mold and mildew forming behind the paper.
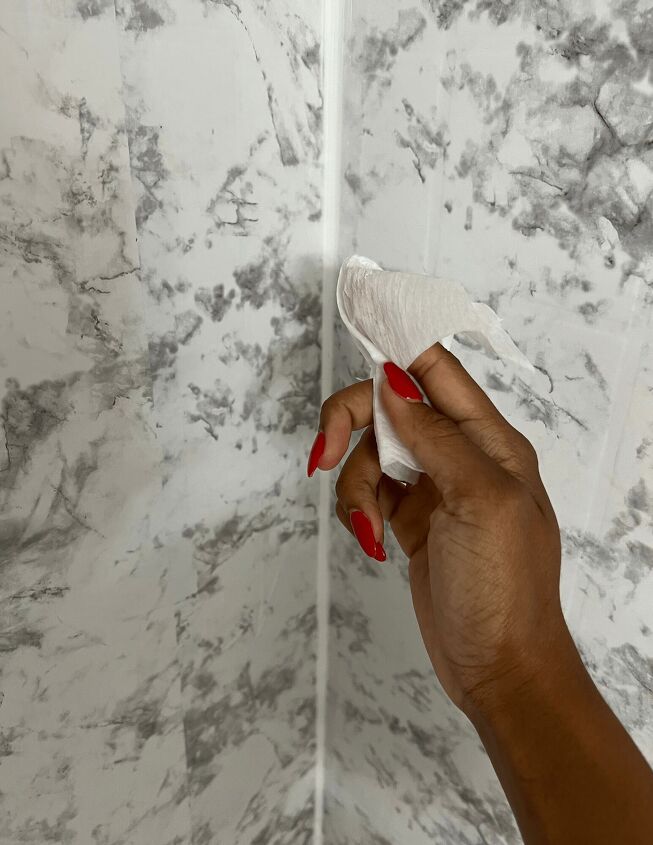
Use your index finger and a flushable wet wipe for a seamless finish, and let dry for 24 hours.
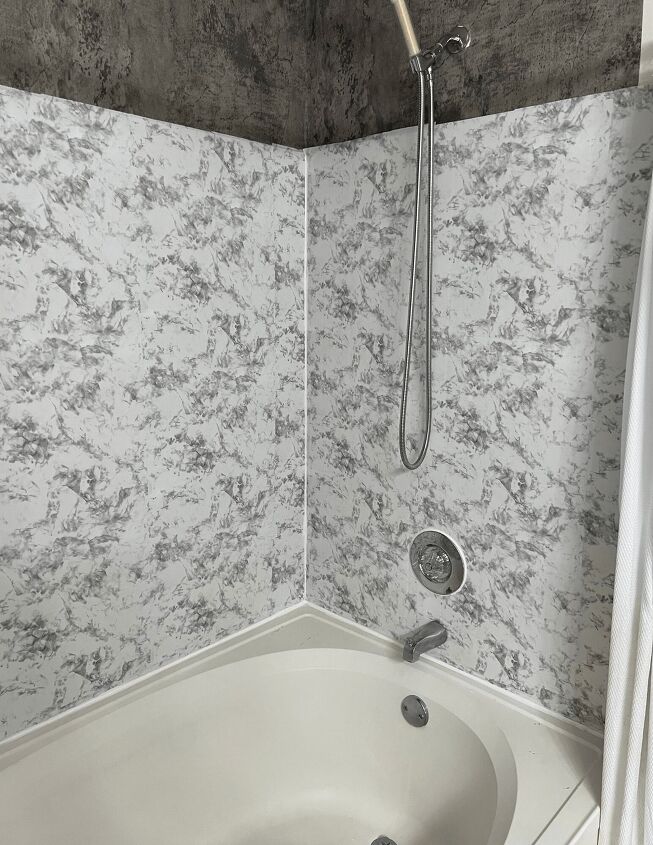
I am in love with the overall look and how it instantly modernizes my bathroom. Can’t wait to work on our next project. Please post any questions below.
Resources for this project:
See all materials


Comments
Join the conversation
-
It looks so much better, great job!
-
Gorgeous! Love it!


Frequently asked questions
Have a question about this project?
Can this be done on regular (not plastic) tiles?
Can you use it in a walk-in shower? In a shower, it would get wet.
Great job. I have been trying to do the same thing to my shower walls but my shower has built in shelves and curved in the center. I am using both peel and stick wallpaper and tiles. I think I finally figured out the colors and design. Do you have any suggestions to help me get this job done?