


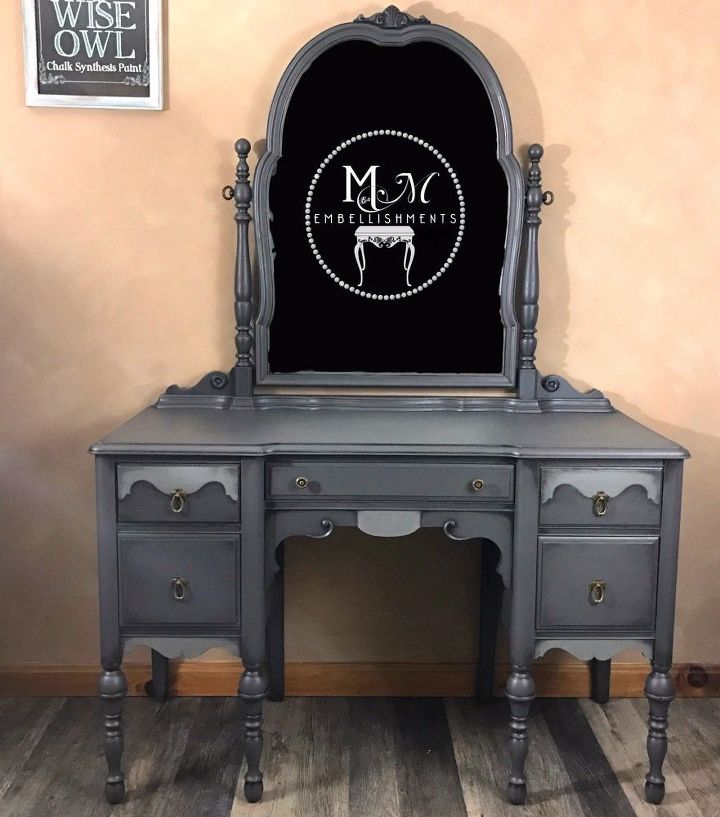
Antique Vanity Re-Imagined

3 Materials
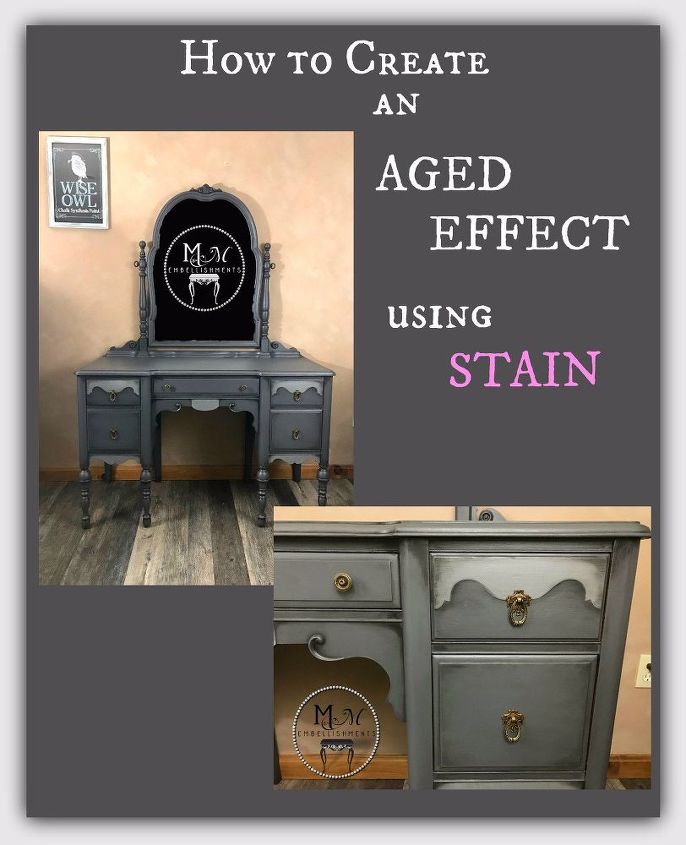
A tutorial on how you can create an aged effect without distressing!
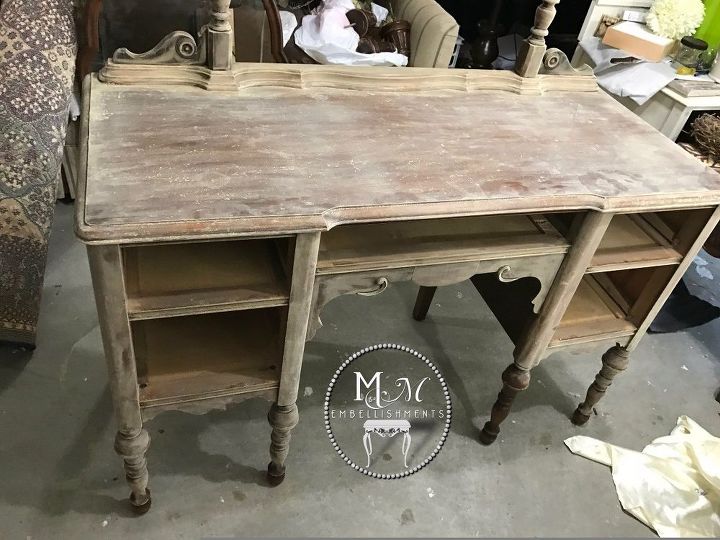
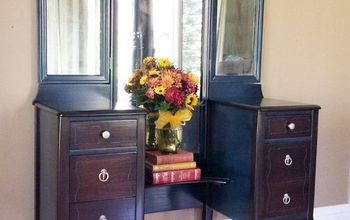
Hi Everyone! It's been awhile since I've posted anything. I've been hard at work with custom orders! And this is one of them. I found this beautiful antique vanity in super condition quite some time ago.
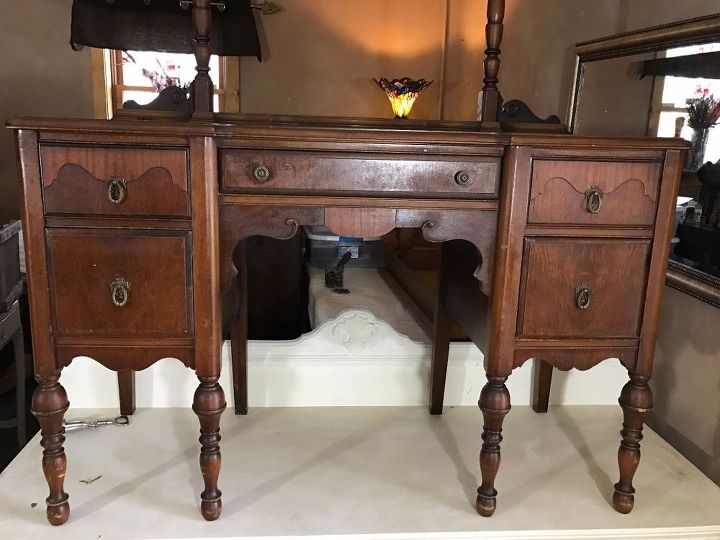
I have been putting off doing anything to it because I just couldn't decide what to do. Well, the decision was made for me when Melissa contacted me about purchasing it and having it painted in gray hues to match her daughter's bedroom
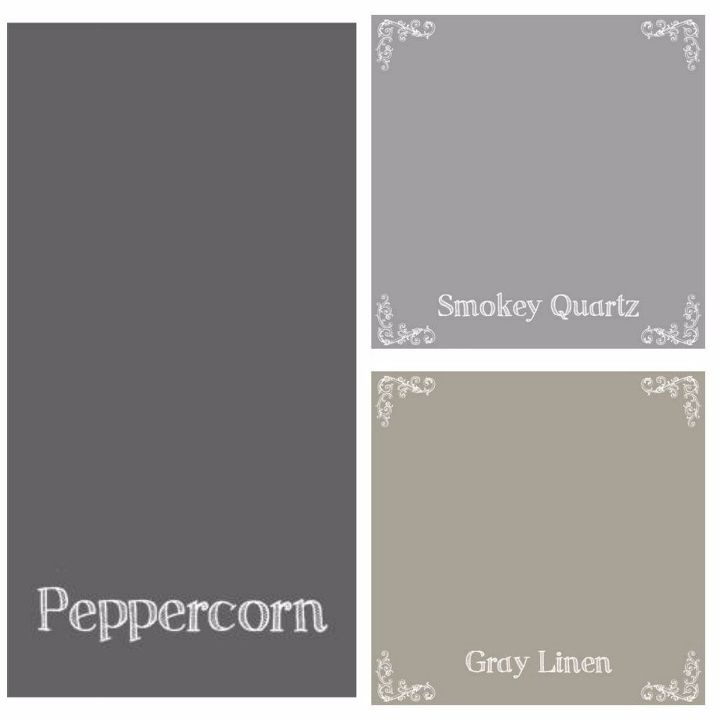
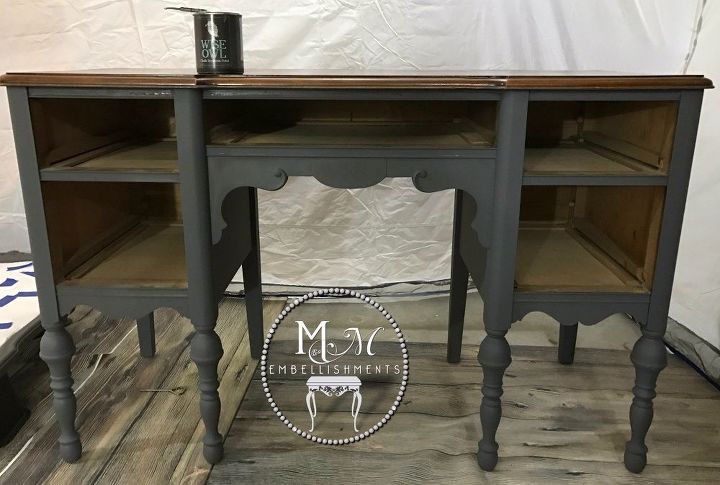
We decided on Wise Owl Peppercorn for the main color.
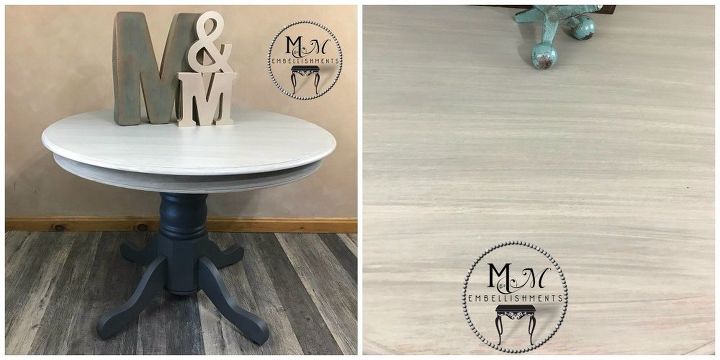
After some discussion we came up with the idea that we would do a washed look on the highlighted areas (they had seen my Gray Washed Tables and liked that look). I used a wash of Wise Owl Smokey Quartz and Gray Linen to achieve this look.
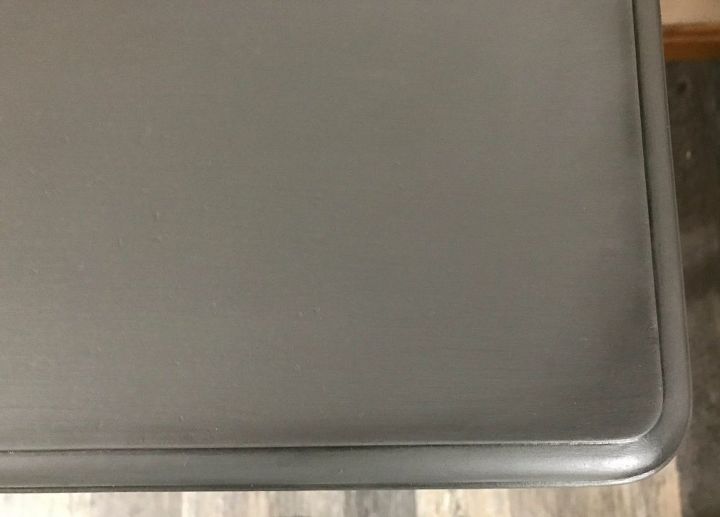
Here's a pic of the table they liked the top of
So, I got started with the hated, but necessary, prep work... First I dismantled the mirror from the base and then did a good cleaning, sanding, and cleaning some more. I also taped off the mirror (which is probably my least favorite part lol)
Because this piece is mahogany, the tannins in the wood might bleed through the paint after a top coat is applied. This isn't usually a concern when using darker colors, but because of the washed areas I would be doing and also to be on the safe side, I decided to use a couple of coats of shellac.
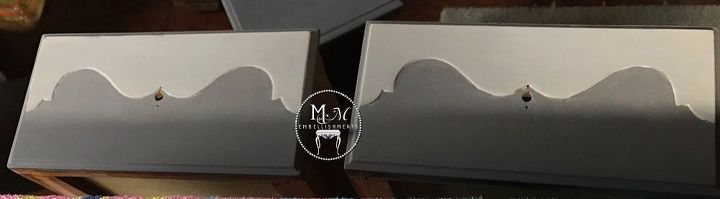
I started with the base and got everything painted with the peppercorn
We wanted to add dimension and have an aged look without distressing. I'm not a huge fan of distressing. Don't get me wrong, I like the look; however, I am not a fan of doing it. Not that it is hard, I just never know how much the customer really wants. I think it is all a matter of taste, so I tend to avoid distressing unless I get a VERY good idea from the customer the look they are going for.
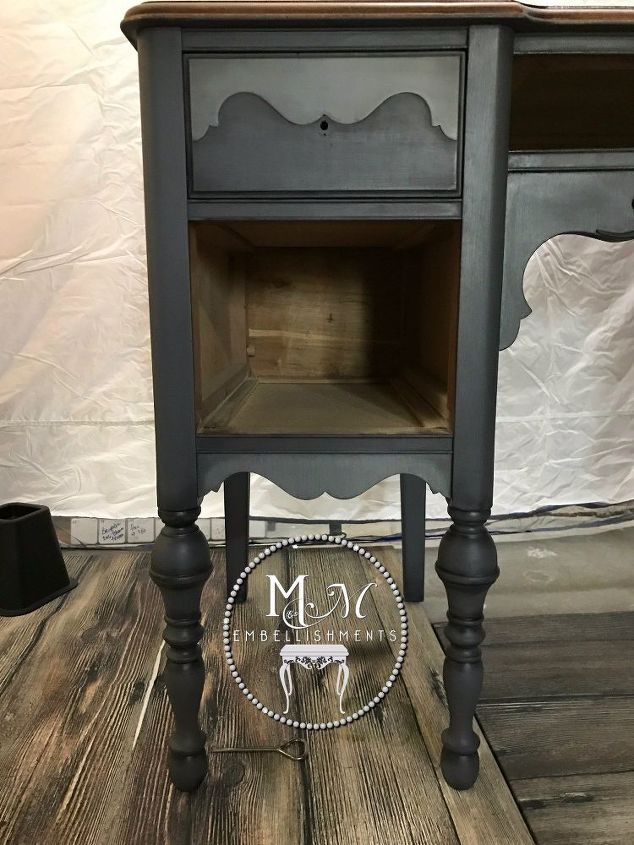
At any rate, I used black wax on the whole piece by rubbing it in really good and then buffing... and buffing... and buffing it smooth.
This deepened the Peppercorn, but there was specific look I REALLY wanted to achieve. I wanted something similar to the look I did on my Baseball Table, but I didn't necessarily want quite so much contrast on this piece. I see this look often, but never seem to be able to achieve it with wax or glaze.
So, I took out my good friend - my MinWax Ebony stain! This stuff never fails me!
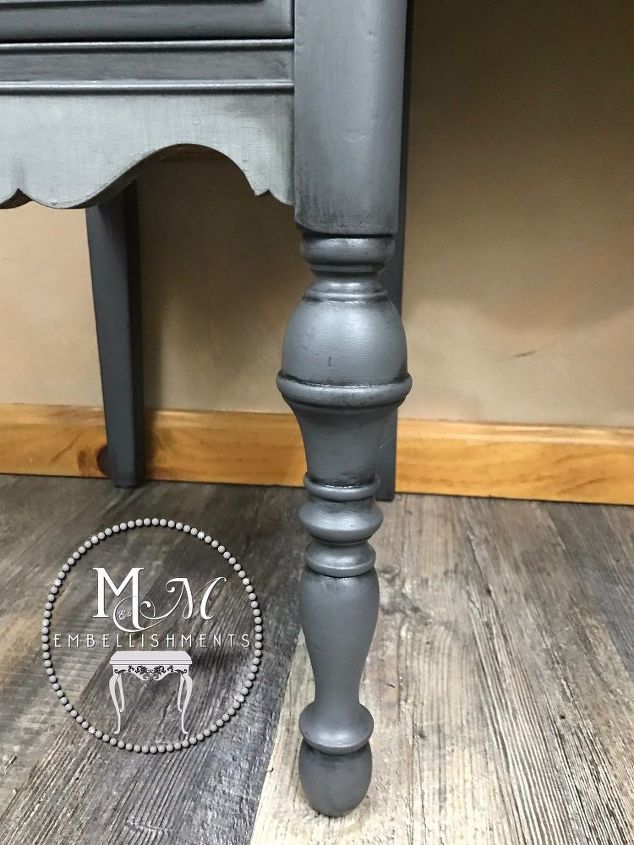
I used an artist brush around all of the detailing on the legs (in the crevices) and wiped it back a little and then feathered it all out. I added some at the bottoms and tops of the vanity as well as on the edges of the drawers. I will tell you, this step is a bit nerve wracking if you have never tried it. You will think you are ruining your freshly painted piece. And it takes some finesse, I'll admit. I'm used to working with stain and how it reacts since I do so much stained art. If you are new to this, you may want to practice a few times before you try it on a prized piece you have.
Once I got the base all finished up with the paint, wax, and stain, I had to let the stain and wax cure for quite some time. Now it was time to turn my attention to the top of the vanity. I could have done this earlier, but I don't like to keep moving the vanity from it's back to top, etc. So, I repeated the same steps with the top that I did on the base, drawers and mirror.
After a week of cure time (yes, that long!), I was able to put the sealer on top. I used our Wise Owl Furniture Salve for the final sealing. This stuff is a little miracle in a tin!! I rubbed the salve on with a lint free rag and then used my 220 grit sanding pad (very fine) to buff it in. WOW, the finish ended up super smooth and has just enough sheen!!
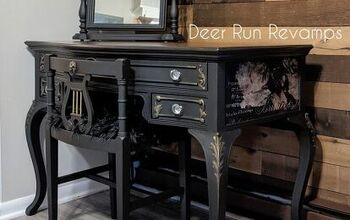
And here she is ready to go to her new home!

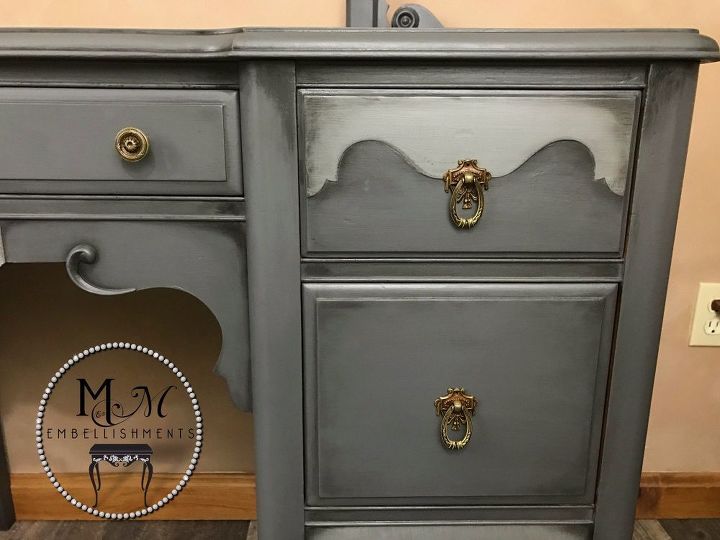
They decided to keep the original hardware, so I used the Furniture Salve on these as well to clean them up. I couldn't have cleaned them even more, but we didn't want them looking to bright. I would have liked to see them with some black gilding paste, but the customer wanted to keep original.
I hope you enjoyed this transformation as much as I enjoyed creating it! I KNOW it was a beautiful piece before the transformation, and that some might find it terrible that the beautiful wood was painted over. But it now has new life for the young lady who will be using it! {I will not respond to any comments regarding painting over the beautiful wood}
As always, I would love for you to follow along with me!
website
Facebook www.facebook.com/mmembellishments
Instagram www.instagram.com/mmembellishments
Pinterest www.pinterest.com/mmembellishment
Etsy www.etsy.com/shop/mmembellishments
Hometalk www.hometalk.com/mmembellishments


Frequently asked questions
Have a question about this project?
If you were going to do this same project in turquoise tones, what would you use? I'm thinking of a similar project for my 17 year old granddaughter, or would that be a color you would recommend for that age?