


How to Re-stain Bathroom Cabinets With Water-Based Wood Stain

by
Jenni Ingram
5 Materials
$30
2 Hours
Easy
In my quest to abolish all the oak and brass in my new home, I needed to tackle my orange bathroom vanity cabinet. I decided to re-stain it so it would fit my rustic wood theme/on-going makeover in this room.
If you aren't into the painted cabinet look for your kitchen or bathrooms, try restaining them. .This is one of those projects that seems a lot harder than it actually is! Let me show you how...
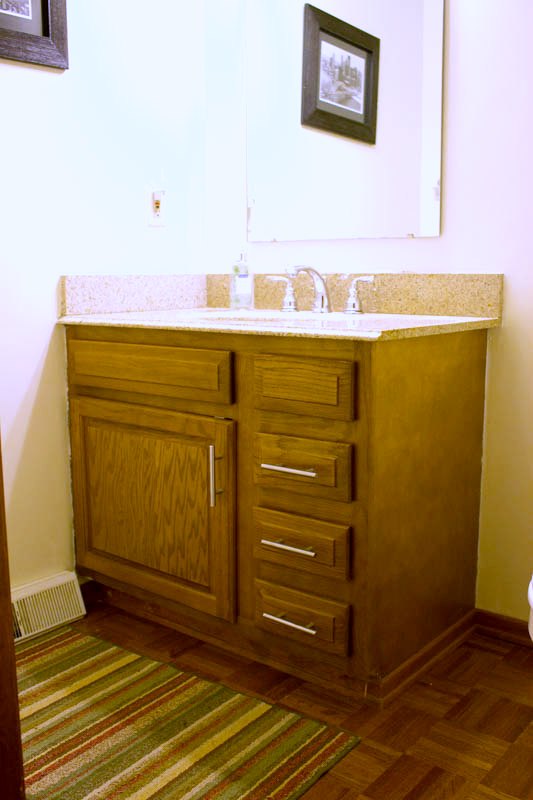
This our vanity cabinet before. To restain it a dark warm wood color, first clean the cabinets and remove the hardware. I opted to NOT take off the door, but for a bigger cabinet job you should so you don't miss spots.
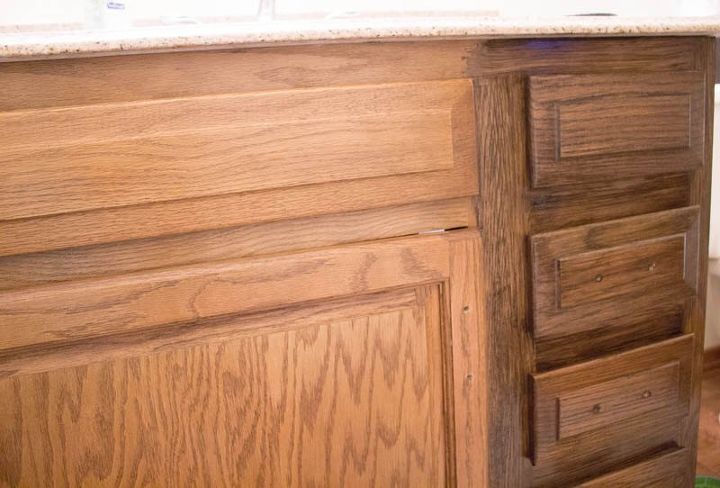
Then tape off the floor and sides of the cabinet .... this can get a little messy.
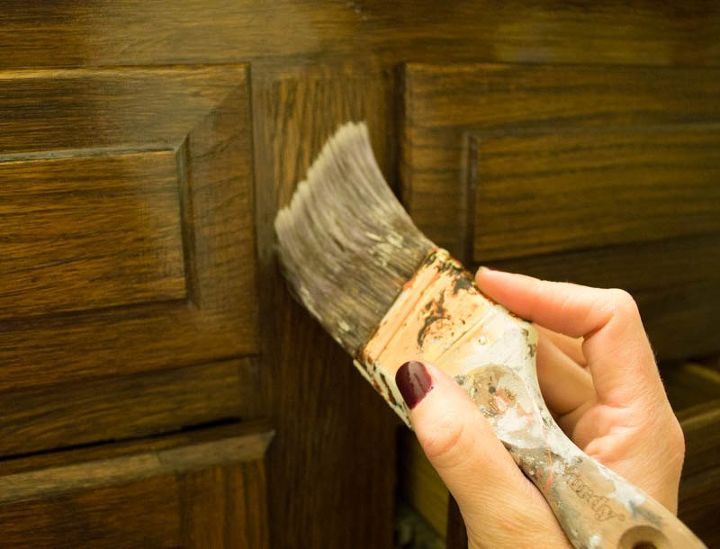
Then grab your stain and brush it on. This is only one coat of stain - and what a difference!! If you want a darker color, you can let the stain dry (about 2 hours) and reapply another coat. My full blog post has a video of me painting this project and showing you how to "wipe back" some of the stain and I also link to the gorgeous walnut stain I used. Go look at it because I HIGHLY recommend this one!
I did this one evening, so I let it dry overnight (or 2-4 hours), and top coated it the next day. I used a high-performance topcoat, which you can find in my full blog post. Apply the topcoat using a high-quality brush.
You'll just apply it along with the grain, let it dry and then apply another coat (2-3 coats total will do).
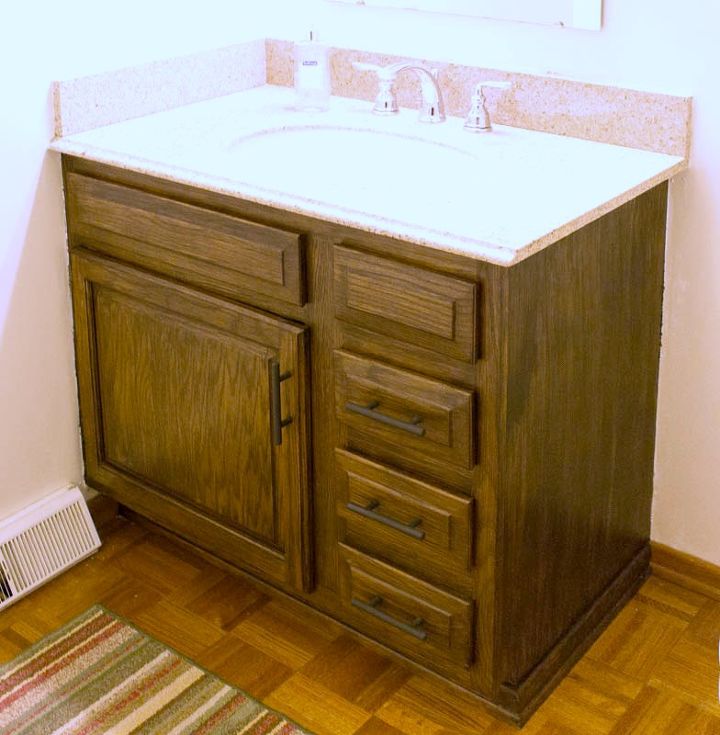
Once it's all dry, re-install your hardware (I spray painted mine black to match the barn door hardware, which we added to the bathroom).
And you have a new (old) cabinet!!
This bathroom makeover is NOT over yet. Subscribe to my blog HERE to see what else is coming and get more DIY tips and tricks.
You can get all the specific brands of products I use, love and recommend, plus watch the video by clicking on my blog link below..
Thanks for stopping by!


Any price and availability information displayed on [relevant Amazon Site(s), as applicable] at the time of purchase will apply to the purchase of this product.
Hometalk may collect a small share of sales from the links on this page.More info
Want more details about this and other DIY projects? Check out my blog post!
Comments
Join the conversation
1 comment
-
Looks great in the darker color. One thing you didn't mention here as you did on your blog that you used a gel stain. A lot of Hometalkers may assume you just used a regular stain which wouldn't necessarily work.


Frequently asked questions
Have a question about this project?
How do you stain white painted cabinets?