


Plumbing 101 : You Don't Always Have To " Go With The Flow"!

by
Suzette
5 Materials
You don't have to "go with the flow" when it comes to your bathroom sink. We're given choices that range from $99, well into the thousands. I say don't conform or settle. Make your own! Let your personality shine with a one of a kind piece that is as unique as you are!
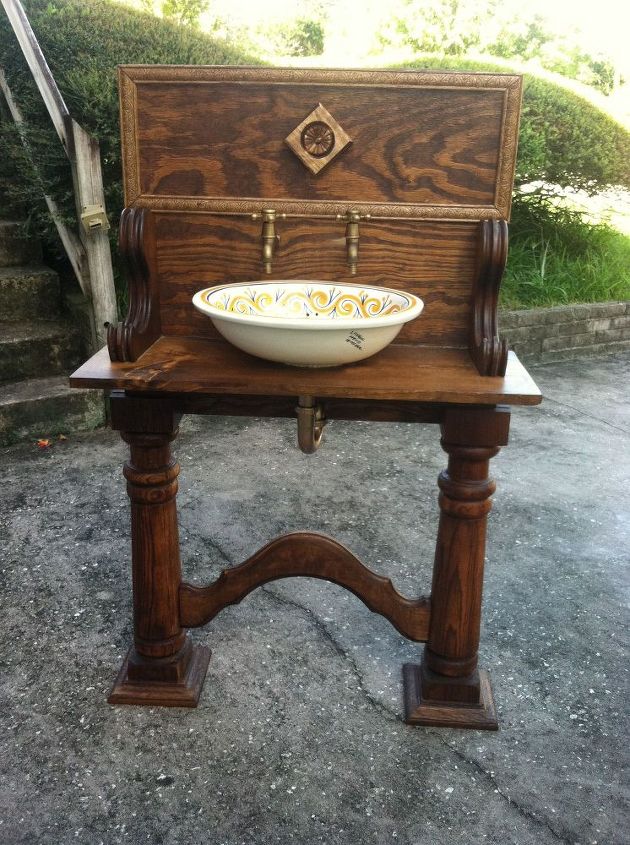
I was given a heavy antique table base. I had no idea at the time what I would do with it until I looked in a box I had on the shelf for over 10 years! It was a vintage porcelain Mexican sink I fell in love with all those years ago but never used. (Let's keep track of cost: Table base was $0, Sink was $10).
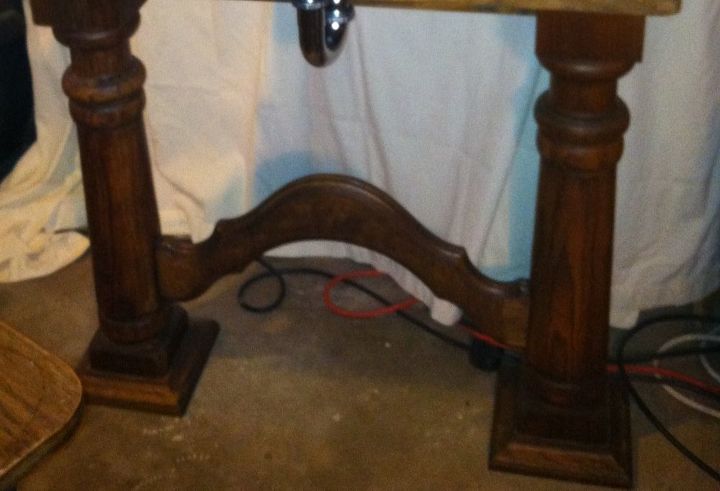

First I measured the height of a standard sink and plumbing to make sure it was tall enough, and it was! I sanded the table base and stained it. I had lots of left over wood and trim from other projects so I just measured the width and length I wanted for the sink area and back, cut, sanded and stained both. At this point, I marked where the sink was going and cut a hole large enough for the drain, but snug enough so it wouldn't move around. I used several coats of polyurethane to make it water proof. I attached the (Ima call it the counter top) to the table base, then attached the back, to the back of the table base. This is where the corbels come in.

I had purchased these vintage corbels in my travels and knew right away they would be great with my vision. These were $6 each. So, next I positioned and attached the corbels on either side of the back and created my end pieces.

I let this dry overnight. If you don't feel comfortable doing the plumbing, relax! It's really not hard and you can ask someone at your local hardware store to show you how when you purchase your drain kit! They are usually very happy to help. The cost of drains vary, but I paid around $15 for mine. Before I installed the sink and the plumbing, I used clear caulk around the hole in the wood to form a leak proof seal under the sink. Then used clear waterproof caulk inside the drain hole in the sink. I installed the plumbing and let it dry.

While the caulk was drying, I marked where I wanted my faucets to go, cut the holes and installed. Faucets were $38 from Ebay. My last step was to decorate with wood trim and corner block. I think they are for the top corners of a door frame. There you have it! All this for $75! Sorry I don't have better detailed pictures, but when I built this, I wasn't planning on doing a "how to". As a side note, you may be able to re use your existing sink drain. And, if you like your faucets, re use them too!
Comments
Join the conversation
6 of 18 comments
-
Gorgeous! Any pictures with the faucet?
- See 2 previous
-
Love this. Very creative.


Frequently asked questions
Have a question about this project?