


Boys Bedroom: Small Space With Big Personality

by
Krosiepowers
$425
Over the past few months, I have been working with an amazing group of bloggers on a project for a Habitat for Humanity house. With Hometalk as our main sponsor, we each took on an empty space in the house to "welcome home" the new homeowners. I was lucky enough to be in charge of the little boy's room!

My biggest obstacle with the room was size, so I had to be cautious about how much I could bring into the space. The little boy's mom had already chosen a good-sized bed/dresser piece that she loved, so i decided to make that the focus for the room.
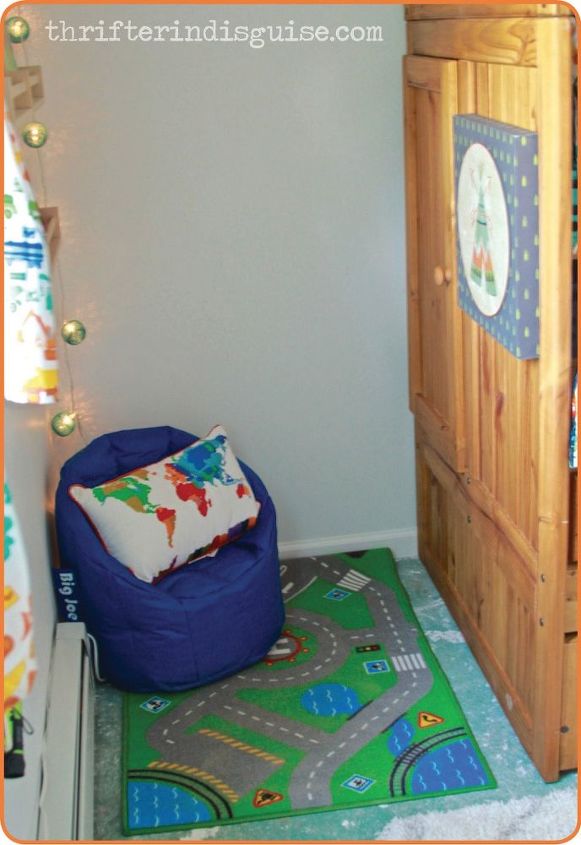
I started out by making the corner space next to the bed into a reading nook. I hung some artwork and lights to make the space cozy.
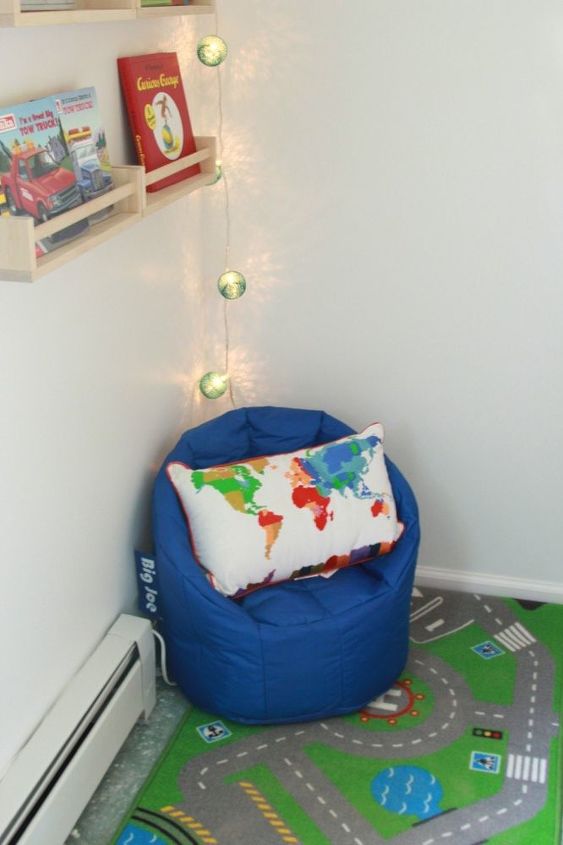
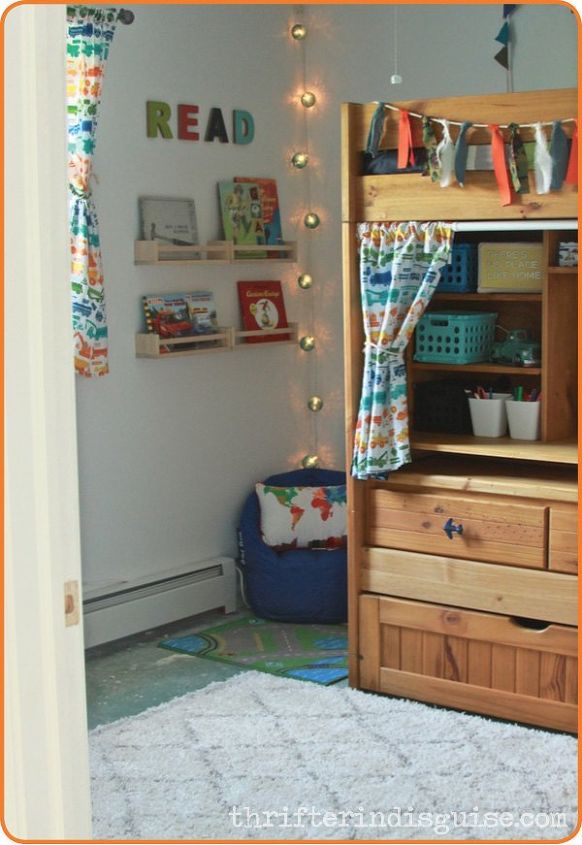
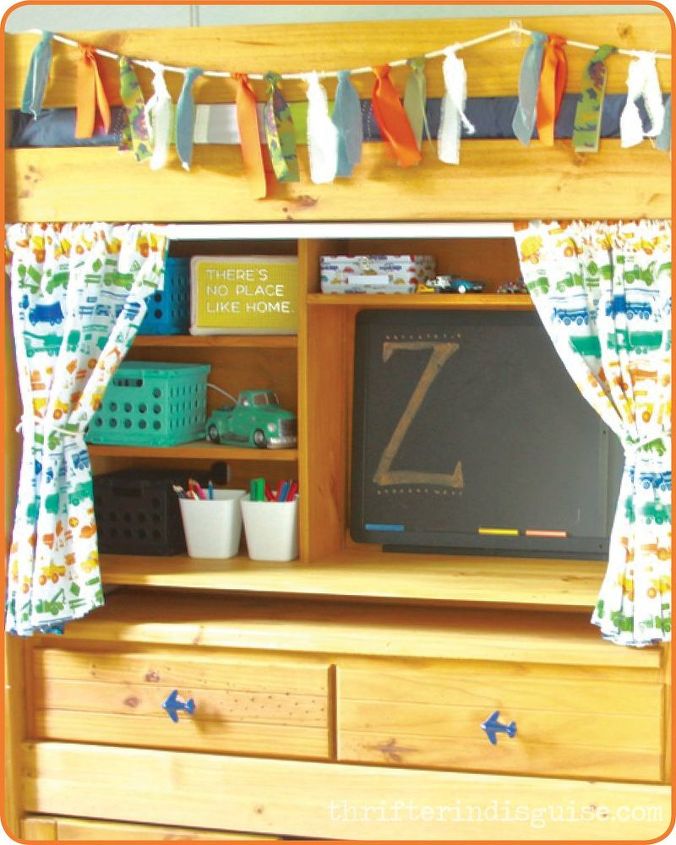
I used Ikea Spice Racks as the bookshelves--they were easy to hang, and they fit right into my budget.
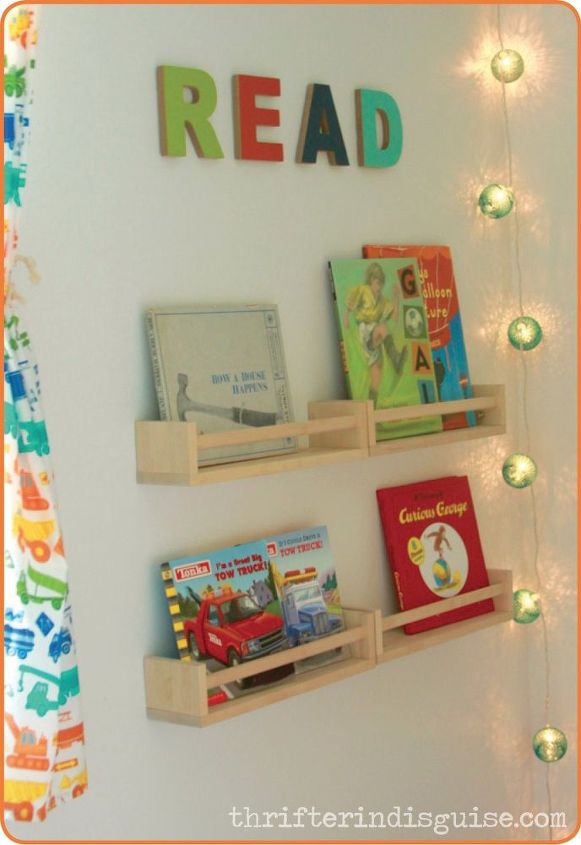
My favorite book was one I found at a library used book sale--How a House Happens. It's written on a kids-level, and it has great pics of all the stages of building a house.
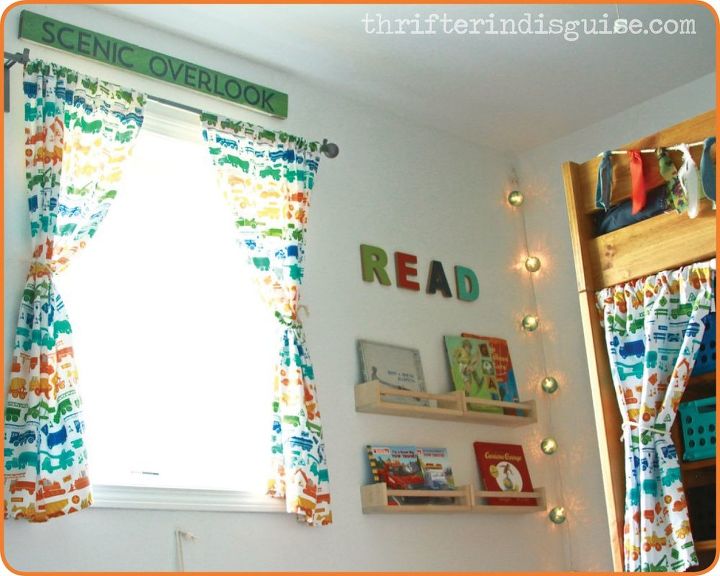
The view outside his room was absolutely beautiful--the lot abuts a preserve, so it will never be developed! I wanted to capitalize on that by making a little "lookout" space for him. I made the "Scenic Overlook" sign to top off that section.
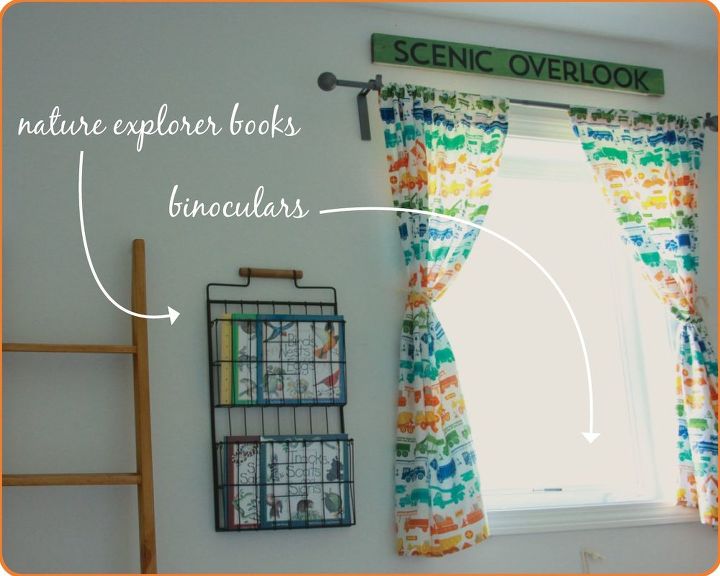
I grabbed some really cool kids nature-explorer books (about animals, plants, animal tracks, water) and displayed them next to the window. Now whenever he sees something interesting in his backyard, he can look for it in the books!
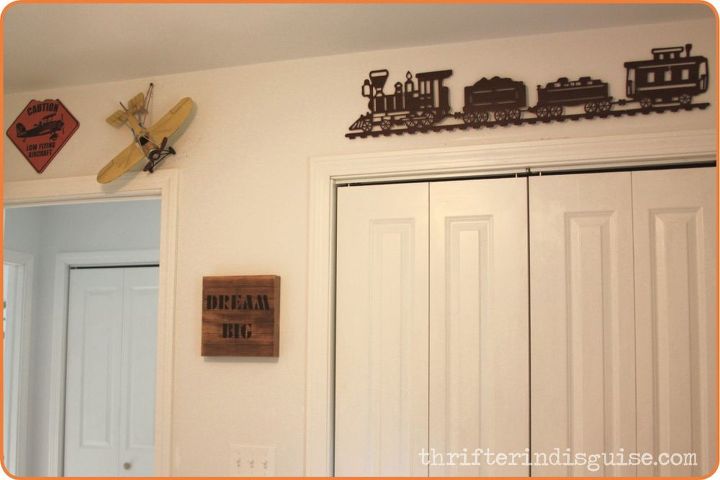
I know my own 4-year old boy loves trains, planes, and automobiles, so I wanted to incorporate them into the design, too. I was able to squeeze some in over the doors!
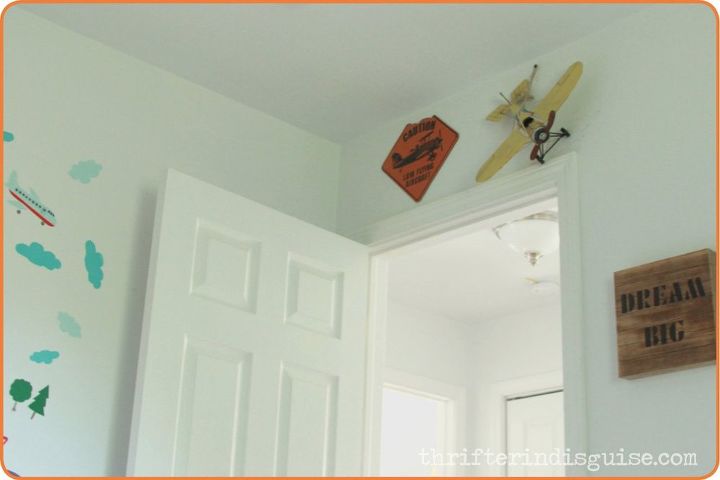
His mom also loves quotes, so I had to add this "Dream Big" quote for her little boy!
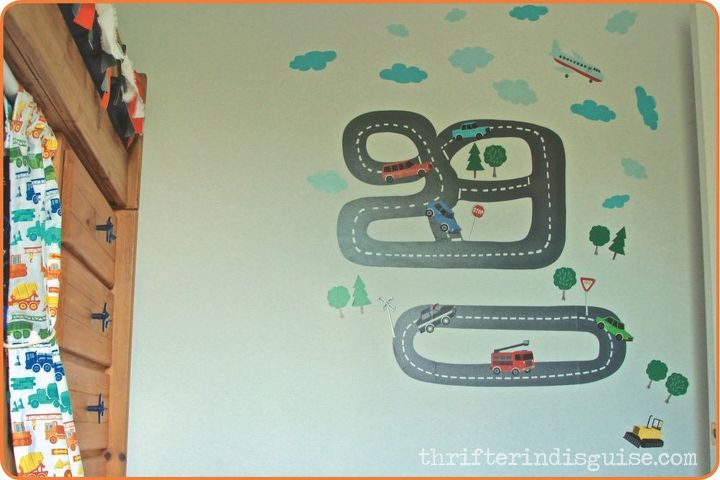
I loved this repositional road decal from Wayfair (another sponsor of the project). He can move the cars, trucks, and trees whenever he wants and they'll remain sticky!
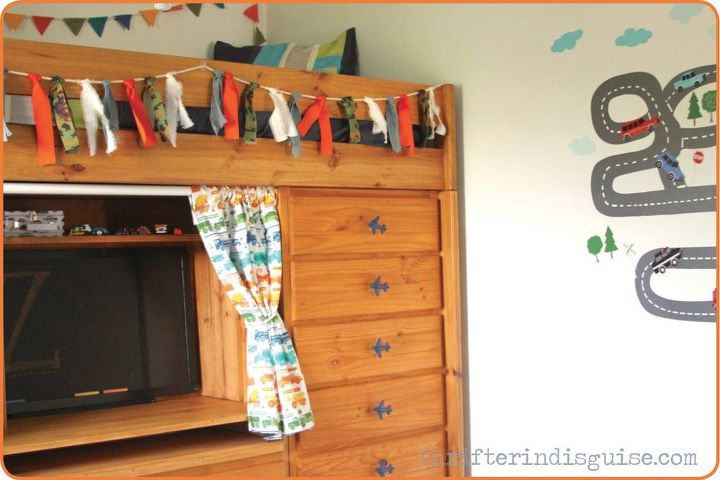
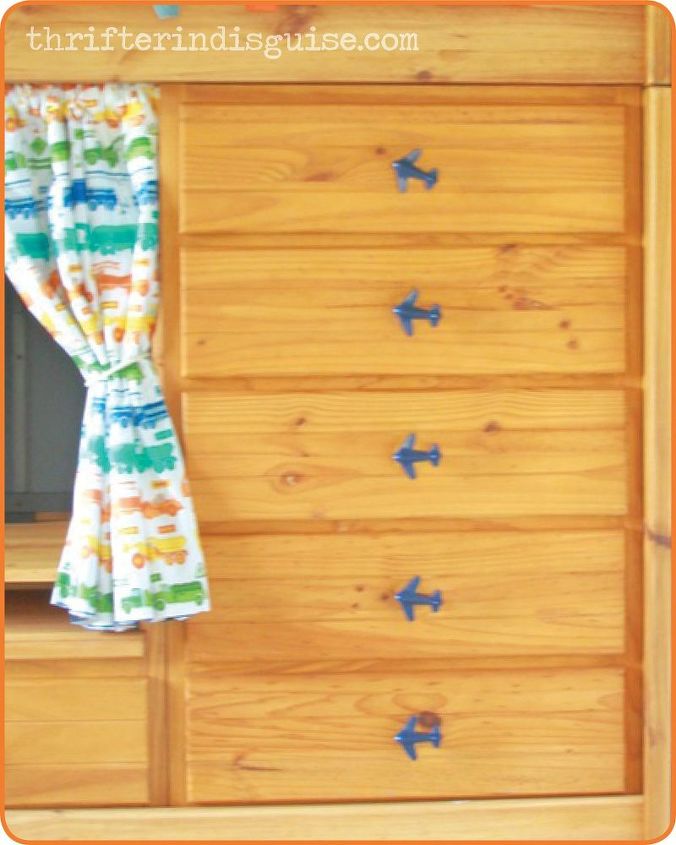
I wanted to make the bed a little more fun, so I added these cute airplane knobs to the drawers.
I made a ribbon pennant to hang along the top of the bunk, playing on the colors from the curtains I made.
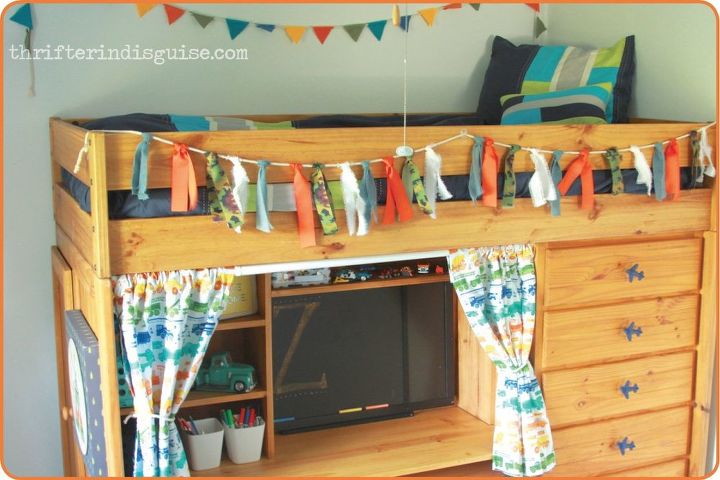
I used sheets that I found on clearance at Target to make the curtains, and I hung them in this "desk" space using a tension rod. You can't see it from here, but the curtains are reversible--the other side is a "space" scene!
This room was so much fun, and the best part was seeing the family's faces when they came for the big reveal!
Want more details about this and other DIY projects? Check out my blog post!


Frequently asked questions
Have a question about this project?