


Surprising My Parents With a Closet Renovation

This has been a long-awaited project. For a few years, I have been trying to convince my dad to do some home improvement. My dad and stepmom purchased their home back in 1996. Over the years, the home took a beating. Almost every room needs a little TLC.
Back in September 2018, I took a trip to my dad house and captured their closet dimensions. I could have picked any room: at the time they had no idea what I was up to. The conversation came up many times, but I never act on it. So I figured this was the time. As a way to motivate them to give the place a facelift, I figure I’d take the first step and give them a surprise for Christmas gift.
My first intention was to build out the closet furniture. Due to the time restraints and my busy scheduled, I felt that modular closet was the quickest solution. In theory, I had the basics worked out. I had no way of getting my parents out of their home for two days. So, I had to let my dad in on the surprise and I instructed him not to spill the beans. Just disappear for two days.
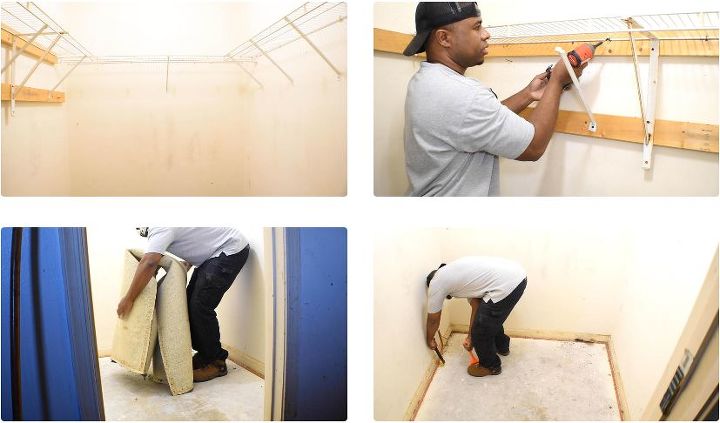
Step 1: Clearing Out The Closet
My dad offered to remove their belongings from the closet, but to keep things discrete I opted to remove their stuff myself. Knowing this would cut into my time it was the risk I had to take. After many trips and 45 minutes later the closet was cleared. Everything was placed in a spare bedroom. The size of this closet is 69 inches wide and 77.5 inches deep, which is not massive but still a good size.

Step 2: Removing The Old
Now the real work can begin, I started by taking out the old shelf system. Then, it was on to removing the old carpet.
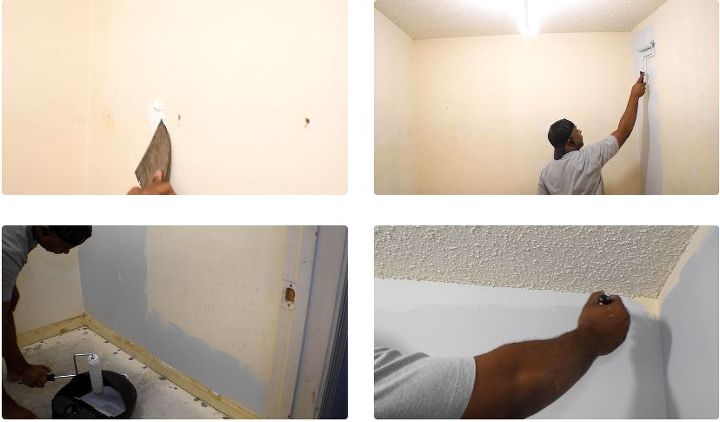
Step 3: Painting
Three of the walls needed to be repaired. The holes caused by the old shelf system were around 1/4” to 3/8”. To fix these holes I used spackle. Next, I lightly sanded the spackled areas to flatten them. Finally, it was on to painting. I used paint with built-in primer to prevent recoating.
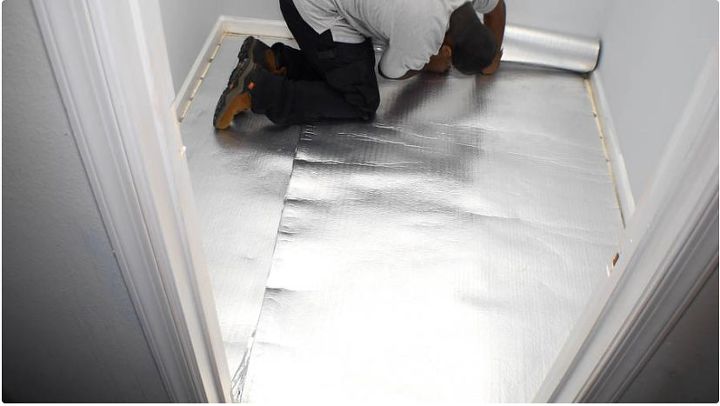
Step 4: Installing The Underlayment
Prior to laying down the underlayment, I cleaned and scraped the floor to remove anything that would raise flooring.
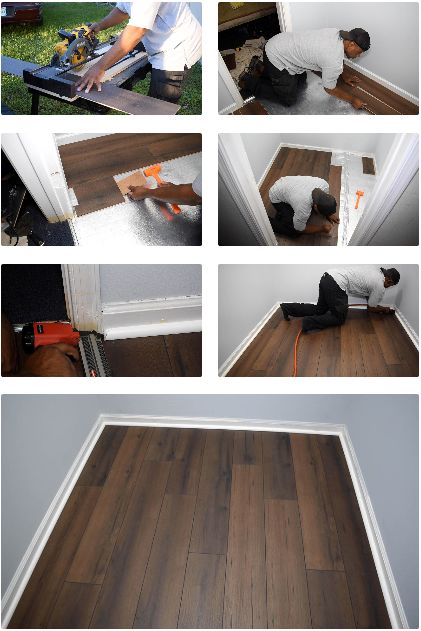
Step 5: Installing The Floor
With the underlayment down it was on to the laminate flooring. The installation went very smooth. I used my DIY Circular saw Jig to make all the necessary cuts; a miter saw would have worked just fine. However, I need my circular saw to make a few rips, so this setup was a quick answer. I pre-cut all the laminates to size before doing the final install. Once the install was complete it was on the 1/4 round to hide the gaps along the baseboard. The question did come up many times, why didn’t I remove the baseboard? The simple answer is time.
Step 6: Assembling The Wall Towers
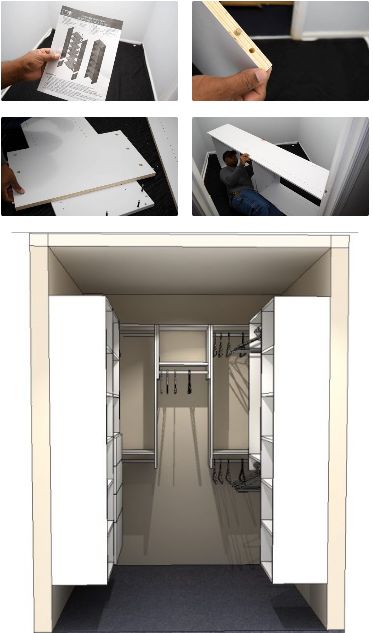
When it comes to the layout in the closet I used Modular Closet solution. This was the quickest option for me and for many reasons. There was no other way I could pull this surprise off. Building these would have taken me a couple weeks. I gave them my story and they provided a layout. They do have a free closet design system that anyone can take advantage of. I had the towers shipped to me prior to installation day. It was very helpful that I could download the PDF instructions prior, this helped me plan out the tools I needed.
To assemble the tower all you need is a Phillips screwdriver. It’s all assembly with cam locks and dowels. Another thing that drove me to these pre-assembled towers is the fact that they are made from plywood. It’s a very solid product.When you walk to the closet.
To Your Left
(1) 24-inch Shelf ----> http://bit.ly/2MymfuI
(1) 30-inch Drawer With Storage ----> http://bit.ly/2MzeK6R
To Your Right
(1) 24-inch Shelf ----> http://bit.ly/2MymfuI
(1) 30-inch Hanging System ----> http://bit.ly/2sQg8c9
Towards The Back
(2) 24in-inch Hanging System ----> http://bit.ly/2MxS1Ii
(1) 18-inch Tall Hanging Section ----> http://bit.ly/2ScgUyz
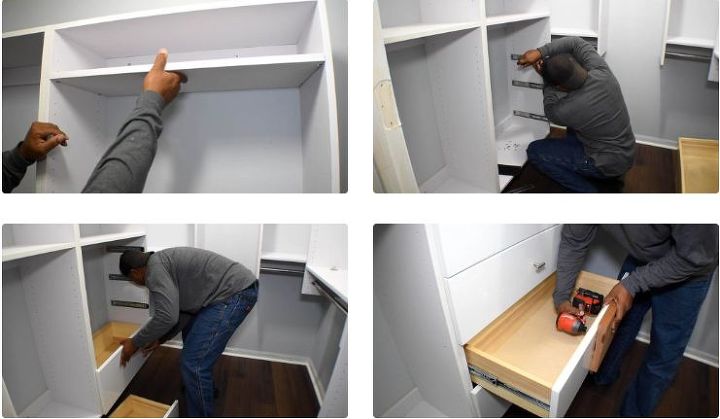
Step 7: Installing The Towers
Before I started the installation. I used masking tape, the marked a line going around the room. I marked the line at 82-inches from the floor and used that as my starting point.
To mount the units to the wall, I would recommend a second set of hands. However, if you roll solo then consider using something to prop up the first unit as you attach it to the wall. Then reference the next tower off that one and so on. The goal is to mount these to two studs. For the back wall, I didn’t have much luck with one of the hanging systems, only locating one stud. After mounting to the single stud I moved forward with the installation. As a way of making up for the single stud issue, I added additional screws to join the towers together. Now, they act as one.

Step 8: Adding The Remaining Parts
As time was running out, I needed to kick things into high gear. It was day two and a few hours away from revealing. I randomly placed the shelves; install the drawers along with the hardware.
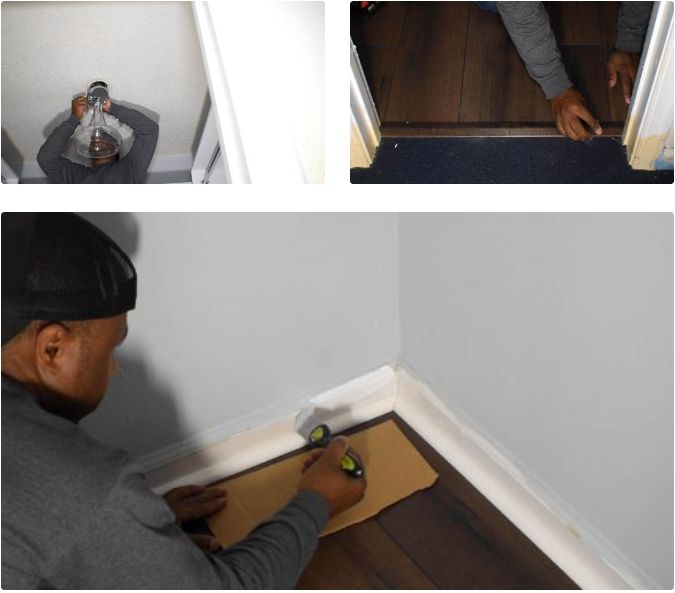
Step 9: Finishing Touches
I updated the old light fixture replacing it with a more modern fixture that I felt fit space better. Next, I finished off the flooring by installing the transition piece where the laminate flooring met the carpet. Originally I didn’t have the correct paint to paint the baseboard and trim. At this very moment, the parents were on their way. This one came down to the wire and luckily I managed to complete everything except for the door trim.
Step 10: The Reveal
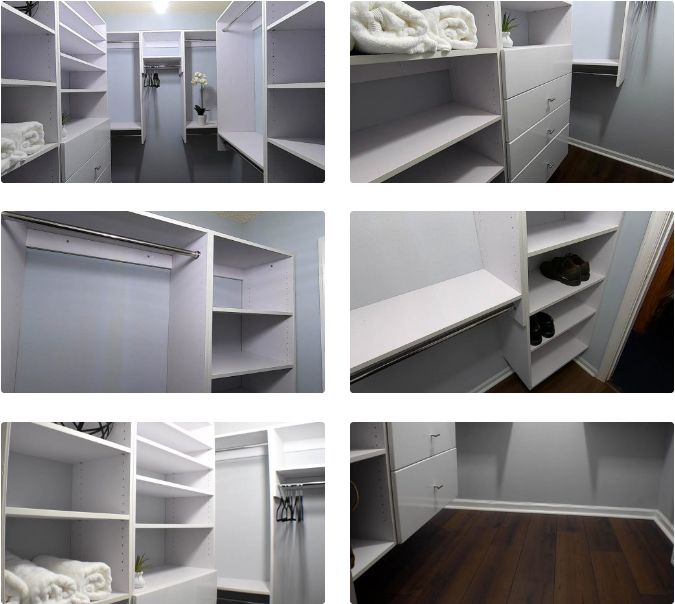
Here it is. If you didn’t watch the video you can see it at the top of this post. You will see how they took in the new transformation.
As a quick recap, I let my dad in on this surprise, my stepmom had no clue on what was going on. He took her out of town for two days; this allowed me the time to completely upgrade their space. Even though my dad knew what was happening he had no idea what he was coming home to.
As they were taking it in; I remind them that they need to put their things back. To me, that’s a good trade-off plus they can thoroughly go through their stuff and hopefully get rid of things that do not belong in a closet or just not being used.
Unfortunately, I do not have pictures of what the closet looks like yet, it’s been a few weeks. I know there has been a few concern, whether this was a better setup than the previous, to me, not a question. After measuring the previous shelf space, I then measured the new system. There was a loss of 27 inches of usable hanging space. In results of that, there is now one and a half wall of adjustable vertical storage including 4 drawers. Lots of space to put their things neatly.
I was quite pleased with what was done in two days. I really hope they get it together so I can help them turn that place around. If you guys have any questions on this project let me know.

Comments
Join the conversation
-
You should open up your own shop. You’re amazing. By the way, you are very handsome

-
Excellent! What a wonderful surprise. Love the finished product.


Frequently asked questions
Have a question about this project?