


1959 Master Bedroom Furniture Make Over

by
Karen H.
4 Materials
This is my first project post. I have been following this site for a while. Love all the viewing everyones awesome ideas and projects. We inherited my parents master bedroom furniture when we got married. We always thought we would keep it few years and then purchase our own. That was over 20 years ago. I finally got tired of the old ugly furniture and decided I would start shopping. My Dad reminded me that they just do not make furniture like this anymore. I was thinking thank goodness, it is so ugly. But he explained the furniture had good bones and good wood, all poplar solid wood.
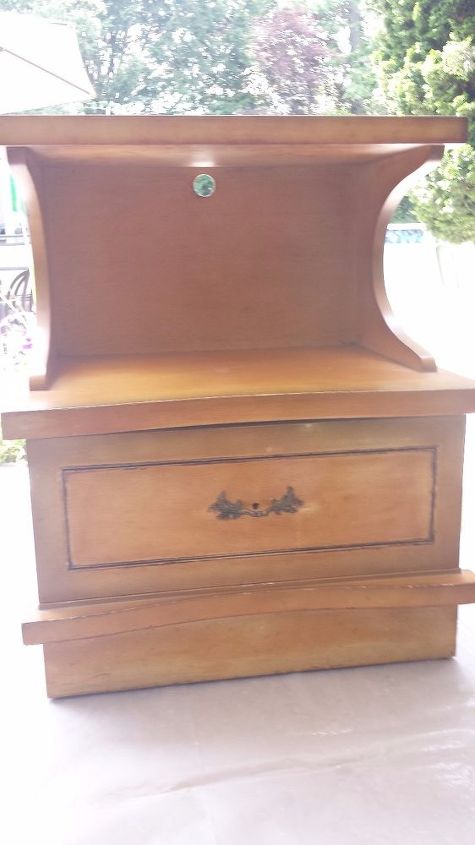
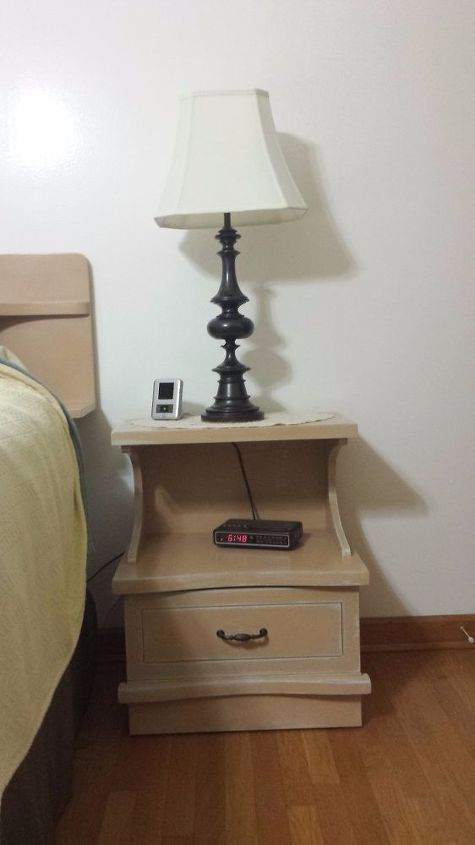
Night stand before
I decided to start with the night stands. They were the smallest of the the five pieces that would need to be done. I decided on diy chalk paint since the pieces were so large. I decided on a two tone distressed look.
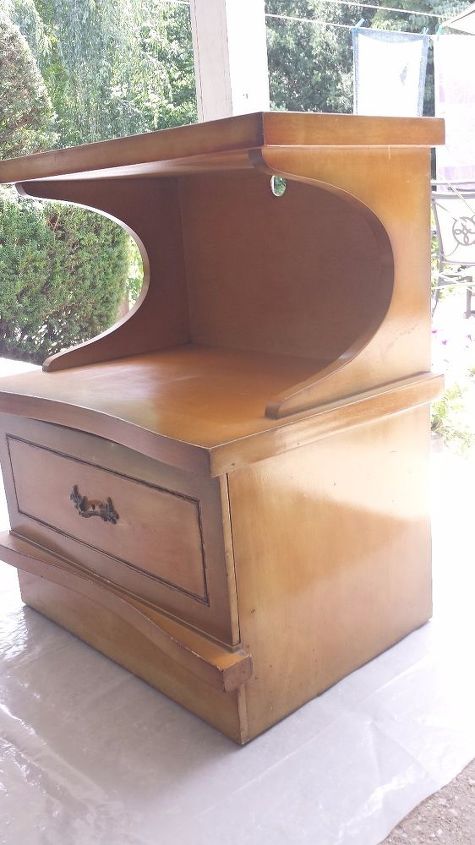
Before side view of the nightstand.
This was painted furniture in a blonde color with brass inserts and hardware. The edges had a greenish distressed look for the day. The doors of the dressers were solid wood with green leather inserts, which had dried and cracked over the years. Ugly at this point in its life. First I removed all the hardware and brass. I stripped and sanded all the paint off. Not an easy task, but well worth the result.
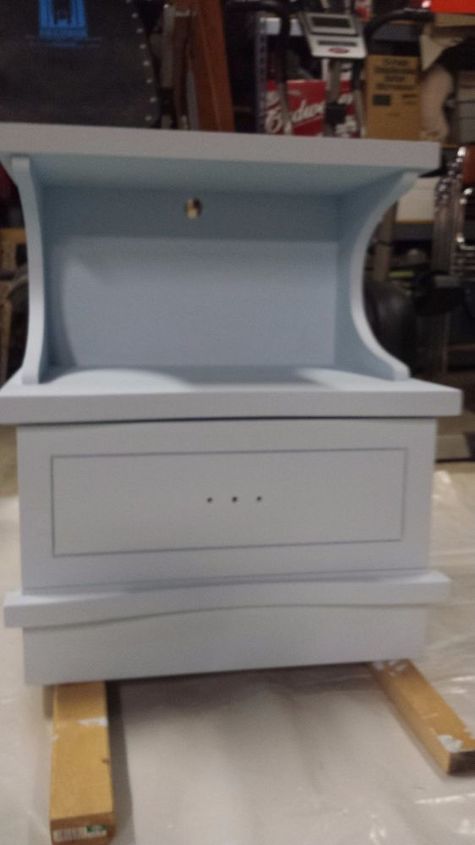
Base coat in blue
First I painted a base coat in light blue. Our master bath is blue, but not wanting blue furniture, I decided a little blue peeking through the distressed beige might be a nice highlight to the room. Just be sure the base coat is completely dry for a day or two before painting the top coat.
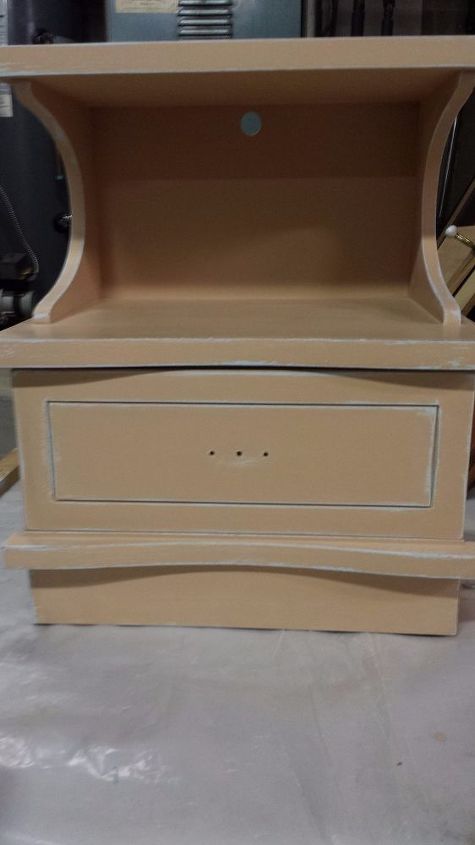
I applied wax where I wanted the blue to peek out before painting the entire piece in the beige color. Although I did not find the wax necessary for the distressing, so save your wax for the final sealing. I lightly sanded the corners, edges and around the drawer pulls anywhere normal wear would appear with daily use on furniture. I emphasize lightly, because you dont want to remove the base coat if you want it to peek through like this.
Completed night stand with new hardware.
I sealed the paint with clear Minwax furniture wax. I applied this by hand and then buffed by hand and also used a buffing brush attached to an electric drill for the larger pieces. My lamp was a thrift store purchase redo also. I will post that project next. Below are a few of the pieces in process.
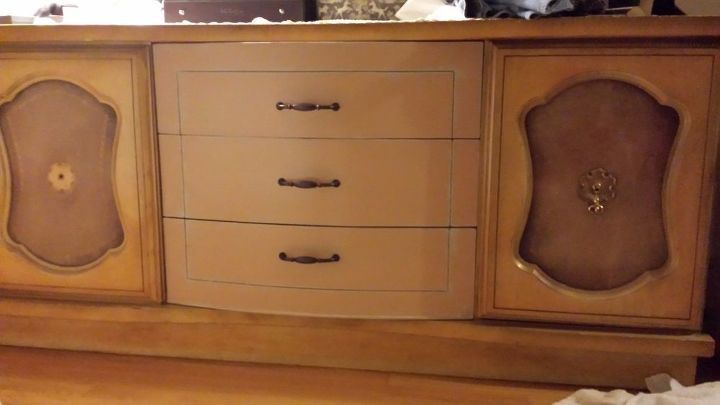
Dresser with drawers done & original doors
Here is the Triple half done. I had completed all the drawers added the new drawer pulls. Because of the painting of the furniture, you can change up and move your drawer pulls by filling in the original wholes and drilling new ones to match the new hardware configuration. See the dried up leather inserts on the doors?
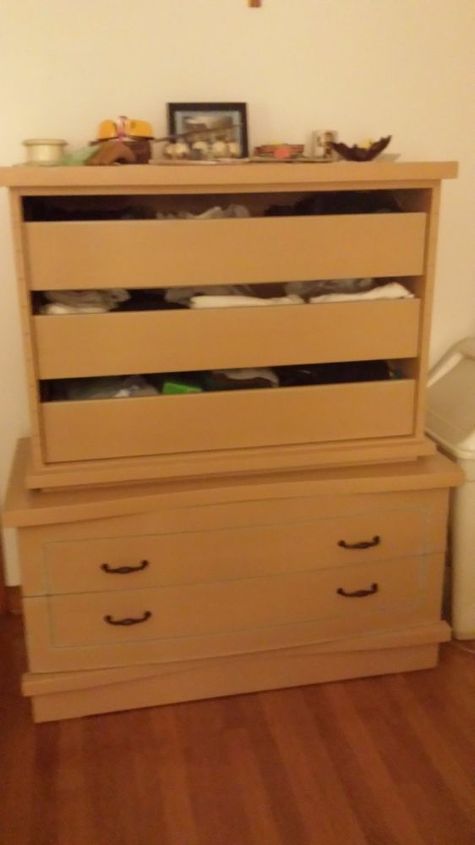
Tall dresser mostly completed but without the doors on. Each piece had drawers, doors and more drawers behind those doors. Lots of paint required for this project, which is why I used DIY chalk paint with plaster of paris
Comments
Join the conversation
2 comments
-
You did an amazing job!!


Frequently asked questions
Have a question about this project?