


Blushing Pink Dresser
4 Materials
$50
3 Days
Easy
For this furniture flip, I took a tired old dresser and turned it into a blushing pink beauty. Here’s how I achieved this soft, barely-there look.

Clean and prep for paint
PREP - The first step in any painting job is to prepare the surface, no matter what you are working on. Make sure all areas to be painted are clean and free from greases or dirt. Then sand smooth, scuffing up “shiny” wood in order for the paint to have something to grab onto, and level out any bumps or blemishes.
After cleaning and sanding, I applied a coat of Zinsser Bulls Eye SealCoat all over. This not only seals the surface of the dresser but also acts as a bonder and water-resistant barrier.
2 coats Seagull Gray
PAINT - For the base, I applied 2 coats of General Finishes Seagull Gray Milk Paint, drying between coats.
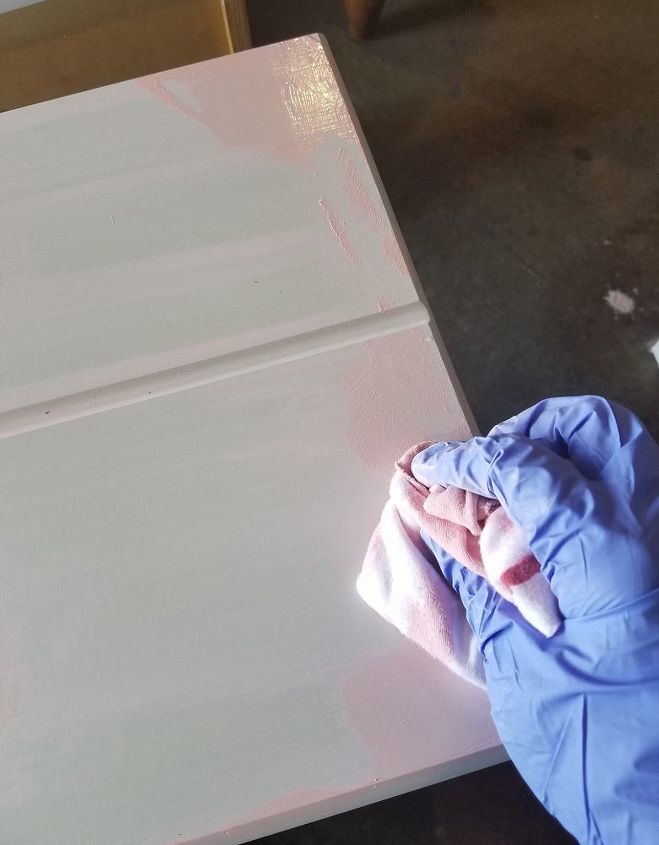
Add blush pink to the edges
To obtain the blush pink, I mixed up Black Dog Salvage Furniture Paint in Clean Canvas and Appalachian Sunset, adding in some General Finishes Extender to make it a thinner consistency. Once I achieved the color I wanted, I brushed the pink onto the edges of the doors and under the knob areas using a foam brush. With a soft cloth, I blended the pink into the gray but left the hint of pink in those areas.
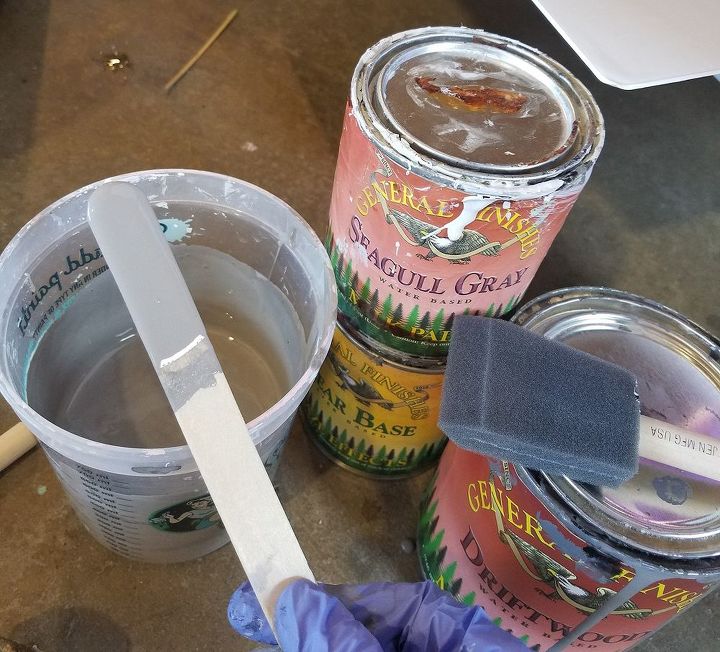
Custom Gray Glaze
CUSTOM GLAZE - I created a custom gray glaze using General Finishes Glaze Effects in Clear Base. You can make any paint color into a translucent glaze by mixing it with the clear base. Glaze goes over a painted surface to add dimension or a wash of a complementary color.
For the glaze on this dresser, I used a mix of Seagull Gray and Driftwood Milk Paint mixed with the clear base. I mixed the two grays because I wanted my glaze to be darker than the underlying Seagull Gray, but not too dark, as I wanted a soft look for this piece.The paint /glaze ratio should be 50/50.
I brushed the glaze on with a foam brush one section at a time, and then I wiped it off with a soft rag leaving behind a light wash of the gray color.
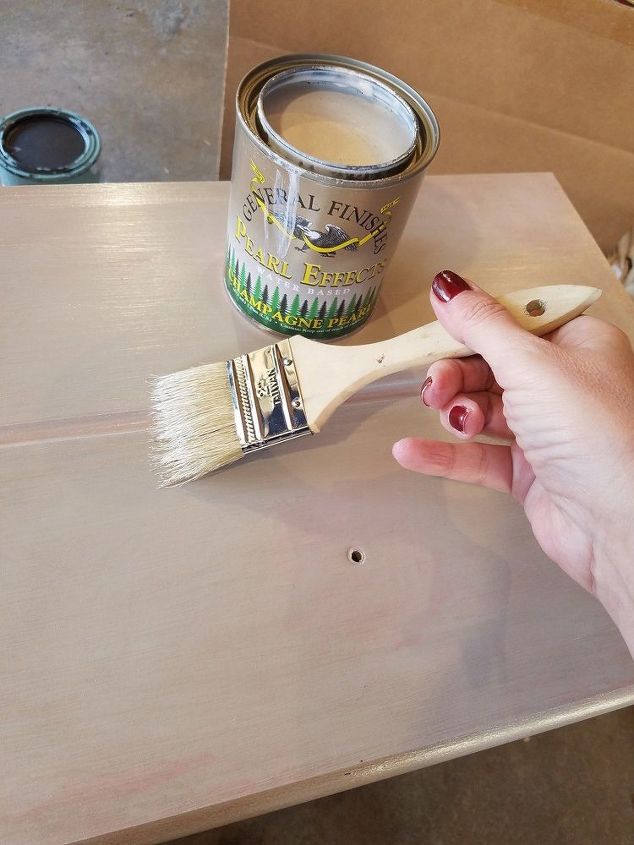
SHIMMER - Next, I wanted to add a little “fairy dust shimmer” to this dresser. General Finishes Champagne Pearl Effects was just the magic I needed. Using a cheap, scruffy chip brush, I lightly brushed the Pearl across the surfaces of the dresser. Perfect!
The last step of painting is topcoat, so I added 3 coats of General Finishes High Performance Topcoat in Satin finish to protect it all.
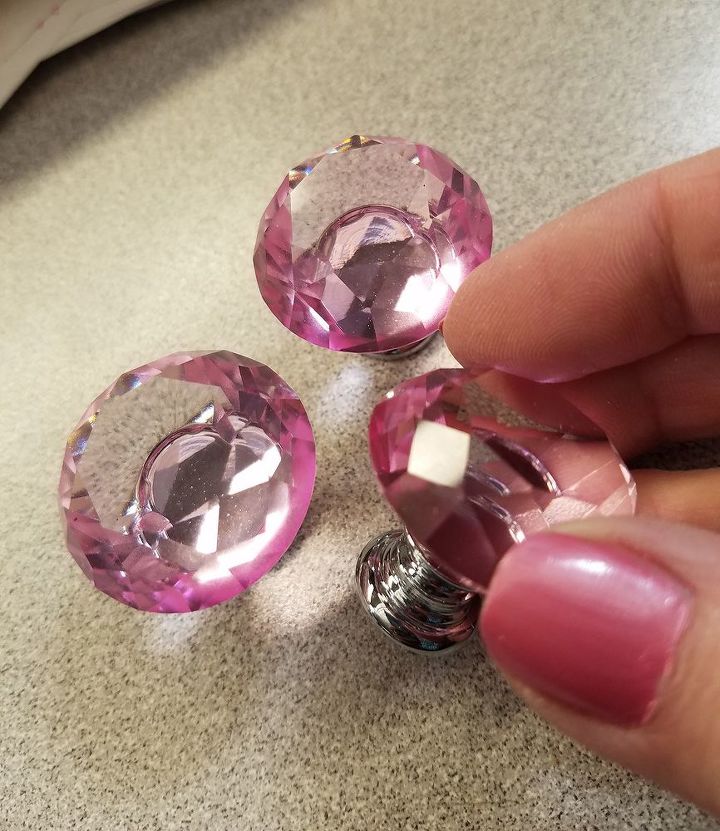
Pretty pink knobs!
KNOBS - Though the original knobs on this dresser were in fine condition, this project called for some sparkle. I found these 30mm pink crystal knobs on Amazon, and they are so pretty on the completed dresser!
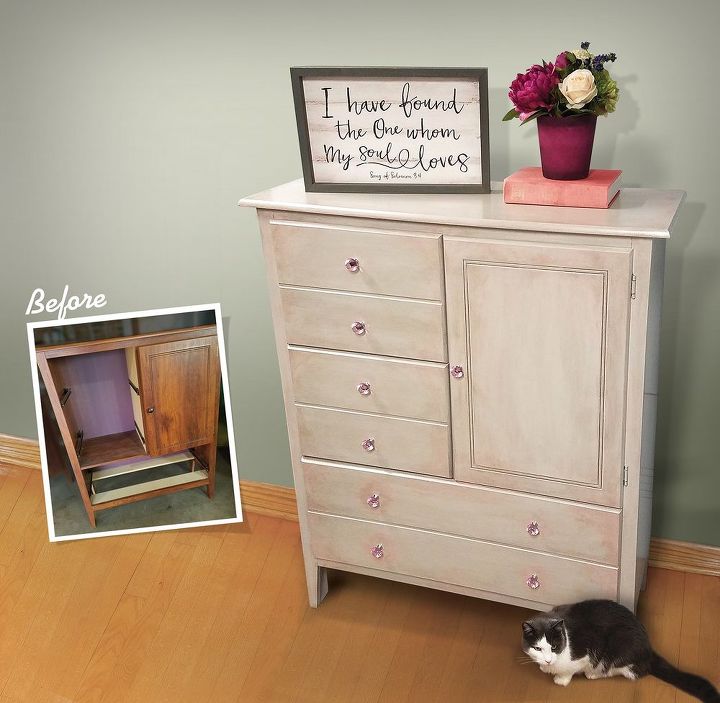
Here is the finished look! I love how it all came together.
P.S. Meet Lynard, my nosy cat! 
Resources for this project:
See all materials


Any price and availability information displayed on [relevant Amazon Site(s), as applicable] at the time of purchase will apply to the purchase of this product.
Hometalk may collect a small share of sales from the links on this page.More info

Want more details about this and other DIY projects? Check out my blog post!
Comments
Join the conversation
3 of 23 comments
-
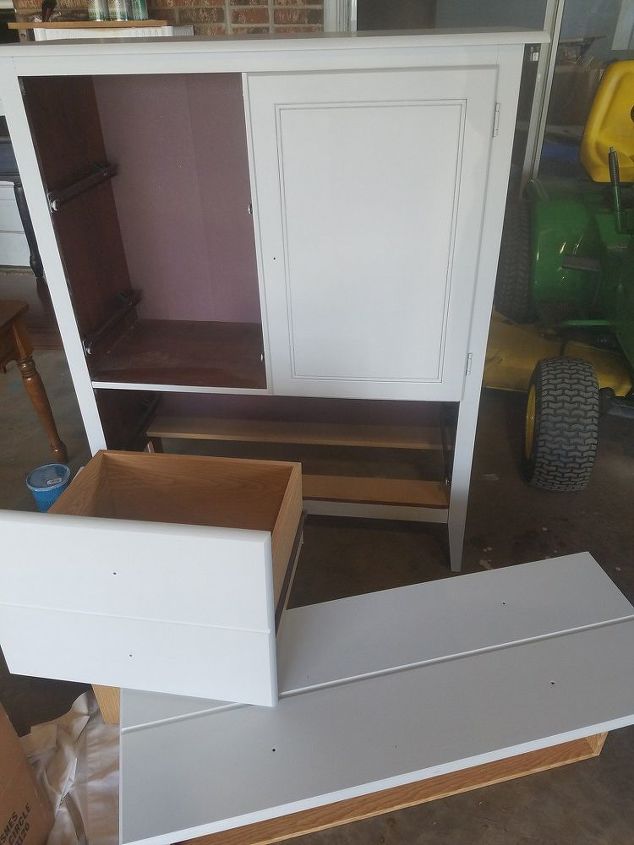
An old chifferobe! Or, as it was, a shiftable wardrob. I grew up w one of these but a bit taller! Left over from days when there no closets in houses. Nice job, a lovely soft finish.
-
I really think what makes this piece are the pink knobs! It elevates it to a level of being perfectly sweet that other knobs wouldn't have done! It's funny how that one decision changes so much.
No, i can't imagine no closets, i think there should be as much storage as living space! It allows us collectors (organized hoarders) to keep it together! At the very least, an spare bedroom!


Frequently asked questions
Have a question about this project?
That's really pretty. So nice to see something done were half the paint is not rubbed off! Can you get the glaze with a blue tint?