


Bring New Life to a Dresser With Chalk Spray Paint!

2 Materials
$75
6 Hours
Easy
A few weeks ago, I bought a matching pair of dresser that were a 'lil beat up but had good bones. You might have seen my post about the first dresser that was inspired by a 1950's woodie surf wagon, but for this one, I wanted to keep it simple with a spray chalk paint makeover.
Take a moment to check out my video below to see exactly how I did it!
{
"id": "4025444",
"alt": "",
"title": "",
"video_link": "https://www.youtube.com/embed/AYEY9Zoi9iI",
"youtube_video_id": "AYEY9Zoi9iI"
}
{
"width": 634,
"height": 357,
"showRelated": true
}
I tried to share as much of the process as I could in the video above, so you can see what to expect for a quick chalk paint makeover like this. Don't worry, it's pretty simple though!
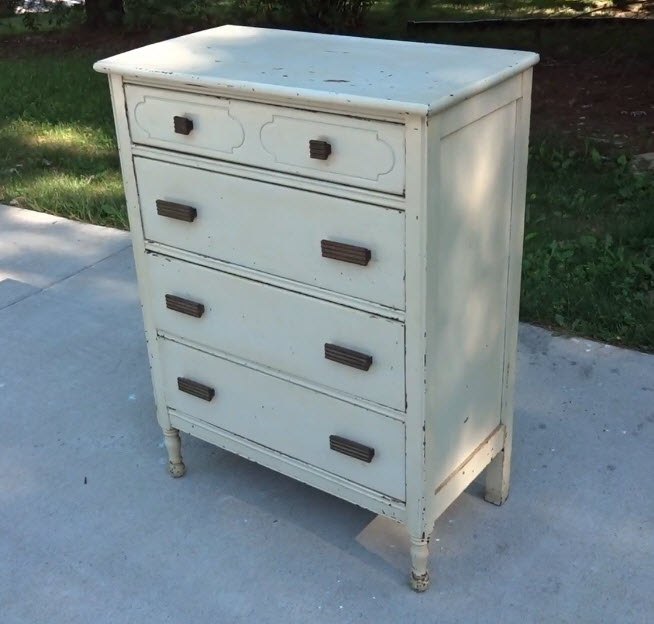
Here's how it started. Overall, the dresser was in pretty good shape. But up close, it was in rough shape. No worries though... it's gonna be a pretty simple flip.
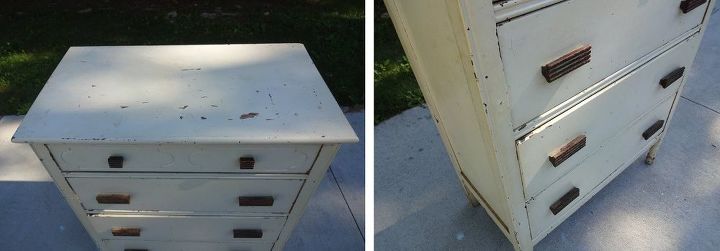
As you can see, the paint was pretty beat up. There were scratches & chips all over it. Plus it had this weird, dirty orange tinge to the paint all over.
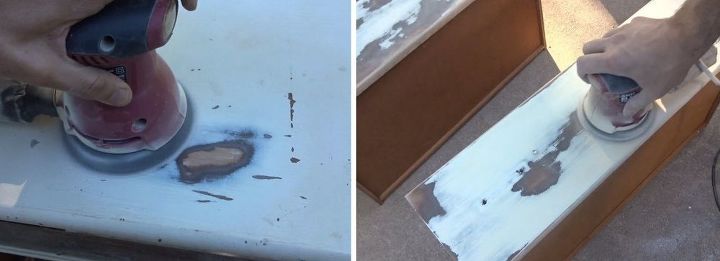
I took care of all those scratches & chippy spots with my handy dandy orbital palm sander. I used a 120 grit sanding disc to quickly feather out all the blemishes on the body and drawer faces.
You can see how far I feathered all the chips and scratches. About half the paint was gone once I was done sanding! I cleaned up all the sanding dust with a damp rag to prep it for the chalk paint.
The cool thing about chalk paint, is that you don't have to prime! You don't really have to sand either, but I wanted to smooth out the really rough spots or they'd show through the sprayed layers.
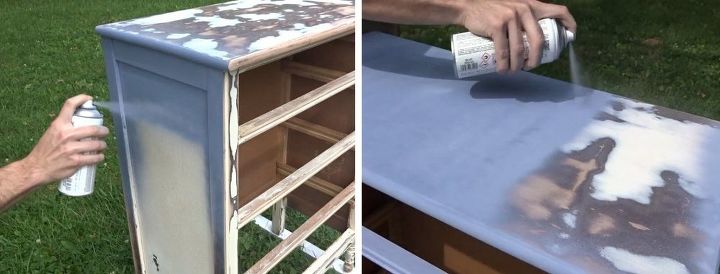
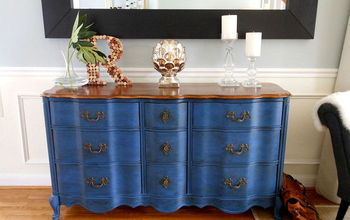
I used a new chalk spray paint from Pinty Plus. The body was painted with their "Blue Indigo" color. It has a nice blue/purple/gray color that's very similar to periwinkle blue.
The first coat was sprayed horizontally, and the second coat was sprayed vertically to cover everything really nice. I was happy to see that none of the spotty, sanded mess I was covering up bled through either. Perfect!
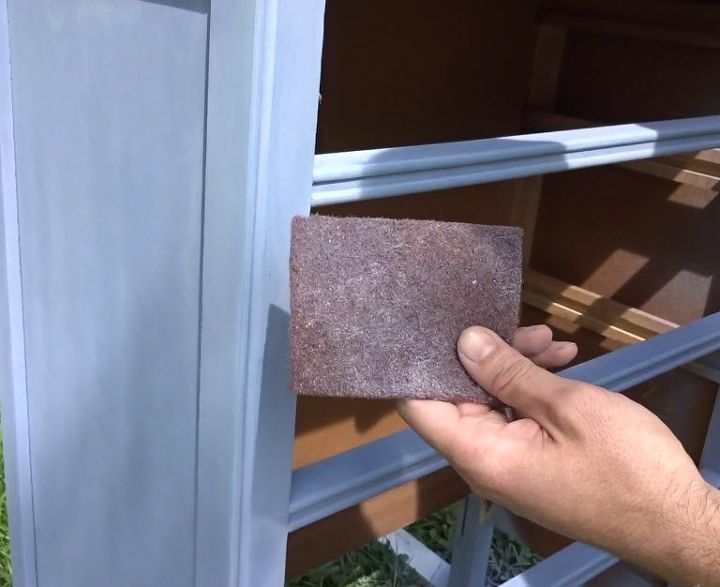
In between the two coats of paint, I used a maroon Scotch Brite pad to quickly smooth it down for a silky finish. You could also use a fine grit sand paper instead if you wanted. (320 - 400 grit or so)
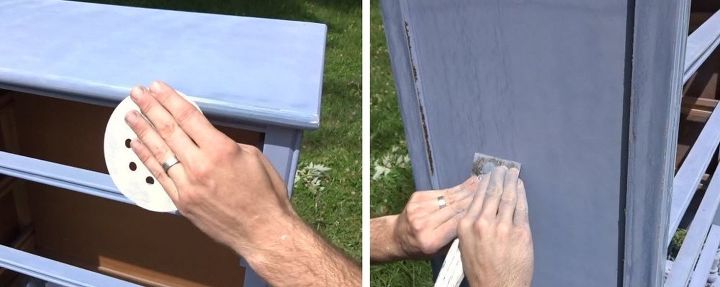
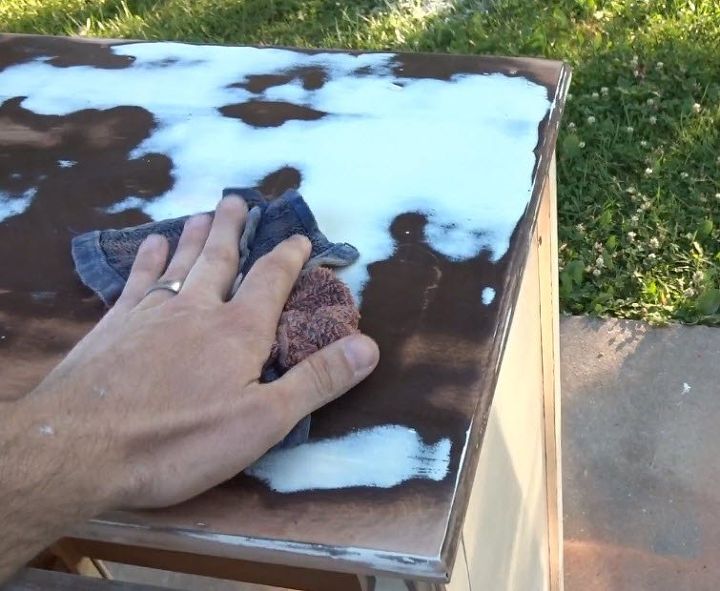
I decided to distress it a little with a couple of methods. When the paint is still a little wet, you can wipe a wet rag on spots to wear through the paint. It was pretty hot outside when I painted it though, so it had already dried on me. I used a piece of sand paper and a putty / spackling knife instead.
The sand paper quickly wore down the paint on the edges to give it that aged look. The putty knife gave some of the edges a chipped look. I also "wiped" the paint with the flat edge of the knife to give it a unique look. It gave it sort of a crackled or alligator skin pattern to it. Pretty cool!
Once I finished distressing the body, I moved on to spraying the drawer faces.
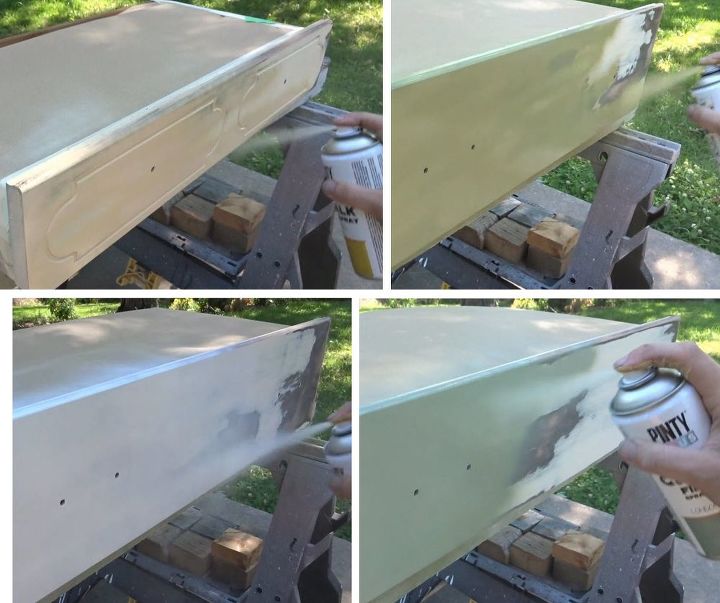
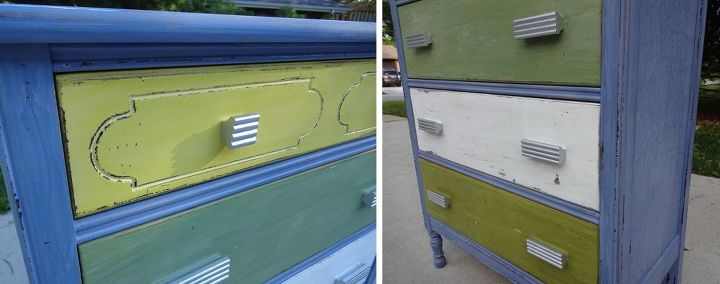
I decided to paint each one a different color based on a color scheme I saw on a T-shirt. (blue, yellow, gray, white, green). I used Pinty Plus paints for them as well.
Clockwise, the colors are: Yellow Mustard, Vintage Olive, London Grey, Broken White
The yellow had a creamy/tan color to it out of the can but turned bright yellow after sanding it. The London grey had sort of a green/gray color to it out of the can and looked a little more green after sanding it. The olive green and white stayed the same though.
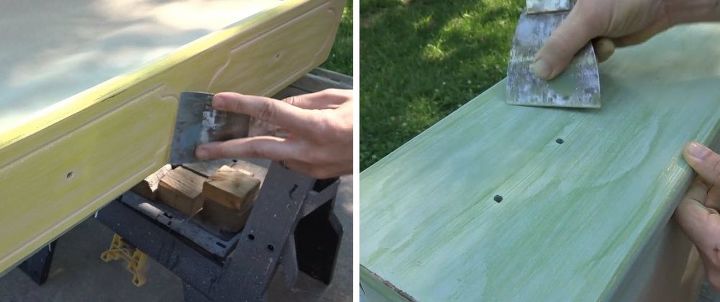
I used the putty knife and the Scotch Brite pad to distress the drawer faces as well. Some light sanding with the Scotch Brite pad brought out the color, and "wiping" the knife along them added a really cool texture. I also did some light chipping in a few areas with the knife edge to give them a little more spotty look.
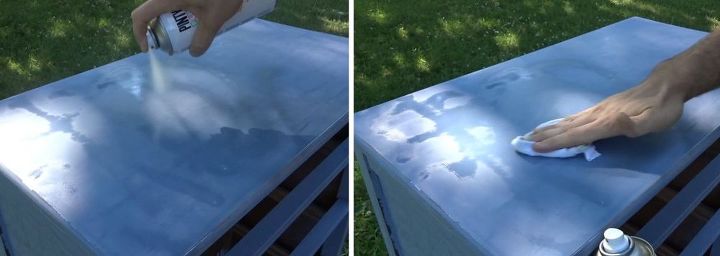
Once I was happy with how all the paint looked, I needed to seal it. I used some spray wax also made by Pinty Plus. I had never seen wax in a can before, but it worked great! You just spray it on in a criss-cross pattern, and then wipe it down with a rag. It was super easy to use and brought some richness to the colors as well as give the paint a silky, smooth finish.
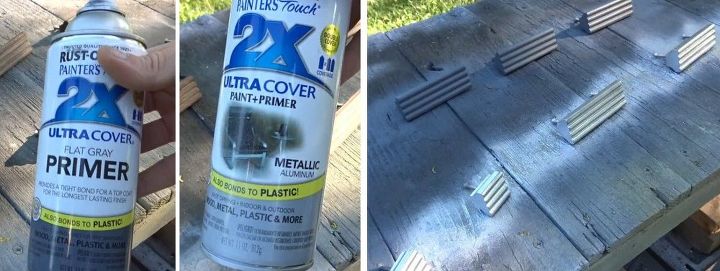
The finishing touch was a little primer and paint on the drawer handles. I used a metallic aluminum color to add some contrast to the beat up, aged look of the chalk paint.
And... WAH-LAH! Here's how it turned out.
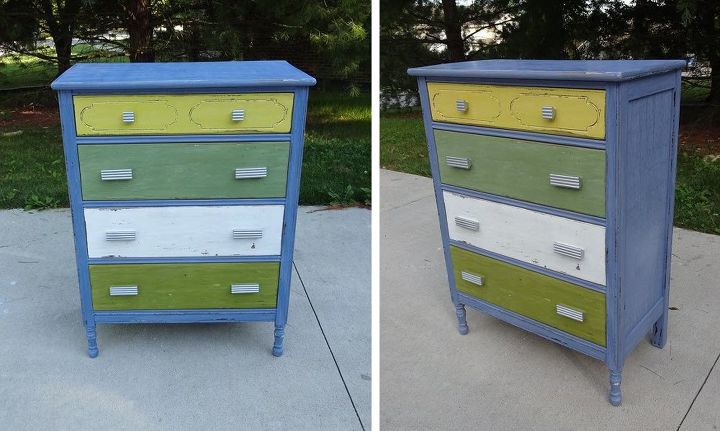
The body has a nice, creamy blue color, and the drawers really pop with that color scheme. I was really hoping for more of a light primer gray color with the London Grey, but like I mentioned earlier, it has a hint of green to it, which still works nice with all the other colors. I looked on Pinty Plus' website, and they have another gray (Ash Grey) that I think would have that primer look if you're interested.
Here's some close-ups of the distressed paint. I made up my putty knife "wiping" trick on the fly, but it gave everything a really interesting texture. You can also see how I slightly chipped the paint in spots to give it that beat up, aged look. The spray wax really brought out the rich, creaminess of each color as well.
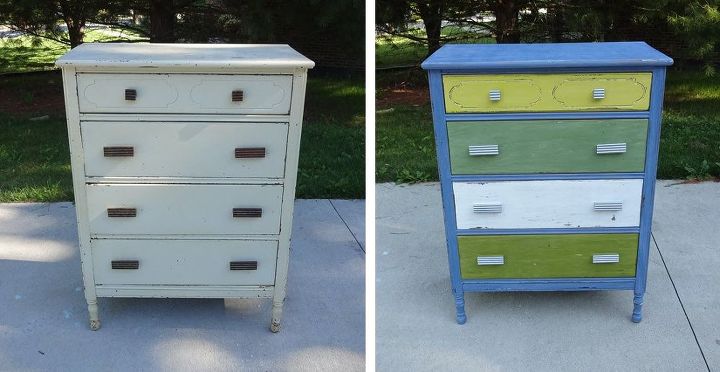
And here's a before and after of my quick chalk spray paint makeover! It turned out pretty awesome! I plan to post it on Craigslist for a nice, quick flip.
If you liked this makeover, let me know what you think, and I'd love to invite you to check out all the other furniture makeovers, custom builds, and house renovations I do on my MrDiyDork YouTube channel: www.youtube.com/user/MrDiyDork/videos and on my website: www.diydork.com!
Thanks for checking it out!
Later!
Kevin - DIY Dork
Comments
Join the conversation
3 of 4 comments
-
No offense but I think you could have had more for it in it's natural state. But hope I'm wrong.
-
I would have antiqued it instead but for somewhere who is more flamboyant or a kids room I agree they would like it.


Frequently asked questions
Have a question about this project?
You do masterful work! How well does this chalk paint stick and hold up? How much does it cost? And where is it sold?