


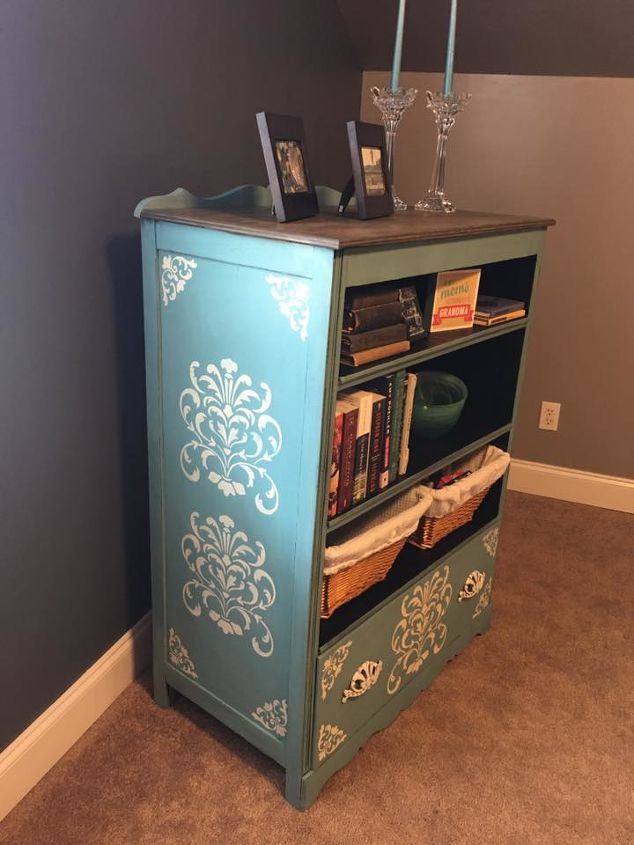
Chest of Drawers to Multi-purpose Cabinet

5 Materials
1 Day
Medium
Remember the dresser makeover I posted? Well, we bought this chest of drawers from the same person. It definitely showed some strong potential, and the drawer pulls were amazing. Once we got it home, we realized the drawers were all in really bad condition. One was salvageable with some work, but what to do what to do? Shelves! Check out the process this piece went through....
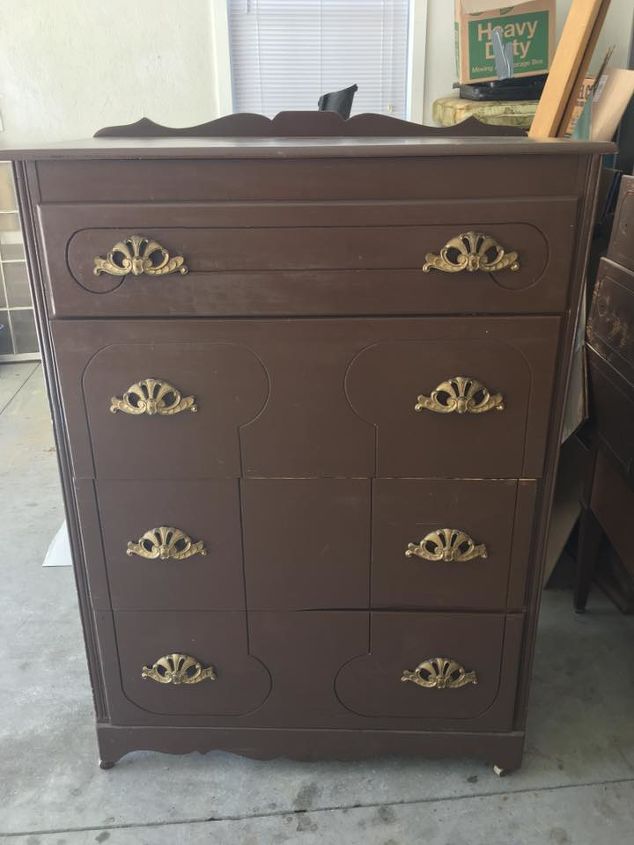
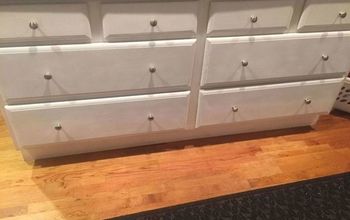
Here she is after we got her home, see the potential?
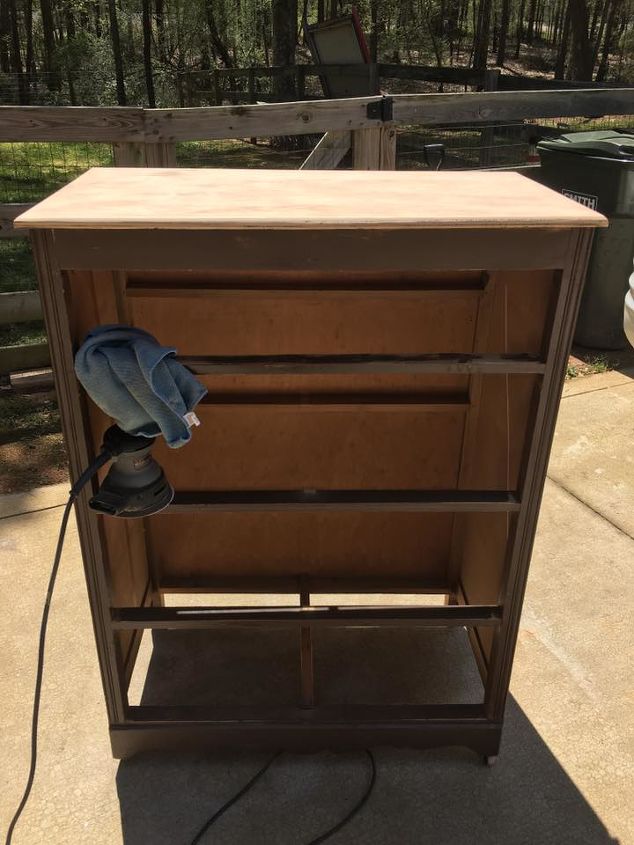
Sanding, sanding, sanding, I always sand my pieces first. How much depends on what the plan is. Down to the bare wood if you want to stain or just rough it up if you plan on painting.
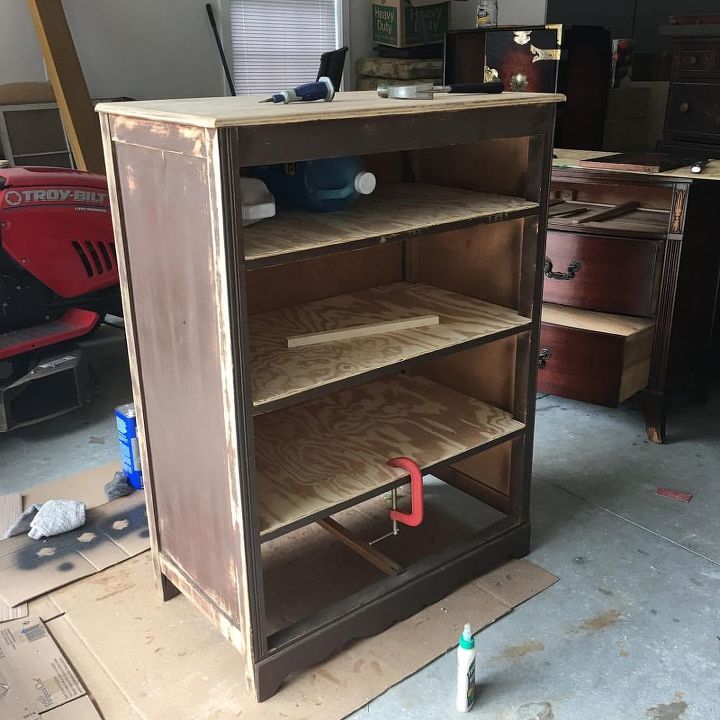
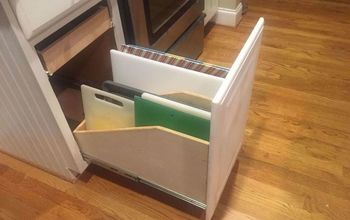
Hubby did this part for me (see why I keep him around). He cut and installed shelves to replace the three drawers that were too much to repair. After the shelves were installed, he added a bit of decorative trim to give shelves a finished look.
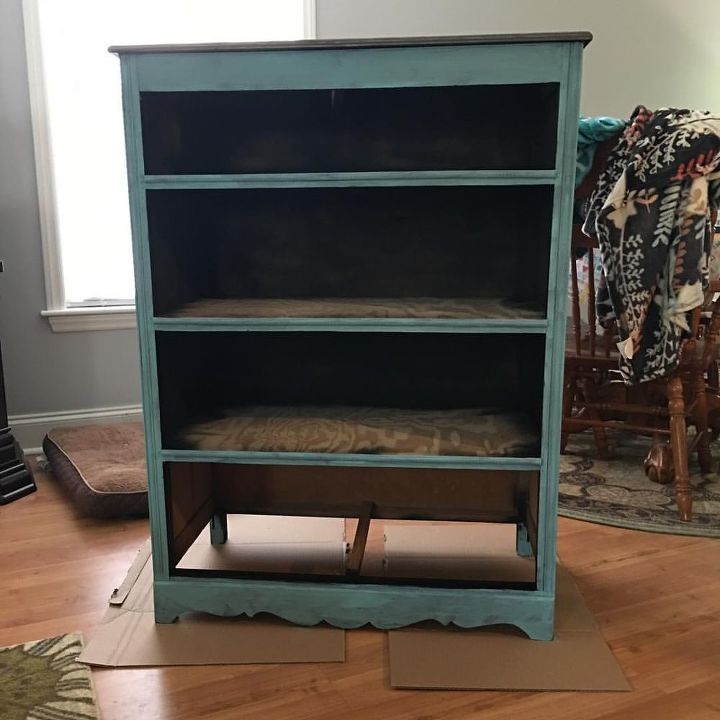
After a base coat of black (I always base coat if I want to distress a piece) I started chalk painting. This was after one coat of chalk paint.
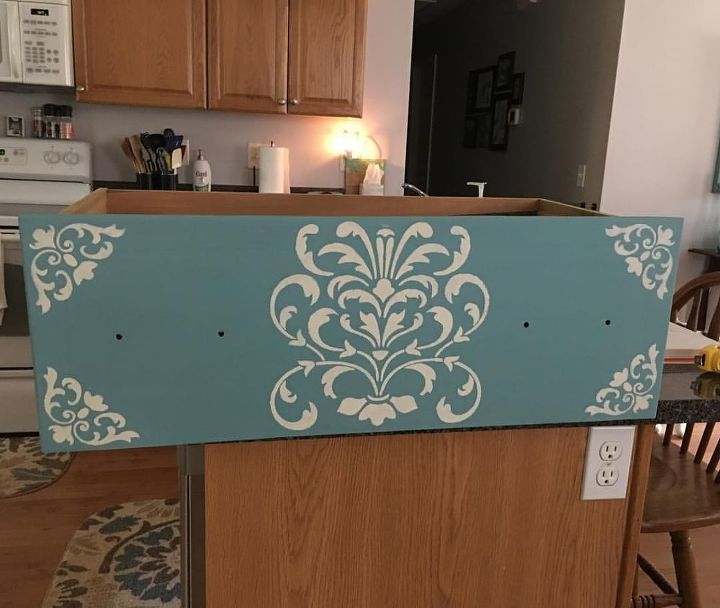
Hubby was kind enough to fill in the grooves that were on the drawer front so I could stencil it instead!
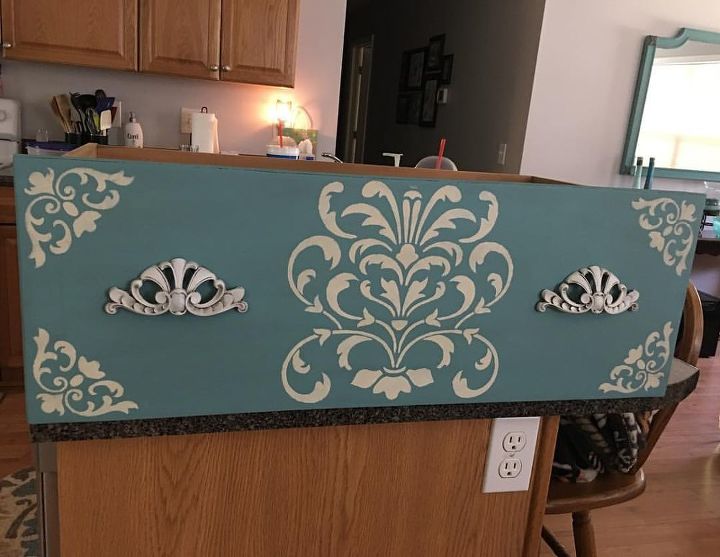
Remember those drawer pulls (which I saved for another project)? After some debate, I spray painted them white, then glazed them to enhance that stunning detail and tone down the bright white to better match the linen white chalk paint used for stenciling.
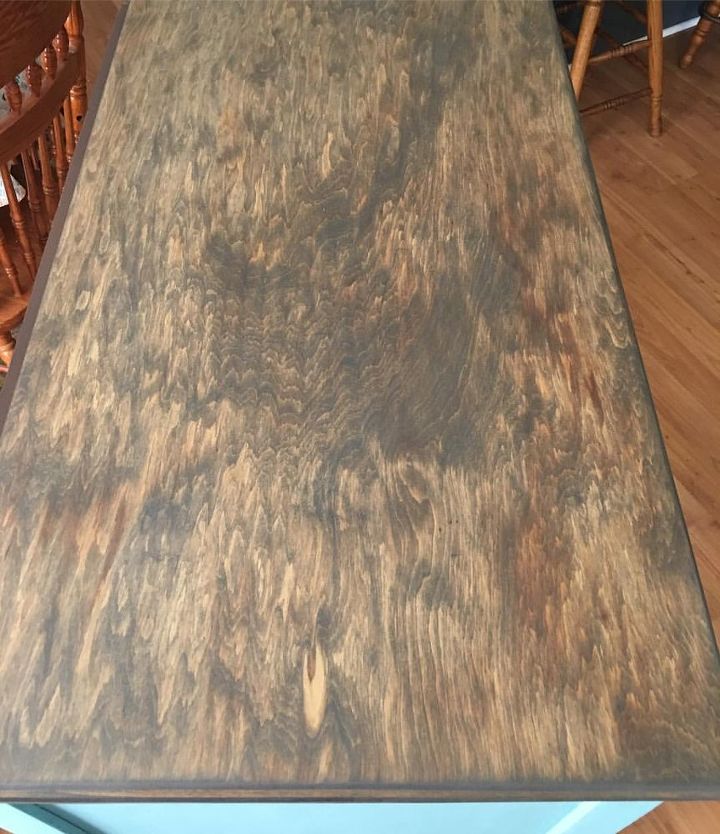
Oh the top! It has some gorgeous wood grain! First we tried weathered oak stain, but it wasn't dark enough so I decided to mix in some ebony stain to darken up the weathered oak and try again. I love it!
The sides were a little more stencil work. Much to my chagrin, I had to do math. *sigh* not my cup of tea for sure, but I wanted to make the sides look good, so I sucked it up and did the math to make them even!
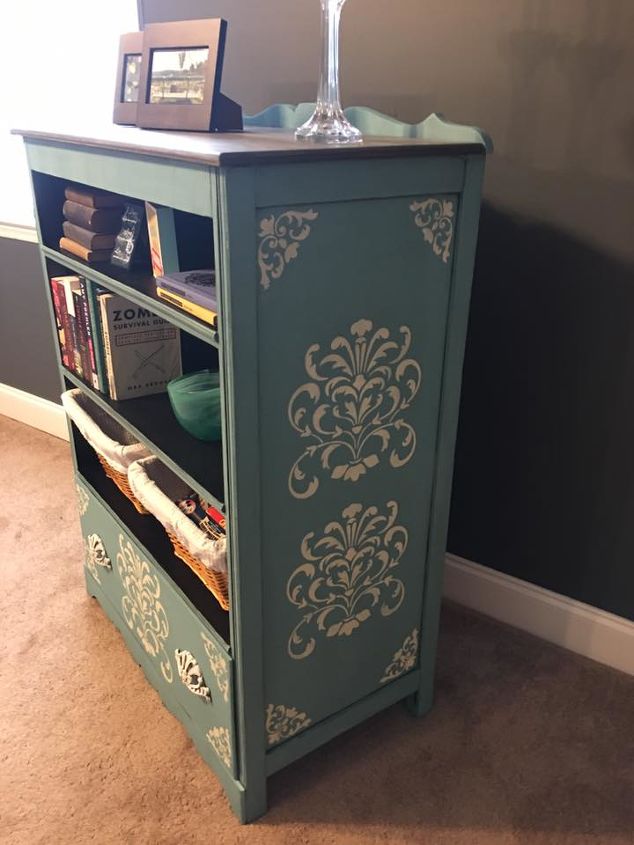
This is the other side, after stenciling, I distressed, and glazed to give it a more vintage look.
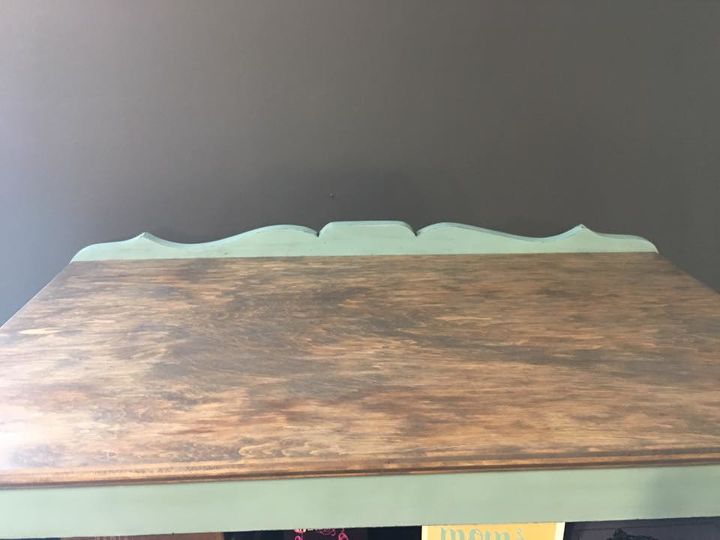
Added the back top piece back after painting, distressing, and glazing. The top got a nice coat of poly!
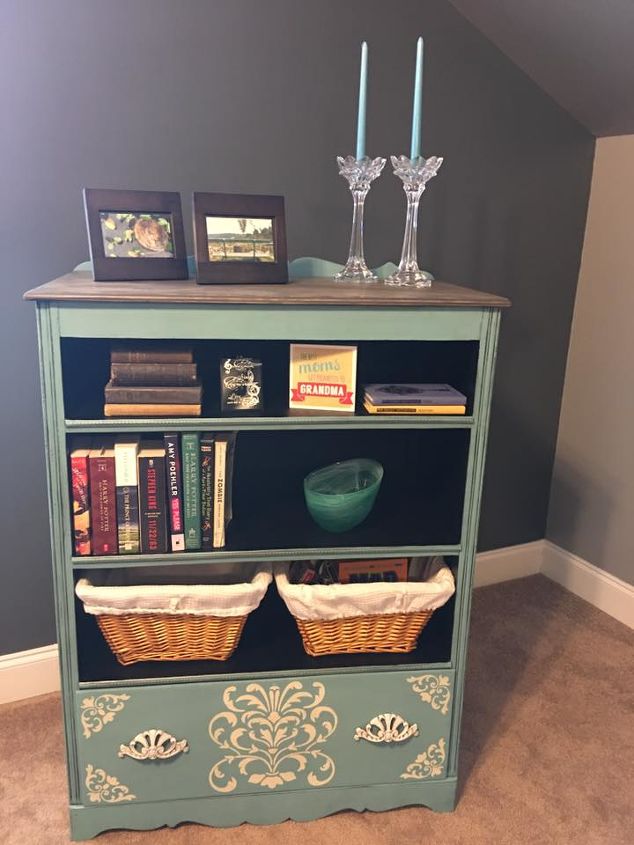
And done! Imagine the possibilities for this piece. Staged here as a book case, but would be a great entertainment center, or just a display case. Bottom drawer is fully functional after receiving a new bottom. What a perfect transformation! Follow us on Instagram @nettes_emporium or facebook at www.facebook.com/nettesemporium/ to see all our projects!
Comments
Join the conversation
4 of 70 comments
-
Love the colors. One question that doesn't really matter but did you make the baskets too ?
-
Love the idea, thanks for sharing.


Frequently asked questions
Have a question about this project?
hi, I'm in the uk so don't have quite the same choice of materials. However, you said you used a base coat on the stunning drawer/shelves unit, then chalk paint. What kind of base coat did you use, please? I want to paint my grandad's 1930s walnut veneer bureau which is quite marked in places and needs updating. I'm not sure whether to use chalk paint (there are now a few brands in the uk) or whether to stick to traditional wood paint ( not gloss, though), something like Dulux Satinwood. Either way I think I will need to do an undercoat/base coat. Any advice?
thanks, Sue, Wiltshire (uk)
What are the colors of paint you used ? Please include the base color and the stencil color.
Would it be possible to make one shelf one that pulls out?
Thank you.