


Mismatched Nightstands in Deep Grey

by
Natalie
5 Materials
$150
10 Hours
Medium
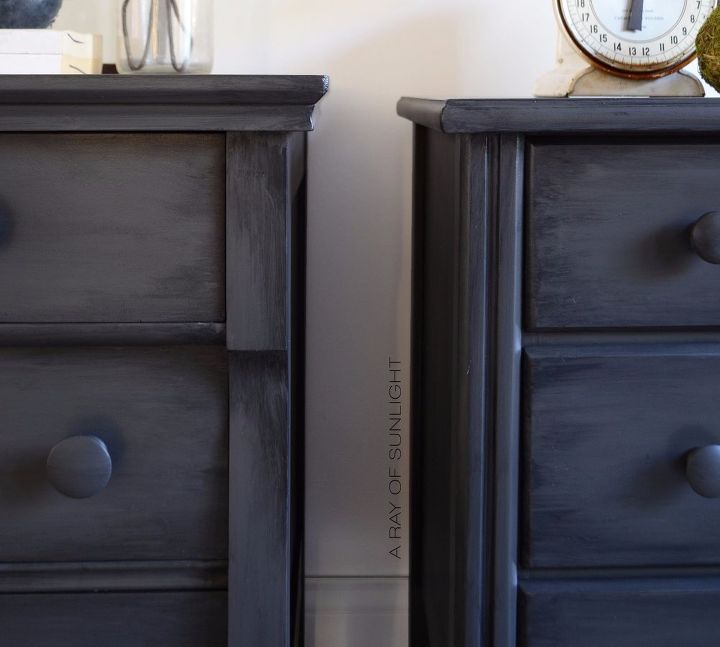
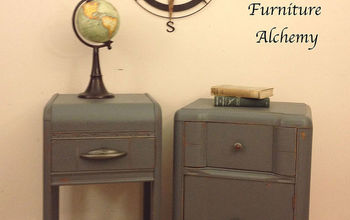
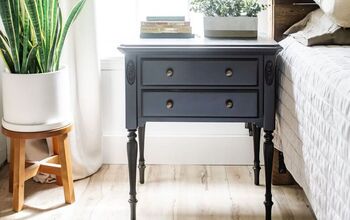
Small vintage or antique dressers are perfect as nightstands because they are tall enough for the height of our modern beds, and they provide so much extra storage! I loved that the empire dresser has a more masculine look, while the antique dresser has a feminine feel; perfect for those fun his and her nightstands!
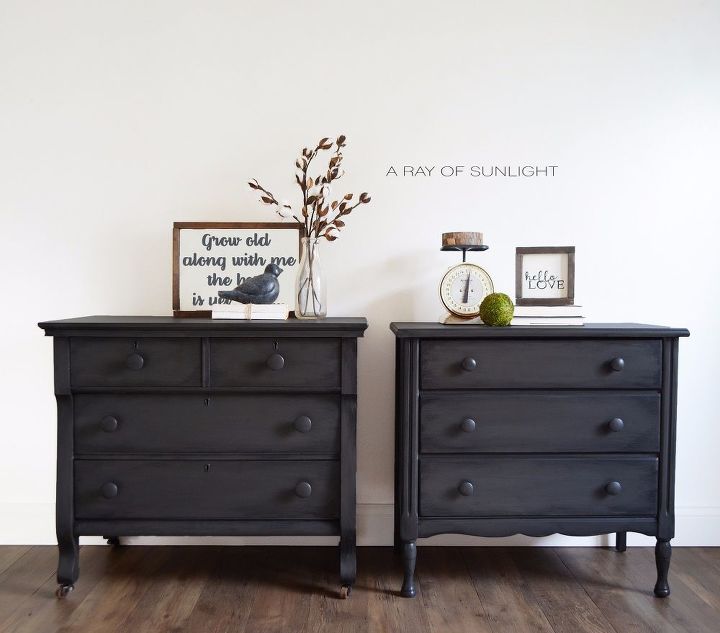
We prepped them for paint by lightly sanding and thoroughly cleaning each piece. Then we sprayed on multiple coats of our homemade chalk paint in Urban Bronze by Sherwin Williams using our favorite paint sprayer. Once everything was dry we sealed the chalk paint with a coat of Varethane Polyurethane in Satin and let it dry again. The poly makes it so much easier to work with the glaze as it can't soak into the poly like it would the chalk paint.
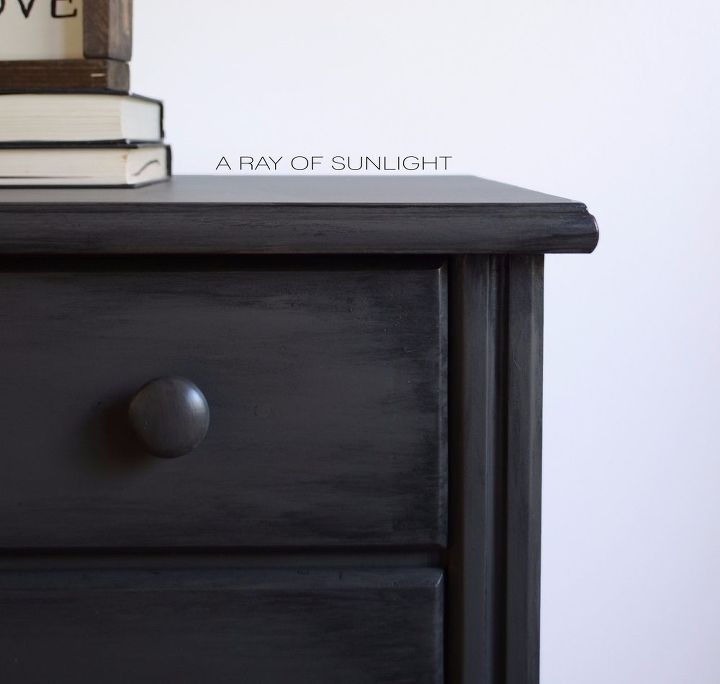
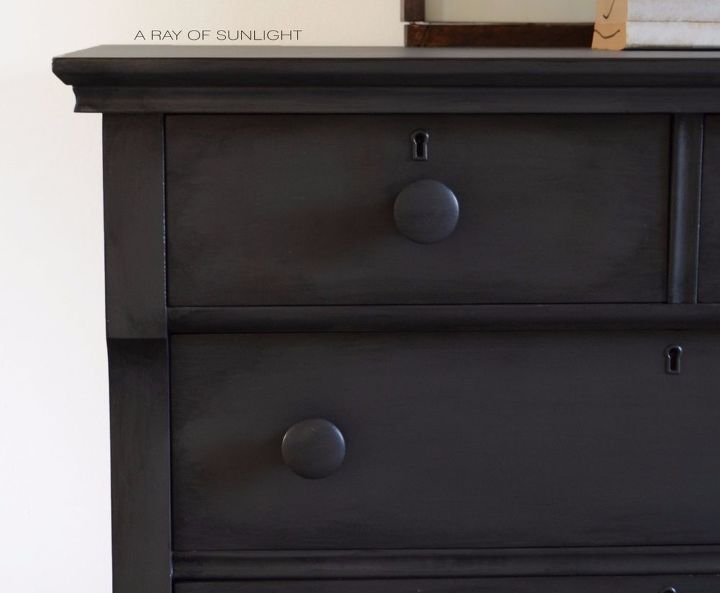
I mixed up a small batch of black glaze following the instructions on the jar, using black latex paint and clear glaze. Then brushed it onto a small area (I did 2 drawers at a time, or one side) with a cheap brush. Using a baby wipe, I wiped off the glaze, going with the grain of the wood, in one long swipe from edge to edge. Once I liked the look I let it start to dry. After a few minutes I went back and lightly dry brushed the edges where I wanted the glaze a bit darker. If it got too dark, I would very lightly wipe it off until I achieved the perfect look.
To protect the new finish we sprayed on 3 more coats of Varethane Polyurethane in Satin. I seriously love this poly! It doesn't yellow over light colored finishes and it provides such a durable finish! We painted the hardware in the same finish as the dresser, making sure to remove the hardware and paint them separately.
Glazing furniture is the perfect way to bring out the character and add even more charm to the finish. I couldn't be happier with these mismatched nightstands! If we didn't already have the amazing apothecary style nightstands for our room, we would be keeping these mismatched ones!
For more info on our process, as well as more photos (including before photos) visit our blog post below!
Want more details about this and other DIY projects? Check out my blog post!
Comments
Join the conversation
4 comments
-
these look great - well done!
-
These dressers are just gorgeous! I love glaze and haven't used it in years, so will definitely have to give it a go on some furniture soon. Enjoy your new night dressers! :)


Frequently asked questions
Have a question about this project?