


DIY Dresser Makeover Using A Sander & Paint
I want to thank Surfprep for sponsoring this DIY dresser makeover.
This DIY Dresser makeover was done easily with a good sander, foam abrasives, and a 3-in-1 paint that cuts your project time in half!
I have been flipping furniture for over twenty years. It is something I did out of necessity to furnish our first home on a tight budget. Then, family and friends started asking if I could do their furniture and/or if they could buy pieces I had finished. That necessity turned into a great side hustle and is one of the reasons I started my blog in the first place. Now, I get to teach others how to flip furniture and make money doing it through my course and private flipping community.
It has been more than twenty years and I am still rescuing pieces that have loads of potential. It is fun for me and getting to help and inspire others to do the same thing is so much fun for me.
I am excited to share my latest dresser flip and take you on the journey to make it over.
{Affiliate links are used in this post so you can easily find these products. You can read my disclosure HERE.}
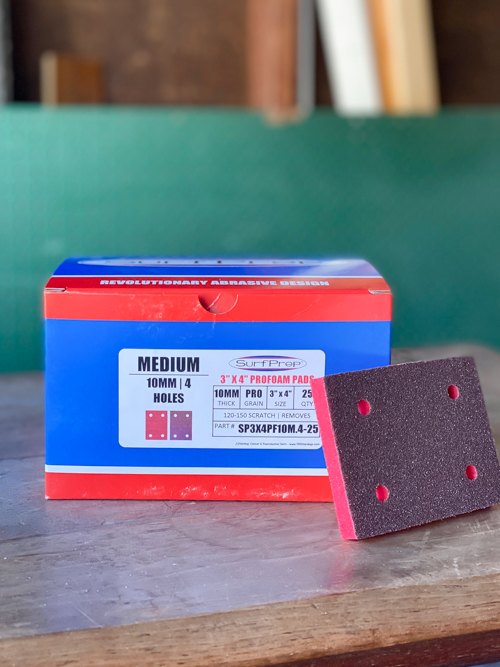
Supplies Used In The Dresser Makeover
Sander (use the code "mycreativedays10" to save on your order)
I found this dresser at my local thrift shop.
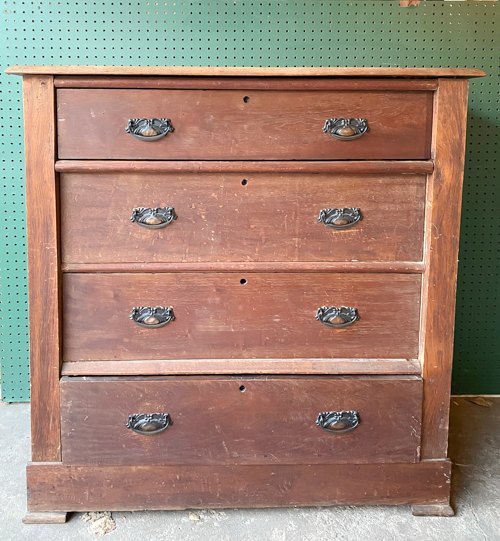
I loved the simple and straight lines it had. It was a good size and still had a lot of life to live.
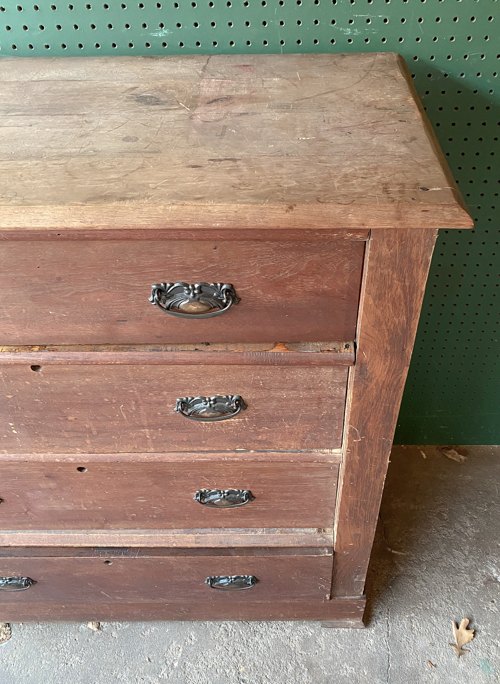
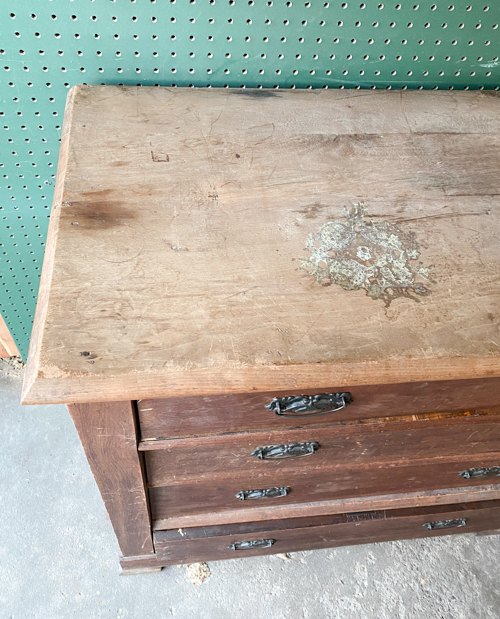
There were a lot of scratches and stains on the surface but nothing that scared me away.
All of the things that I saw "wrong" with the dresser were the reason it was still in the thrift store. Most people will not even look twice when they see things like this on furniture. It makes me happy because I will come in and swoop them up. These things are easy to remedy and this piece will be stunning in the end.
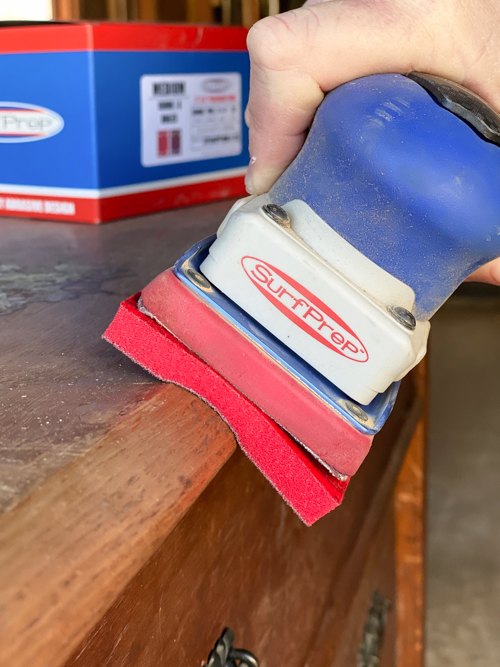
I knew I would be staining and painting this piece. The new 3-in-1 paint line I am obsessed with would make an appearance but not until I prepped the dresser with my favorite sander. Every furniture piece should be prepped before you paint or stain. The Surfprep sander makes light work of that process. It is ergonomic, lightweight, quiet, and easy to use compared to other sanders. You can change the speed on the Surfprep which is a game-changer. That feature alone makes it perfect for all levels of DIYers and all kinds of projects. Other sanders only have one speed which can make them hard to handle and harsh on furniture pieces.
I have the 3x4 Surfprep sander. It fits great in my small hands. The fact that it hooks right up to my shop vac means that the sanding dust is minimal to none! It all goes into the shop vac!
I do have a coupon code with Surfprep that I shared in the supply list above.
Okay, let's get back to the makeover.
I started the sanding with a medium foam abrasive on the Surfprep. Since I have been flipping furniture for so many years, I knew that the finish would sand beautifully.
If you look at the photo above, you will see my favorite thing about foam abrasives. They are flexible. They mold around the edges and curves of your projects. You can get in all the nooks and crannies with them which means you aren't having to change sanders or grab a hand sander to get the job done. The foam abrasives also fit on other sander brands which is nice.
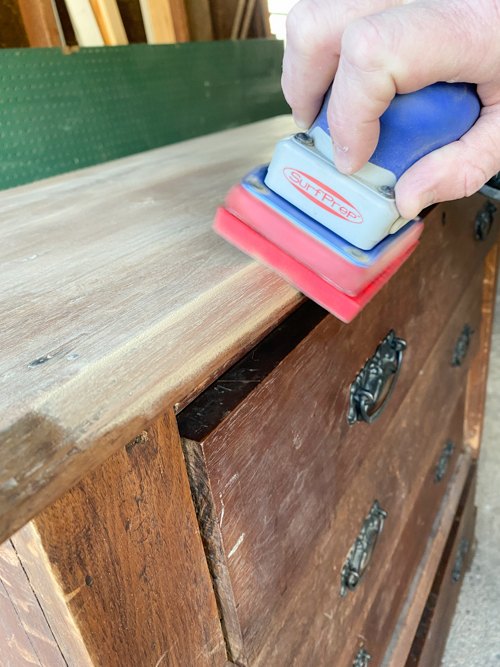
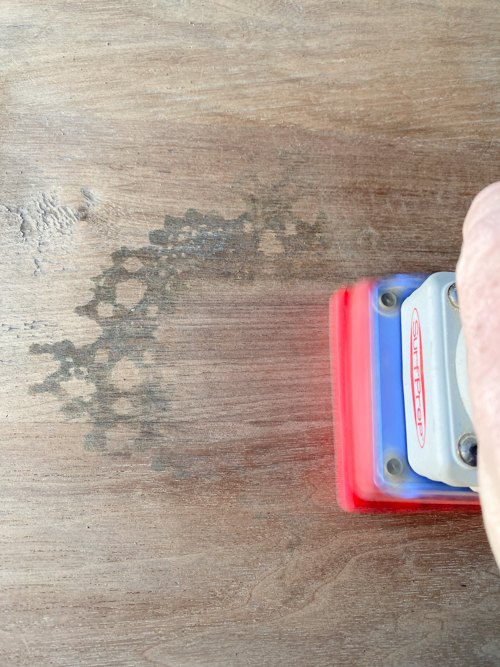
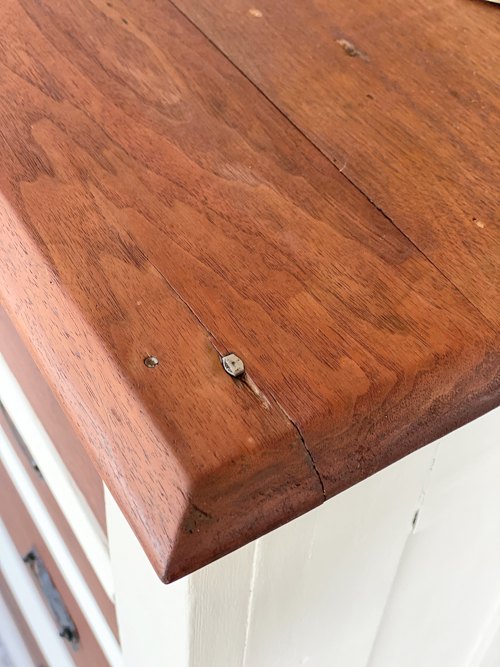
The medium foam abrasive took the top down to the bare wood and got rid of the big stains!! It was perfectly prepped for stain.
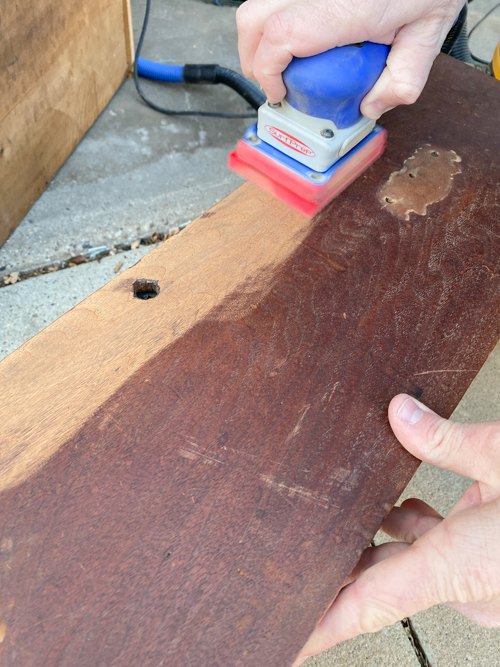
The drawer fronts were also easily sanded down to bare wood and ready for stain.
Now, it was time to work on the "shell" of the dresser that I knew I wanted to paint.
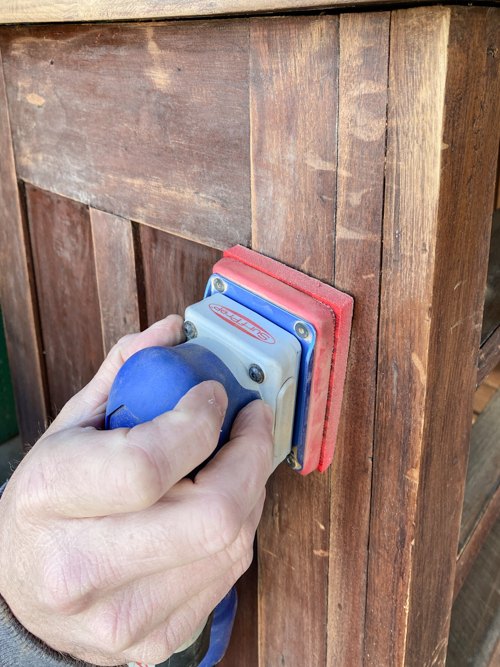
I just needed to give the outer shell a scuff-sand since I was going to paint it. Scuff-sanding is a must with any piece you are painting. It preps your surfaces for primer, paint, and a topcoat. Scuff-sanding is just to "scuff" the surface so it is ready to take the primer, paint, and topcoat. You aren't trying to get down to bare wood with a scuff-sand.
Once the sanding was all done, I wiped down the entire dresser with a damp cloth. The sander being hooked up to the shop vac does suck up most of the sanding dust and debris but I always want to make sure there is nothing left on the surface before I apply any primer, paint, or stain. You don't want anything getting into the products you are applying.
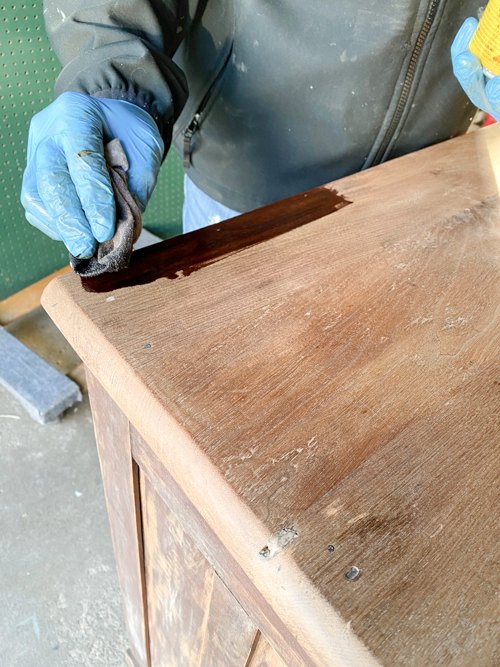
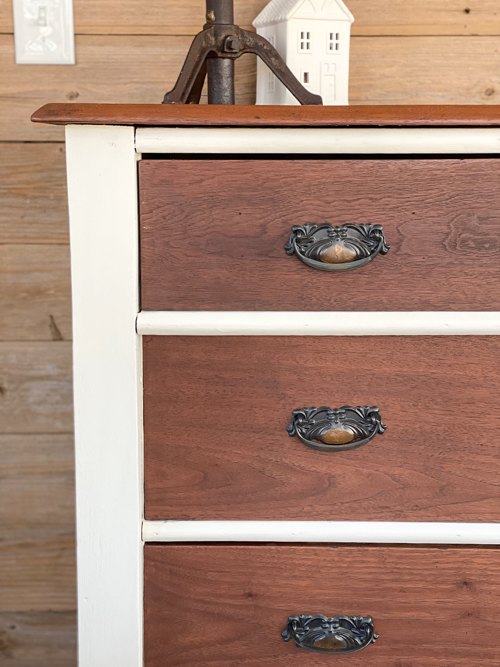
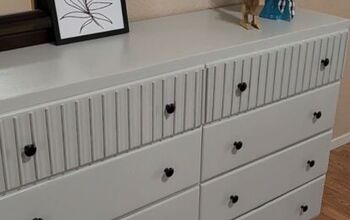
I chose the stain color "Early American" for the top of the dresser and the drawer fronts.
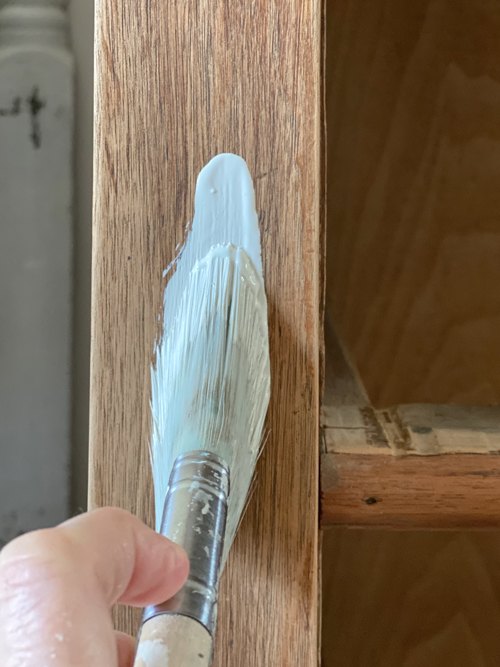
Once I had those areas stained, I started painting the rest of the dresser in the color "Endless Shore". This line of paint has the primer, paint, and topcoat all in one can. You don't have to worry about multiple cans and multiple products. It is one and done with this line of paint. I am obsessed with it. It makes easy and fast work of all my furniture projects.
I had to add two coats to this dresser but once it was dry, I was amazed at what we ended up with.
This piece looks new!
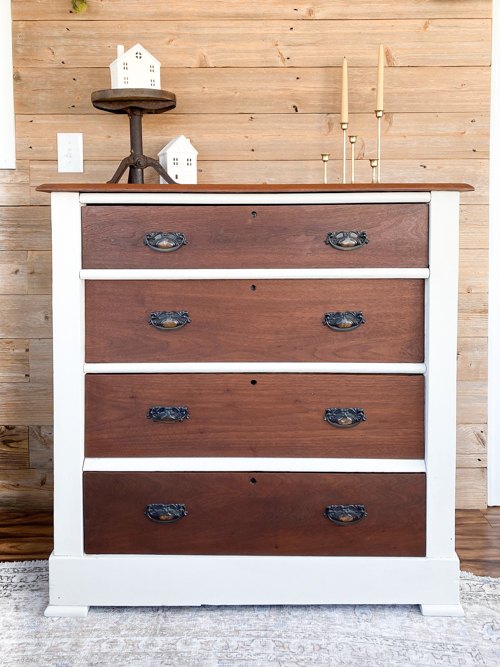
I was able to use the hardware that came with the piece. It is always nice when you find a piece that had all the hardware and the hardware works with the makeover. It saves you a ton of money not having to buy new hardware.
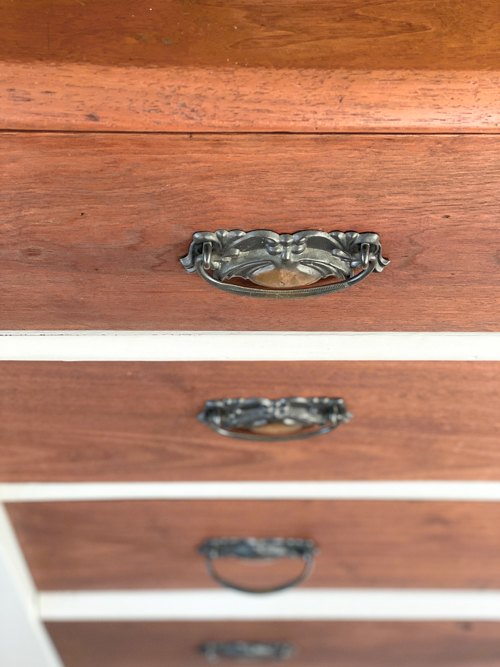
One of my favorite things about this dresser is the old nails that were used to construct this piece that are still intact and in plain sight.
I love the look of paint and wood together. The fact that the top and the drawer fronts sanded down to bare wood made this piece a perfect candidate for paint and stain.
I will never tire of rescuing pieces that still have a lot of potential.
Even after doing this for more than twenty years, I am still amazed after every makeover. A little paint, some good tools, and stain can really go a long way!

I hope this project inspires you to take a closer look at the furniture at thrift stores, yard sales, and estate sales.
Resources for this project:
See all materials


Comments
Join the conversation
-
Would love to see a tutorial on fixing the misaligned drawers!
-
I have videos for that on my YouTube channel and my blog! Head there to check them out. I don't think I can leave the links for them in the comments here but you will see the link to my blog in this post and my YouTube link is on the front page of my blog. Thanks!


Frequently asked questions
Have a question about this project?
I have a dresser that could be a twin to yours. Did you have to do repairs to keep the drawers from going in cockeyed? I know I need to do that to mine. You've given me inspiration on doing the two tone, I really like that!!