


How to Use a Vintage Headboard
Today I’m sharing how to use vintage headboard ideas which will create extra space within a small bedroom as well as how to makeover the headboard.
Both bedrooms in the guest cottage are tiny and require some creative thinking to add headboards.
The question most people ask is “how can you use an antique headboard with a modern mattress and bed frame?”.
Many antique beds are smaller than current day mattresses. Therefore, using the side rails and foot board may not be an option
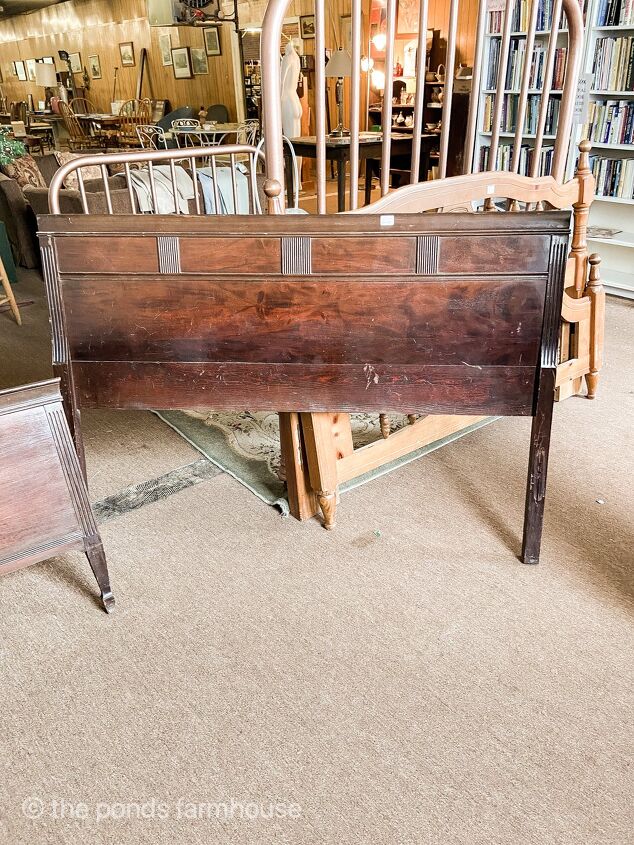
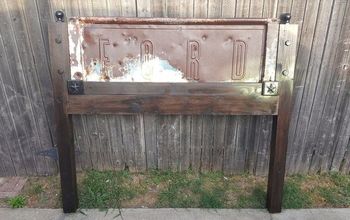
If you follow along with Thrifting with the Gals, you know I found an antique vintage headboard to use over the summer.
Although the side rails and footboard were included, I knew they would not work with the mattress. So here is what we did.
Vintage Headboard Ideas
You may remember that I previously shared about using a yard sale shutter to make a headboard for the master bedroom in our guest cottage.
In my search for a bed to go in the additional bedroom, I knew I needed a headboard that wasn’t very bulky and one that would work in front of a window.
Refinish Vintage Headboard
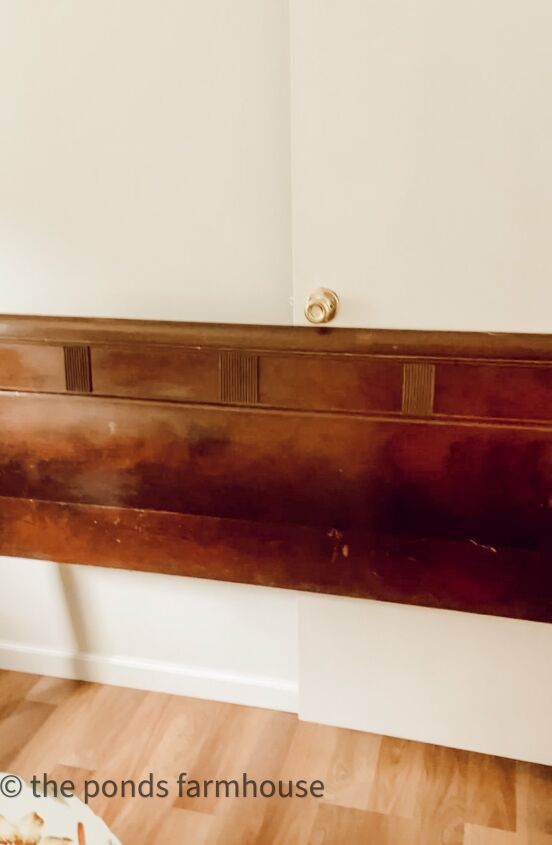
The vintage headboard had some minor scratches and dings in the wood, but it was a great price.
Although there were some blemishes, I wanted to keep some of the natural wood, so I decided to paint some of the headboard and leave some wood showing.
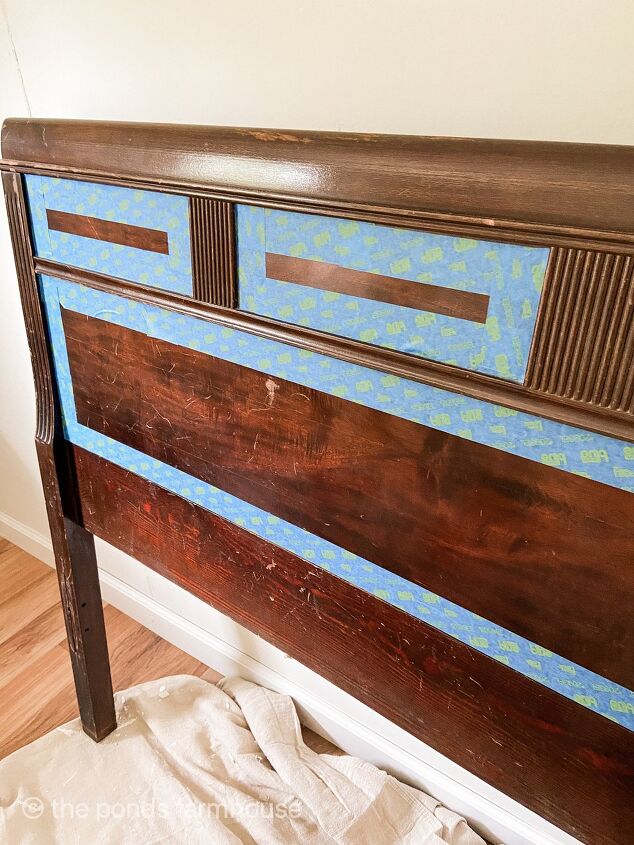
In order the achieve this technique, you first need to tape the areas you want to leave natural with painters tape.

Next, paint the exposed areas of the headboard with a paint color of your choice. I used Annie Sloan Chalk Paint Amsterdam Green for my accent color and then used a mixture of dark and clear wax to finish.
In addition, I touched up the natural wood with Annie Sloan Dark Wax. This resulted in the wood looking brand new and eliminated the visibility of any scratched areas.
How to Attach the Vintage Headboard Idea
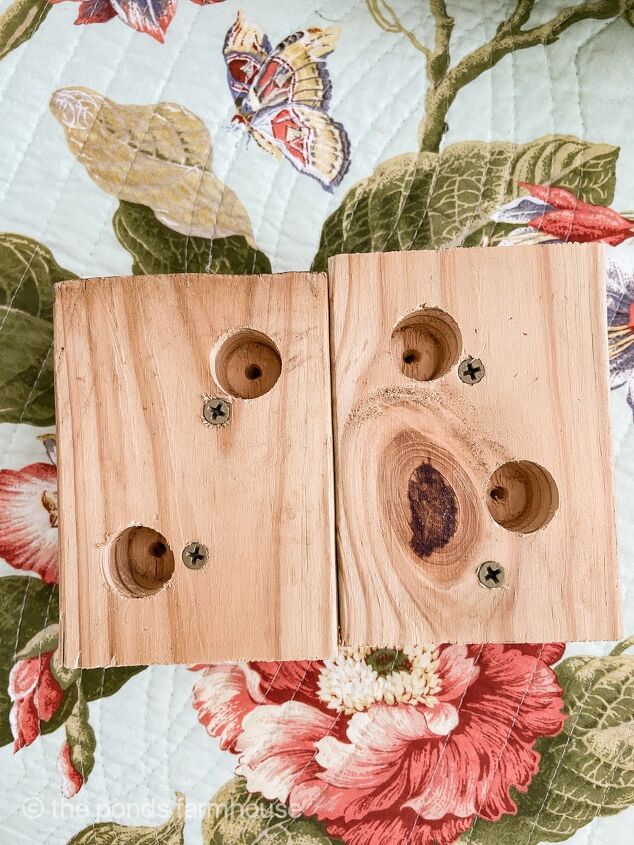
The challenge in our guest cottage is space. The only good area for the headboard was in front of the only window in the room.
Because we needed a blind on the window, it was necessary to attach the headboard slightly away from the window.
Brad built a couple of blocks to use as spacers from some scrap 2 x 4 wood we had on hand. He then drilled a couple of holes to countersink the attachment screws. This allows space for the screws to attach firmly and securely to the wall.
Disclaimer: Please note that extra security should be taken to assure that the headboard is firmly attached to avoid it falling onto the bed. You may need additional attachments if your headboard is heavy or doesn’t have legs. The headboard we used is very light weight and the legs also rest on the floor. All of our attachment screws are imbedded in secure wall studs. If that is not the situation, you will need to use proper wall anchors that are recommended for the weight of your headboard.
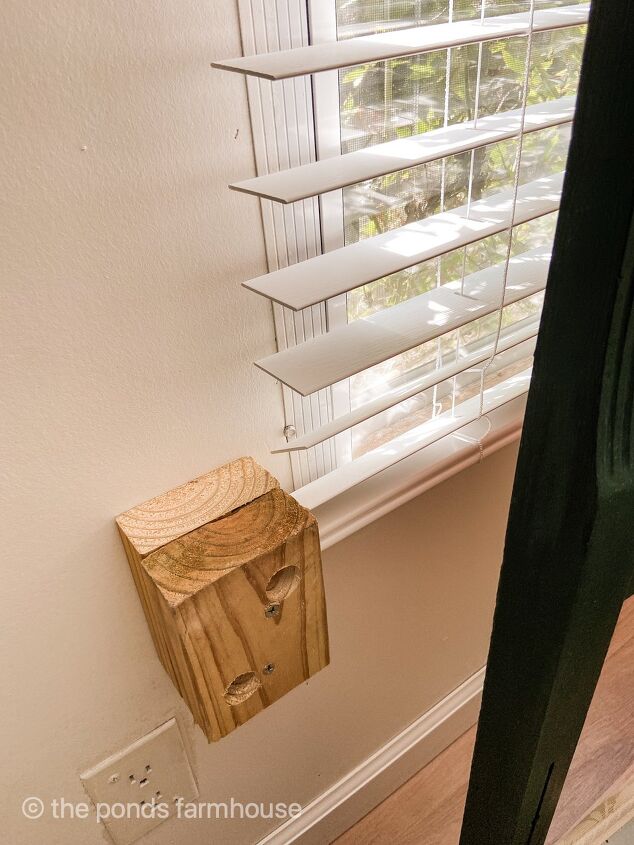
Next, using wood screws, he attached the two blocks to either side of the window. Fortunately both blocks were attached to a wall stud for extra security. However, if you don’t attach to a stud, you will need to use wall anchors to add stability to your headboard.
Be sure to place the blocks at a point they can be easily attached to the bed headboard.
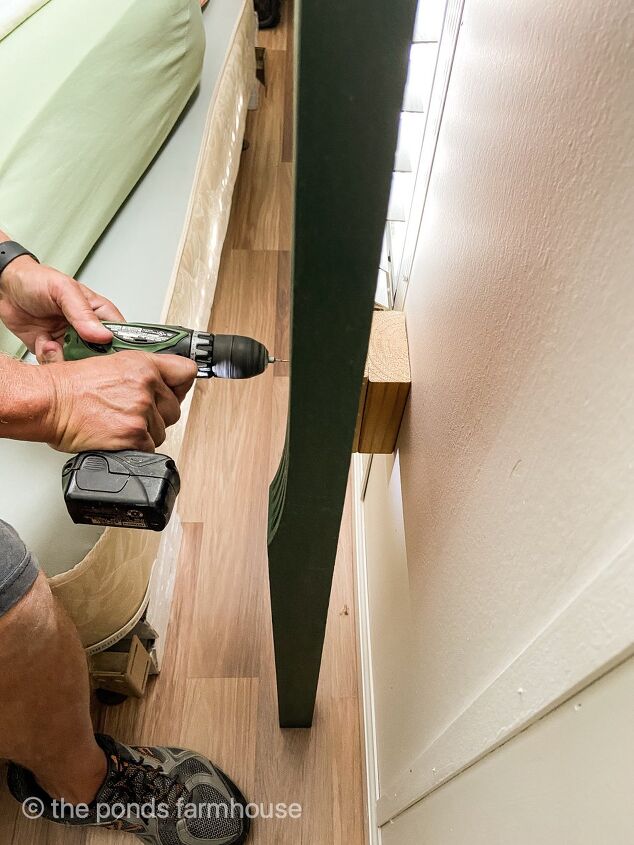
Finally, to assure that the old wood doesn’t splinter, drill pilot holes in the headboard at the points of attachment.
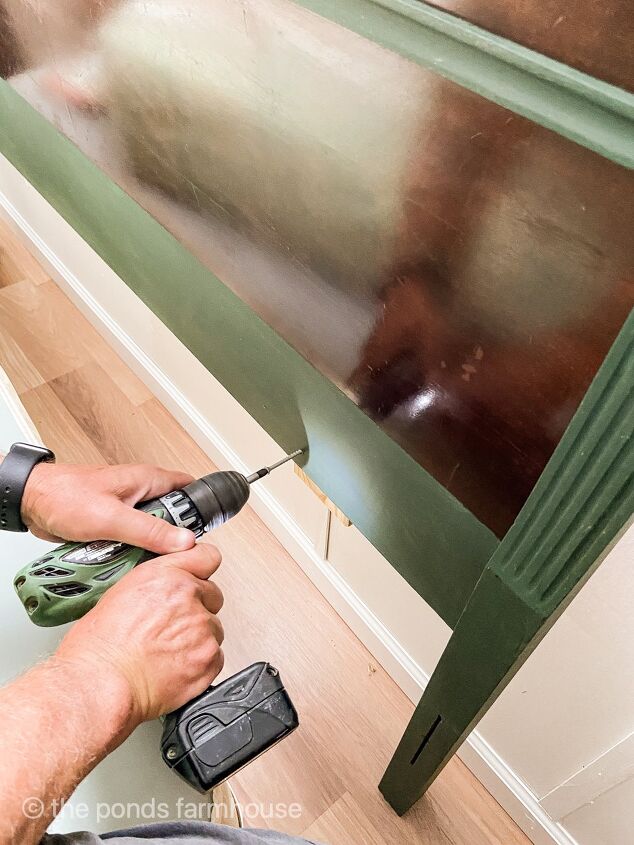
Then attach the vintage headboard to the block spacers using at least 2 wood screws per side.
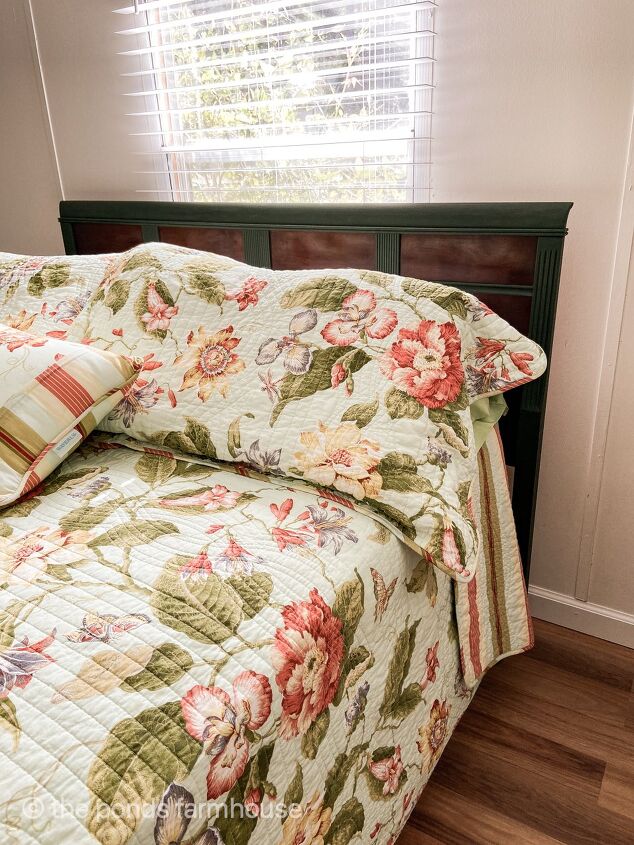
Now just add your mattress to a bed frame and slide the bed frame up against the headboard.
These bed frames are very inexpensive and allow you to be creative with your headboard choices.
I hope you got some ideas about how you can use vintage or antique headboards in your home. Many are inexpensive because they are smaller than todays beds. Therefore, you can get a great deal.
If you’d like to see more tips for vintage and thrift store shopping, see this post.
Thanks so much for stopping by today and I look forward to sharing my next adventure with you.


Frequently asked questions
Have a question about this project?