


How to Use Table Legs to Transform an Old Dresser
2 Materials
$20
4 Days
Easy
I love making over old dressers. It's one of my favorite furniture flips. I just can't resist when I find an old, well made dresser for free, or extremely cheap. It's like they scream out to me: "Make me pretty again! I won't let you down like those new fangled dressers that can't even call themselves wood! Look, I even have dovetailed drawers!" I'm such a sucker for dovetailed drawers.When it comes to dressers I know I could definitely use a few more with my growing family and multiple bedrooms. I mean everyone needs at least one in their bedroom, right?? Luckily I usually have two or three sitting in the garage along with some other furniture friends, waiting patiently for their day of transformation. Hence the reason my car sits outside all winter long...Well, now that you all know about my dresser obsession I can move on.
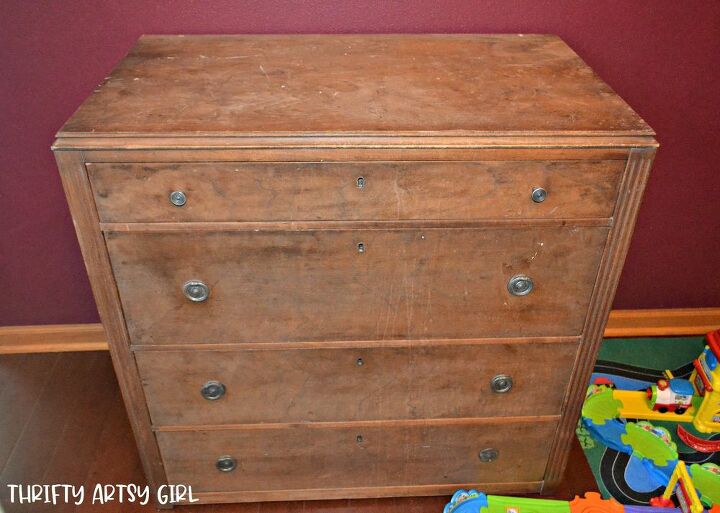
A little back story on this dresser: About 3 1/2 years ago one of my coworkers had a yard sale where she sold a bunch of her recently deceased brothers belongings. Fortunately for me this cute squatty antique dresser did not sell and she offered it to me for $20. The poor guy had seen better days, the top was bubbled and peeling and there were drip marks all down the front drawers (hence the $20 price tag). I had a vision for this dresser that included painting part of it white while leaving the drawers stained, natural wood. I was really feeling the combination of some natural wood and some painted wood for Jackson's woodland forest themed room. I also wanted to raise it up because it was just too short and chunky looking for my taste.

For part of my dresser makeover I went on a search for legs to boost this stumpy guy up and give him a whole new look. I found the perfect little legs, waddell ash end table legs to be exact, at Lowe's and they were only $1.98 each!I wanted to paint the legs white to match the body of the dresser and to make them look like they had always been there. I scoured my house for something to set them on to easily paint them and found a piece of styrofoam in a box of packing materials that would work perfect!
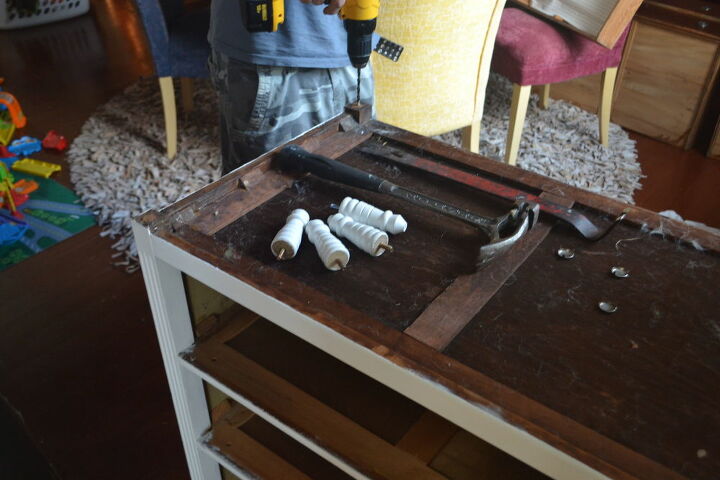
Next I had to put the painted legs on the dresser. Cory flipped the dresser over and removed the metal caps that were in each corner. Don't mind the 50 year old dust that I conveniently cleaned up after the pictures were taken because Cory had "other things to do" and "didn't want to wait" (typical man haha).Oddly enough there were only 3 metal caps supporting the dresser. Cory drilled holes in each of the corners for the table legs to screw in. He drilled the holes slightly smaller than the screws so that they would screw in tight.
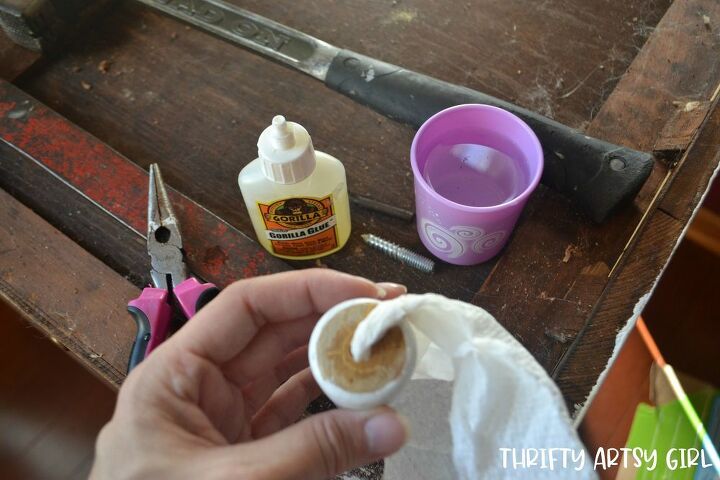
I decided to use gorilla glue for wood to give the legs extra support. Gorilla glue for wood requires water to work so I rolled up a paper towel and got it wet and put it in the holes in the dresser as well as the holes in the legs before squirting the glue into the holes.
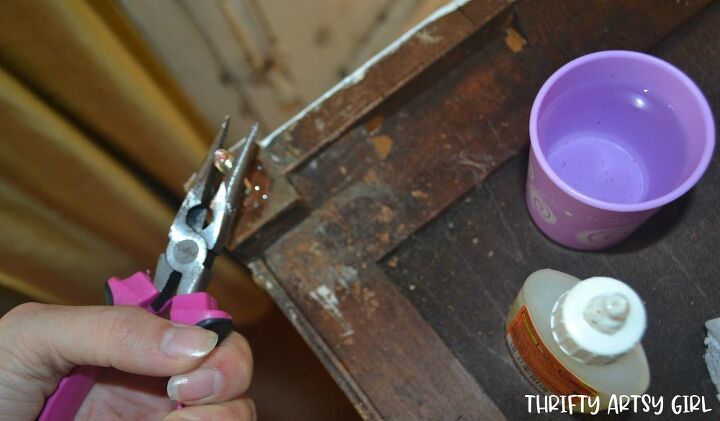
I then used a pair of needle nose pliers to screw the screw into the dresser and then lastly I screwed the leg in until it was tight.
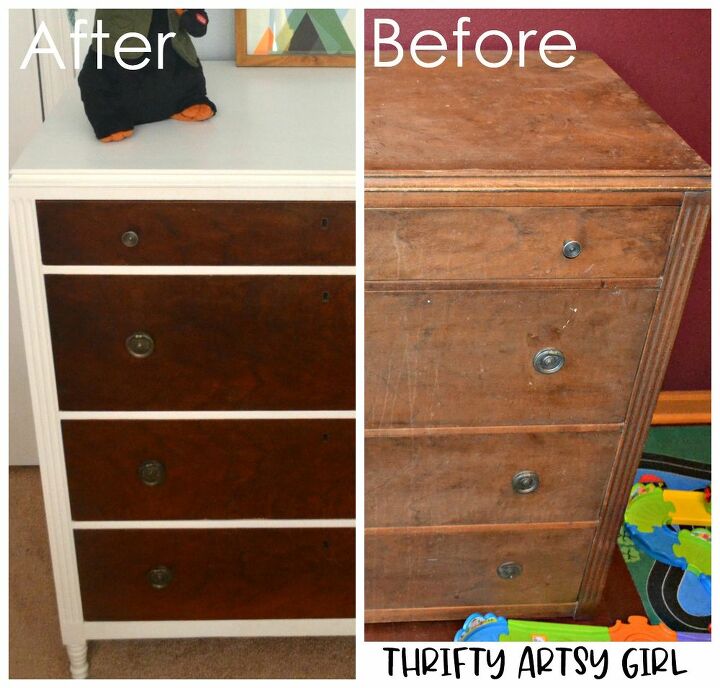
Here's a before and after shot of the dresser.
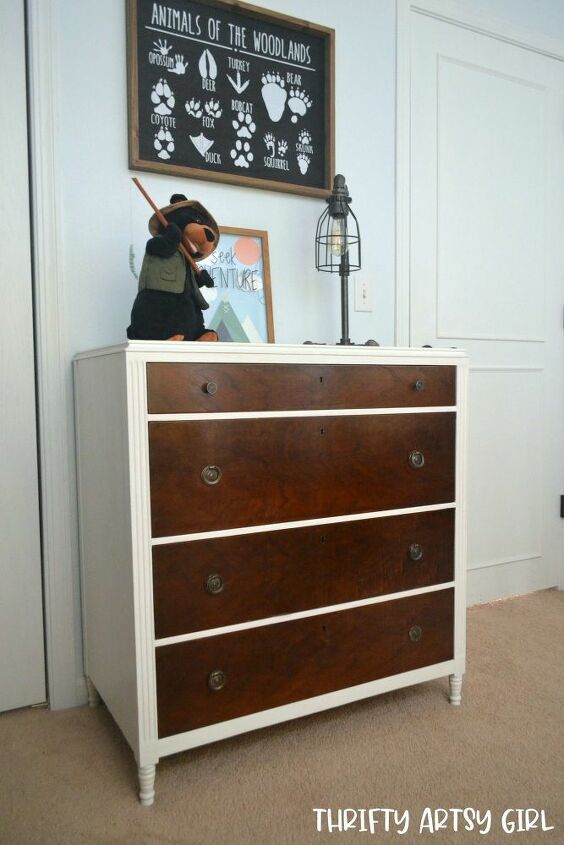
I absolutely love how Jackson's antique dresser turned out. The new legs give it a whimsical, but yet still masculine look. It's not perfect but it is probably 100 years old so I wouldn't expect it to be. Plus I love the character that it brings to my son's woodland forest bedroom.
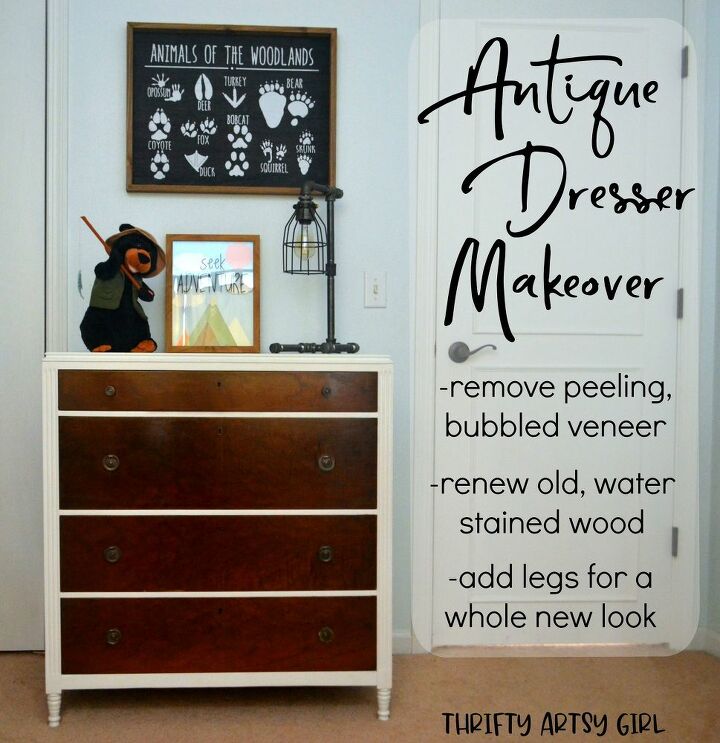
Not bad at all for less than $30 (or $40 if you count the paint and tung oil that I already had)! I could not be happier that my friend from work gave me the opportunity to buy this old guy. Hopefully I did her brother proud by bringing new life to his dresser. Check out my blog for more pictures, how to remove peeling, bubbled veneer and a super easy way to renew old wood without sanding or staining: https://www.thriftyartsygirl.com/2020/02/a-dresser-makeover-on-whole-new-level.html


Any price and availability information displayed on [relevant Amazon Site(s), as applicable] at the time of purchase will apply to the purchase of this product.
Hometalk may collect a small share of sales from the links on this page.More info

Want more details about this and other DIY projects? Check out my blog post!
Comments
Join the conversation
2 of 44 comments
-
Very nice job! The legs actually improve the original proportions. Thanks for sharing. :-)
-
Looks really nice. Great job.


Frequently asked questions
Have a question about this project?
Was there a darker stain used to enhance the details in the wood? I think it made the details stand out well. Beautiful job!