


New Life For Twin Dressers

$40
2 Weeks
Medium
When my grandmother passed from our world to the great beyond (God rest her soul) , my mother, who was her only child, inherited all of her belongings. My sister and brother got the things they wanted, but that left me with the bulk of her stuff(because my mom lives with me). Two of the items where a matching set of small three drawer dressers. At first I just put them in our room as side tables to the bed. Then we moved our bed, and they no longer fit. But , we used them, so they had to go somewhere. We had gotten a new bedroom set (cherry sleigh bed, ooh la la) and so I refinished them in cherry stain to match and stuck them on a wall, whatever wall was not occupied when I rearranged the furniture... and so it went for the next 10 or so years. Segue to much more recently, like two weeks ago. We have changed many things in the house (story for another day), and with all the cherry and grey in our bedroom it was beginning to look very dark. I needed a 'pop' and a 'focal point' in that room. I picked on the little dressers that were beginning to look tired and worn.
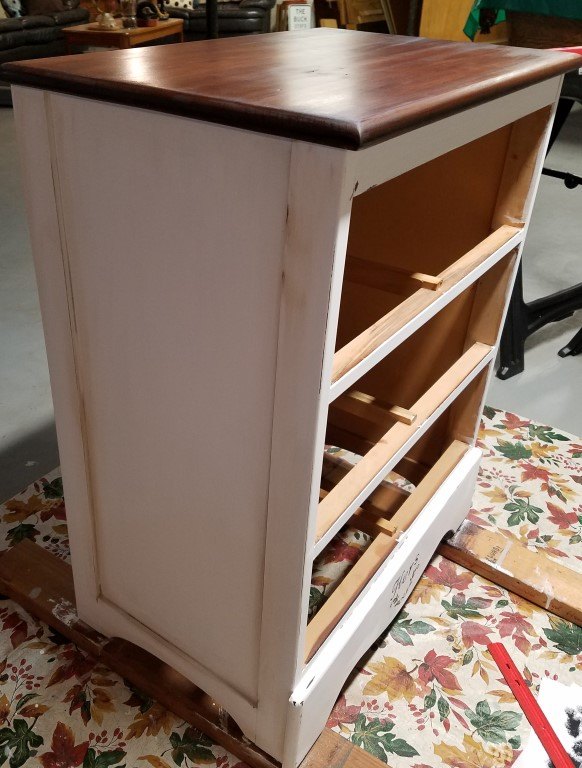
I decided on white. Now, what white you ask.. and that would be a fair question, except, I don't know. Just like many furniture painters, I swoop up paint samples when they go on sale for a dollar! Wheeeeee new paint! This was one such find. Then I make them into chalk paint . Suffice it to say that it's as close to 'plain white' as you can get.
I began by sanding the finish off the top of the dresser using my brand new, handy dandy drill master palm sander! That.. my hubby bought me : ) Now that's love 💙 I started with 80 grit, and finished with hand sanding using 320 grit. I simply 'scuffed' the rest of the dresser , as chalk paint does not need the finish removed. Then I began painting, staining, distressing and waxing. I also added, using some stencil's I had on hand, the 'his' and 'hers' motif on the bottom of each dresser in black. ** Note: If you are using White over a darker color/stain , you will most likely need to prime it or need more than 2 coats of paint. I did three coats, then sanded lightly with 320 grit sandpaper (this gives a smoother less brushy finish) and then added one more coat of white. )
I used clear wax first, then I discovered BLACK wax!
I met a friend of mine up town in Chelsea (MI) and went into a store called La Maison... where they had Annie Sloan chalk paint and *sigh* black wax. Of course I had to buy it and try it. (I also got the white wax... not used yet...). Can I just say.. LOVE it.
I stained the top with a combo of Minwax Ebony and Rustoleum Espresso (I mixed the two colors for a deeper brown). Once I stained the top I cleared it with polycrylic, waited for it to dry. Sanded with a 3m scuff pad, another coat of polycrylic and let it dry then sanded again. My poly was not satin and I wanted a duller and smoother sheen , so I then coated it with Wipe on Poly by Minwax. Then I added the new pulls.. and , Awesomeness! I now had exactly what I wanted , it brightened the room and gave me a focal point.
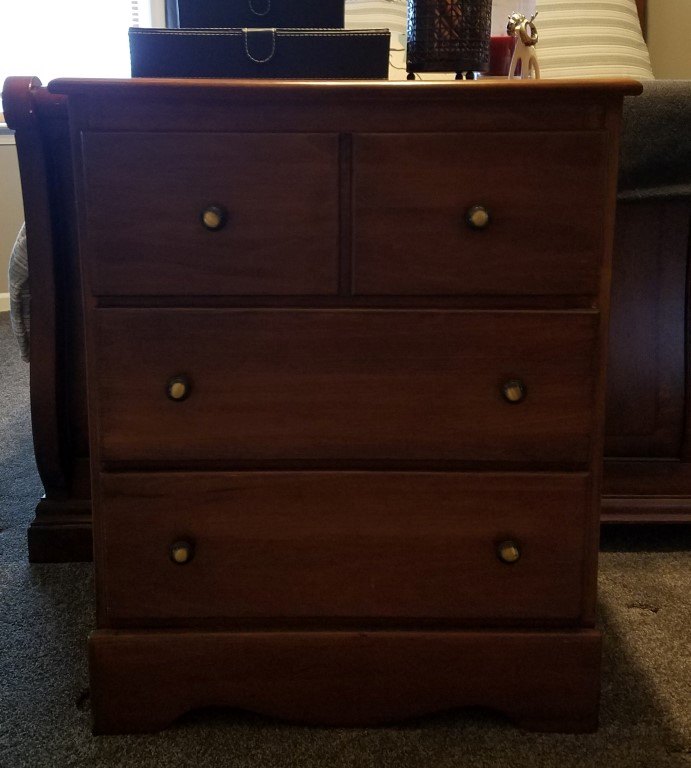
Looking old and tired
After painting and stenciling I began distressing
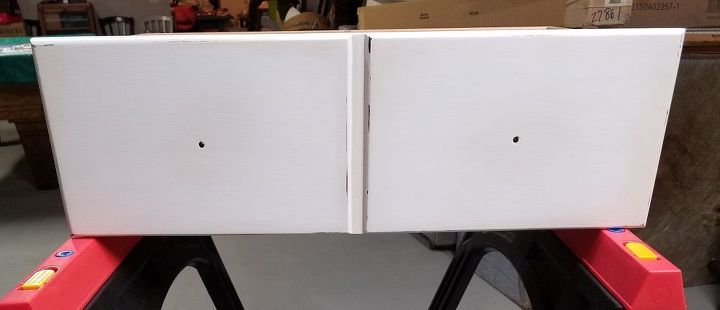
Front of the top drawer
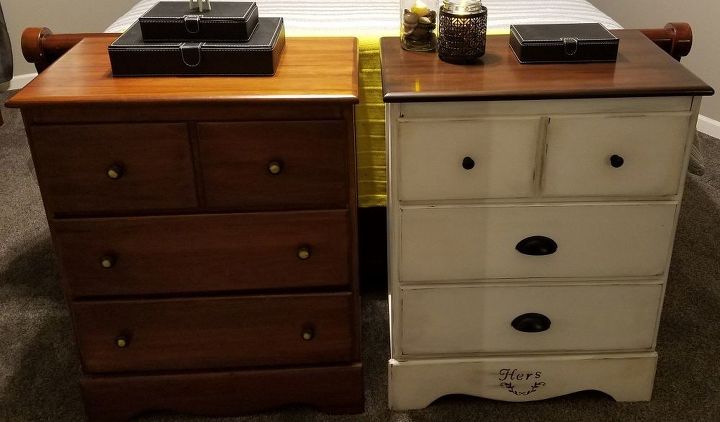
One old and one new
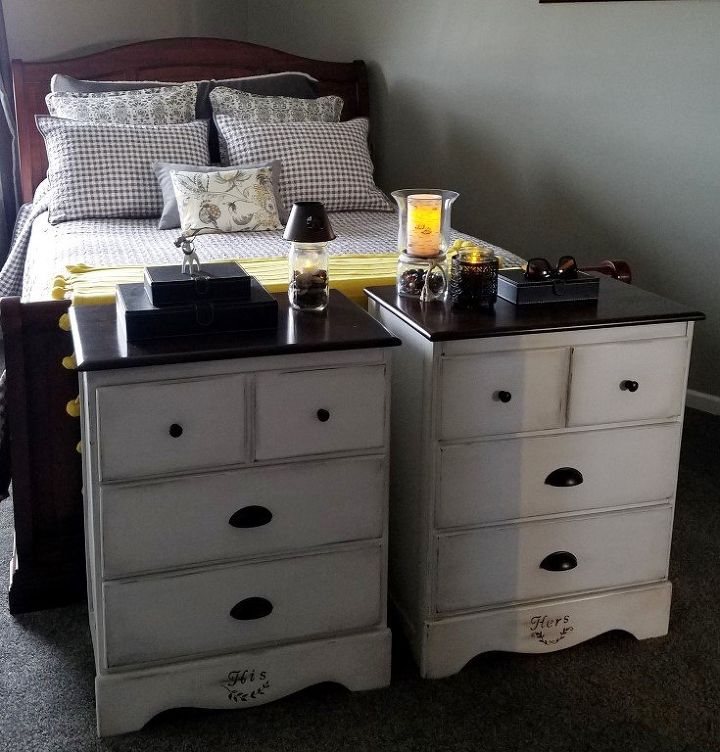
The finished set!
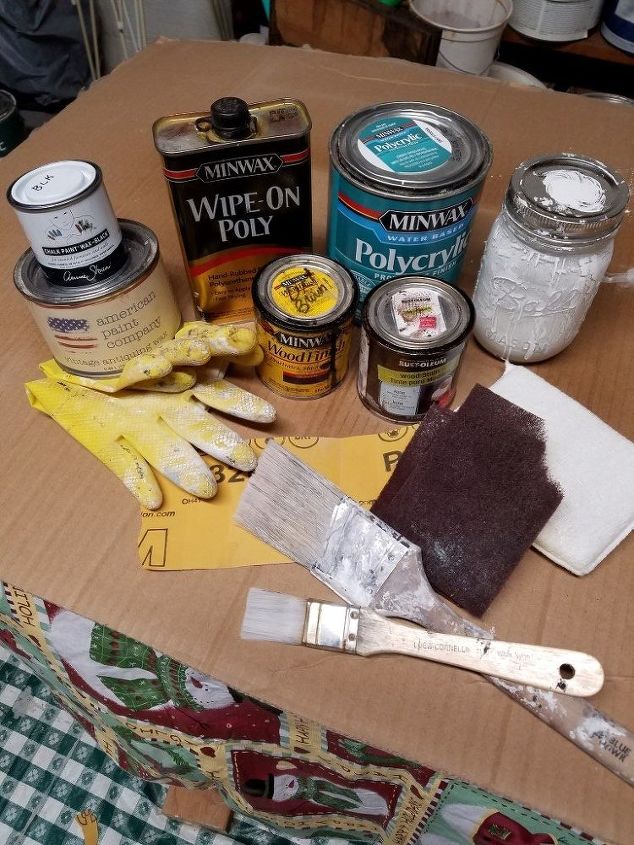
Things I used for this project:
Hand sander
80 to 320 grit sandpaper
Minwax Ebony and Rustoleum Espresso stain
White homemade chalk paint
Clear Wax- American Paint Co
Black wax -Annie Sloan
Black Fusion chalk paint and Martha Stewart stencils
3M scuff pads
Polycrylic
Wipe on Poly
Black drawer pulls and cup pulls (D. LAWLESS HARDWARE)
Comments
Join the conversation
3 of 7 comments
-
Love the transformation!! and they fit perfectly at the end of your bed :)
-
LOVE them!!!


Frequently asked questions
Have a question about this project?