


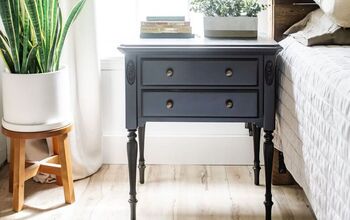
Nightstand Gets a New Look
Hi, I'm Liz from SimpleDecoratingTips.com a DIY and decorating blog. I also have a DIY shop, Frame and Frills.
The whole point of this blog I write is to encourage you!
Over the years, (and years!) of painting, redoing, renovating and flipping, (both furniture and houses) I’ve learned that some of you are afraid. I’m here to tell you to fear not! I’ll walk alongside you, just like in this post where the nightstand gets a new look, I want you to be encouraged to give your own piece a new look.
I’ll give you the step-by-step guide with the best products and tools to make the job go well. If you mess up, join the club! I’ve messed up a ton, that’s one way to learn.
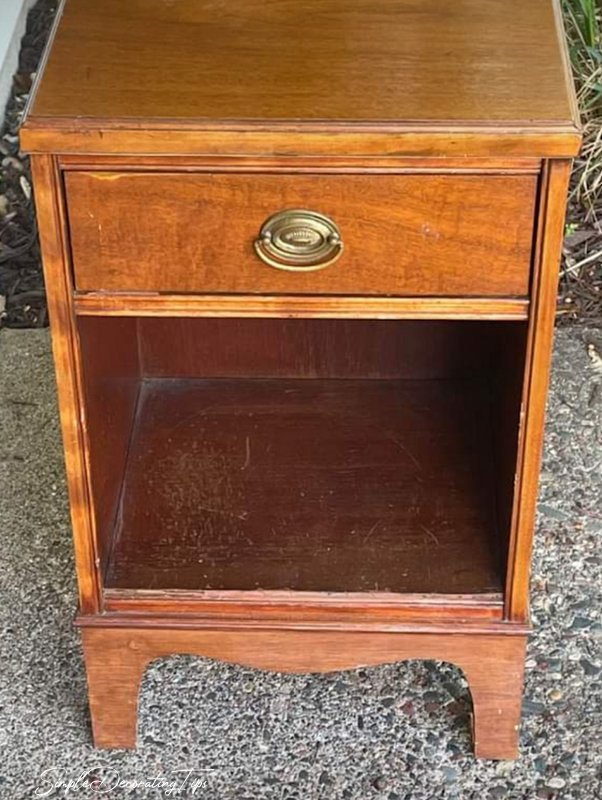
This was a little nightstand end table I picked up on Marketplace for a mere pittance. I cannot tell you enough times, there are so many quality pieces of furniture, cheap, just waiting for you to re-do!!
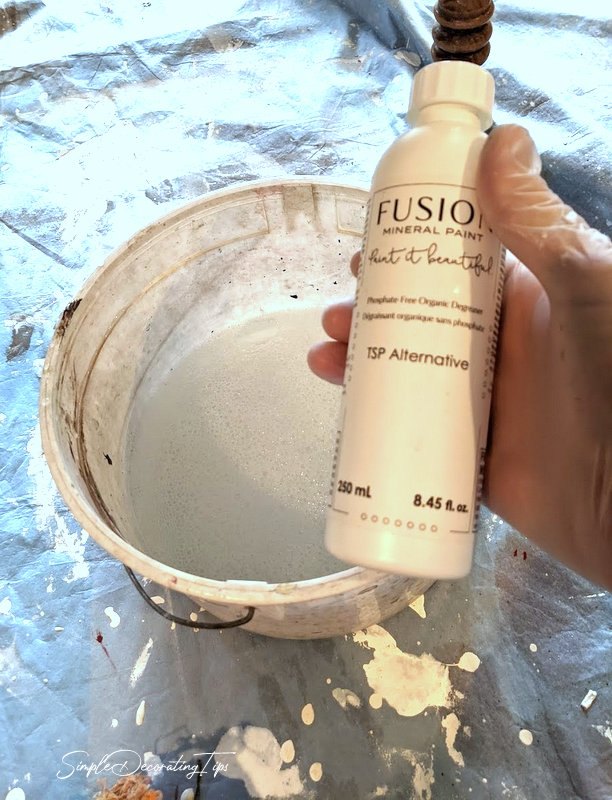
First thing I did for this table was to wash it with Fusion TSP Alternative. That is an important first step. It removes dirt, grime and grease, all of which could inhibit good adhesion for paint.
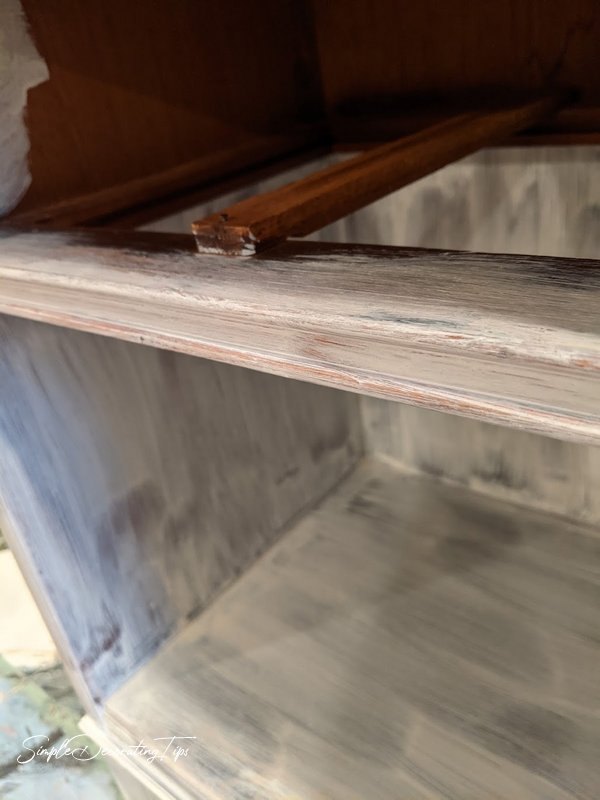
This nightstand is a vintage piece made with mahogany wood veneer. The reason I mention the type of wood is because some wood is prone to tannin bleed, and mahogany is one of the very worst! If it’s not sealed with the right kind of primer, the tannins will bleed through the paint and discolor it.
So what’s the right kind of primer?!!
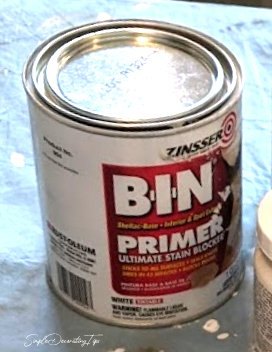
To seal the tannin bleed it must be this BIN primer, the one with shellac! Don’t be fooled, BIN makes other primers, but only this exact one will work. This primer also works to seal water stains that magically can bleed through layers of paint… oh and it truly covers marker and ink pen too…
It’s a stinky job! Open the windows and turn on the exhaust fan because this primer stinks! It kinda smells like ammonia. It is ammonia clean up so maybe that is what’s in it.
Be sure to stir it well with a paint stick, get the stuff on the bottom mixed in well.
Usually 1 coat works, but sometimes a second coat is necessary. Work fast, because it dries almost instantly when you put it on the surface.
Once that icky, but necessary job was done, I could start the fun!
I had a vision for this sweet little nightstand. The inspiration came from one of the new decoupage papers I just started stocking in my shop Frame and Frills. Most of the products used in this project are for sale at FrameandFrills.com, (even the finished nightstand is available, but it is a one of a kind, so when it’s gone, it’s gone).
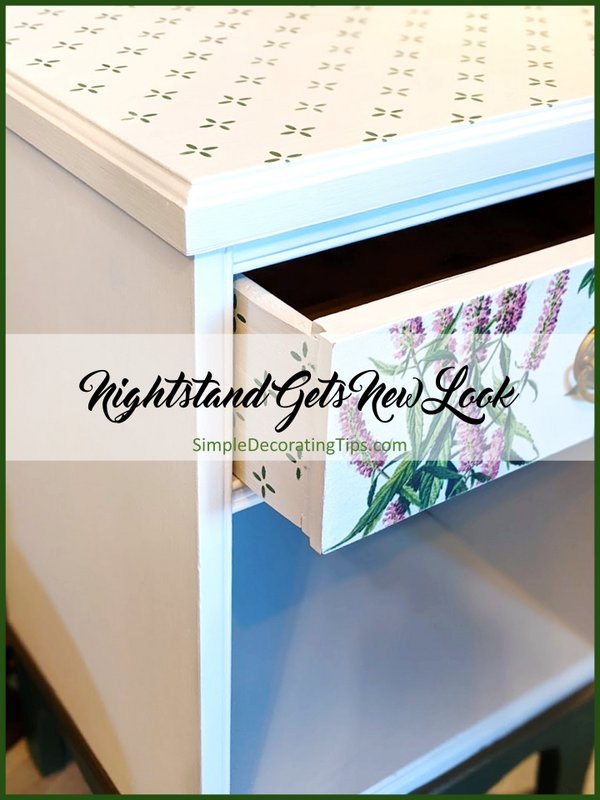
For the main body, the nightstand was painted in 2 coats of ‘ Lamp White‘ which is a white with a grey hue.
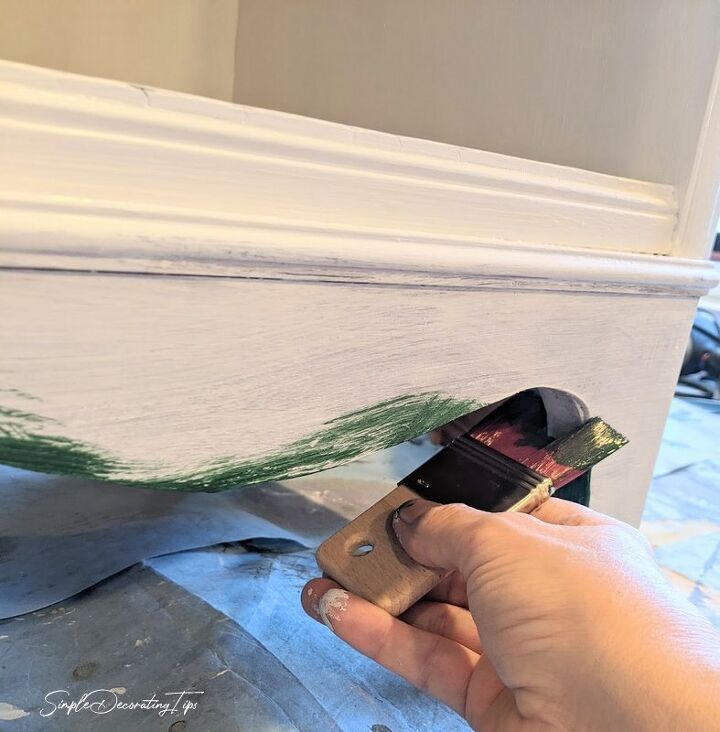
Taking color clues from that decoupage paper that I planned to apply to the drawer front, I painted an accent color in Fusion Mineral Paint ‘Pressed Fern’, a lovely vintage deep green color.
See that cute little brush I’m getting the under part of the curves with? That is in the line of my favorite brushes! I stock 3 sizes of the One Series brushes, this small one with a stub handle is perfect for getting in tight places. All the brushes from this line have super fine synthetic bristles and lay the paint out so super smooth. If you’re having problems with brush strokes, I highly recommend the One Series brushes by Staalmeester.
Another ‘Pressed Fern’ accent I decided to add was with a simple stencil.
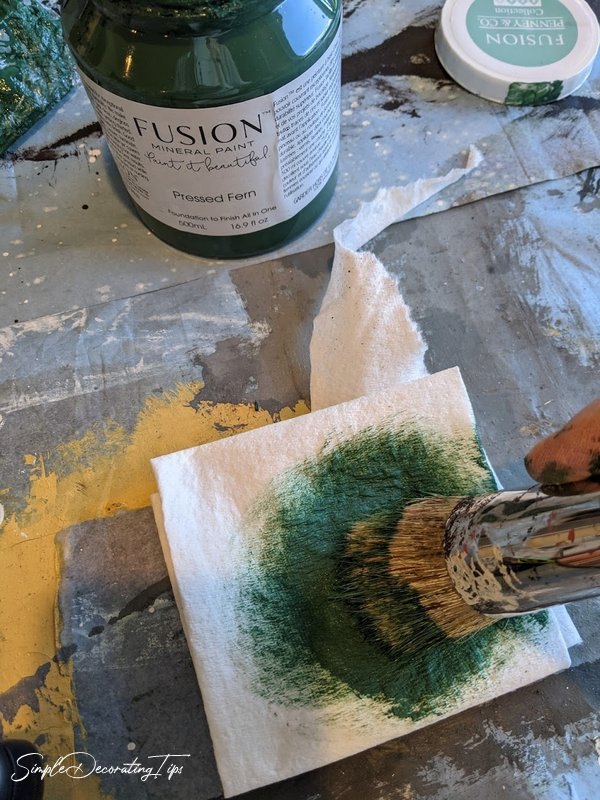
Using a stencil brush and folded up paper towel, I dabbed the brush in the paint, then off-loaded most of it on the paper towel before I started to use it to stencil.
That way when I stenciled, (which is rubbing the flat bristles in a circular motion around the stencil) it didn’t leave an excess of paint that could seep under the stencil.
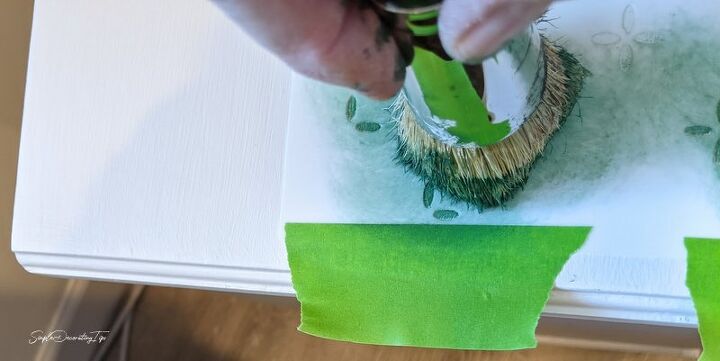
Another stenciling tip is to use painter’s tape to hold the stencil in place. A tiny slip of movement can lead to a pattern mishap.
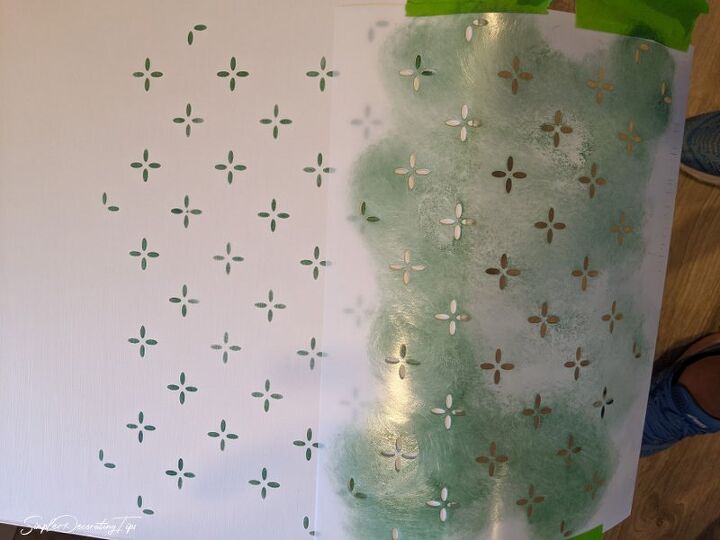
The stencil has a repeat pattern, so I laid it across where I already stenciled on the table to perfectly match the pattern through it.
Now to that decoupage paper for the drawer front. This is a Re-Design with Prima decoupage paper. That’s what they call it at least…
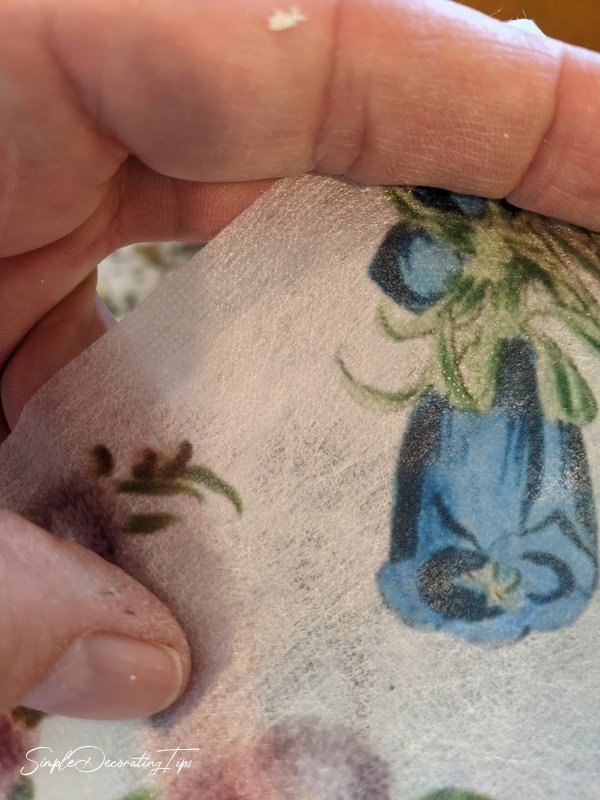
It’s more like fabric to me. It feels like a dryer sheet. There is a definite weave texture in the printed material. It’s very different from the Mint by Michelle decoupage papers I stock in the shop too.
This tissue paper is transparent, so to make the colors pop, it’s ideal to decoupage over a white painted background.
To decoupage the drawer front, I first spread an even coat of Fusion Decoupage and Transfer Gel on the drawer front.
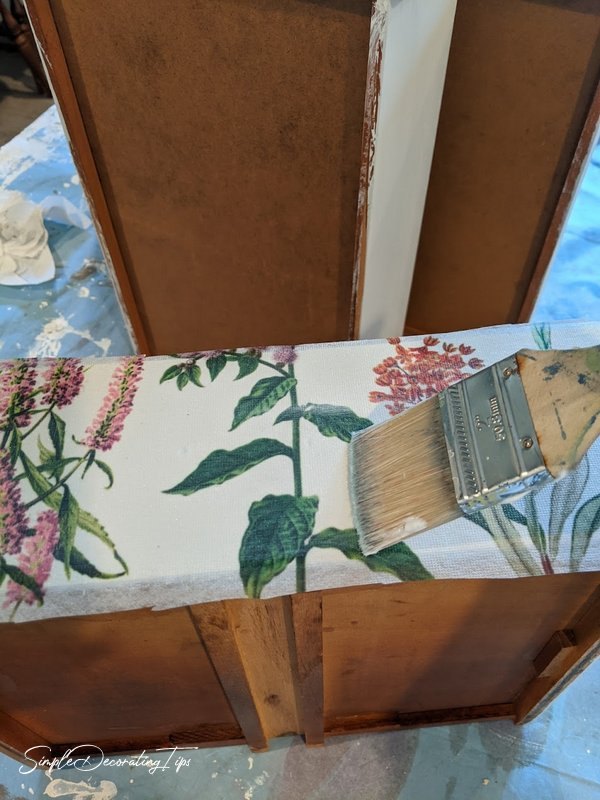
Next, I laid a cut piece of the paper on the drawer. (I cut it a bit wider and longer than the actual drawer for the rough size. I’ll sand it once it dry to fit exactly to the right size.) I coated the top of the decoupage paper with another layer of the Gel. This ensures the paper is securely affixed to the furniture, and also seals and protects the paper.
Here is a short video I made on a different project showing how to perfectly trim the decoupage paper from the drawer front:
It’s important to wait until the decoupage paper is totally dry for this trimming technique!
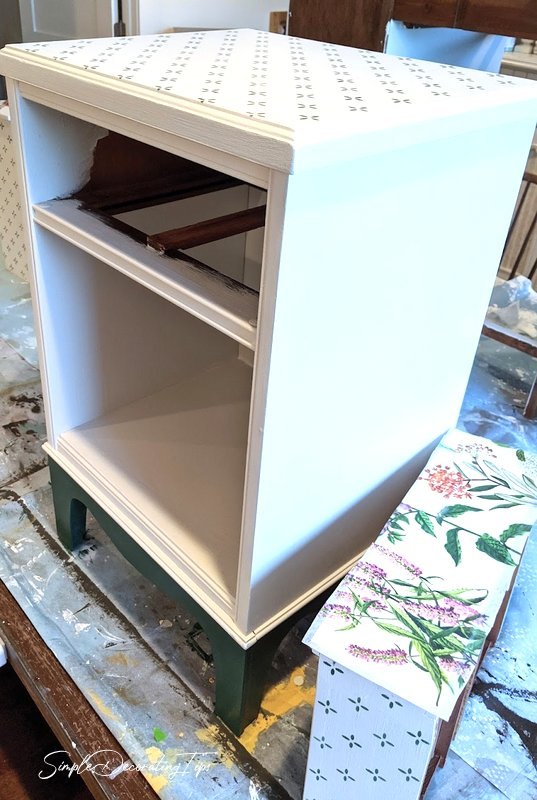
As the drawer front was drying, I decided to add a little pizzazz to the nightstand…
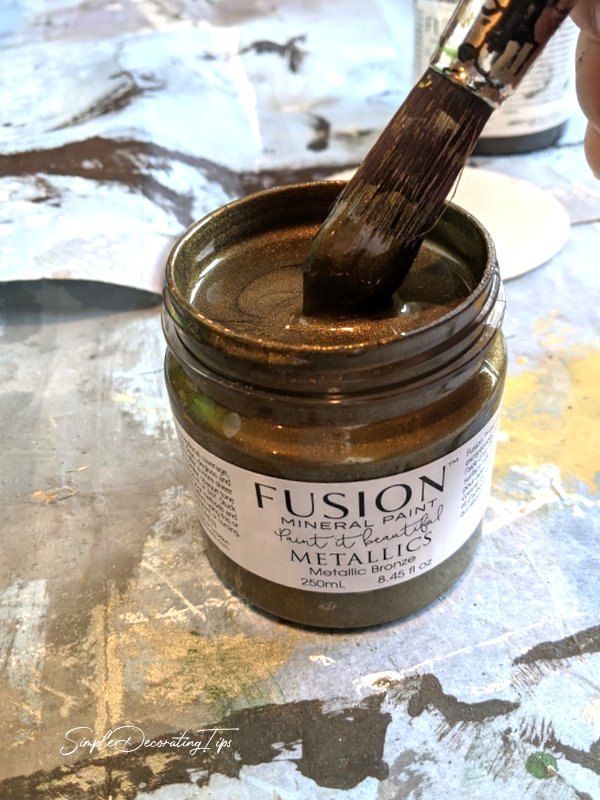
I just received the shipment of the new ‘Bronze’ color from Fusion Metallics in the shop. My favorite Metallics color was ‘Vintage Gold’, but I think I may have a new favorite!
One coat of ‘Ash’ and then 1 coat of ‘Bronze’ and yummy! I love the deep old world subtle color it offers. I put ‘Ash’ on first because Fusion Metallics are a bit translucent so a base color in a similar color helps.
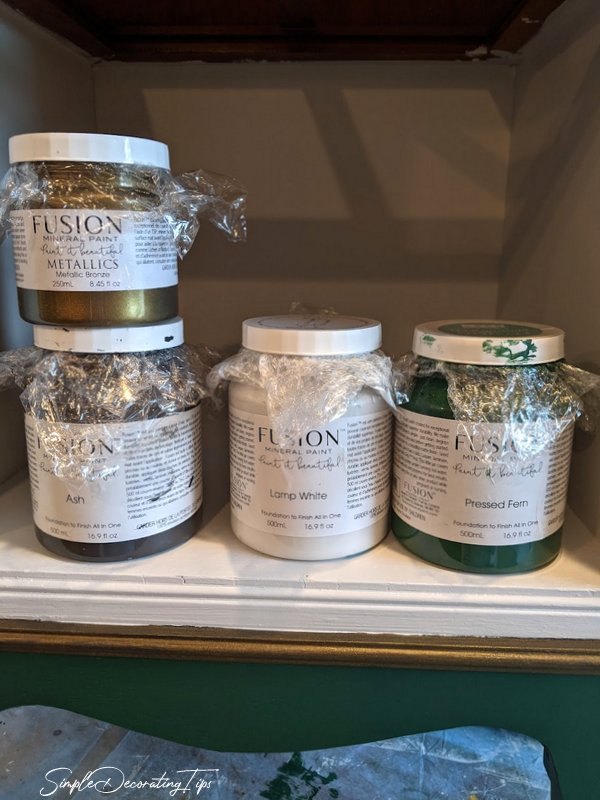
Here are all the colors I used in the project, though ‘Ash’ was just a for a single coat under the ‘Bronze’ and didn’t even show in the finished look.
Putting all the parts together, isn’t she a charming little nightstand?
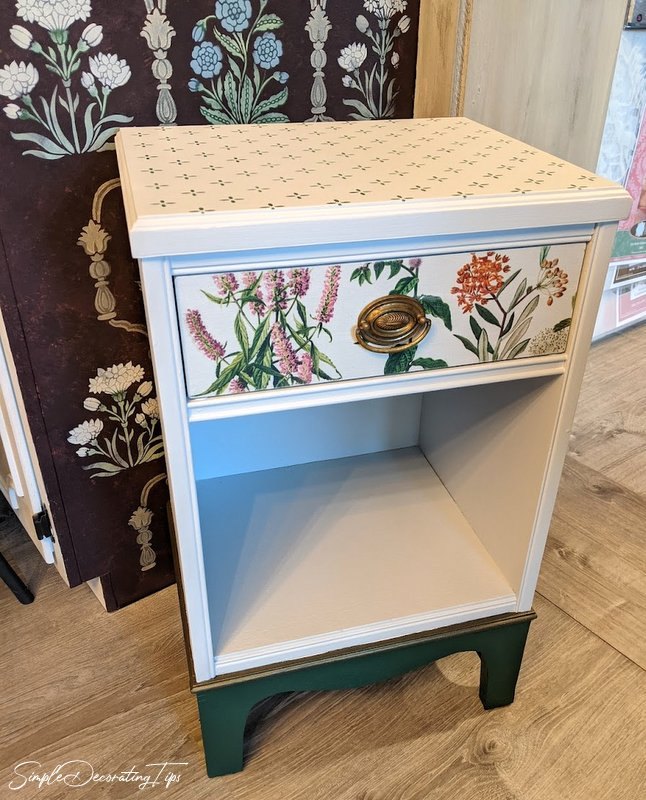
Sweet and fresh!
This drawer front used a small amount of the sheet of decoupage paper. I actually did another project with part of the rest and still have more left for yet another project.
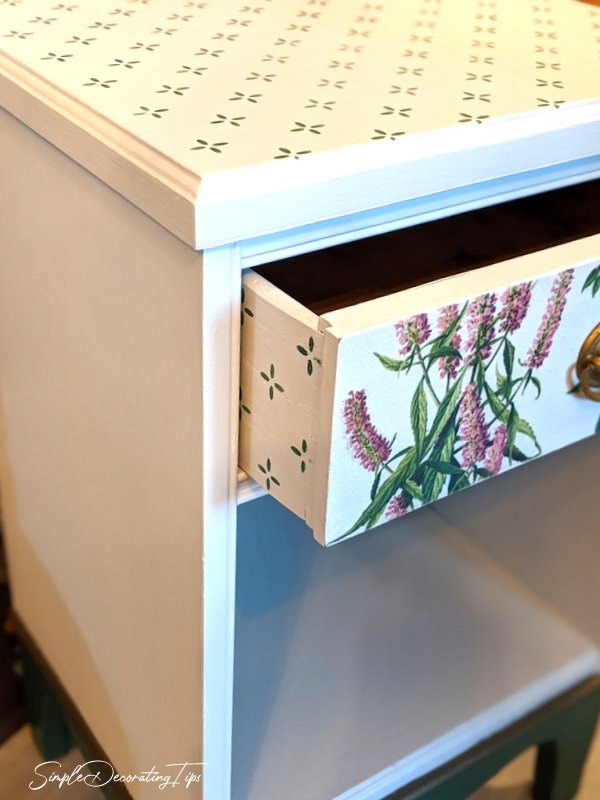
I like to stencil the sides of the drawers for a fun secret surprise. It’s super easy to do and just adds a bit of charm and personal detail to a piece.
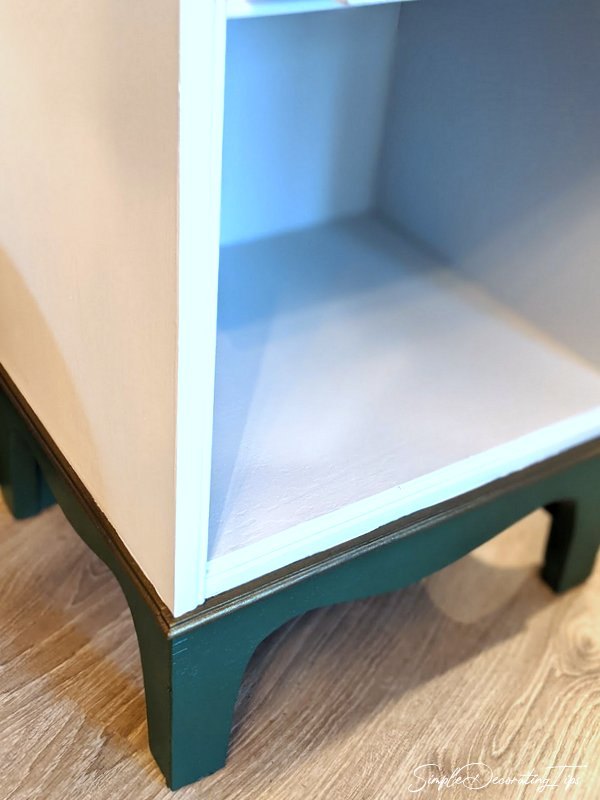
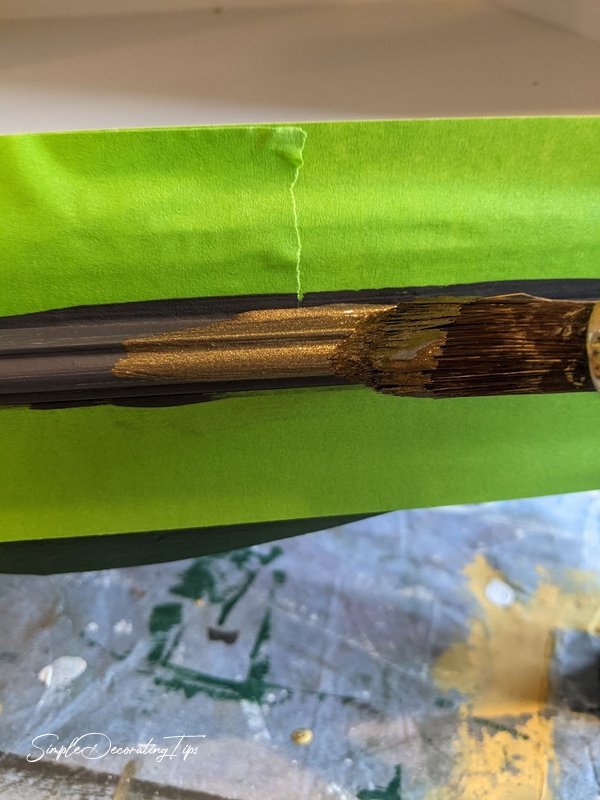
The bottom detail isn’t overdone, just a touch to compliment and pull the piece together. That metallic color ‘Bronze’ looks perfect with the truly aged vintage brass hardware.
Here is the link if you’re interested in purchasing this nightstand from the shop. (sorry, at this time I don’t offer shipping on furniture)
Here is the shopping list, (in order of use):
- TSP Alternative
- BIN Primer, (I don’t stock BIN but it is readily available)
- One Series Brushes
- Lamp White Fusion Mineral Paint
- Pressed Fern Fusion Mineral Paint
- Stencil and Stencil brush, (available in person only)
- Fusion Decoupage and Transfer Gel
- Wild Herbs Prima Decoupage Paper
- Bronze Fusion Metallics
You can also find me at Frame and Frills! I offer decorating coaching and stock amazing DIY products like Fusion Mineral Paint, Stencils, Mint by Michelle decoupage papers and ReDesign with Prima Transfers in the shop. You can shop in person or online.
Resources for this project:
See all materials


Comments
Join the conversation
-
Bravo 👏
-
Absolutely beautiful! Can't wait to try myself! 💗🥰❗


Frequently asked questions
Have a question about this project?
Where did you get the stubby brush?