


Occasional Table Makeover

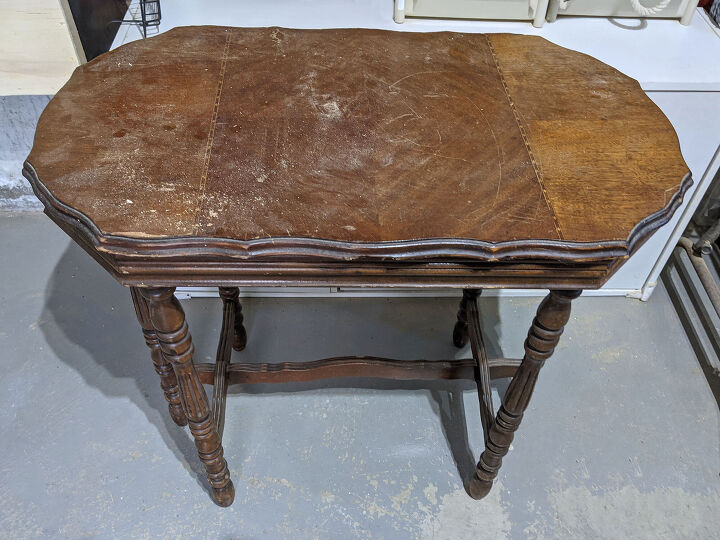
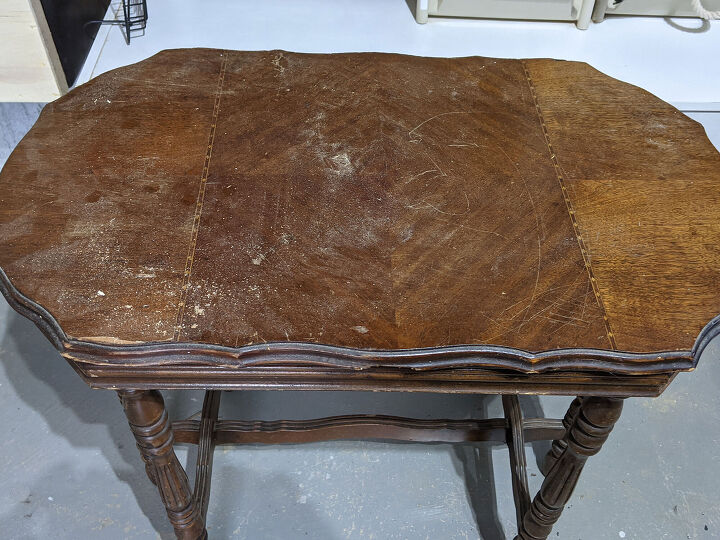
I found a cute little wood table on marketplace for $5 and scooped it up. It was pretty beat up and drab so I gave it a makeover.
I was hoping the top was solid wood so I could sand and re-stain it, but once I picked it up I could see it had a top layer of veneer because it was cracked around the edges. Ugh.
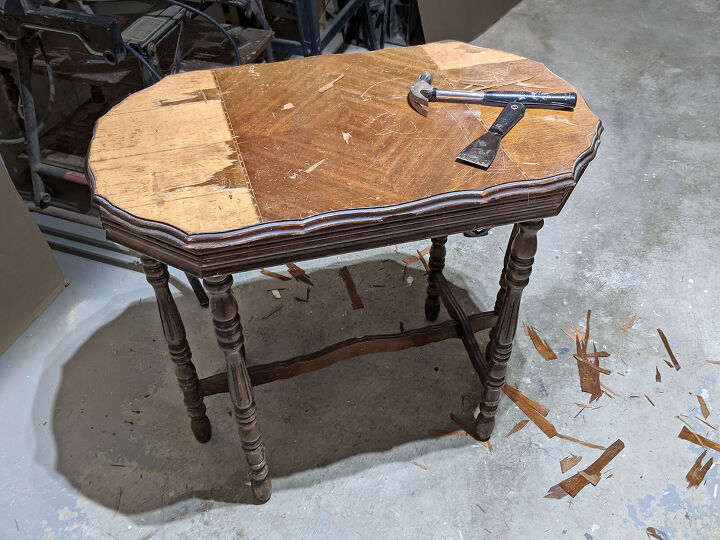
I tried my best to remove the veneer, but it was much harder than I expected! I tried a heat gun, I tried the wet towel trick, I tried a hammer and putty knife…it was not coming off in the center! So I decided to give up on that idea and paint the top instead.
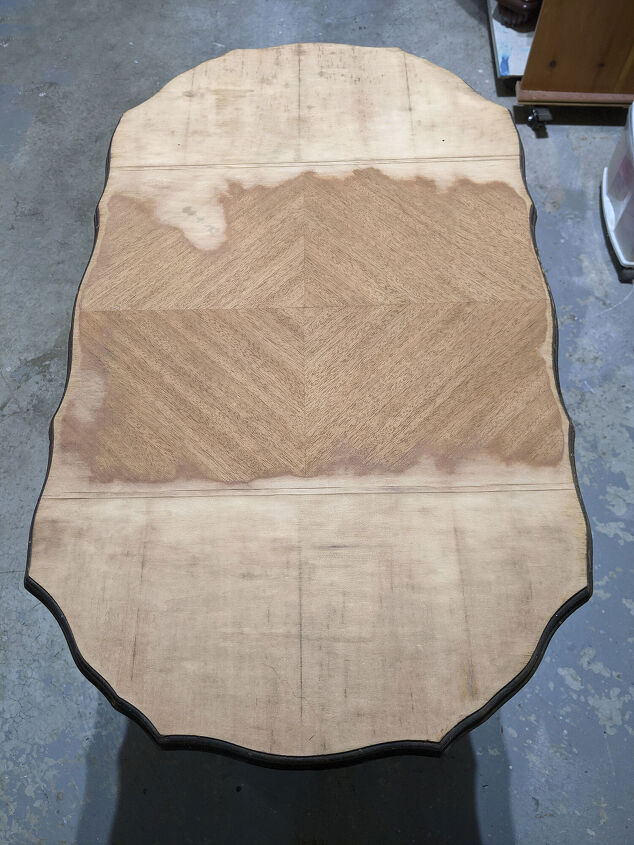
I sanded it down, using an orbital sander and 80 grit paper, so the ridges on the veneer would smooth out. Afterwards I sanded it again with 120 grit for a nice smooth finish. I gave the legs a light sanding by hand, using a sanding block.
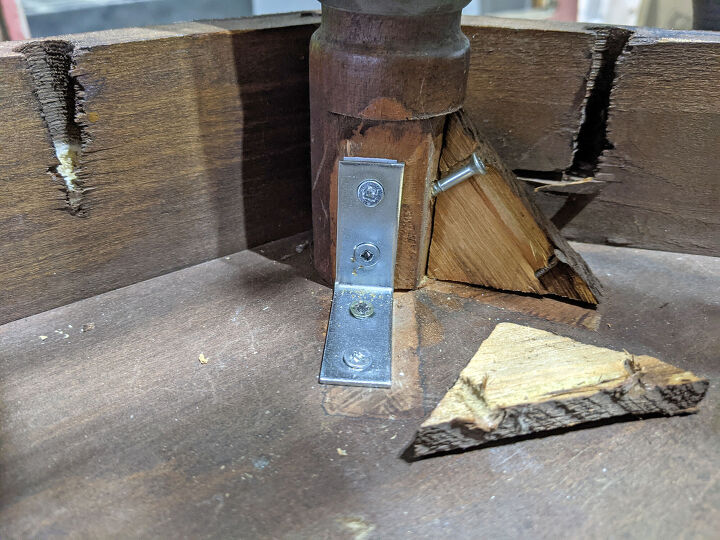
The table was wobbly, so I replaced the brittle and cracked brackets with metal L brackets for sturdiness.
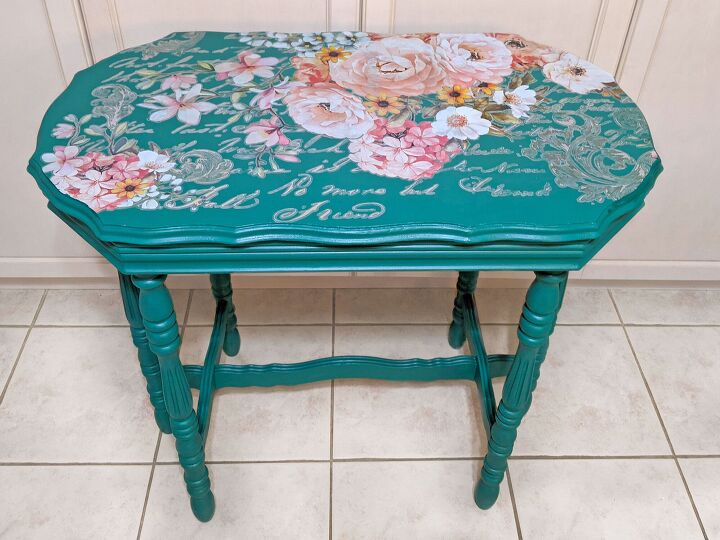
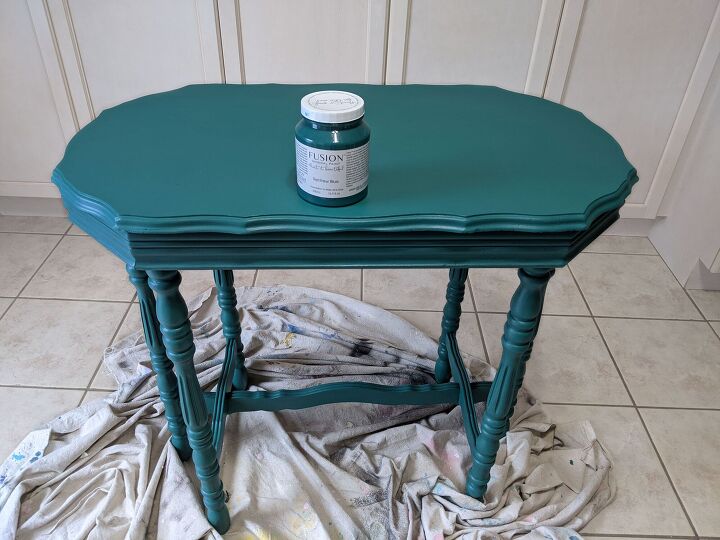
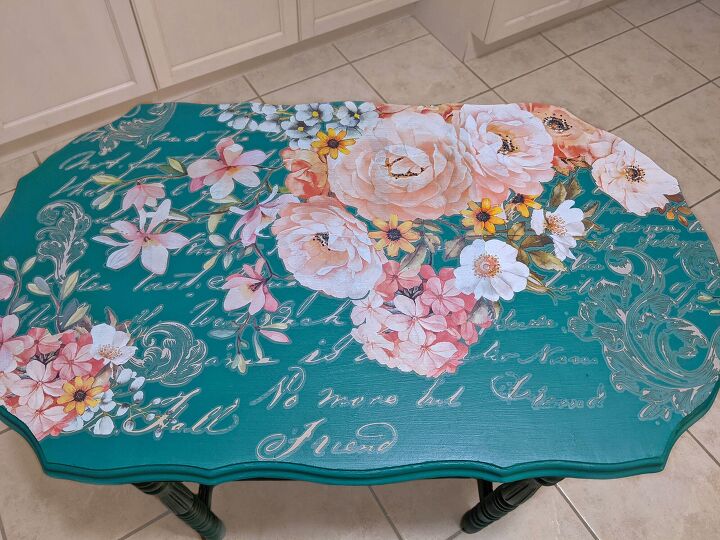
I cleaned the table with TSP and painted it with blue mineral paint, two coats. Even though it’s blue, it really looks more on the green side to me. It’s a beautiful shade that I’d never tried before.
For some reason, after I painted it, I totally lost motivation and this table sat in the middle of our kitchen all summer!!!! It happens. I’m not proud.
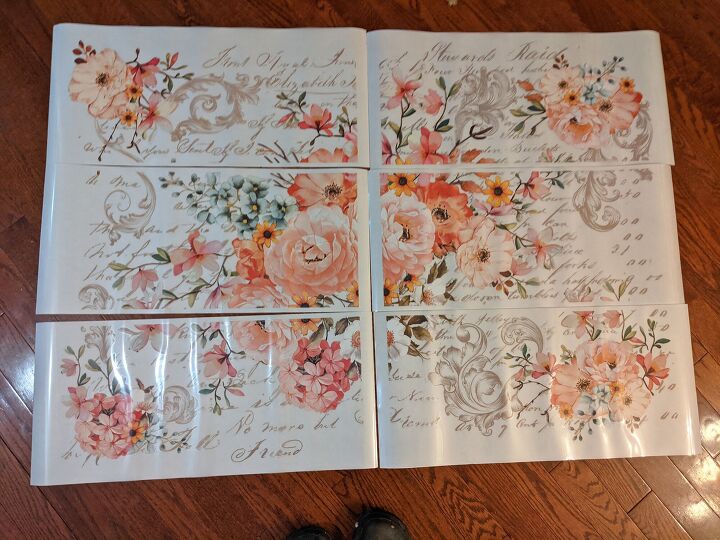
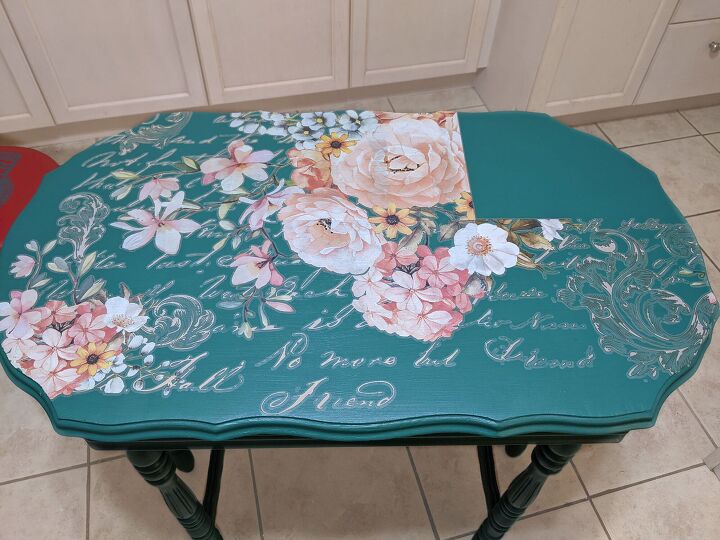
But alas, I decided it was time to finish this project (or throw it to the curb, which I would never do), so I dug deep and took it across the finish line. Because the top was painted the same as the base, it really wasn’t speaking to me. Boring. I had a furniture redesign transfer that I had bought for another project and never used, so I decided to use that on the table top to give it some visual interest. The transfer was divided into six pieces, I laid them out on the floor, measured the table top, and chose the four pieces I wanted to use.
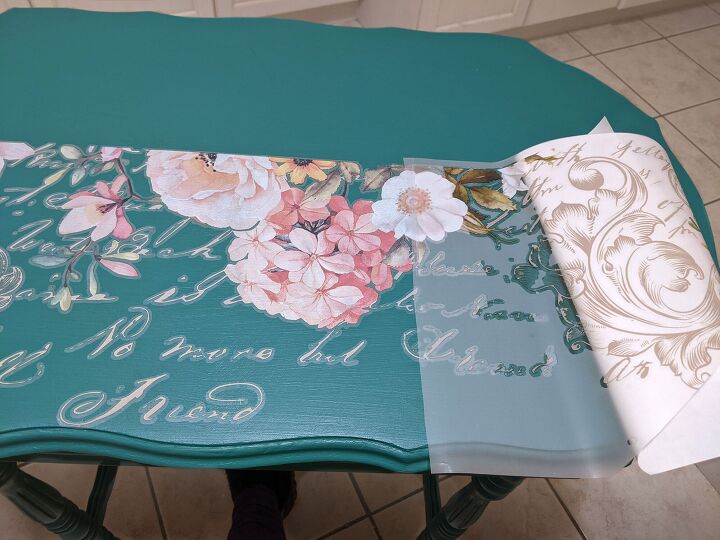
I started on one corner and cut off the excess (my table wasn’t as wide as the two transfer pieces side-by-side). If you haven’t done a transfer before, they’re pretty straight forward. You remove the backing a bit at a time, rub, rub, rub the design onto the furniture until it sticks on and nothing is left on the plastic coating. They’re a pretty great invention for those of us lacking artistic talent, in my opinion!
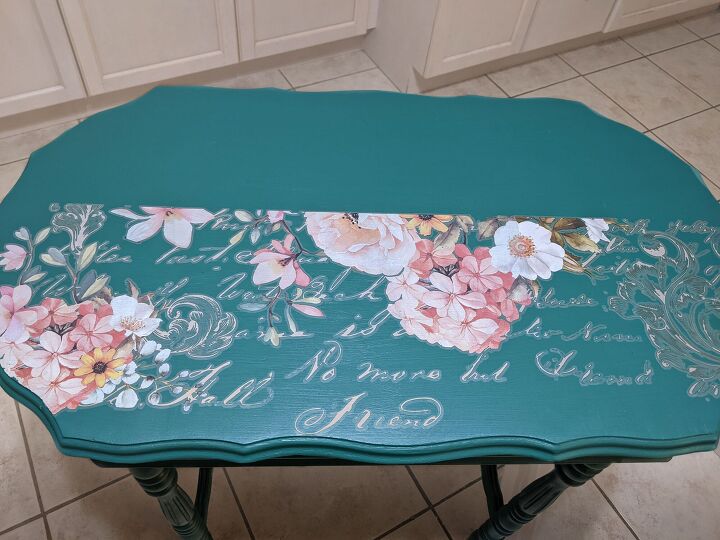
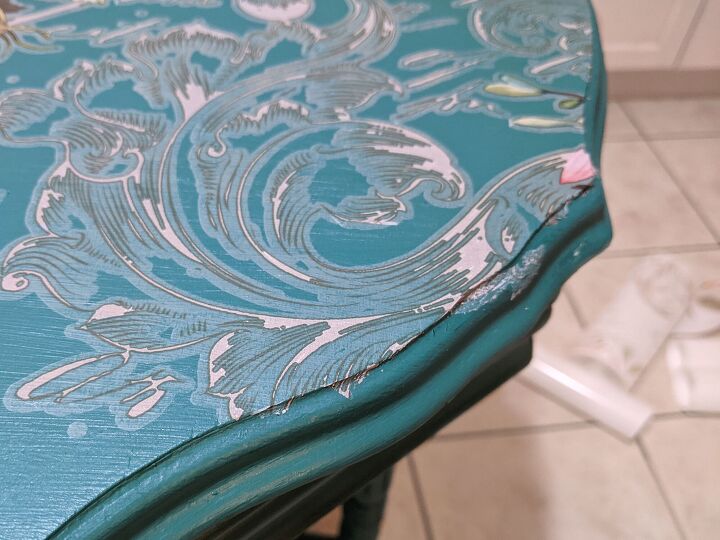
I few spots on the edges of the table had transfer material stuck to it, so I scraped it off with my thumb nail and used a little precision brush and painted over with the original paint colour for a nice crisp edge.
The next day I sealed everything with Fusion wipe-on poly, applied with a damp rag. I forgot that fusion wipe-on poly is not recommended for darker colours, but fortunately it didn’t end up streaky (likely due to the lighter colours in the design transfer)! I’ve made that horrible mistake before and can’t believe I forgot! But "all’s well that ends well," as they say.
And after this table invading our kitchen space all summer…it’s finally done!
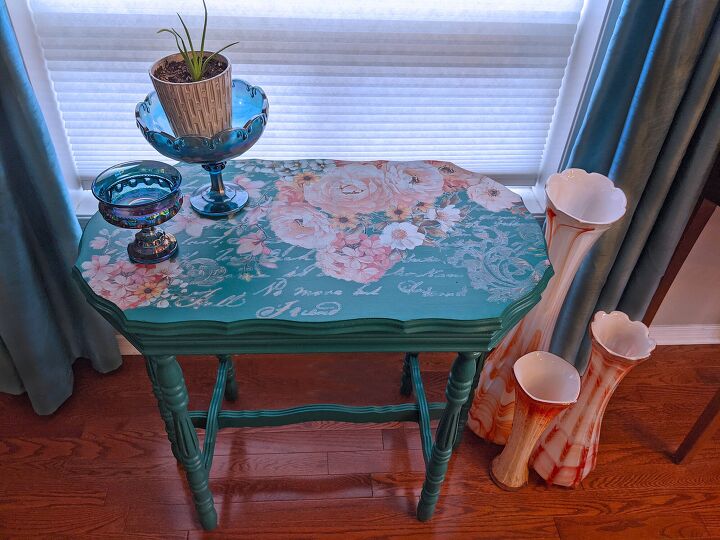
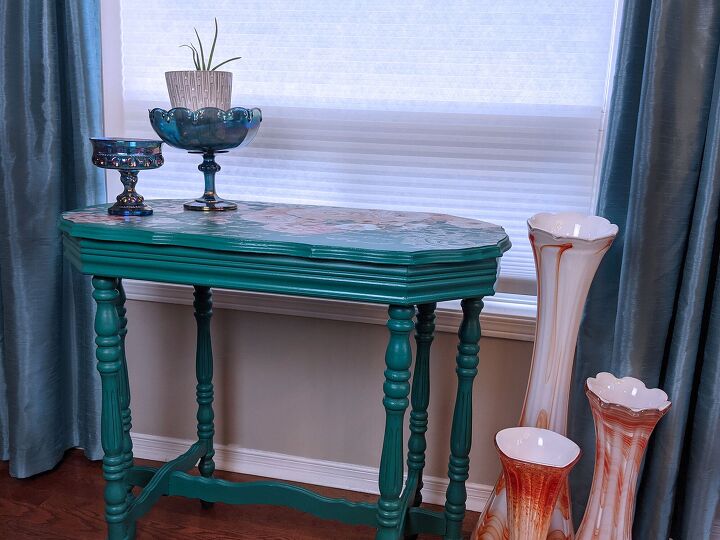
I think it turned out pretty cute, the design transfer gave it the little edge it needed. What do you think?

Resources for this project:
See all materials


Comments
Join the conversation
-
I like the base color. The decal is nice but for some reason I see a faux marble look to top. Either way the basic table is nice and versatile and open to many design ideas
-
I’m going to look for a table like yours so I can try this project
it came out beautiful. I’m not a blue person but this green/blue is perfect for anywhere
where can I purchase transfers


Frequently asked questions
Have a question about this project?
Love It! It's just beautiful!
Did you give it a final coat of something to protect it?