


Outdated Nightstand to Old, Farmhouse Chic!

9 Materials
$10
2 Days
Easy
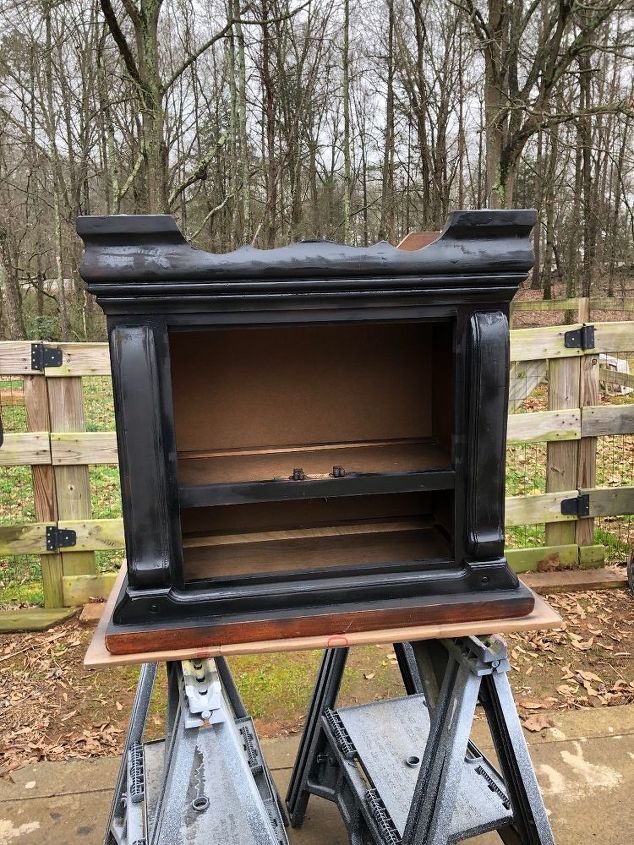
So, I picked up this VERY outdated nightstand awhile back. Finally getting around to working on it. My husband (the enabler) said it would look good in a farmhouse finish. So, I took his idea and ran with it.
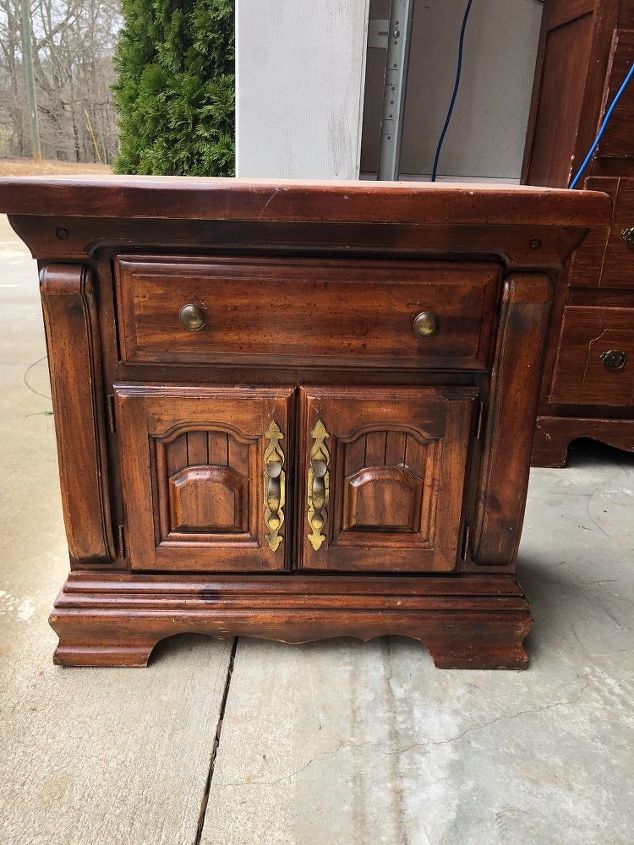
Here it is...rather ugly! Oh, smelly as well. First things first, Mr. Clean to the rescue, and I washed this stinker down.
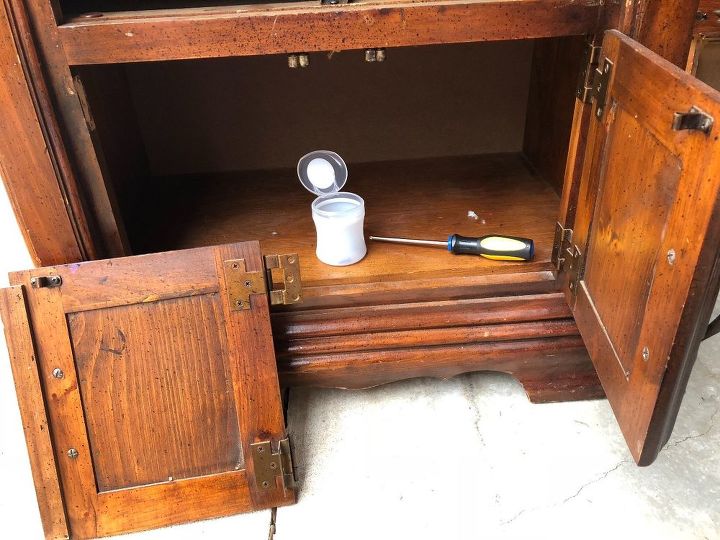
Next up, removing the hardware. I know I have said this before, but those gum containers are great for holding all the screws, even small hinges and knobs. I save mine just for that purpose (we chew a lot of gum).
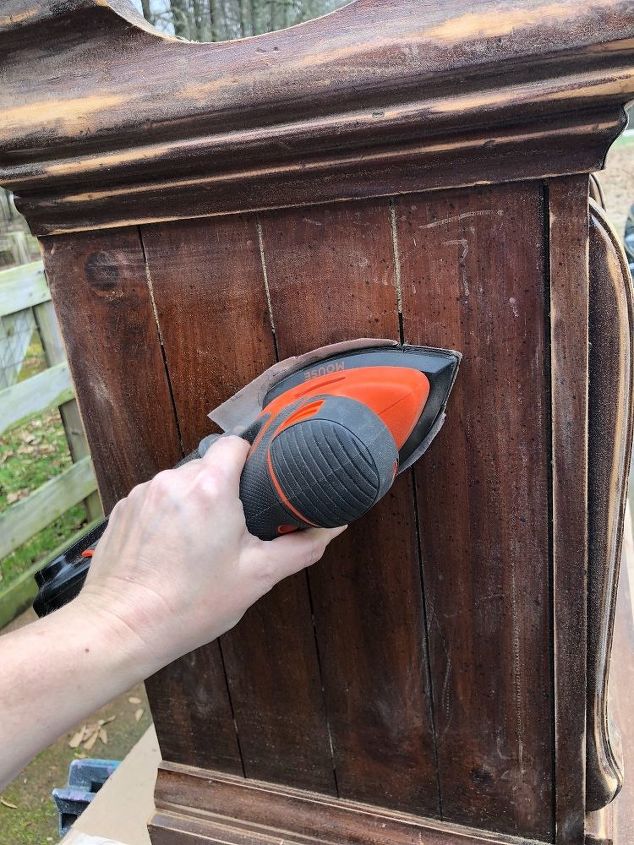
Roughing up that old finish is my next step. On large surfaces, I use a power sander. On smaller areas, nooks and crannies, just sandpaper will do. I generally go with a 120 grit for this stage.

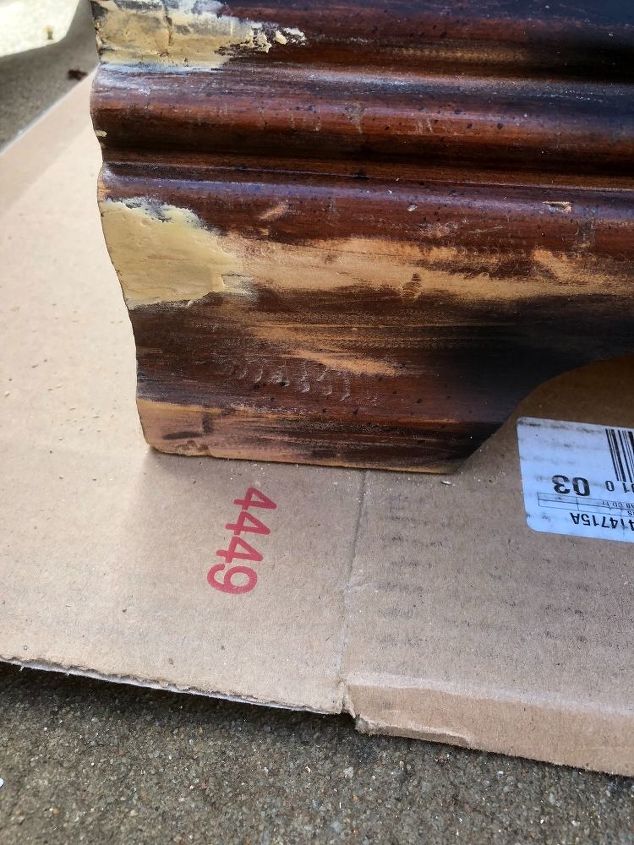
This stinker had some chunks missing. *sigh* nobody wants to just slap paint over that. Wood putty! Here you can see the missing chunks, and after I filled it with wood putty. Now civilized people use a putty knife, but I always end up using my finger. 😂
Once the putty was dry, I sanded it down (using a small piece of 120 grit sandpaper) for a smooth finish. Sometimes you may find that a little more putty is needed. Keep at it until you get a finish you are happy with.
Base coating was the next step. I knew I would be distressing this piece, so a layer of flat black spray paint was needed. Again, whenever I am going to distress, I add a base coat to enhance the aged look....or add a pop of color if you are so inclined.
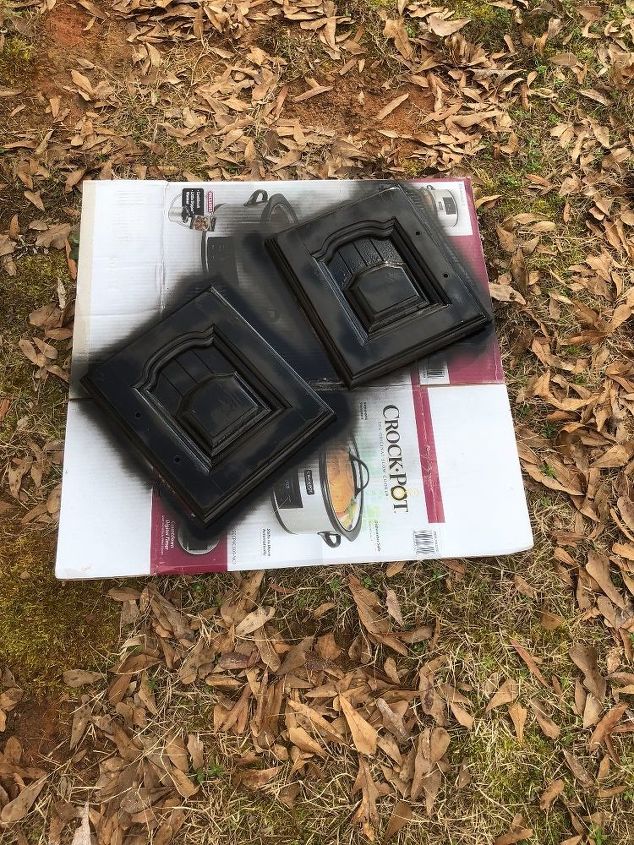
I also base coated the doors and drawer. I went with a flat, a satin will work, but the chalk paint adheres better to flat finish.
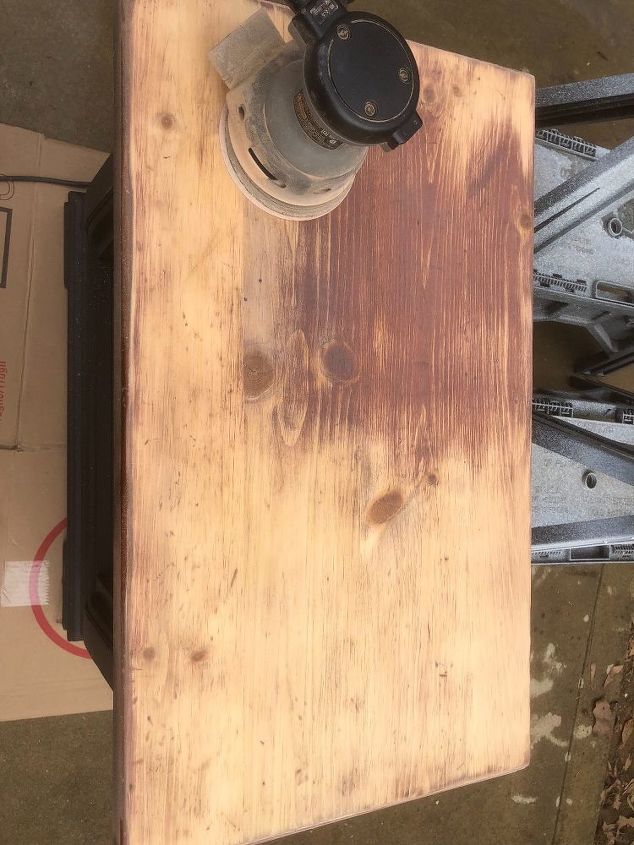
I wanted to stain the top, so sanding down to bare wood was necessary. I use an orbital sander for this, starting with 120 grit and finishing with 220 grit. Then I applied stain. I just wiped it on with paper towel, allow to set for a couple minutes, then wipe of any excess stain (with paper towel).
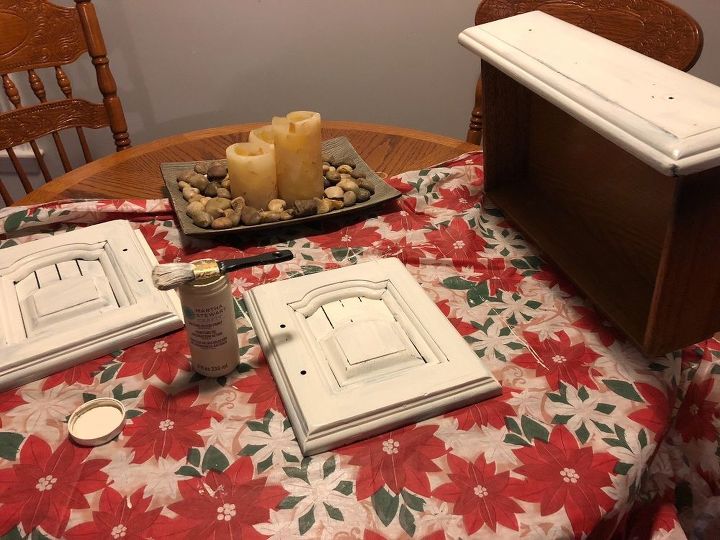
Chalk paint time! At least two coats are needed. A light sanding with a fine grit (320) sand paper in between coats will give you a nice smooth finish.
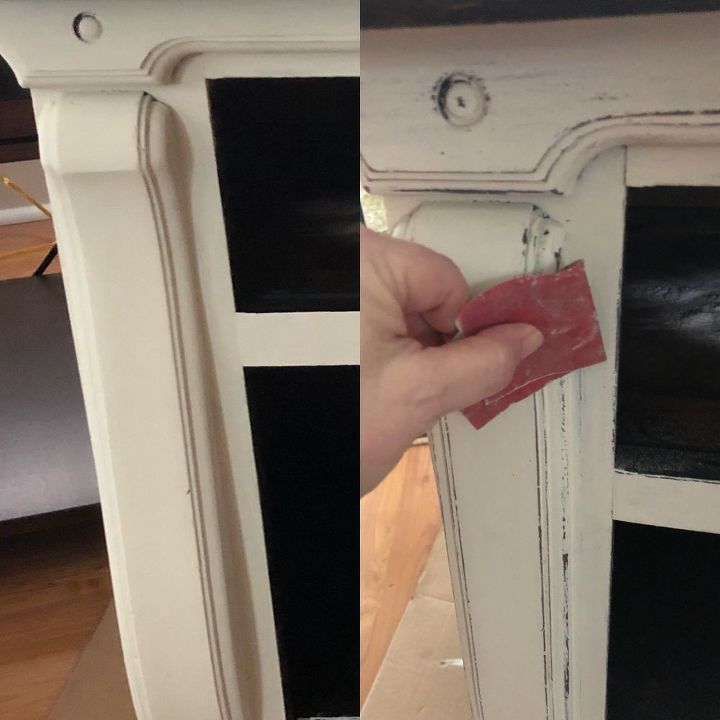
After I finished chalk paint, I grabbed my 220 grit sandpaper and started distressing. I wanted a very farmhouse feel so I heavily distressed.
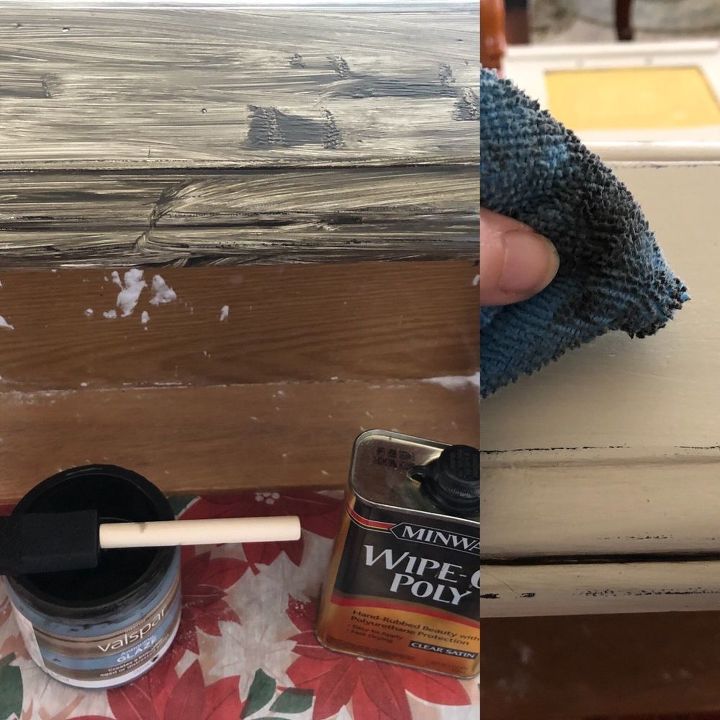
A light coat of poly is needed BEFORE you apply a glaze. I wanted to darken this piece up to give it an aged look. So, I applied a coat of antiquing glaze...this needs wiped down with a damp rag (you will need to rinse the rag frequently) until the desired finish is achieve.
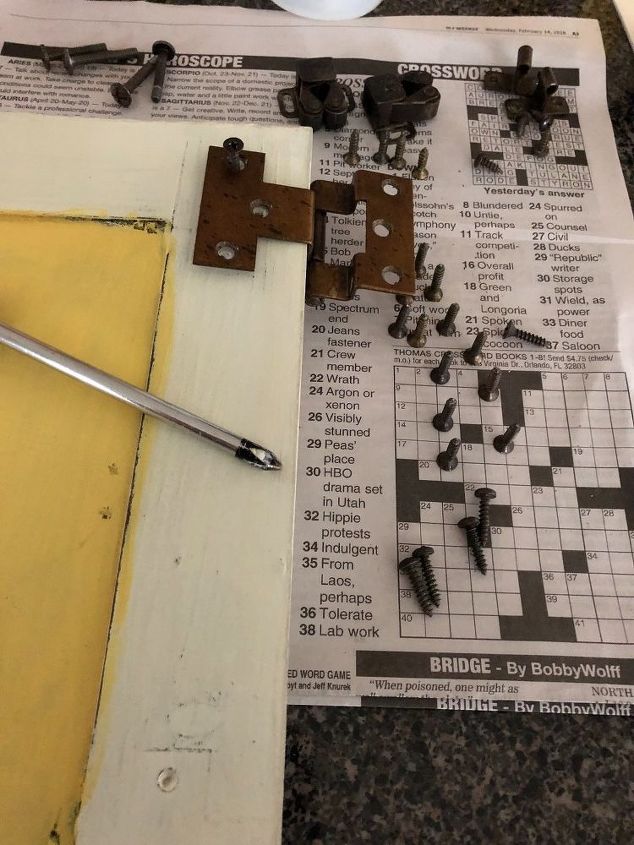
All that hardware had to go back on. You can ignore that crossword puzzle, I like to do those in my spare moments  . By tossing all the screws and small pieces in a container, it makes this step much easier. Oh! I almost forgot about that pop of yellow on the inside of the doors. I wanted to add a little surprise for when you open up the doors.
. By tossing all the screws and small pieces in a container, it makes this step much easier. Oh! I almost forgot about that pop of yellow on the inside of the doors. I wanted to add a little surprise for when you open up the doors. 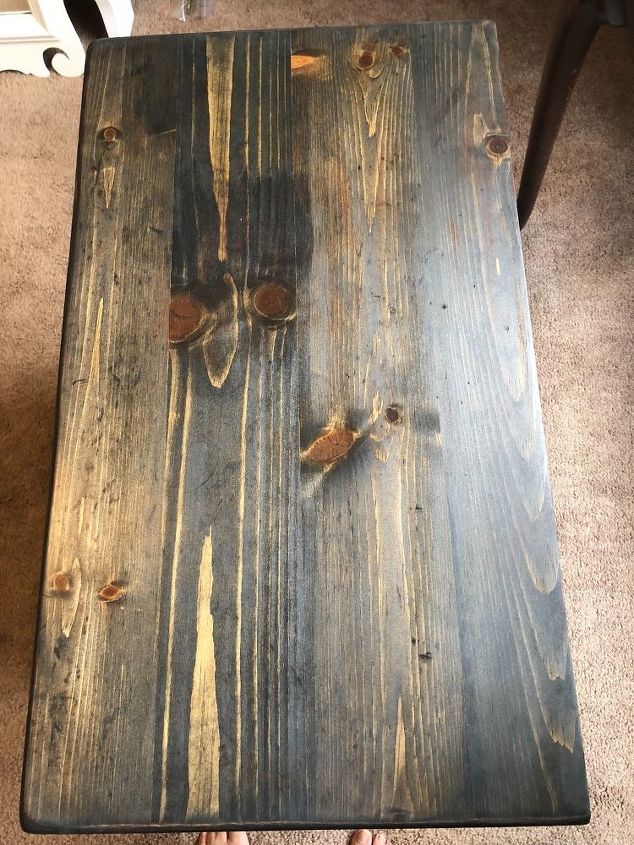
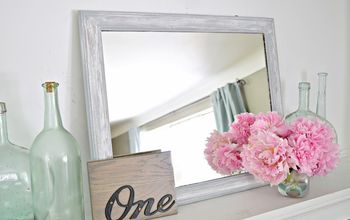
Here is the top after all that hard work, isn't that gorgeous?! I sealed the top with wipe on poly. I recommend you do a couple of coats (wait about 12 hours in between) to protect all that hard work.
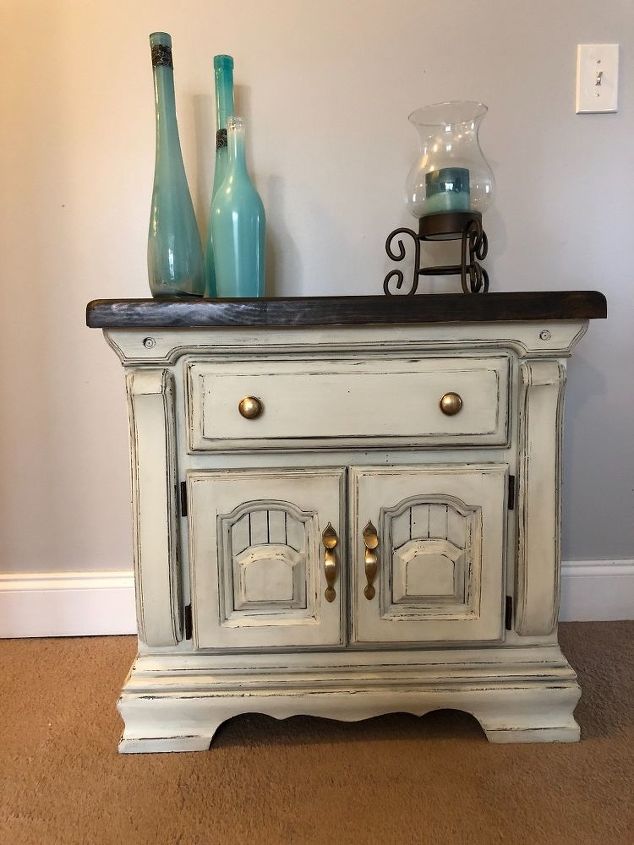
And DONE! I am very pleased with how this piece turned out. Doesn't it look like an old farmhouse piece? Because I ALWAYS forget something...I forgot to say that I scrubbed the hardware with some barkeepers friend before putting back on.
Comments
Join the conversation
3 of 42 comments
-
I’m ready to do this to my old Mediterranean cedar chest!
-
That’s such a beauty!! Outstanding job!! 👏🏼👏🏼👏🏼


Frequently asked questions
Have a question about this project?
What color is the Minwax stain?
I love this and have something very similar I would love to do this to but I’ve never refinished anything. Do you think a beginner could do this?
My bedroom pieces are dark laminated wood. Can it be refinished like this?