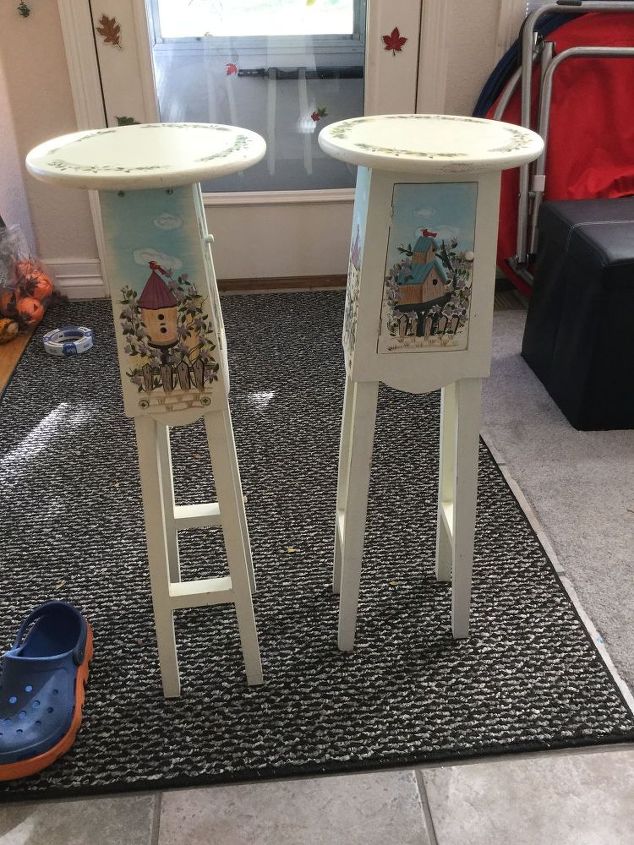
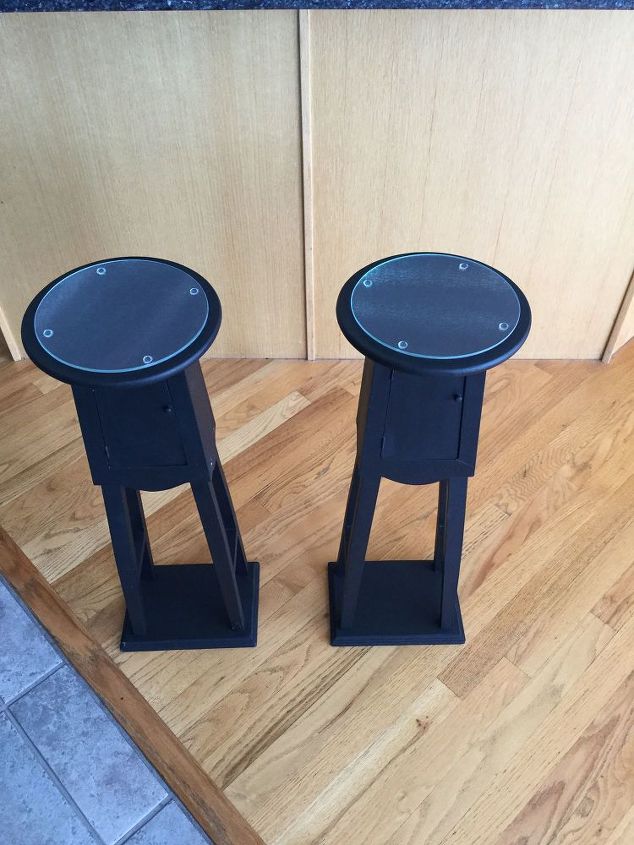
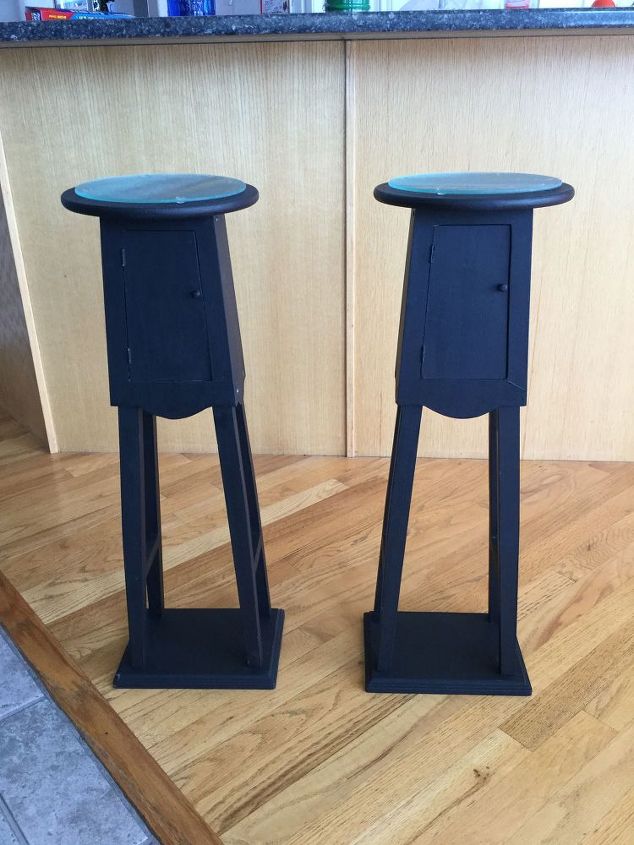
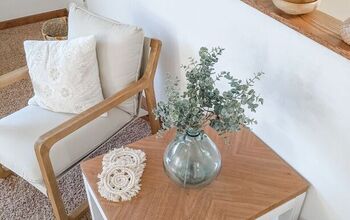
Plant Stands Turned Into End Tables

2 Materials
$10
30 Minutes
Medium
I found these cute little plant stands at a garage sale. I repainted them and turned them into end tables for my house.

I have always wanted to try chalky paint, so I thought I would give it a try on this project. I went with Waverly Chalk in Ink and Waverly Clear Wax and found them both at Walmart.
It truly brushed on easy and dried fast. I did 2 coats to get it covered nicely, letting them dry between each coat. After letting it dry according to the directions I moved to the wax coat. Yes, well this is where I messed it up. I read the directions and it said to put on the wax, wipe off the excess, and buff it out 24 hours later. Well - excess meant I should have basically wiped it all back off. Unfortunately I ended up with a mess. I had to sand down the wax off the tables and repaint them. The chalk paint is very forgiving, I was please that it went back on so well. I let the paint dry, again. This time I put the wax on with a paint brush, then immediately took a cotton t-shirt rag and wiped it off. It's important to work in small amounts at a time. Let it dry for 24 hours, and lightly buffed it with a cotton t-shirt.
After the tables were done, I felt they were too wobbly. I went to Hobby Lobby and bought 2 square boards, painted and waxed them, and my husband screwed them into the legs of the tables. I also bought 2 glass cutting boards at the Dollar Tree to put on top of the tables to protect them.
I am pleased with the way they turned out. They have been getting tons of use already.


I would love to have you stop by my blog    Chas' Crazy Creations  for the full tutorial as well as sign up for my latest creations, posts, recipes, exclusives, and more...


I would love for you to subscribe to my YouTube channel to see more of my crazy creations - https://www.youtube.com/channel/UCIOsMN7hycVRco-MROXwmXg
Suggested materials:
  • Tables
  • Chalk paint
Chas' Crazy Creations
Want more details about this and other DIY projects? Check out my blog post!
Go
Frequently asked questions
Have a question about this project?
  1 question
  • Mary ann waugh Mary ann waugh on Apr 02, 2019

    very unique project! what type of applique did you use on the tops, and did you applique them on?--Mary w.

Comments
Join the conversation
4 of 6 comments
  • Shuganne Shuganne on Jun 09, 2018

    Thank you for sharing your project with us, and your learning process! It's nice to hear you read, and followed, the direcions and got bit by the enthusiasm fairy. I also like how you shook it off and learned from your (their) error.


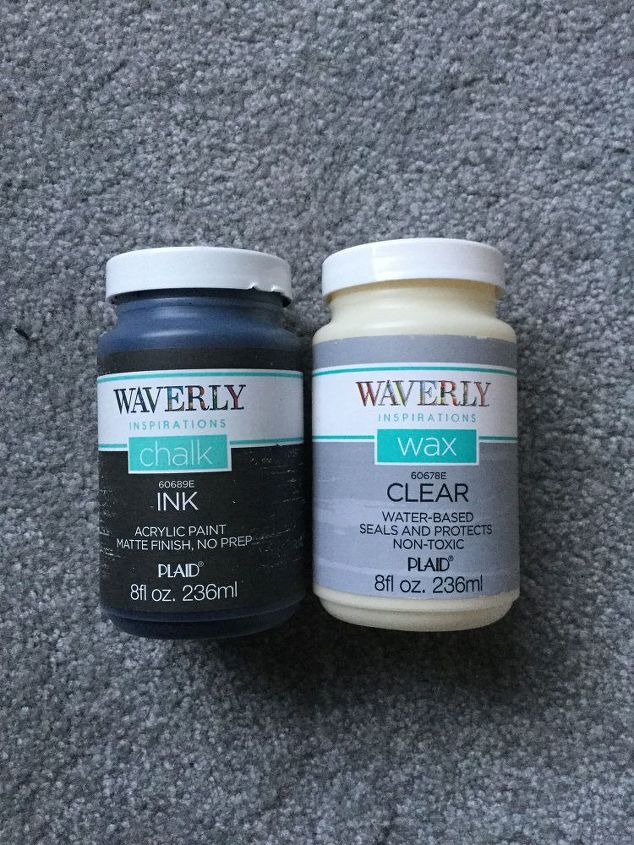
    So many times, I read an article that makes the work sound like an easy yet professional job. (One woman wrote that she put in 100 hours of hand sanding, and then went on to describe the wax step... I almost screamed out loud! Fortunately the dogs are used to this. If i had put 100 hours of anything into a project I'd be telling you about the size of my blisters and how many pain pills I popped, to earn a badge.)


    Anyway, it's nice to meet another human on the DIY trail! I hope no one gives you a hard time about covering the cutesy scenic original paint. Let each woman decide what beauty is, in her home!

    • Chas' Crazy Creations Chas' Crazy Creations on Jun 09, 2018

      You are so very kind, and I absolutely loved reading your comments. Thank you so much for sharing your thoughts and the great giggle. I totally know what you are saying. You are right, I did think a few might give me a hard time for covering the design up. I just wanted them to match my home and use them as little side tables. Thanks again :)

  • Debra Debra on Jun 23, 2019

    Very nice indeed I love them !! What a great find

Next