


Refinished, Vintage Chest of Drawers

9 Materials
$40
3 Days
Medium
This has been setting in the the garage for quite some time. Not gonna lie, I was in no hurry to strip the five layers of paint on it. However, sometimes you just have to suck it up, and get it done.
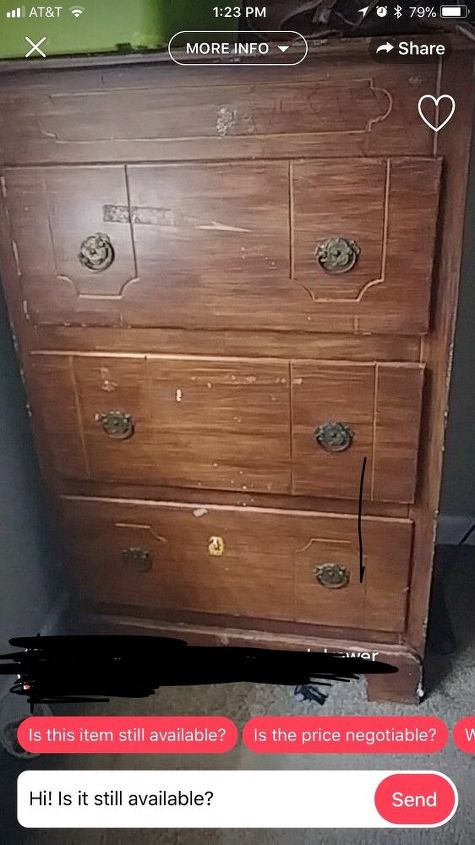
This was the original post from when I purchased this piece. It looks like sometime in September 2017 was when I purchased it...lol
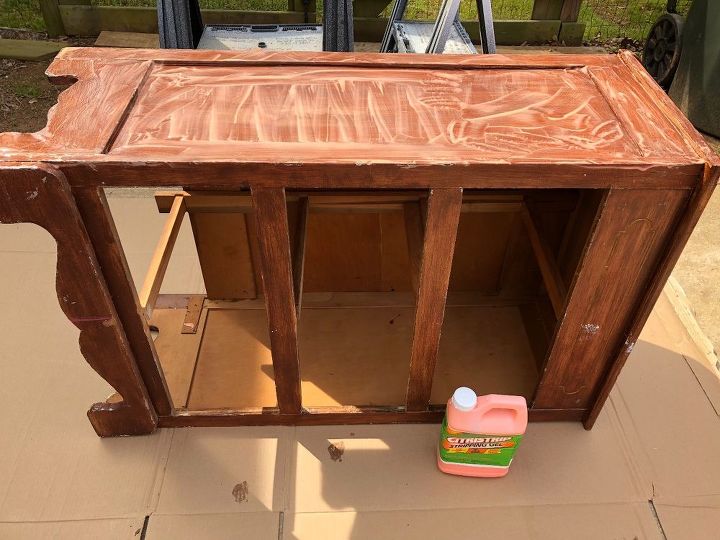
I slathered on some citristrip to get started. *sigh* why do I do this to myself?! It took three rounds of stripper and scraping to get that old paint off.
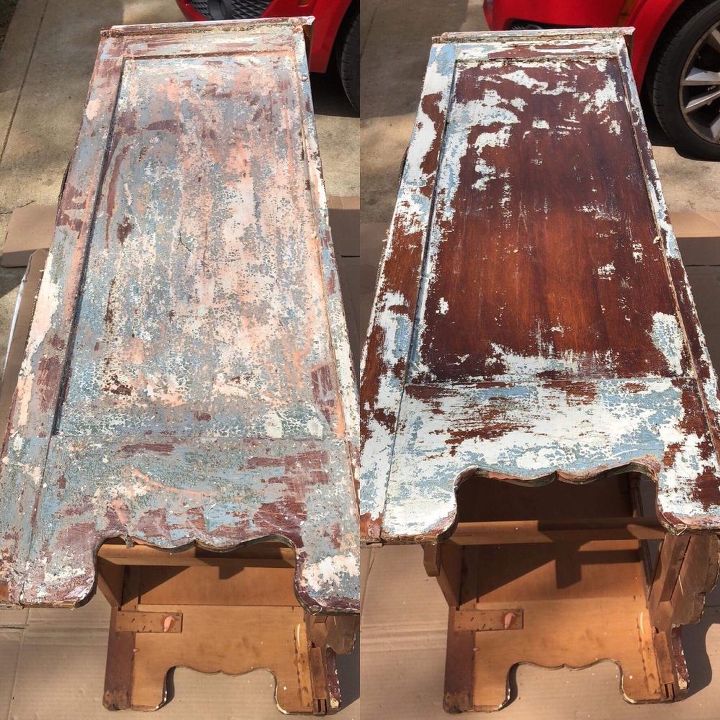
Picture one is after first round of stripper, picture two is after round two!

Since I had recently purchased a heat gun, I decided to use that for paint removal on drawer fronts. It took some time, but it worked really well! You can see that it is taking ALL the layers at once...nice!
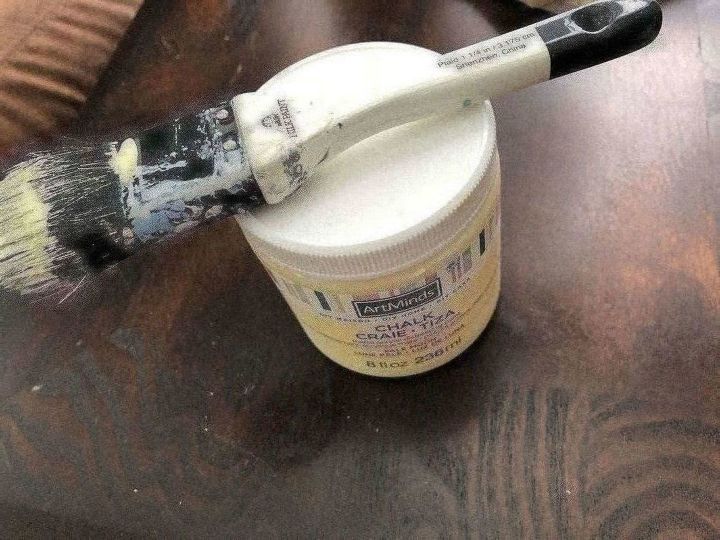
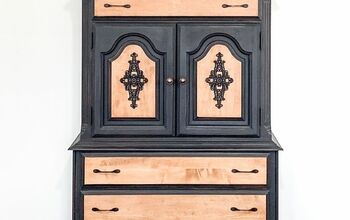
Once I was done using the stripper, I wiped down the piece with a rag and denature alcohol, and gave it a sanding. I chalk painted the body with this soft yellow. I knew I would stain the top and drawer fronts, because I love that combo! I did the same with the drawers after using the heat gun to remove paint.
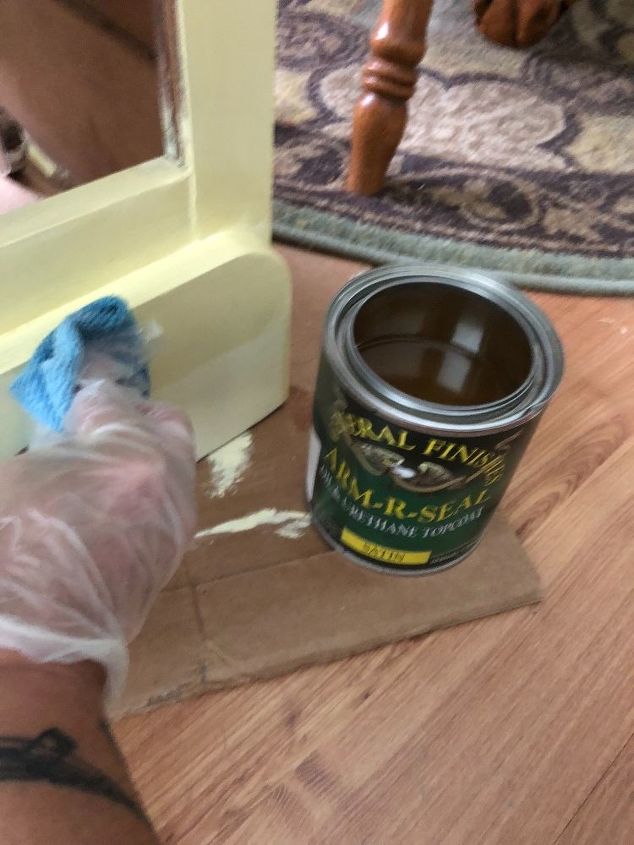
I sealed the chalk paint with General Finishes arm-r-seal satin poly! I used the same sealant over the ebony stain.
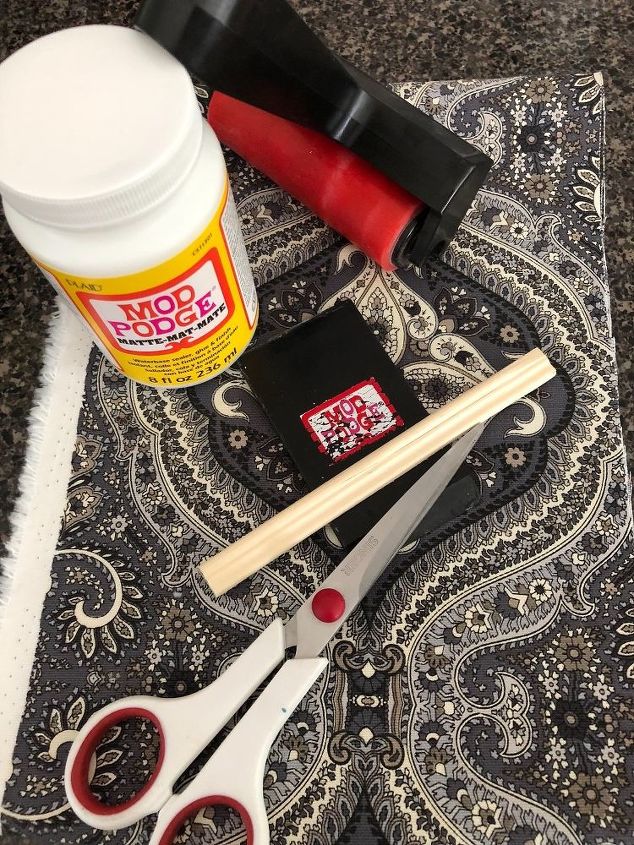
I just wasn’t feeling the plain side panels. Decoupage?! Why not! I grabbed the supplies and some trim and got busy. Yes, I forgot pics during this phase. I measured and cut material, slathered on some mod podge, and applied material. I like to start at the top, going down a section at a time. You can see here that I use a roller to help get out any air bubbles. Also pictured is a piece of the trim used. I can't stand it when a piece looks "unfinished," and trim really makes the difference!
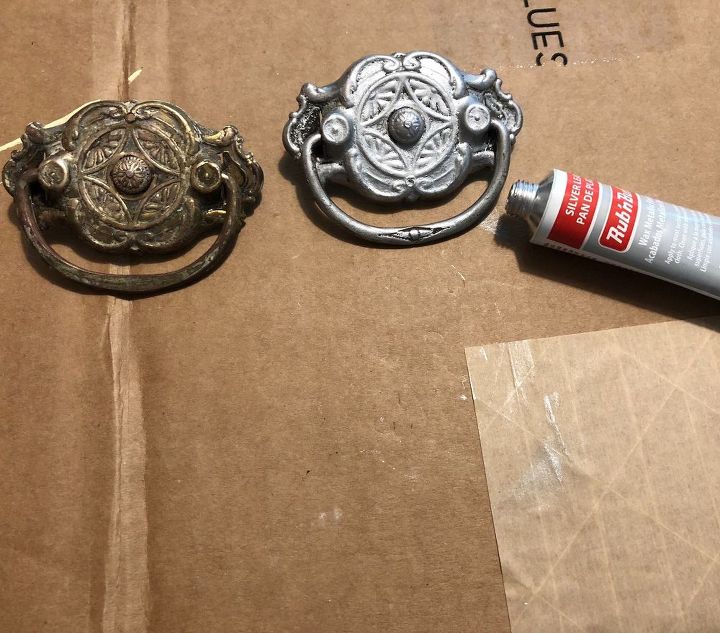
Obviously the hardware was just not going to match my vision...so, after a good scrubbing, I applied silver leaf rub n buff! After that dried, I sprayed them with lacquer, let them dry again, glazed them, let them dry, and another coat of lacquer. Whew! Patience...lol
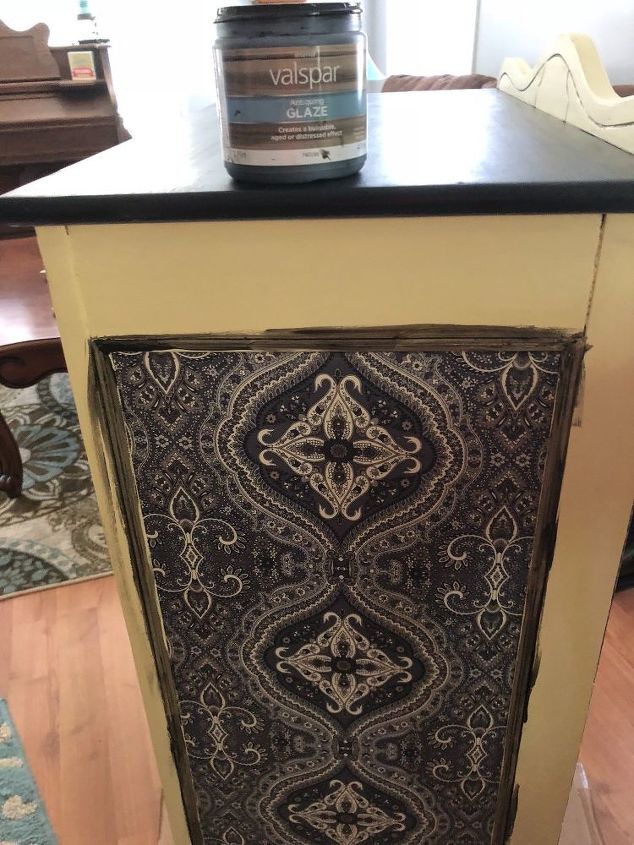
Once the sealant was dry, I used my favorite glaze to give some dimensio to the chalk paint. Here you can see the glaze painted over the trim. Using a damp cloth, I wipe the excess off. I go over the entire piece this way (not the fabric).
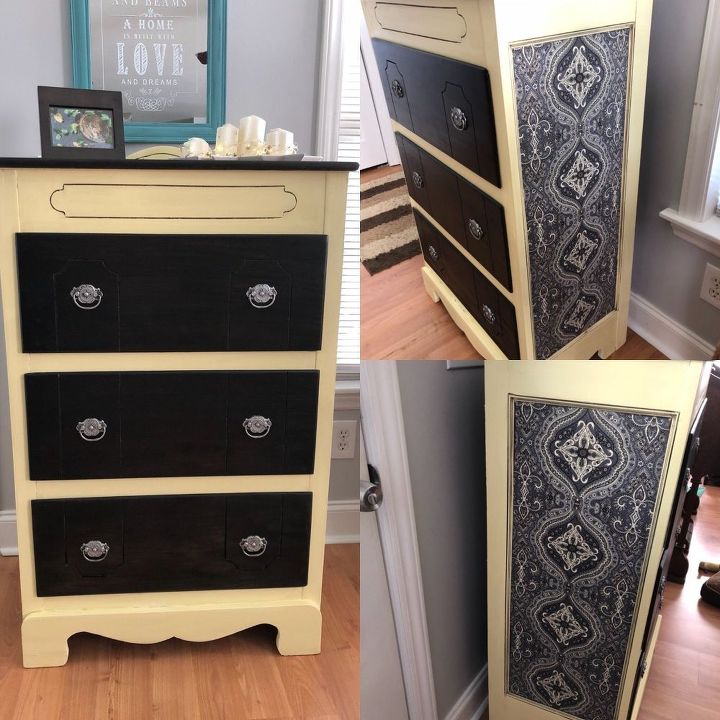
I put the drawer pulls back on, and all done! Look at this cutie now.
Resources for this project:
See all materials


Any price and availability information displayed on [relevant Amazon Site(s), as applicable] at the time of purchase will apply to the purchase of this product.
Hometalk may collect a small share of sales from the links on this page.More info
Comments
Join the conversation
4 of 66 comments
-
You put in a lot of work and it really shows! This piece is stunning!
-
Awesome job!


Frequently asked questions
Have a question about this project?
This project turned out beautifully! I am in love with the fabric you used. Can you tell me where you purchased it? Thank you.
Hi! I’m new to this kind of project so I’m curious why you stripped the dresser if you were just going to paint it?
Love the results!!!