


Renovated Side Table With a Pop of Color

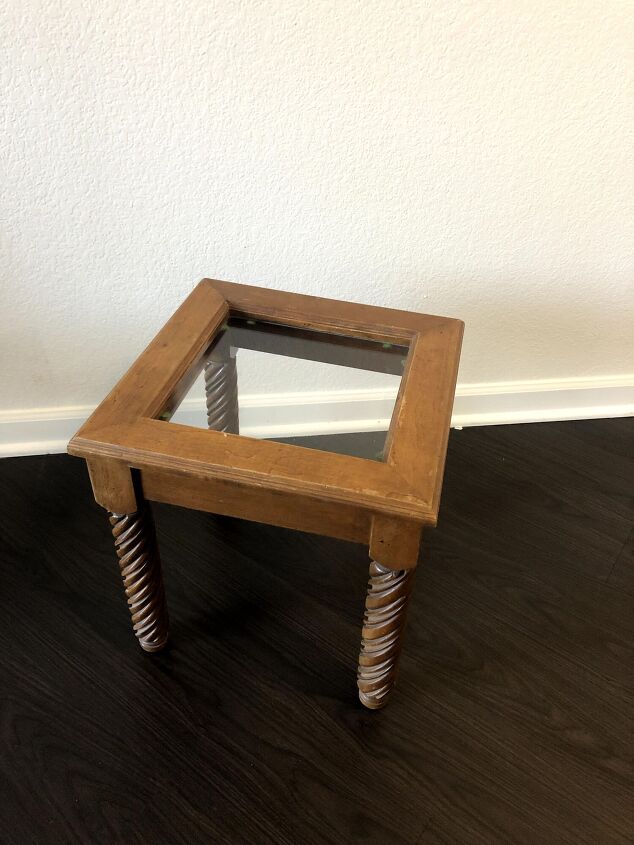
This small side table was in need of a little sprucing up. I loved the spiraled legs but the glass top was dirty and the wood finish was bland. So I decided to to replace the glass top with a resin insert and stain the wood a bit darker.
When I first moved to my new city, I had nearly all the furniture I could possibly need except side tables. I didn't have a single one, which sparked my buying spree of several small tables to spread through my apartment.
I picked up this one on Facebook Market Place for only $5!
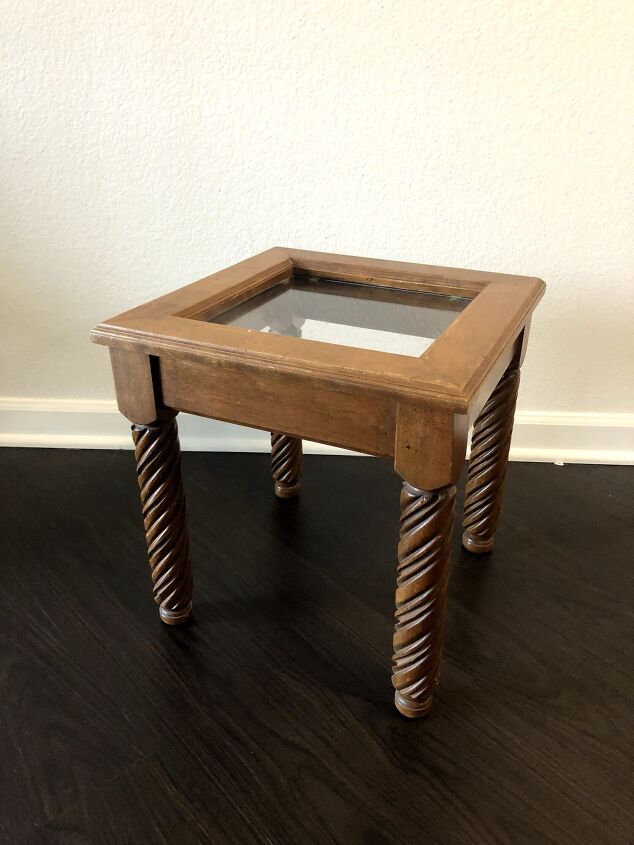
Overall it was in pretty good condition with minimal nicks and the glass top was removable!
I didn't love the color of the wood, so I wanted to stain it a bit darker. I also wanted to experiment with some epoxy resin for the top. My plan was to somehow make a DIY mold the same size as the glass. The backup plan was to simply fill in the lip of the table if the DIY mold didn't work.
Always have a plan B right? 
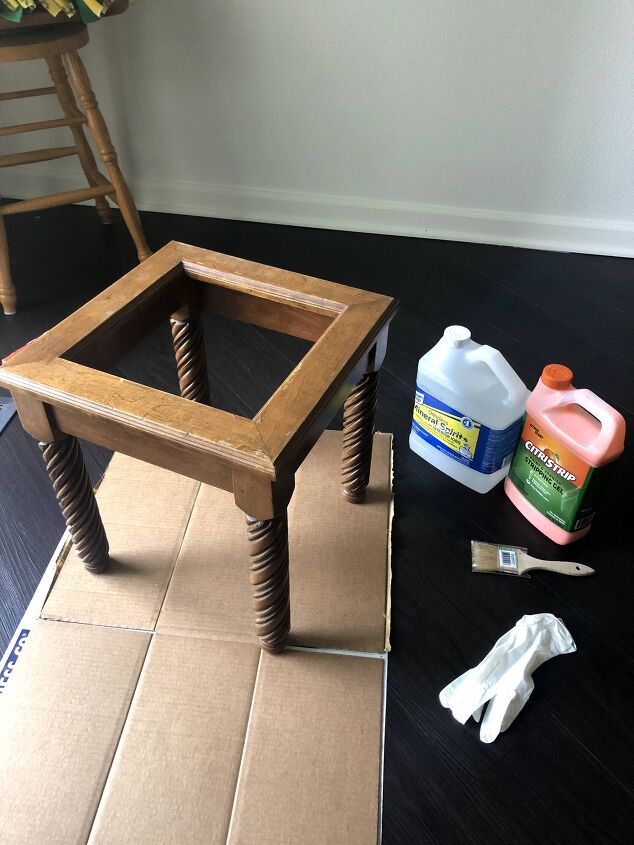
First I removed the glass top, this was as easy as unscrewing the small brackets/clips on the bottom side of the table.
To remove the original finish, I decided to try to use a paint stripper as opposed to sanding only. I went this route because of the ridges in the spiral legs. I figured the stripper would give me a more even removal process and be less time consuming than sanding each ridge. I was only half right.
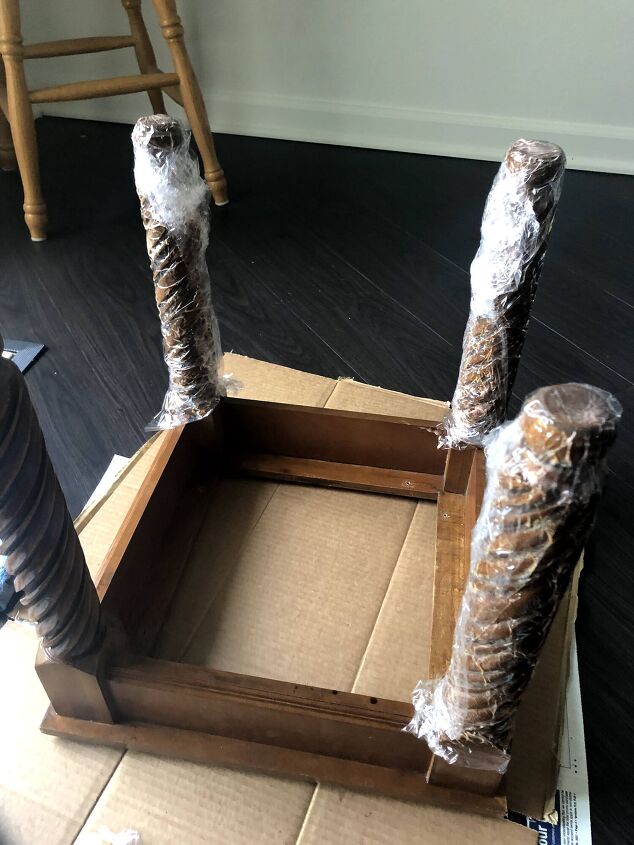
I used CitrusStrip because it supposedly has less of a smell and is safe for using indoors, but I would still recommend having a door or window open. I followed the directions on the bottle, applying a generous amount of goo to the legs and then wrapped them in plastic wrap to keep it from drying out while it worked its magic.
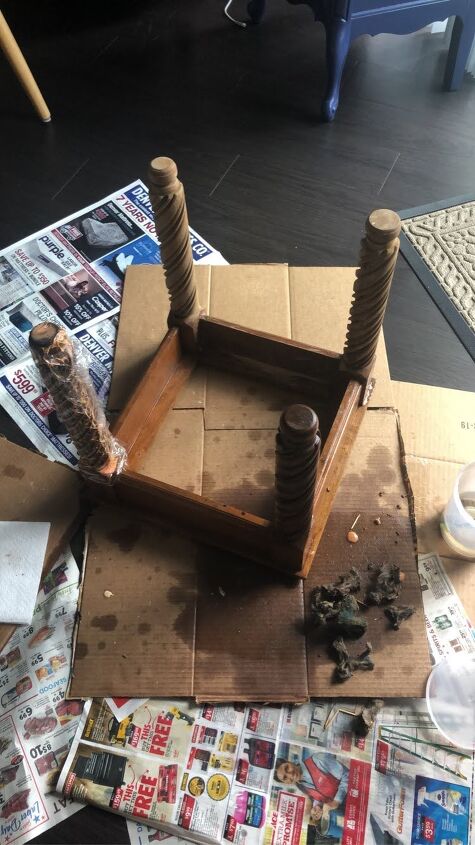
I let it set for about 3-4 hours, then went in with the smallest gage of steel wool. I found that this worked well for the wider ridges but I had trouble applying enough pressure in the more narrow ridges of the spiral legs. So I also used a heavy duty Scotch-Brite pad, an old tooth brush, and many tooth picks for the fine details. I soaked the steel wool/scotch-brite pads in mineral oil and used that to completely remove the CritrusStrip.
This by far took me the longest through this entire process. Between the several hours waiting for the CritrusStrip to work and then it took about an hour and a half of elbow grease to remove the striper per spiral leg.
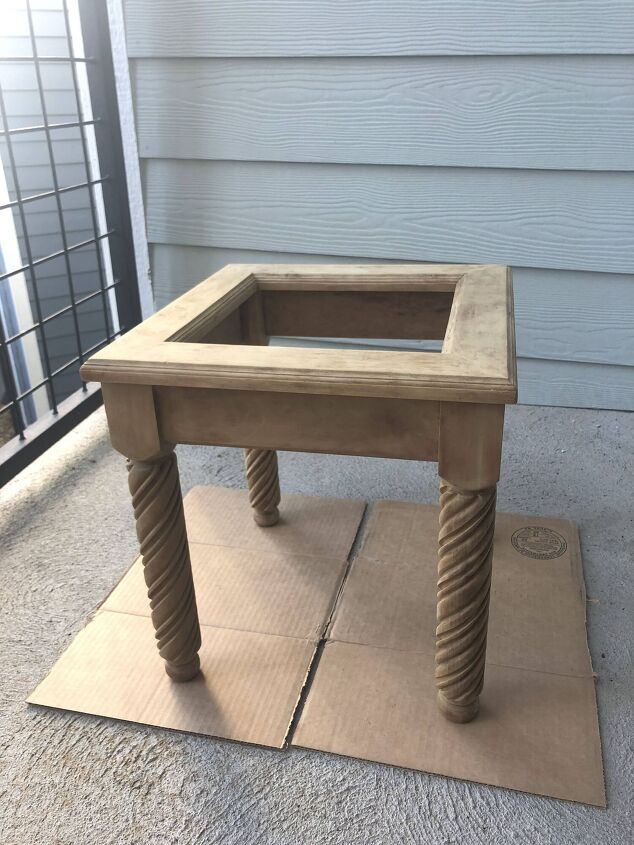
I really saturated the wood with the mineral spirits making sure that I removed all the CritrusStrip, so I ended up waiting about three weeks to ensure that the wood was entirely dried out before applying the stain.
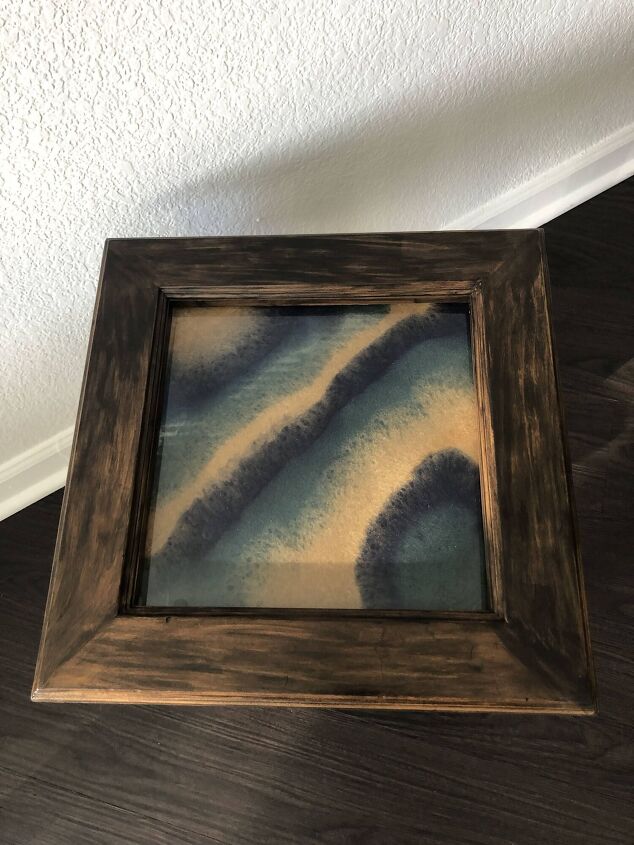
I used Behr's water-based wood stain in the color Jacobean. I applied one coat and then reapplied to a few spots that didn't come out as dark as I wanted.
Now for the exciting part, the resin insert!
This was my first time working with resin and I am very pleased with the result.
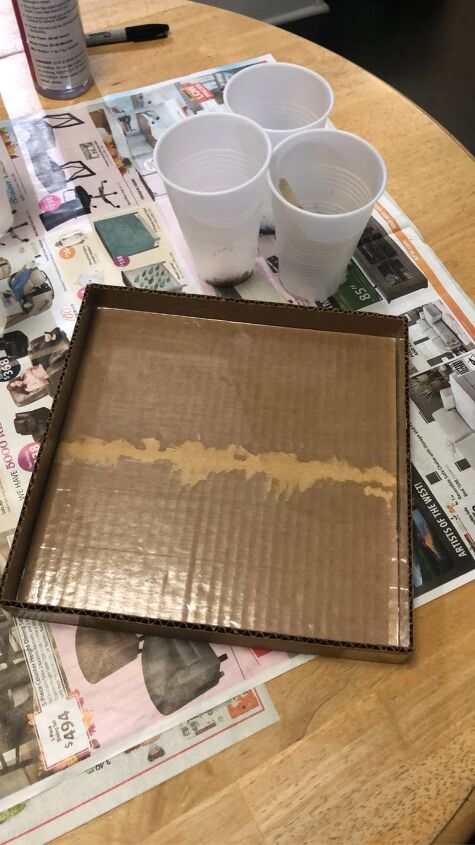
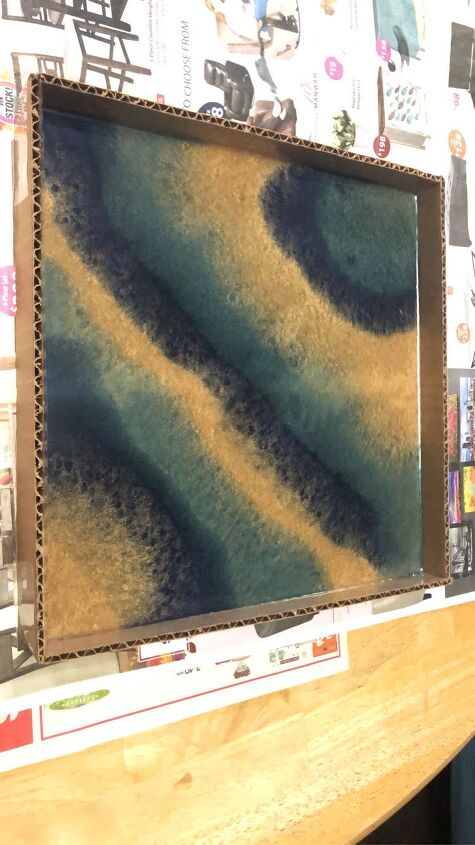
First I needed a mold. After much research I decided the most cost/time efficient method was to make my own mold which I did with cardboard and tape. I used the original glass piece as the template and cut out the bottom square and the side pieces with a box knife.
Now to seal the cardboard I tried both electrical tape and packing tape. Both easily released the resin, but I prefer the packing tape because the electrical tape is a bit thicker and left more defined lines on the resin once it was released from the mold, as well as a bit of black residue along the edges where the tape was exposed.
Taping the corners of the cardboard mold were a little tricky. I wanted to make sure they were completely sealed so the liquid resin wouldn't leak, but I also wanted to keep them as smooth and defined as possible. I just used many small pieces and a pen to press the tape into the corner.
Lastly, the piece of cardboard I used had a bend in the middle and I knew this would be picked up by the resin. So I tried to fill in the bend with wood filler before I covered it in tape. I think this was a good decision because the resin picked up the smaller ridges from the cardboard but the area with the wood filler looks pretty smooth once finished.

I read about several different ways to color resin and since I wasn't going to be doing this often, I decided that using eye shadow was the best option for me. This way, I don't have a lot of supplies left over (you don't need much to color the resin), it was less expensive than resin dyes, and there are sooo many color combos to choose from in all the different pallets.
My first attempt at the resin, I used the four colors circled in green. The second round I decided to leave out the maroon color and only used the blues and gold.
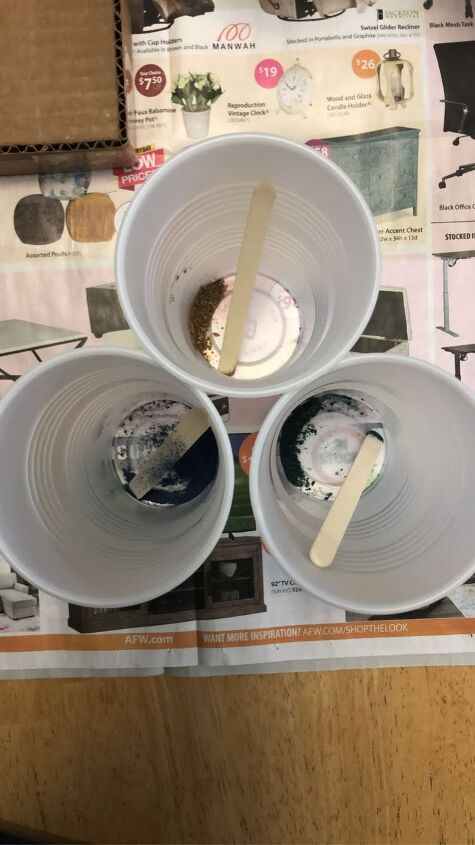
I used a popsicle stick to scrape out a little bit of eye shadow into the disposable cups. Most of what I read online said a ratio of 1 g :1-5 oz. for the color to resin combo. I didn't have a simple way to measure so I found a youtube video that stepped through the process and tried to duplicate their amount by looks.
Then I carefully followed the instructions provided by the resin manufacturer. I used Teexpert Epoxy Resin, found on Amazon, but really any brand should work fine.
Something I found between my first and second attempt was to let the resin cure a tad in the cups before pouring. This made the resin thicker and created more defined lines between the colors. Where as in the first attempt, I immediately began pouring the resin into the mold and the colors blended much more.
Letting the resin cure/ thicken some before pouring did make it a bit harder to get the resin into the corners, but I was able to tilt the mold to get the resin to spread through the entire mold.
I let the resin cure for a full 36 hours before removing it from the mold.
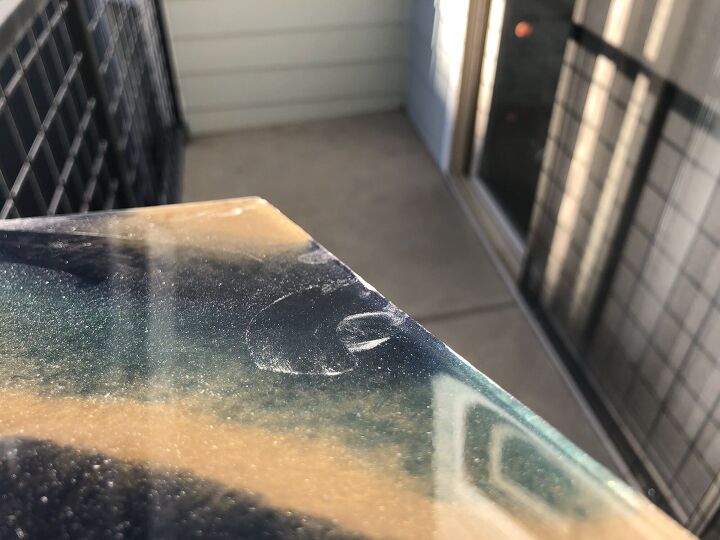
Due to capillary action, the edges of the resin were slightly raised. Since this face would be pressed against the bottom of the table I wanted it to be as flat of a surface as possible.

So I set to work sanding down the edge to make the top surface flat.
While I was at it I sanded down the sides to make it more square. My cardboard mold got me close but it certainly wasn't perfect.
One thing to be aware of is that you don't want to sand anywhere that you still want to be glossy and clear. As you can see on the edge of the resin, once I had sanded it the surface no longer had a clear, shiny finish.
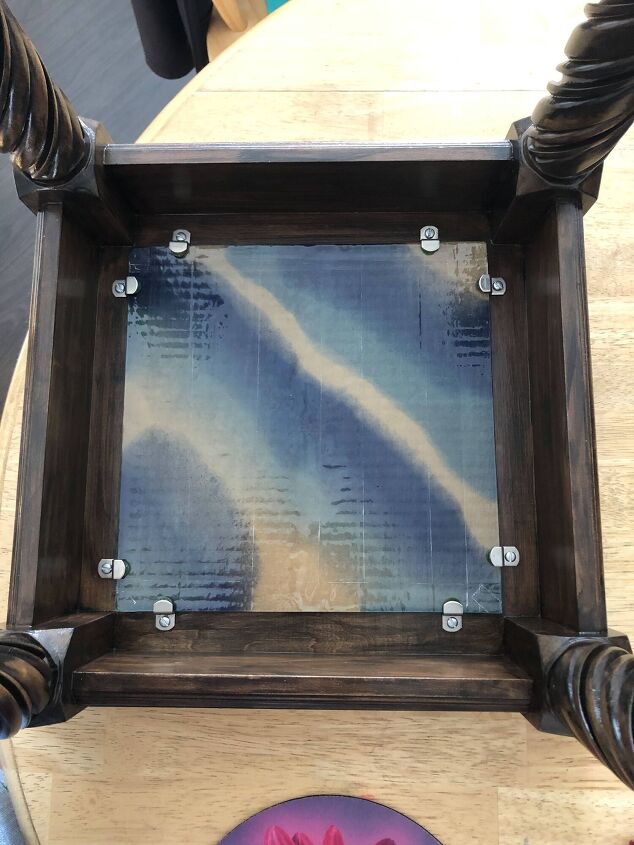
When I was satisfied with the edges and ensured that the insert would fit squarely between the clips, I tightened everything down.
*Side note: Here is a great example of how the resin will pick up the ridges in the cardboard. Its really not noticeable on the other side but definitely something to keep in mind if you made a mold from card board.
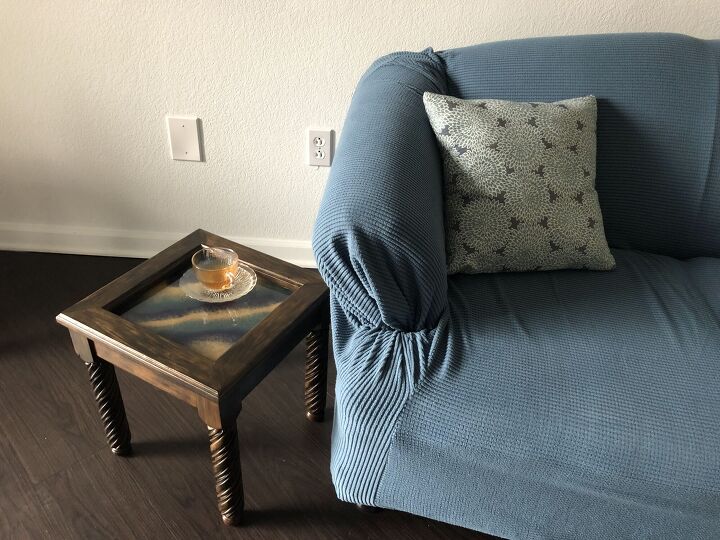
And just like that, it was ready to use!
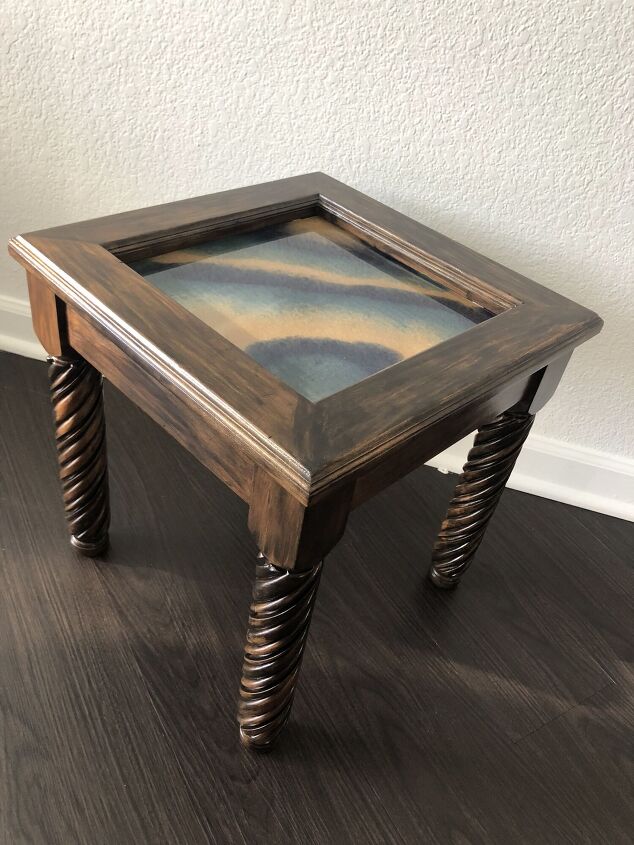
I love the darker wood and I think the colors in the resin work well with it.
I am also loving how well the resin turned out!
Thanks for reading!
Resources for this project:
See all materials


Comments
Join the conversation
-
Beautiful! And it looks like something I could do. I love that you went outside the box (so to speak) and experimented using eyeshadow, etc. Ive been afraid of resin, but not so much now!
-
Nice job, the colors remind me of sand and water, kind of swirling into each other. Well done, enjoy.


Frequently asked questions
Have a question about this project?