


Updating a Little Antique Table
This little table has been in my family for years. Mom had it before me and I've had it for over 40 yrs. so I know it's an oldie but goodie. Over the years it has been used for a phone stand (anyone remember landlines with cords?), a bathroom table for the necessities, an end table, nightstand, you name it, it was used for it!
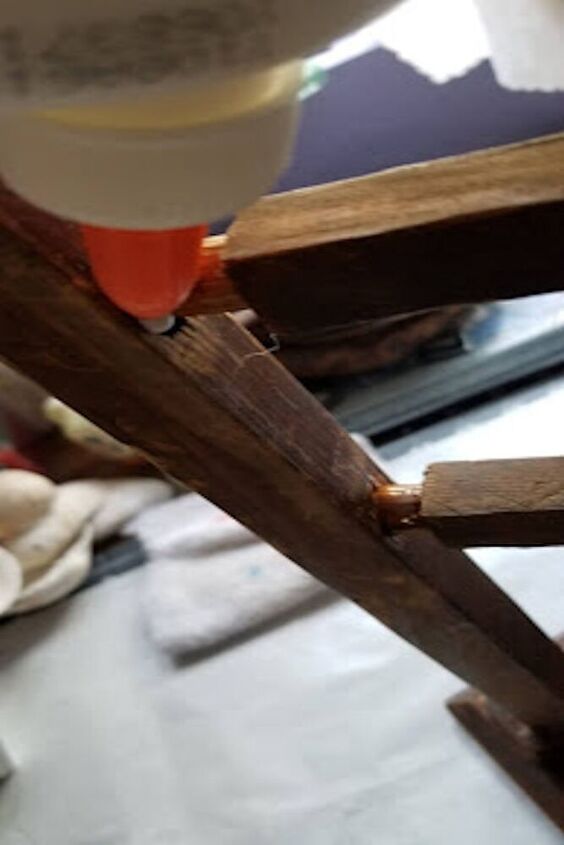
The bare wood was stained and worn. All the supports had become loose. It was time for a change. I glued the supports back in their holes.
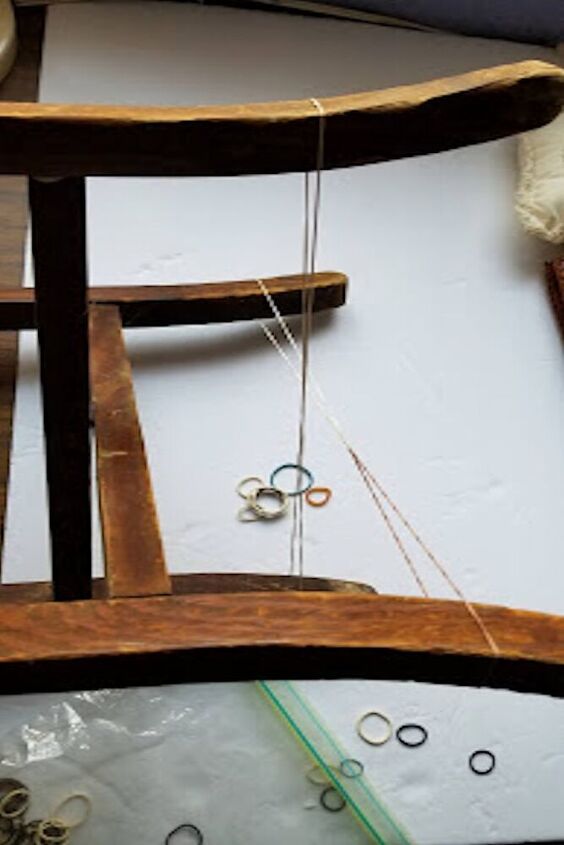
Used rubber bands to hold them tight while the glued dried.
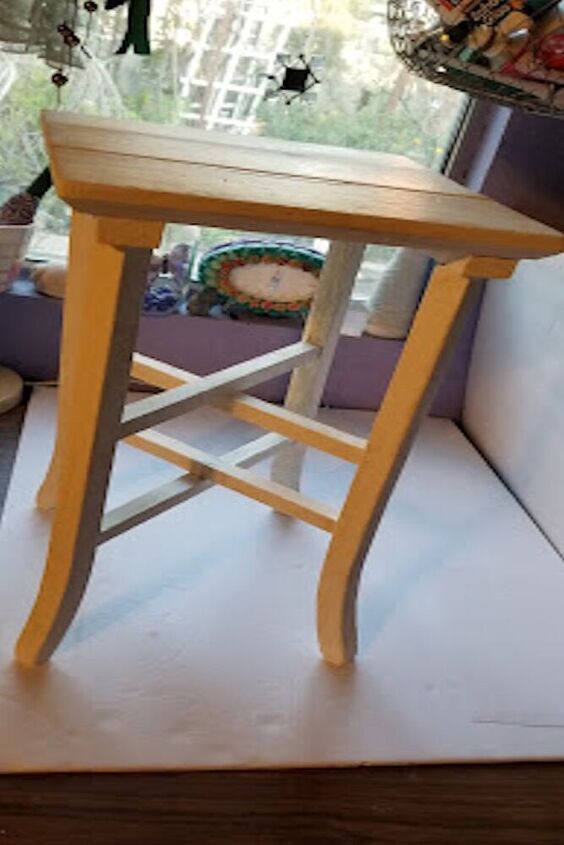
Glued and sturdy once again.
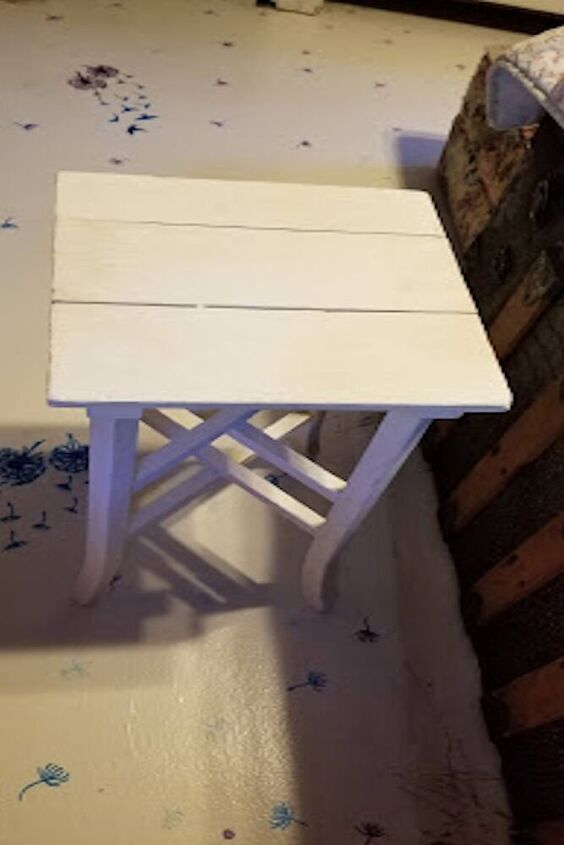
I painted it with white chalk paint to brighten up.
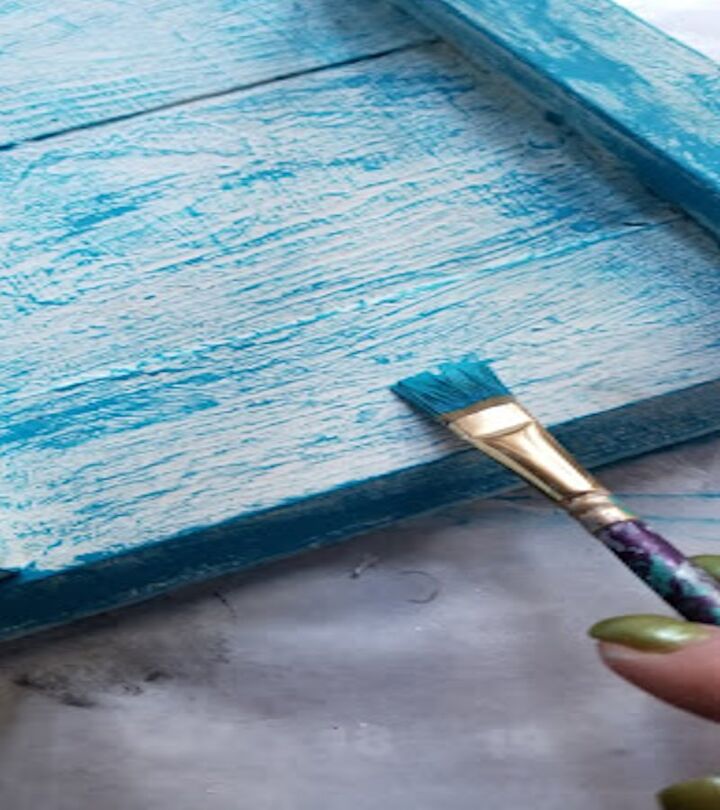
I'm trying to incorporate turquoise into my home decor. This was the opportunity to do that. Once I removed most of the turquoise paint from my brush, I dry brushed the turquoise, over the white chalk paint.
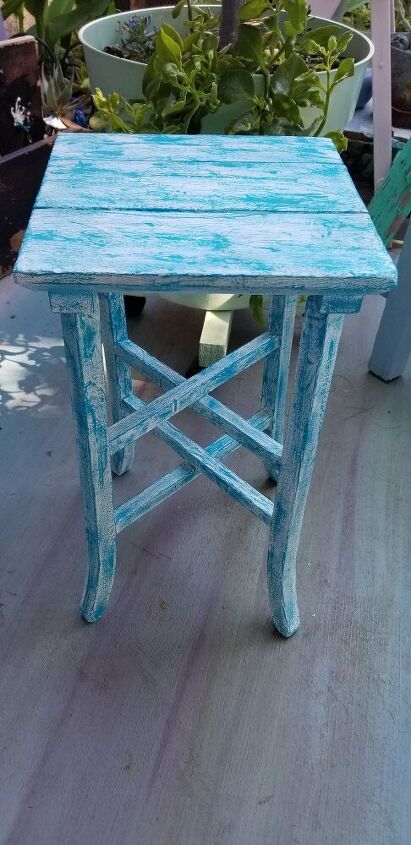
Easy peasy. I love how it turned out, just a dash of turquoise over the white.


Frequently asked questions
Have a question about this project?
Did you lightly sand it when you were done? I think it the color would look softer if you did. The colors would blend better! Just a suggestion, it looks a little rough. I’m sure it’s smooth to the touch, but it doesn’t look it. Love the colors, and the table is adorable.