


Walnut Table Restoration and Restyle

by
Dus17403359
13 Materials
12 Hours
Advanced
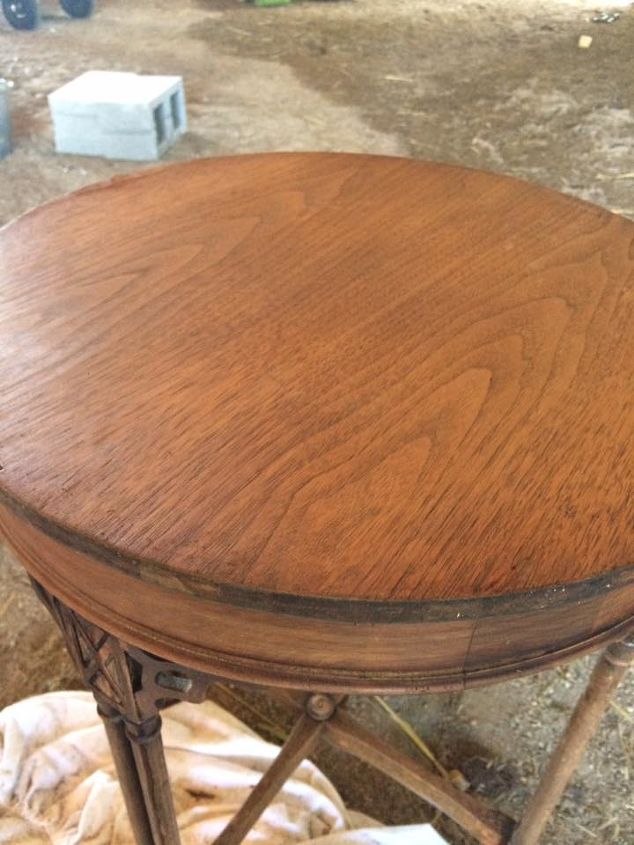
My client had this little table since college. She just hung on to it as one of those tables you just place somewhere and put things on. It doesn't look real special and you think you'll probably just replace it some day....I think we all have one of those somewhere in our homes don't we? Instead of dumping this table, she decided to see if there was anything I could do for it. If you follow my work, this is the same client that had me restore and restyle the grimy old bakers rack! So the two pieces have the same look.
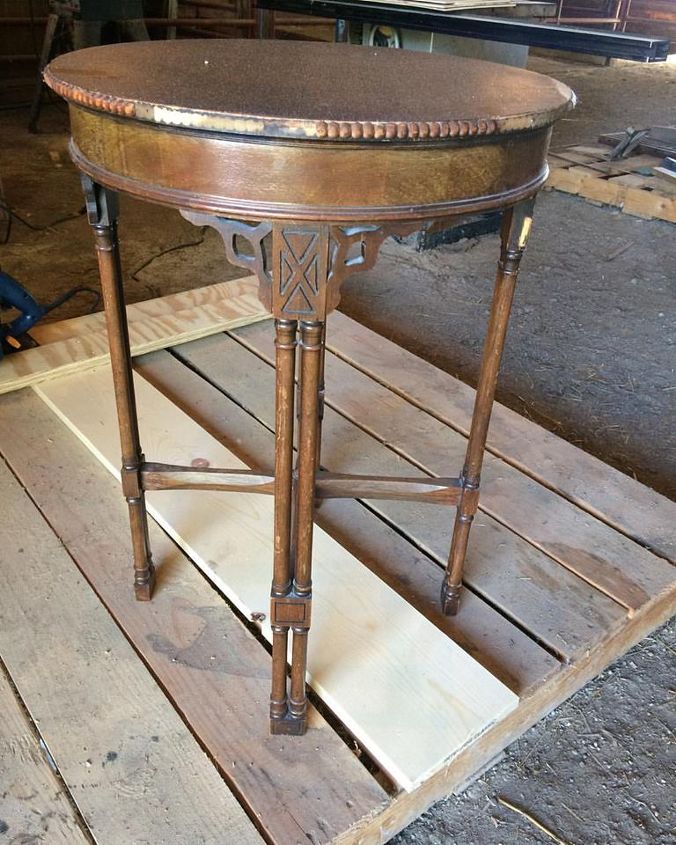
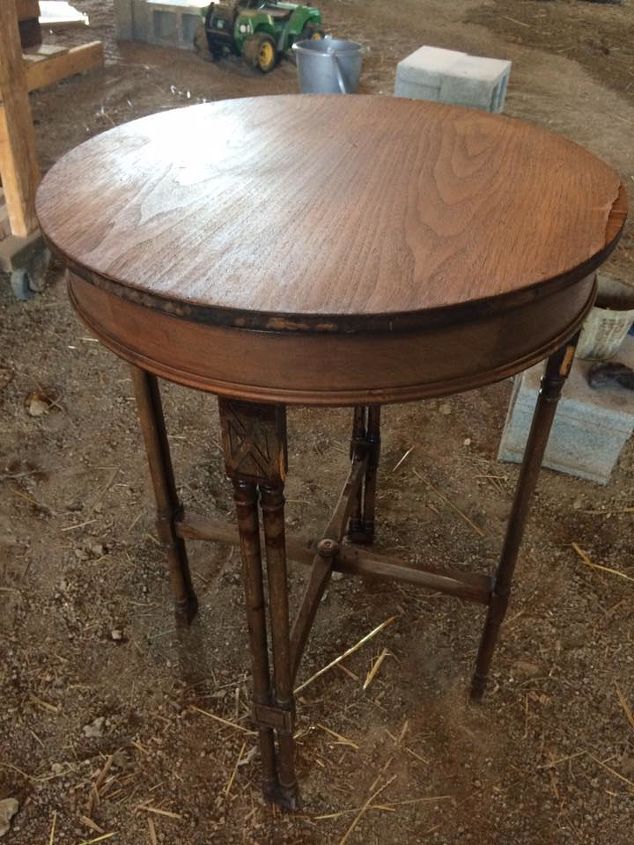
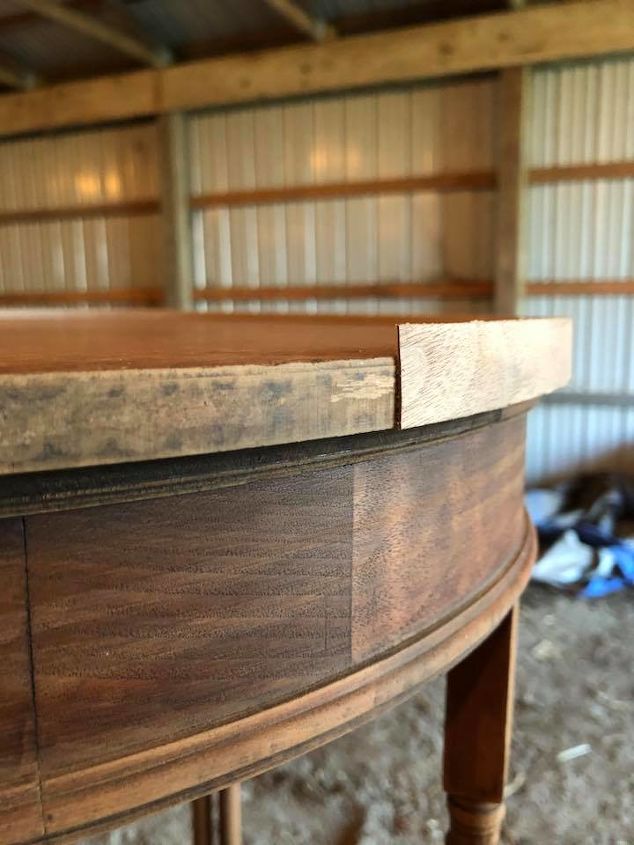
Let me set the tone of this small little round top table. The finish is flaking all over, the decorative trim is falling off and missing in places, the veneer is missing on top and lifting, and there are decorative corner pieces missing. But, underneath all of that mess?.......WALNUT!
I always start my pieces with a good cleaning. A bit of soap and water, let it dry, and then begin with the dirty work. I know, it sounds a little counter productive, but starting with a clean surface helps your other products work better!
After cleaning, I started right in with some lacquer thinner. There really wasn't a whole lot of finish on the top or the skirt, so that removed what little remained.
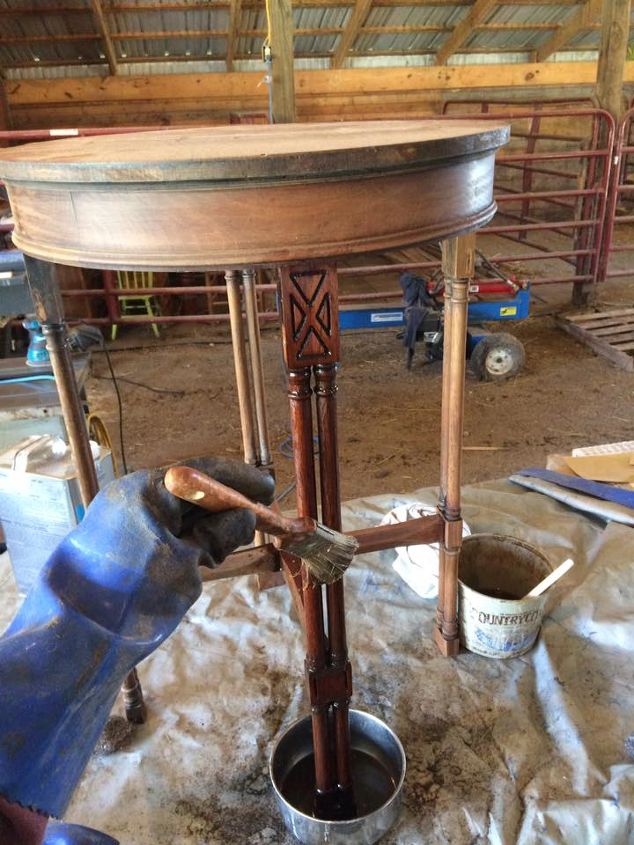
The legs, on the other hand, needed a little more help. I used my go to chemical stripper and combination lacquer thinner here. Brush on and watch it melt away!
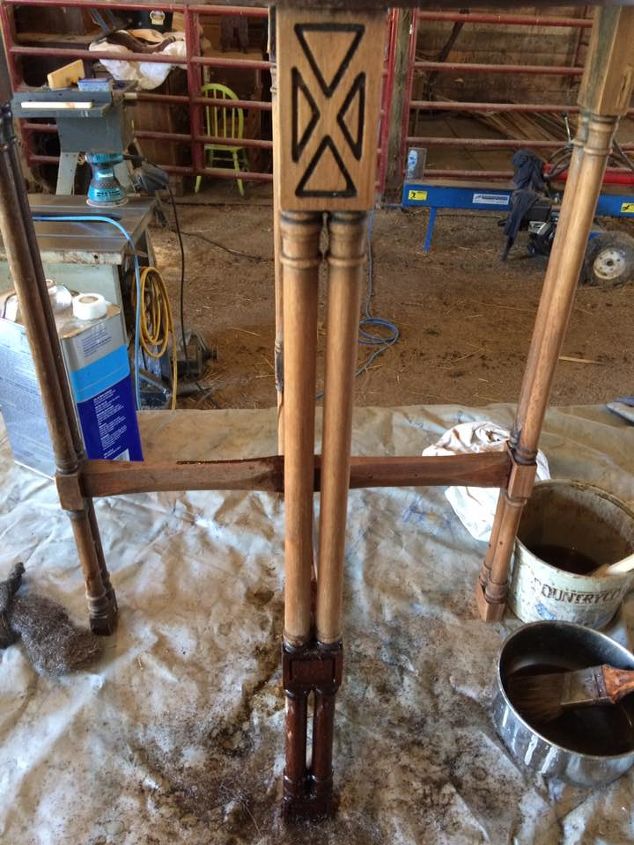
Steel wool was a really big help in getting in the small space between each dowel! See all my little shavings there!!!
Nothing looks better to me than a newly stripped piece of wooden furniture ready for a fresh start! veneer can be so pretty when it's taken care of!
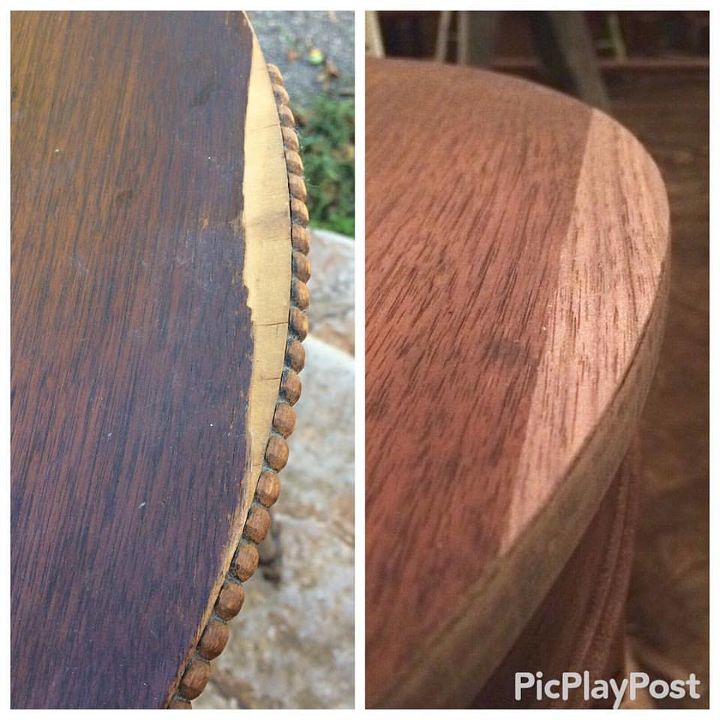
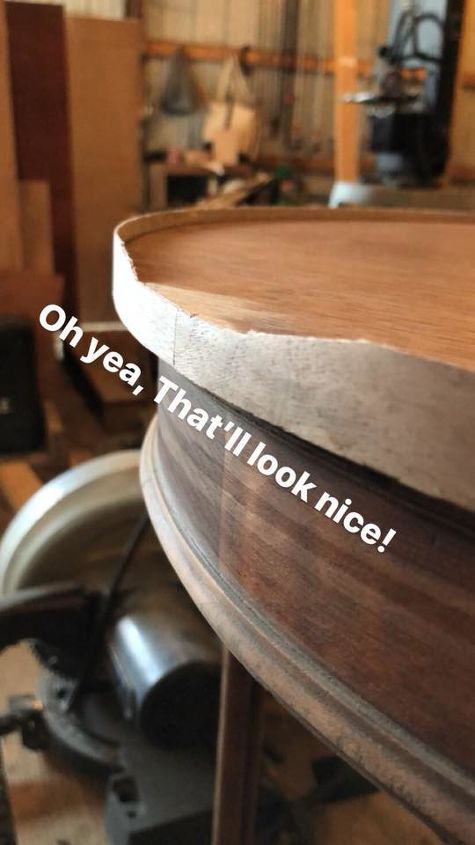
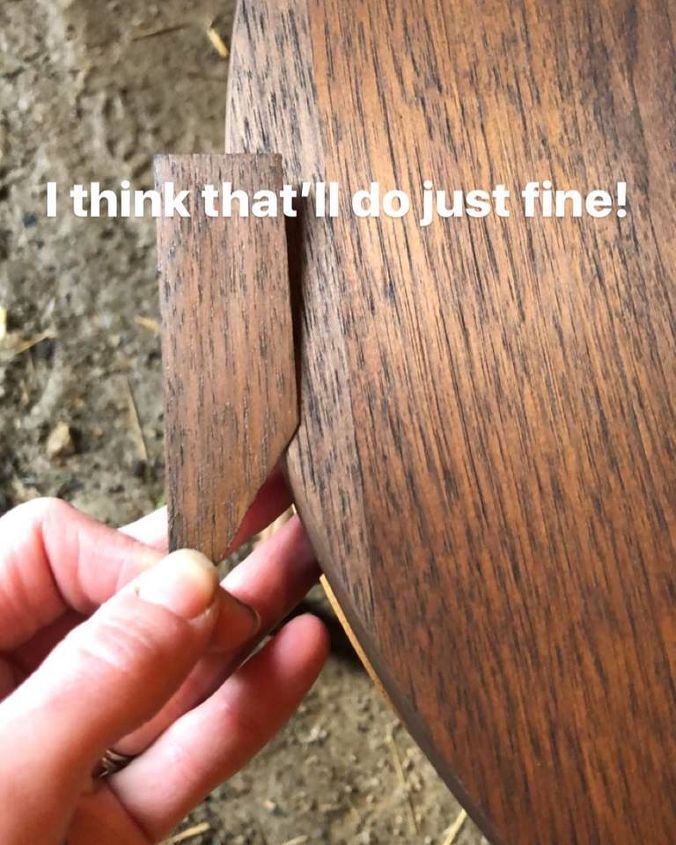
EW! Did I mention the veneer damage? Veneer is delicate and needs to be cared for. Placing new veneer can be tricky, but it is all about the details! Cut away the damaged veneer with a sharp knife or box cutter, match the grain pattern to the existing veneer, cut enough of the new veneer to cover the repair, glue, and remove any excess! Vwala!!!
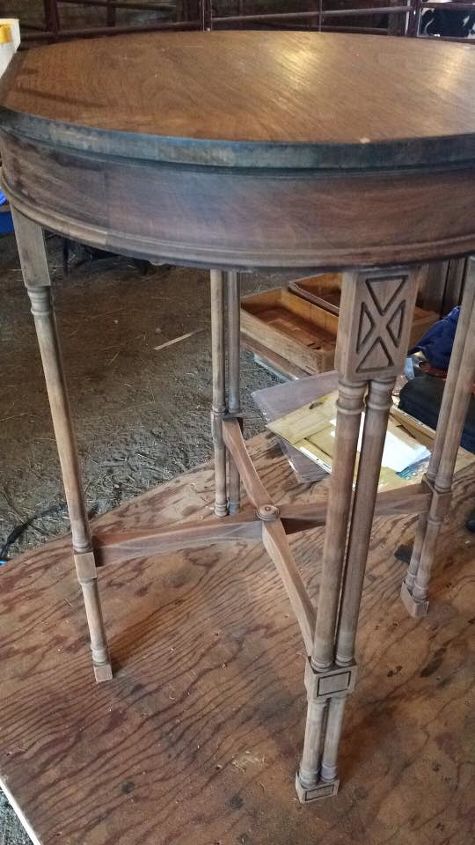
With the new veneer placed and looking sharp, move on to sanding! I knew I would be paining the legs and leaving the accents natural, so I didn't spend much time sanding the legs to perfection. Just a light scuff sanding will do. The cross support in the middle got special sanding treatment as I knew it would be stained.
The top and the skirt, also, deserved some extra attention. I made sure to sand this really well and take care of any imperfections. I knew I would be staining this and matching the new veneer!
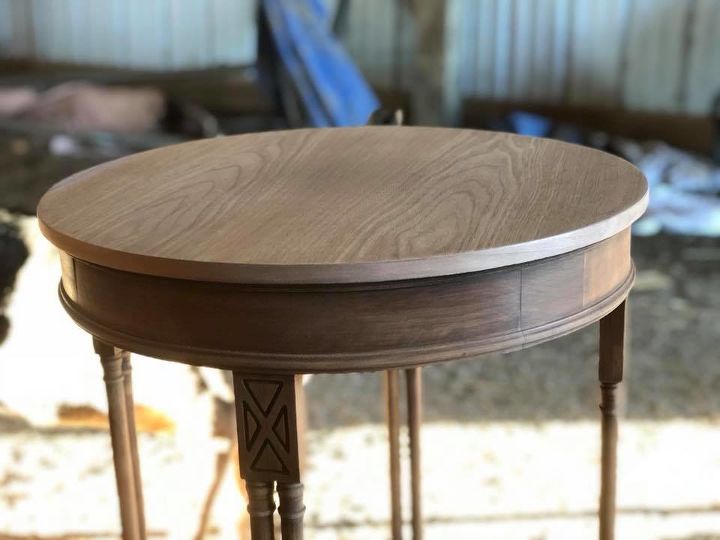
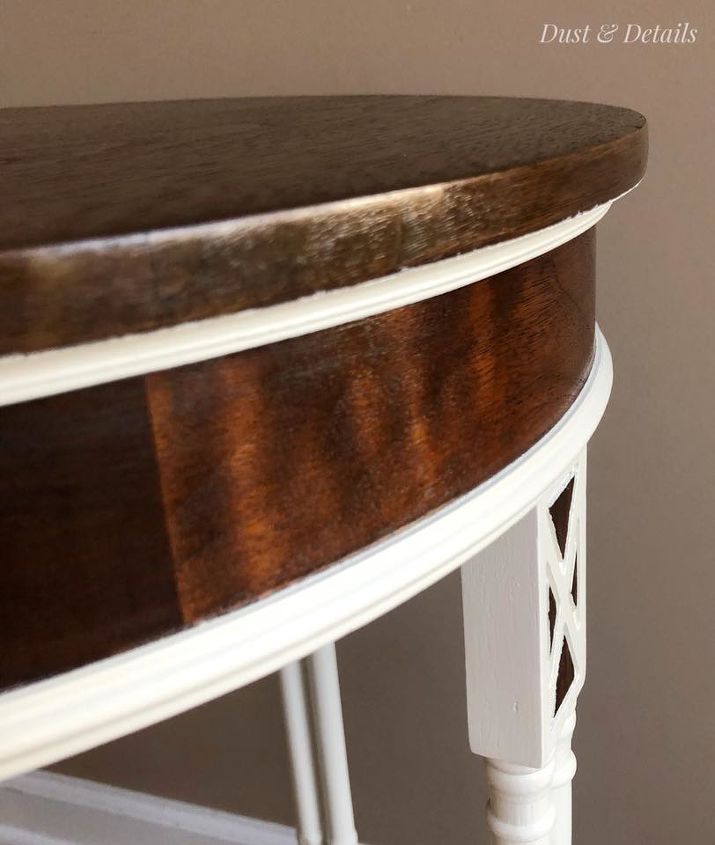
At first, I thought maybe I would just paint the edge, but I knew I wanted the top of the table to look like one whole piece. If I painted the edge I was not going to get this effect. Enter edge banding!
This edge banding is really simple to use. Just cut what you need, iron it on, and cut away the excess!
Time to start finishing!! Stain matching is no easy task. You have to really know your color wheel and understand warm and cool tones. I'm not an expert on stain matching or the color wheel, but I did ok with this piece. I simply picked out my undertones and played with stain colors until I got really close!
After I got the stain figured out I put the top coater (waterlox) on the stain. Once that had ample time to dry, I set up my sprayer and started painting! A few coats of primer, paint, and topcoat and she was ready to step into the light!
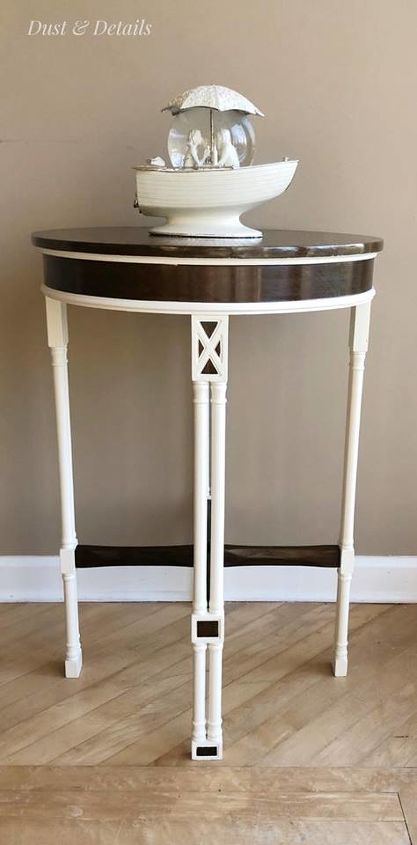
Well, hey there doll face!
A little figure for your viewing pleasure!

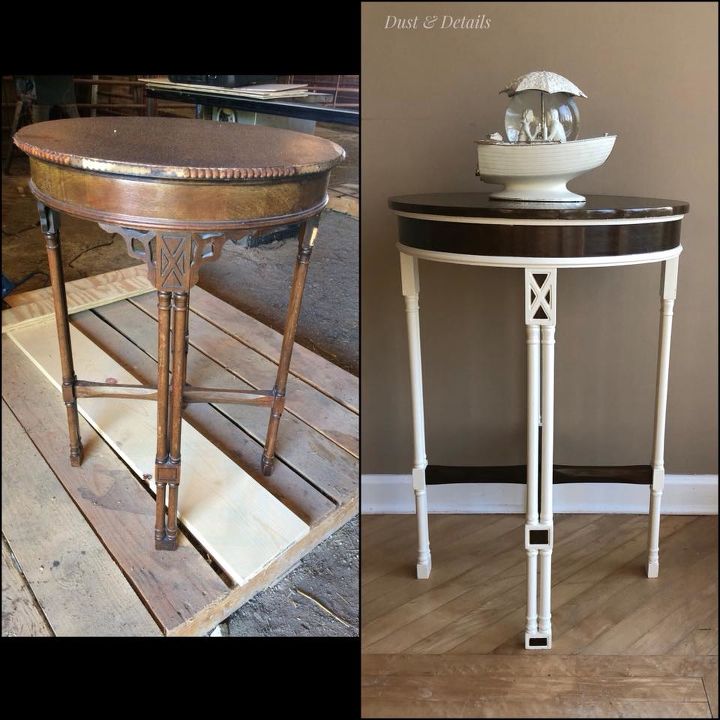
Don't throw out or replace your old wood furniture, restore and restyle it instead!
Comments
Join the conversation
4 comments
-
It looks phenomenal!! Love watching your process :)
-
Gorgeous! Looks amazing. Great job working with the veneer. Quite intimidating for some.


Frequently asked questions
Have a question about this project?