


Whitewashed Vintage Nightstand
When the buyer who purchased the recently refinished vintage whitewashed dresser also wanted the matching nightstand I was so happy. I love to see these vintage pieces redone and if possible kept together as a set.
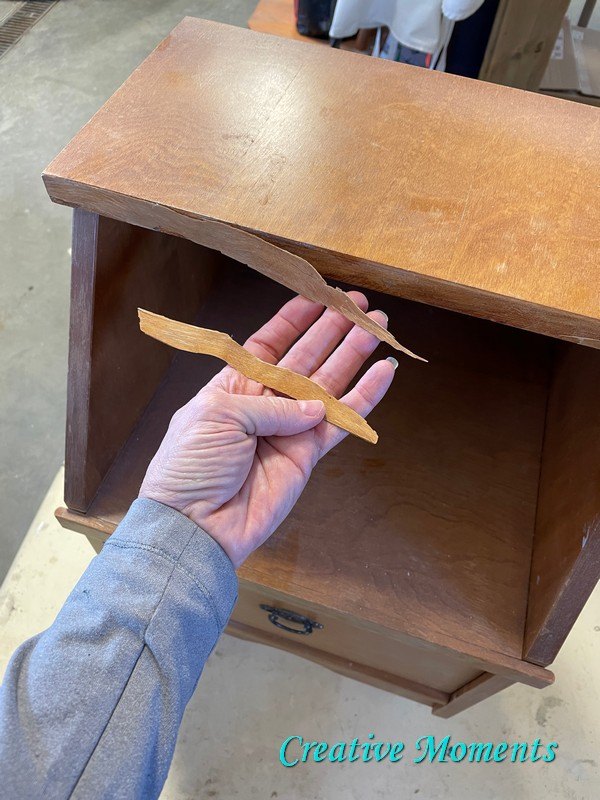
This vintage cutie has seen some wear and tear. The peeling veneer edge was removed and it was scrubbed well.
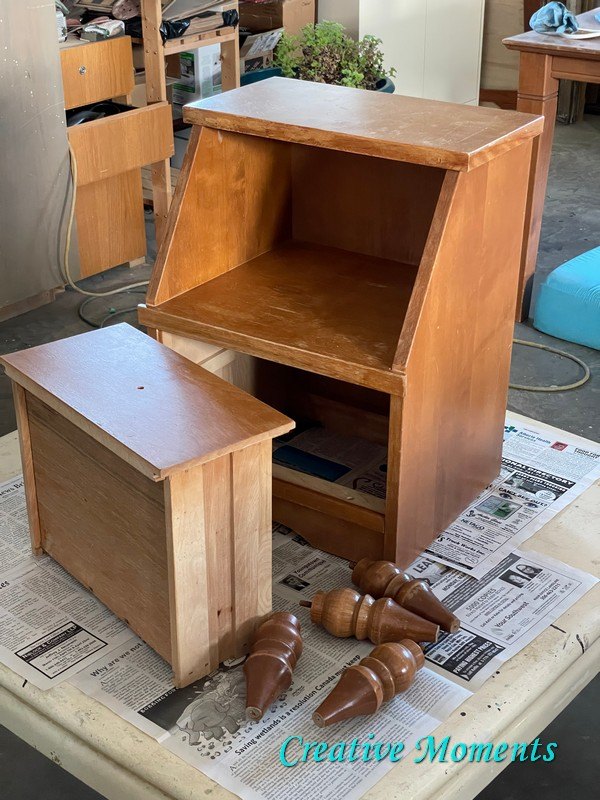
As always everything was scrubbed inside and out upside down with warm soapy water with some Dixie Belle white lightening cleaner, rinsed and dried.
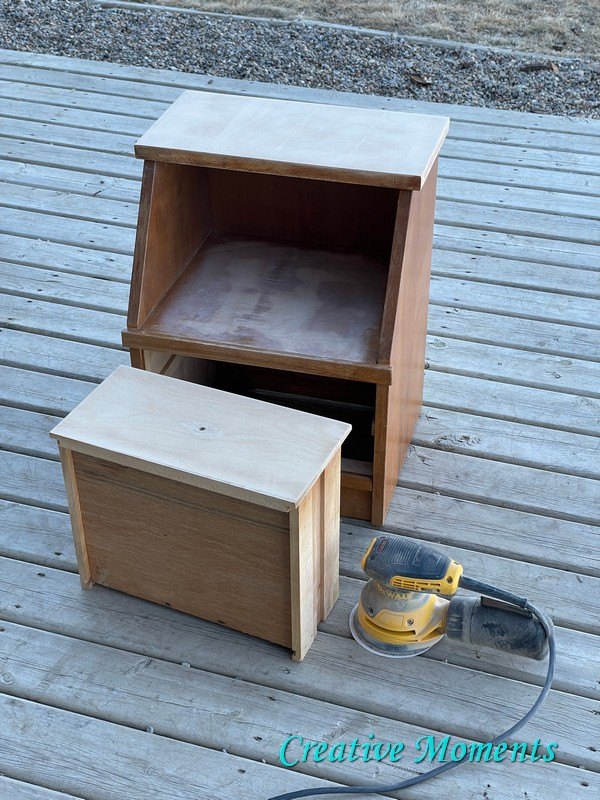
It was then taken outside and the top and drawer front were power sanded to bare wood.
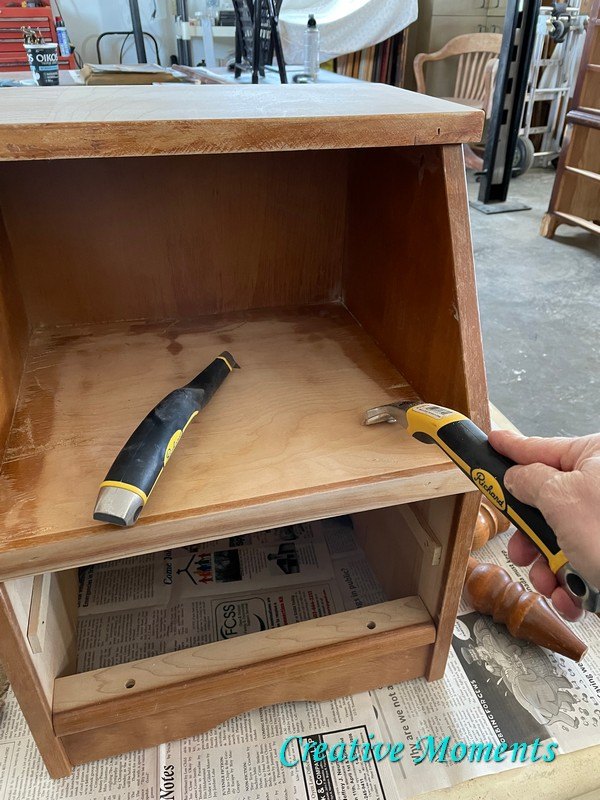
The inside top was power sanded in the center but not wanting to damage the inside edges I pulled out my trusty carbide scrapers from Richard tools; both sizes came in handy to get right up to the sides and remove the old finish.
The inside shelf was hand sanded smooth with a Dixie Belle sanding sponge as was the top and drawer front then all wiped clean.
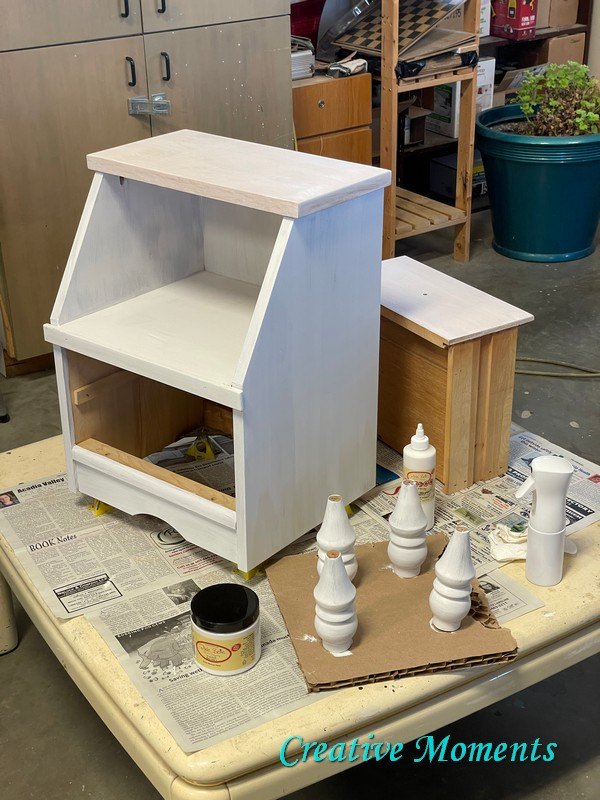
Just like the dresser, the bare wood surfaces were white washed using white magic Dixie Belle Voodoo Gel Stain applied with a Dixie Belle chip brush and wiped with paper towel. There is a video of how easy this is over on the dresser tutorial.
Dixie Belle's fluff white for the nightstand body and feet. Two coats were brushed on with Dixie Belle's oval brush.
When dry the paint was lightly sanded with a bit of distressing on the edges then hand waxed with clear Dixie Belle's best dang wax. This new Dixie Belle La Petite brush is my new favorite for wax!! The tapered natural brushes get in all the right places easily.
To seal the top and drawer front three coats of Dixie Belle Gator Hide were applied using a damp Dixie Belle applicator sponge.
The sweet pull was replaced and legs screwed back on and this sweet stand was ready.
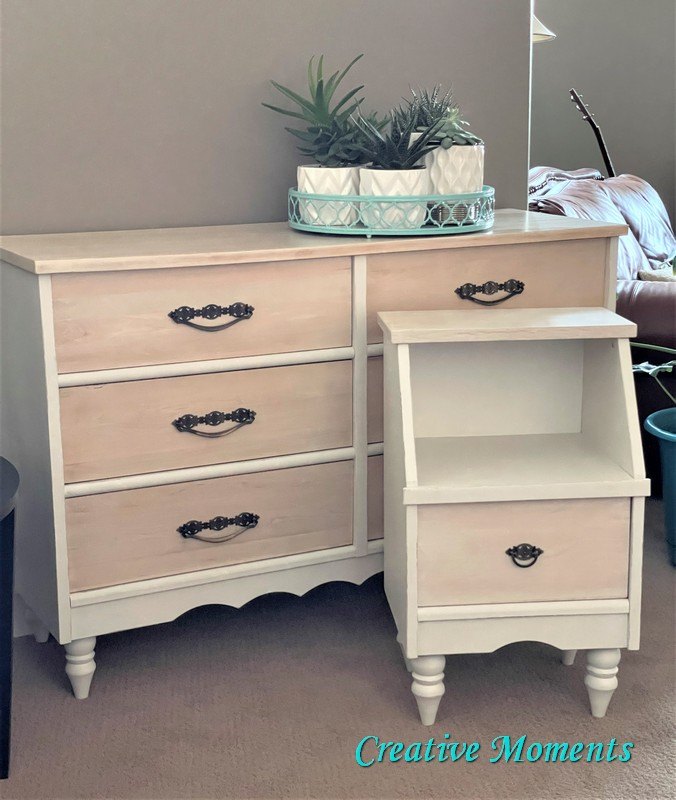
The matching dresser post is here too. http://www.hometalk.com/diy/bedroom/furniture... more unique one of a kind pieces listed here or on my
Facebook page https://facebook.com/CreativeMoments1/
Instagram page https://instagram.com/creativemoments1/
Website https://creativemoments10.blogspot.com/
Pinterest pagehttps://pinterest.ca/lakuhn/creative-moments/
Etsy Shop https://www.etsy.com/ca/shop/CreativeMomentsStore
Resources for this project:
See all materials


Comments
Join the conversation
-
OH...MY....GAWSH! SO, SO, SO, LOVELY!!!!! GREAT JOB!
-
Beautiful job refinishing these pieces. Love the style of them.


Frequently asked questions
Have a question about this project?
I have the same end table however the top seems to be Formica how can this be prepared