


DIY Pegboard Jewelry Storage Holder
Please take a minute to click here to sign up for the Mother Daughter Projects weekly newsletter. You'll get notification about our new projects and what is up and coming.
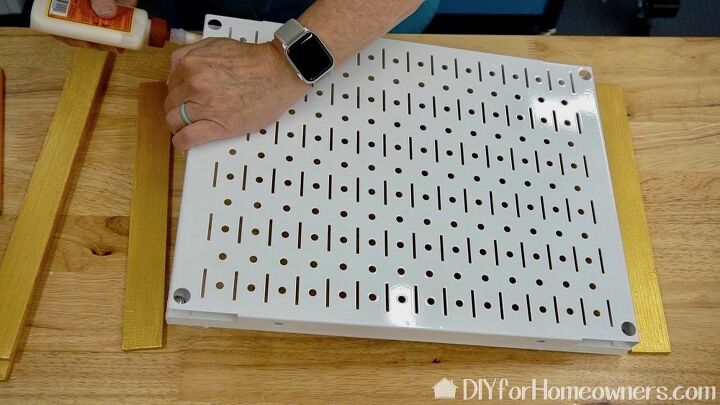
The newest addition to the ever growing inventory of Wall Control products is their new “fun size” pegboard panel. It’s a cute 16” wide by 12” tall, just right for small spaces requiring needing a bit of organization.
I thought it would be perfect for storing and organizing my jewelry. Plus, since the pegs are not permanent, it can be reconfigured when you add more bling!
The start of the project can be found by clicking the video link and fast forwarding to time code 1:16.
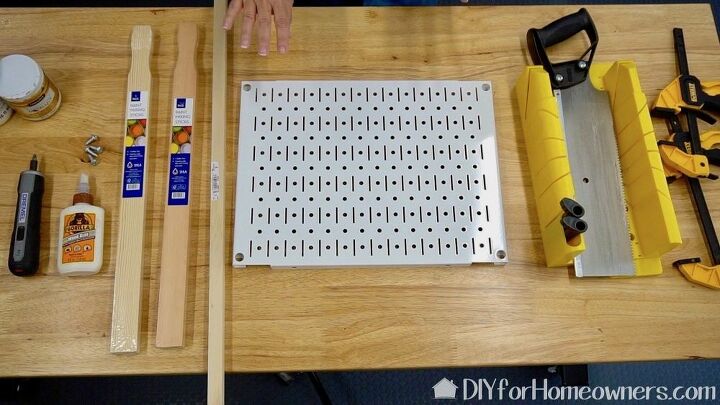
We are using a "fun size" Wall Control panel that you can order from Wall Control. Two packages of 5-gallon paint sticks. They are about .98. You'll be using four of the six. One 3/4" x 36" square dowel. The entire materials list can be found on our website.
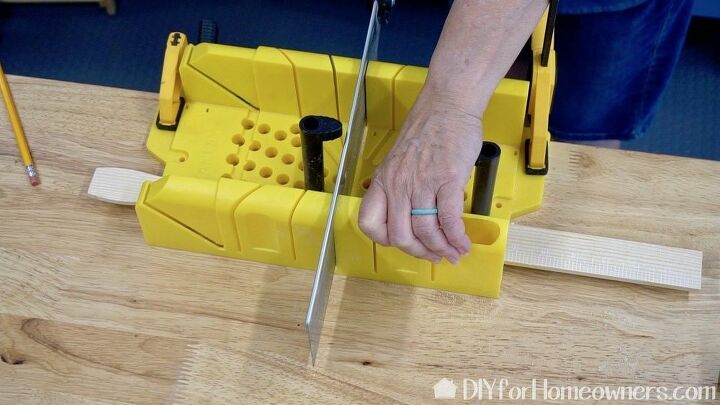
Guess what? You don't need a power saw for this one. Just a miter box and hand saw. We are cutting 2 pieces of dowel, the width of the Wall Control panel, and four pieces from the paint sticks. Two of the pieces will be the length of the side and two will be the width plus the edge width of the paint sticks. In other words, the pieces that go across the width must also be long enough to cover the edges of the side pieces.
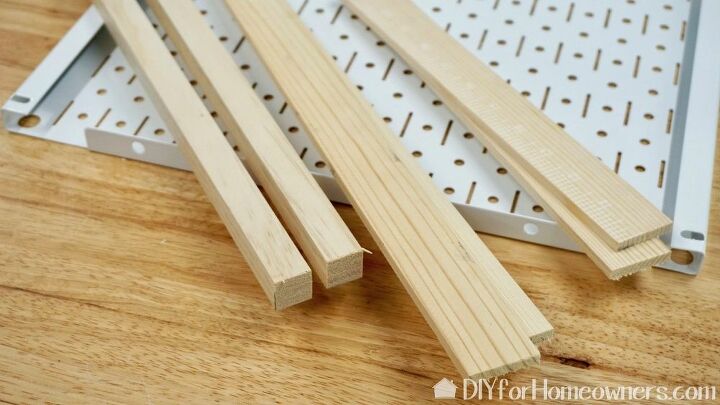
All the pieces are cut and ready for paint.

I'm using a base coat of white gesso. Once that is dry, I'm paining with DecoArt gold metallic paint. About three coats will be needed.
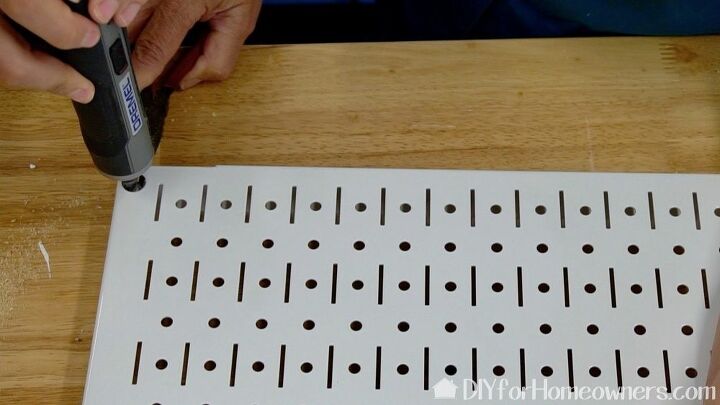
Time to assemble. The wood dowels are attached to the Wall Control panel with screws.
The pieces are glued into place and clamped and allowed to dry. Be sure to let this dry the recommend time or it may not hold. You can use a few nails to hold the sides to the wood dowel if you feel it's not holding well. Although we show using wood glue, I would recommend using a contact cement like E6000 or something that works well on metal and wood.
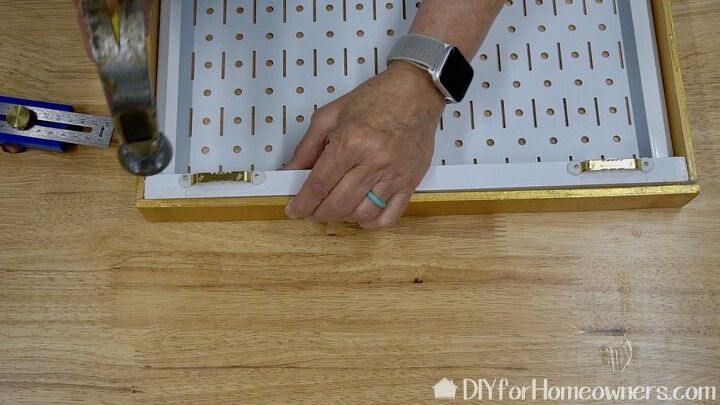
These easy to install picture hangers are used on the back.
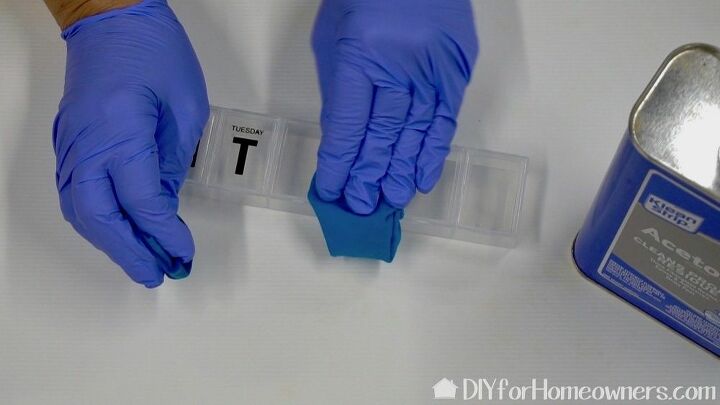
To store earrings and other smaller items, I'm using a plastic pill organizer. The writing is easily removed with acetone. Wear gloves and a mask to keep yourself safe. Using contact cement, I added rare earth magnets to the back side.
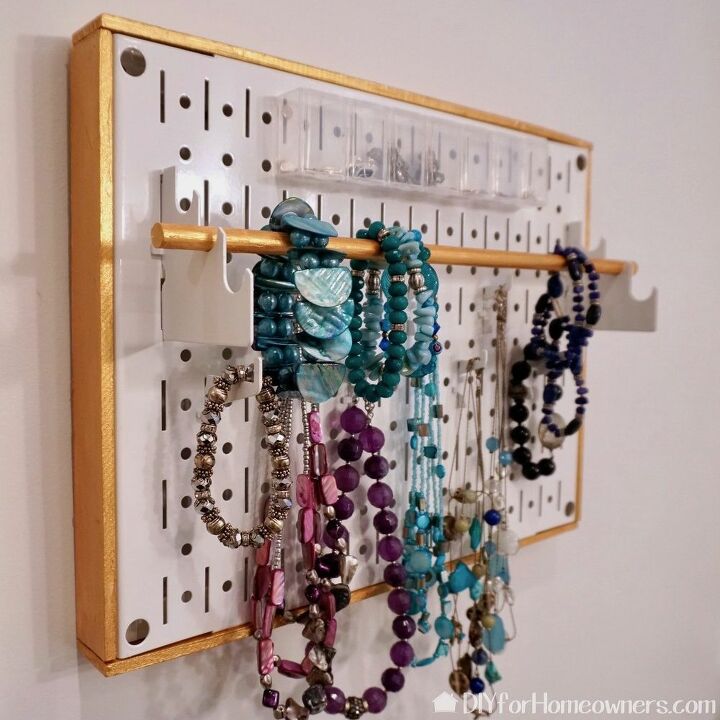
All finished. I added a couple of rod hangers and painted a piece of wood round dowel with the same paint to store my bracelets. You can see the small jewelry box at the top.
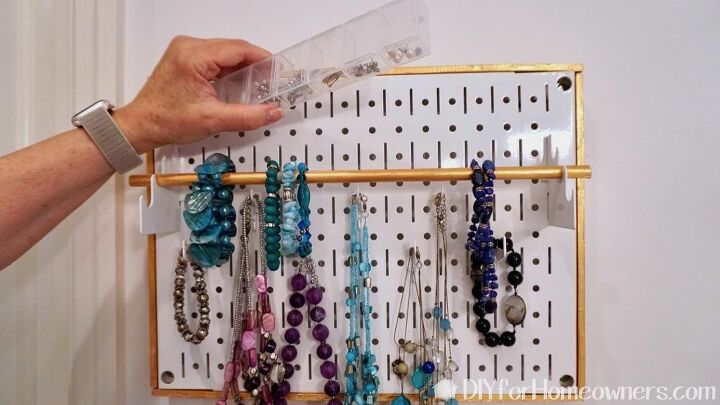
Because the Wall Control panel is metal, the magnets stick to it. I'm using a combination of small hooks and longer hooks to organize my jewelry.
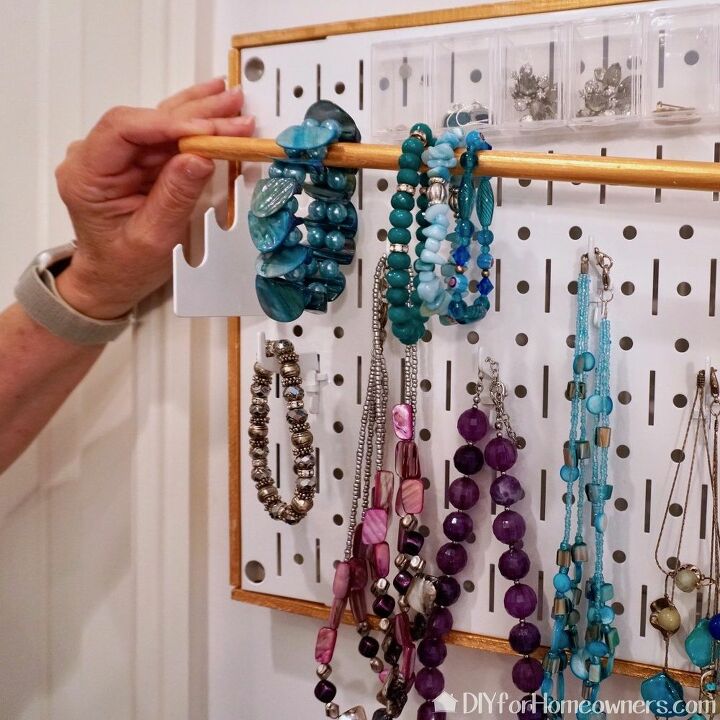
The rod just lifts off for easy removal and return of my collection of bracelets.

This is the initial configuration of pegs, but I already know, I'll be changing it up!
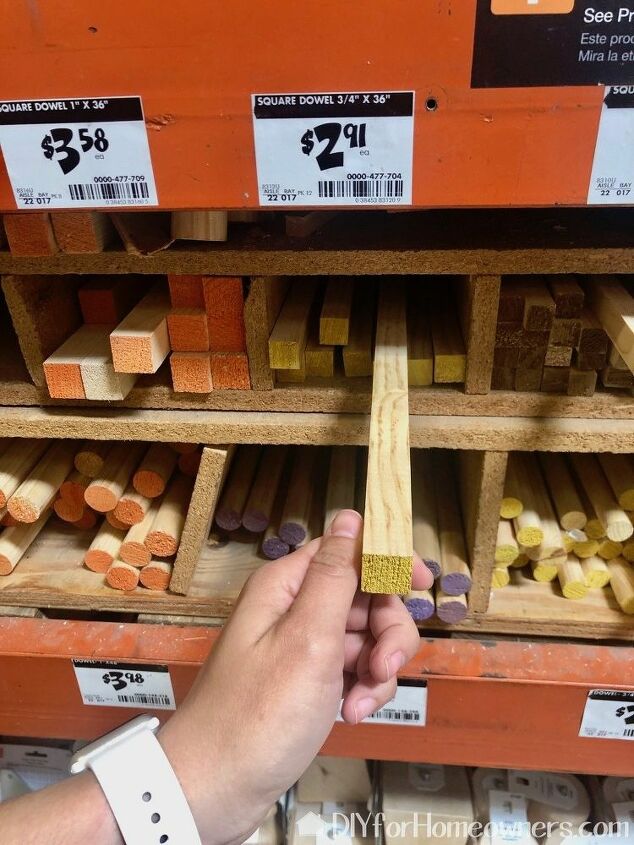
Dowel we used from The Home Depot.
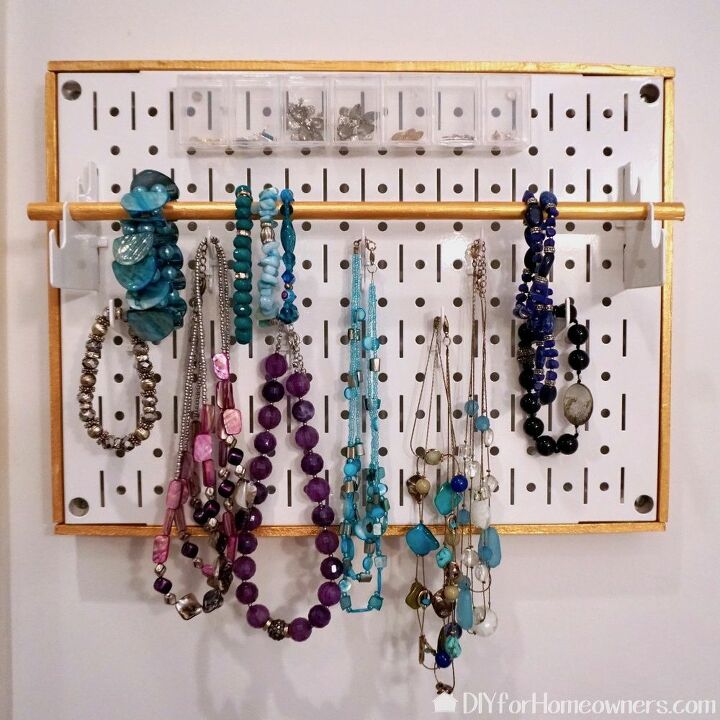
Done!
Resources for this project:
See all materials


Comments
Join the conversation
-
I have a Beautiful Newborn Baby Niece Emberlynn that finally arrived!! I’ve been a little obsessive about buying every bow my Friend makes for her since I got the News!! So I’m looking for Bow holder storage. They’re all on nylon bands and no clips yet! I seen this and had never heard of the Wall Control system! I’m really excited to find something I can decorate for a Nursery now and Mommy can change it around as she grows!!
Thank You SO MUCH!! I hope you continue to bring us great ideas and creative DIY!!


- See 1 previous
-
I'll try?? I don't love Home Depot or Lowe's for shopping, but, I'll try just to get more and more of Hometalks craft ideas for supplies.


Frequently asked questions
Have a question about this project?