


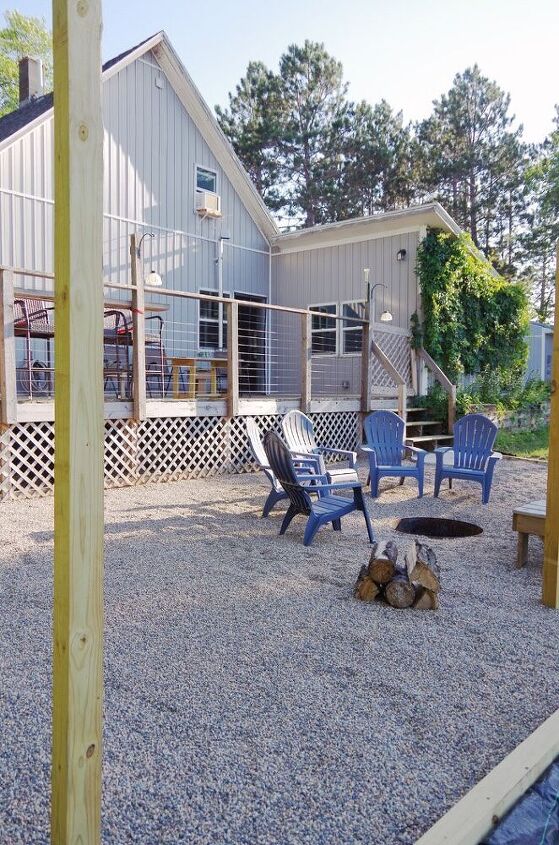
Lower Deck, Prepping, Posts, Frames and Pea Gravel
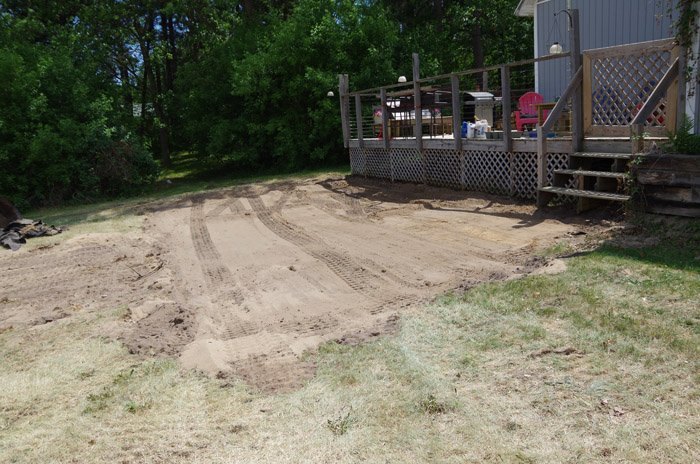
Cutting out the Sod, Framing and Pea Gravel. Honestly, we were going to put off this project for next year but when you have a bob cat rented for two days you might as well utilize it! I’ve had my heart set on this lower deck for a couple of years now. First I thought I could make it out of wood but with my wanting to build a stone fire pit in the middle of it that was a no-go for me. The wonderful thing about our old sand fire pit was that we could practically light it and forget about it and I didn’t want to lose that peace of mind.
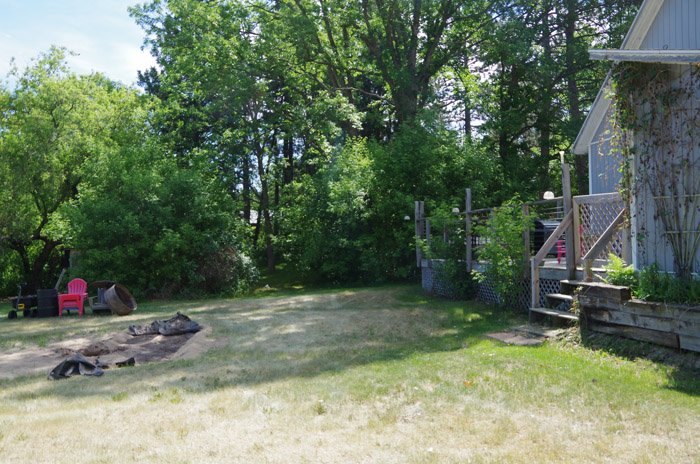
The first step was determining how big we wanted it and then Lodi tackled it with the bob cat.
(The lower deck ended up about 20×35 feet.)
If you haven’t read my post about the absolute hellish first weekend in June when we did this let me just say it was a truly miserable weekend for yard work.
It hadn’t rained in weeks, we hit heat records, our deck thermometer (in the sun) was over 110 degrees…
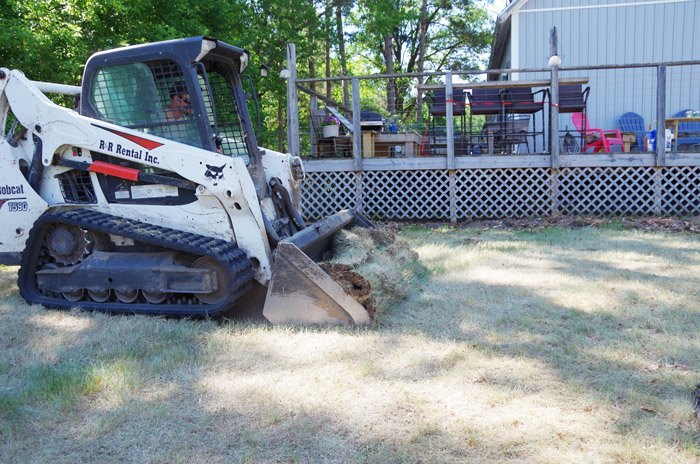
It finally “cooled” down to the mid 80s so the rest of the work on the lower deck was not quite as miserable but you can see our sad, dead yard. Unfortunately, because of the dryness, Lodi wasn’t able to do as well with the bob cat as he normally would have so it did leave us with more hand work than expected, BUMMER.
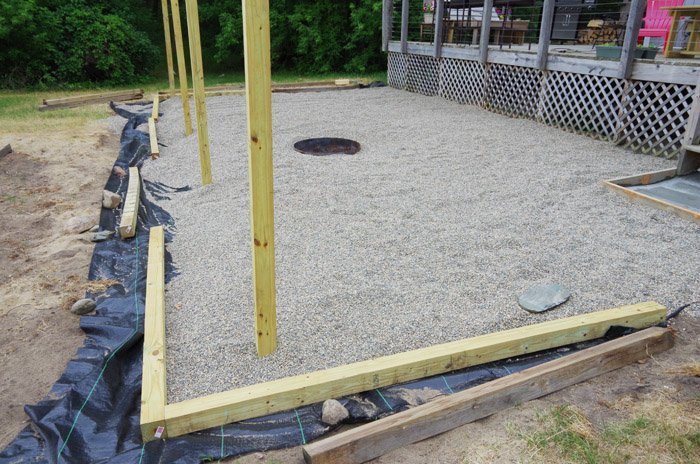
We dug the hole for our new fire pit close to the center of the lower deck the size of our old steel fire ring.
Its not perfectly center because, frankly, we don’t want to burn our house down! And we saw no reason to buy a new ring for this as we like the 3 foot size of our old one fine.
We will be building our new stone fire pit around it – above ground.
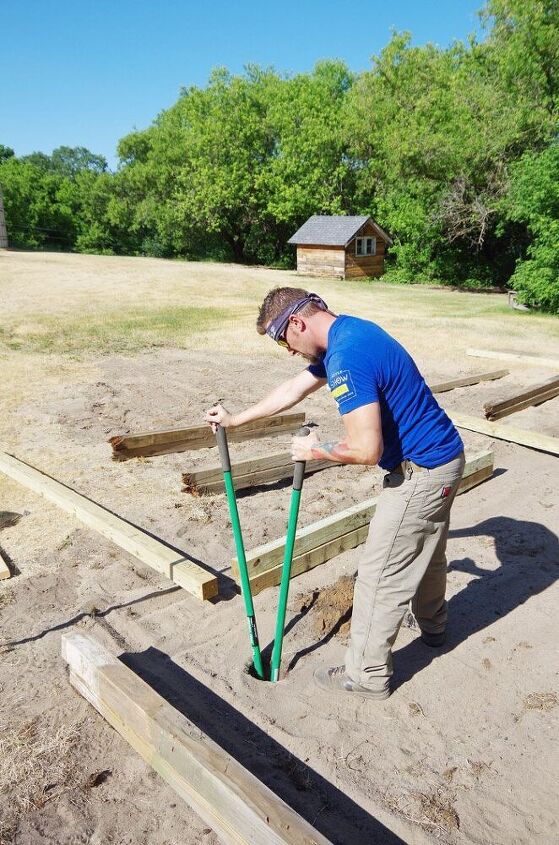
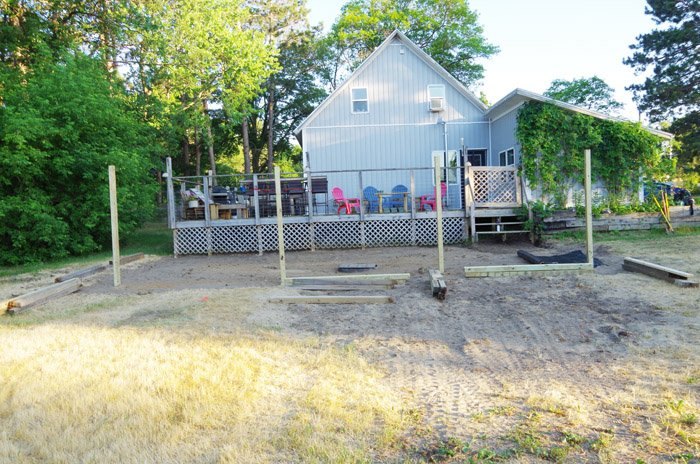
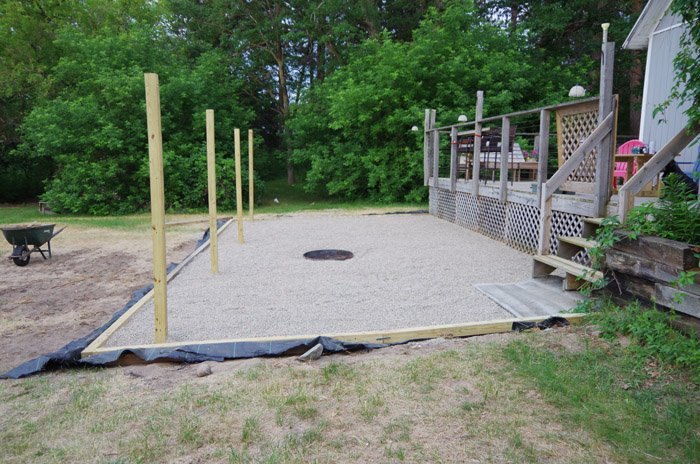
We put in four 4x4x10 foot posts evenly spaced along the outside.
Notice how we pulled them inside our lower deck so they won’t interfere with mowing but I also have a few ideas of maybe building flower planters around their bases someday…
We levelled the posts and used quickcrete to keep them in place.
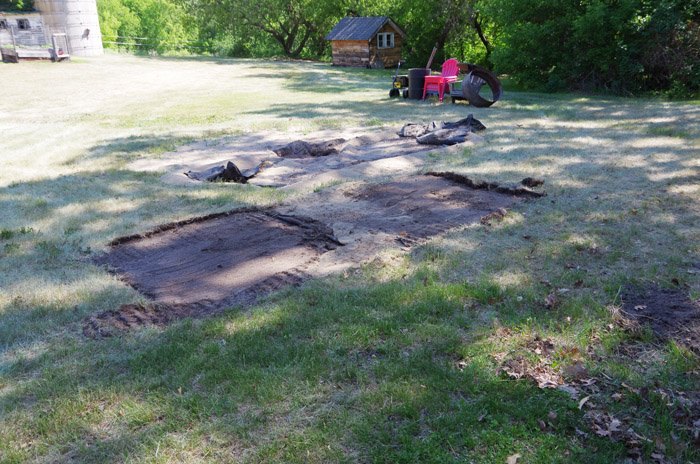
With rakes and shovels we cut out around the entire new deck and raked and shoveled until we were both remotely happy with it. One nice thing about pea gravel is this didn’t need to be perfectly level – it will level itself!

With all of the digging and prep finally complete it was time for:
LOTS OF WEED FABRIC.
I have no intention of dealing with weeds out here lol.
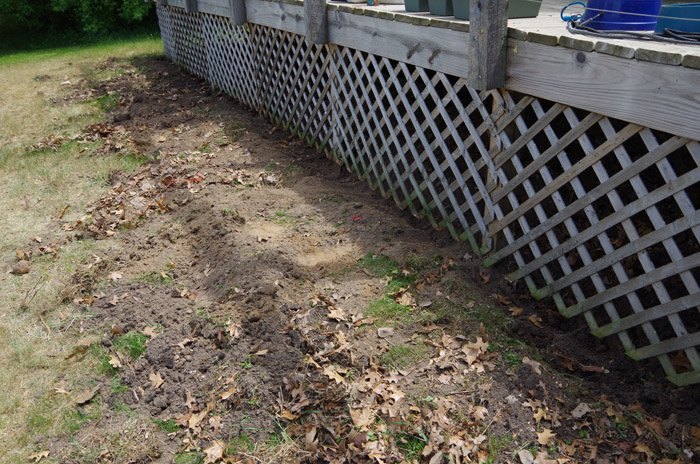
When I was prepping this area I went along our main deck and dug out from under the lattice, clearing out all the little trees and weeds that were trying to take over. I also dug a little ditch under the lattice too.
I crawled under the deck and pulled the weed fabric in while Lodi rolled it out.
Almost There – Phew!
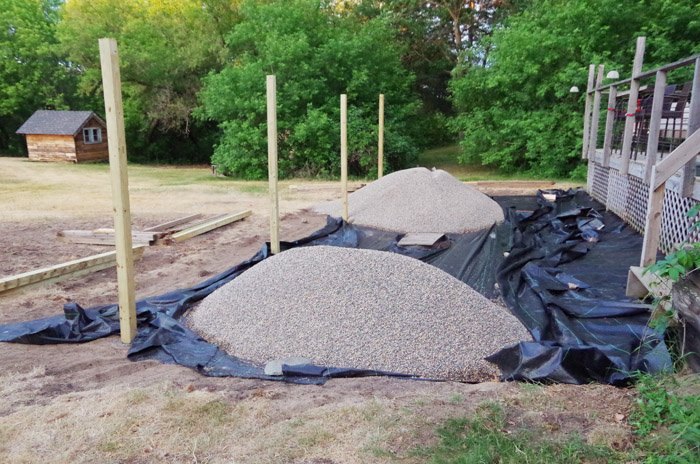
The total cost of the pea gravel (for 8 yards) was $250. We had them dump it on either side of the fire pit.
Lots of shoveling and raking later we got it all spread out and moved into place.
(I just love blog posts: What was literally hours upon hours of sweating, swearing, raking and shoveling literally only amounts to one sentence!)
The last step then was to frame out the entire deck with 4×4 posts.
(THIS WAS NOT THE IDEAL WAY TO DO THIS. Normally we would have had the framing done around the deck to hold the pea gravel in before we had it dumped off but we were in a time crunch and had some help so, unfortunately, the pea gravel came first before we got the framing and the stone fire pit complete.)
We did our last concrete pour the same Saturday I framed all of it out.
Lodi (the darling) let me sleep all through the last pour, totally completing the new garage apron without me. He also put in a little lower step here at the bottom of the deck staircase with the extra concrete we had leftover.
He headed out when I crawled out of bed just in time to give him a kiss goodbye.
Then it was my turn to get dirty for us!
With the framing I was trying to hit what I considered the perfect height: Not so tall that someone would trip on them, not so short that pea gravel would easily spill into the yard and, also, not so tall that we can’t drive the riding lawn mower right over them.
What ended up happening was me just getting the whole thing framed out, remotely level and all the 4x4s secured together. I had no dirt or anything to work with – our poor yard was SO far dead and gone – so this didn’t go at all how I imagined it.
I used steel brackets on either side of each 4×4 seem and L brackets to screw them to the deck posts.
I started with all the “new” 4x4s I had, making sure my corners were as perfect as possible and then I worked up to the deck on each side before tackling the long outside frame.
Someday, when it finally rains, this will all look SO much better. The record breaking drought and heat were just astonishing.
I was stoked to have enough leftover 4x4s from our privacy fence project this spring to get ALL of the framing done! Seriously, with the cost of materials right now that would have been an additional $400.
Because I had so many extra 4x4s I utilized almost all of them by running them along the outside of the framing to help hold it, and the pea gravel in place.
My last big job here was to add a 4×4 post between each of the deck posts under the deck so the entire thing looks framed out.
THIS. WAS. A. PAIN. IN. THE. BUTT.
Just imagine me: Dirty, tired, so sick of hauling 4x4s to the garage to cut them over the last three hours of my life getting this framed out and now…
I have to crawl UNDER the deck, hauling my cut 4x4s with me.
Imagine the colorful language I used to find I cut not one but TWO of the six a touch too long and had to crawl all the way back out from under there, hauling said 4×4 back to the garage to trim it off to return to crawling and hauling it all the way back under the deck…
Not to mention countless extra trips for impact driver, screws, tape measure, a hammer etc.
My poor knees and shins ended up crazy colorful! And there was that ONE beam that no matter how many times I hit my head on it… you’re darned right I hit my head on it again!
This was just silly as a one person job lol but I was determined and utterly stubborn because I was SO close to to being done!
Yes, I insisted on using my miter saw to get perfect square cuts and I know I could have brought my miter saw down here but its so much easier to get decent cuts on a flat surface such as in our garage.
I got them all about even in height and used the same brackets to attach them to the back of the posts that I used for the 4×4 framing.
It made quite the difference in how all along the lattice and lower deck looks, I think its quite the improvement and worth the many bumps on my head lol.
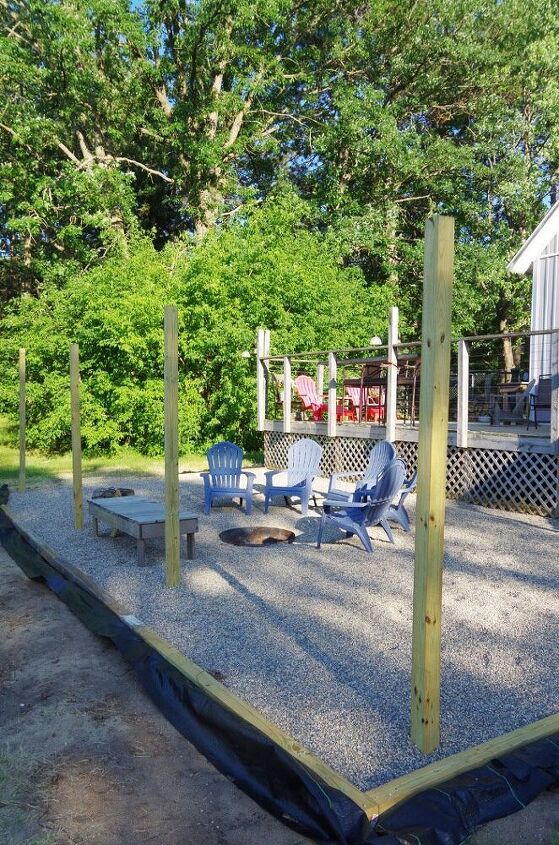
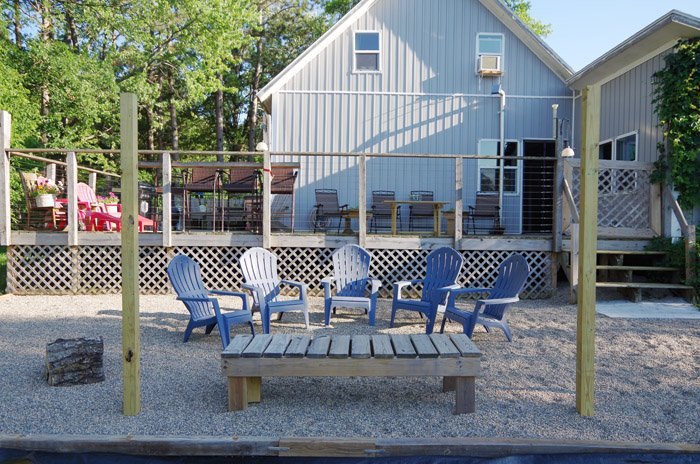
From there it was time to grab my rake one more time and really spread the pea gravel out against my new frames. Not that I was excited about raking but it was pretty awesome to get to that point – to truly have a finished lower deck.
I was so totally over that nine hour day!
But I was also so totally excited that even though my poor body and back were just screaming I still couldn’t help myself but bring our furniture down and get the whole new lower deck ready to use!
We finally made it to what I’ve been so excited about building: our new stone fire pit.
Now that we’ve used it I feel like we upgraded by about 1000% from our sand fire pit and yet achieved the same feeling I was trying to achieve all those years ago. Its relaxing down here, comfortable to walk bare foot in and kind of feels like being at the beach.
(Yes, our yard is very very very dead in these pictures. We’re going to be bringing in several loads of black dirt to back fill around our new lower deck and across our entire yard either this fall or next spring. I’ve always wanted to do that anyway to get rid of our grass and plant clover, creeping charlie, creeping thyme and dandelions… So, we have a plan, and this is all going to look a lot better someday!)
Resources for this project:


Comments
Join the conversation
-
Wow so much space and place to do anything
-
I'm very excited to find out and see if possible stay y'all do next. I think space is my problem harder to fit if you know what i mean


Frequently asked questions
Have a question about this project?