


Transom Window, Give Me Light

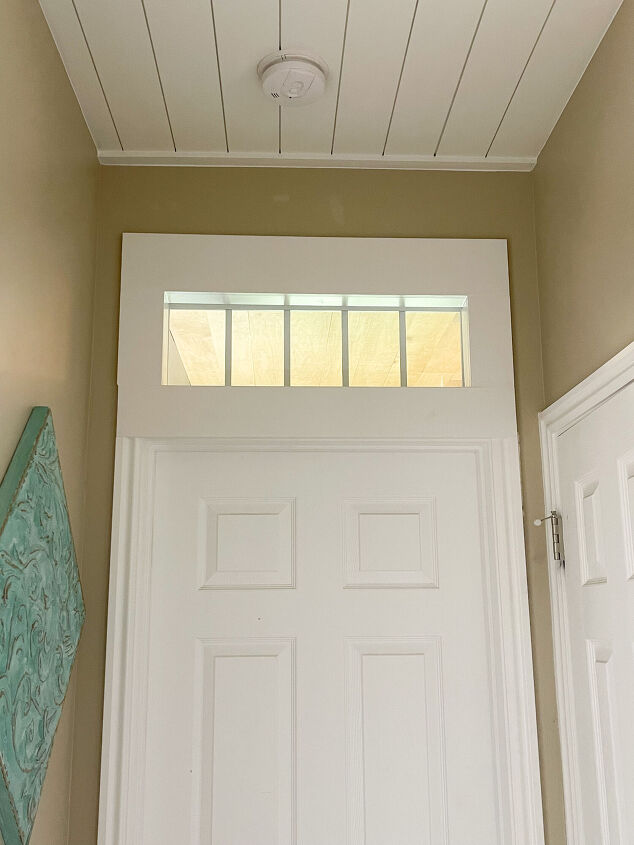
I have always been drawn to the old, classic, craftsman style of transom windows. The small hallway outside my husband's office didn't get the best light when the door was closed. So when I was redoing his office recently, I knew it was the perfect spot to install one.
The first step was determining if this wall was safe to dig into. I found our house plans and spoke with someone who knows much more than I do. DO NOT just go breaking through walls in your home without knowing what's going on in there. We determined this was simply and interior curtain wall (aka, non weight bearing.) So it was go time.
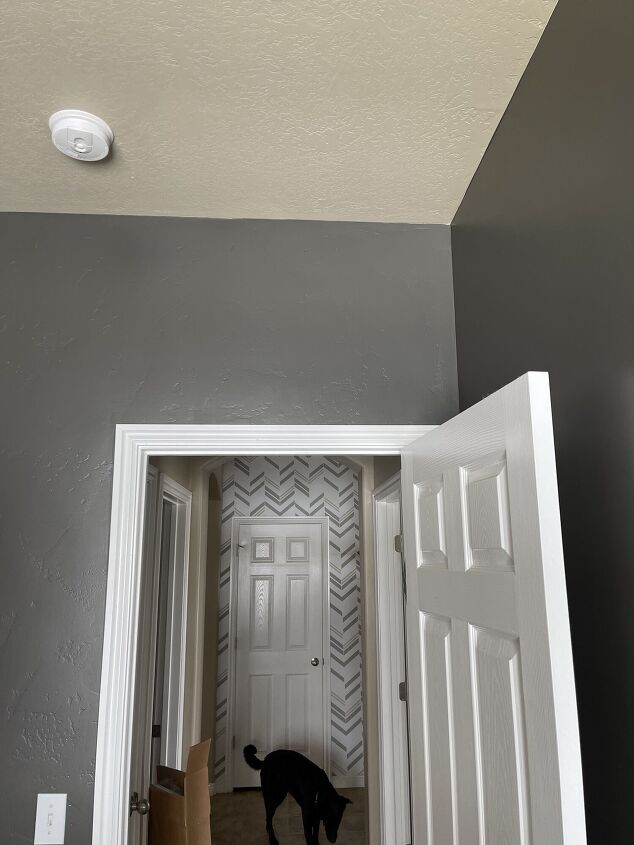
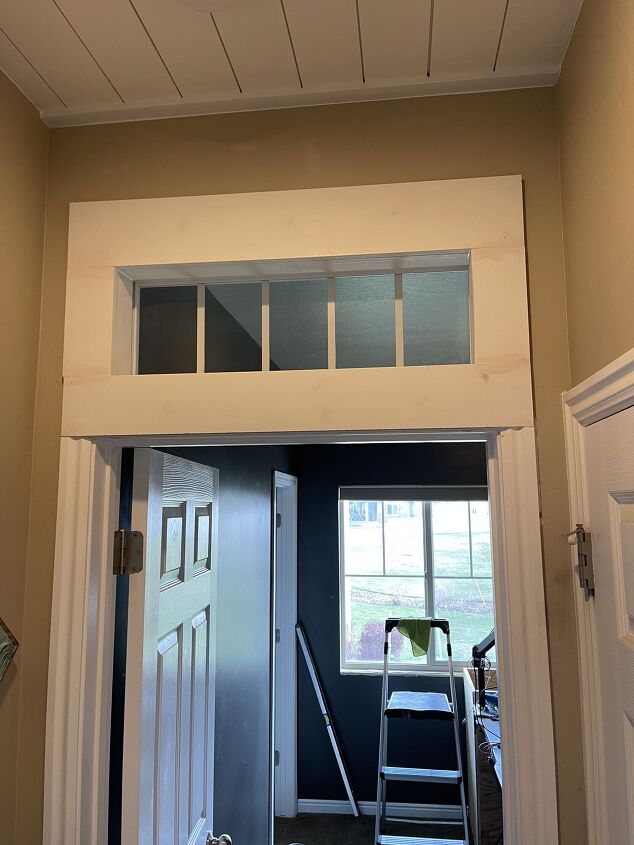
I started off by measuring my pre-made transom window and marked above my door where I needed to go. I scored the drywall with a utility knife, and snapping it out in chunks. There wasn't any insulation inside the wall to the work went pretty quickly.
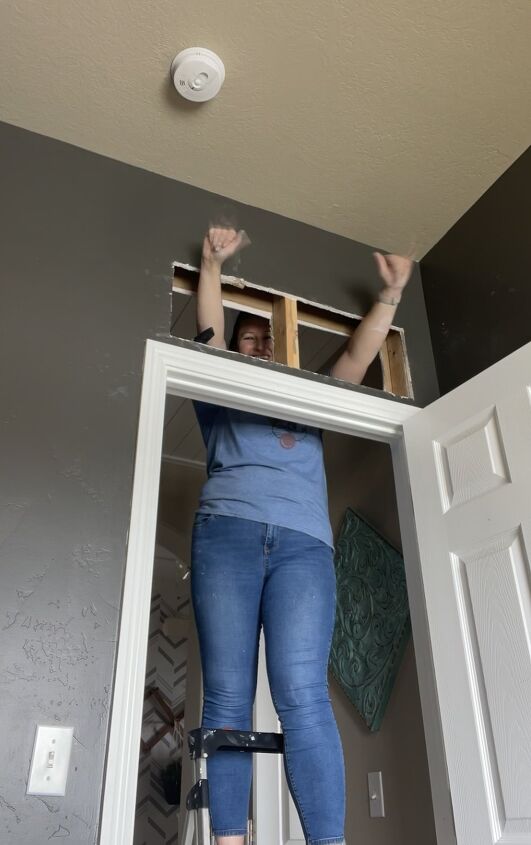
I was left with this single cripple that attached to door jam to the top plate. I cut it out, but not until I reenforced the sides of my cut out. Most framing is done 16 on center as the measurement between the studs. Taking out this middle crutch and adding 2 on either side of my cut out made the measurement between the studs 24". I was reassured this would be alright since this is non weigh bering and because my transom window frame was metal.

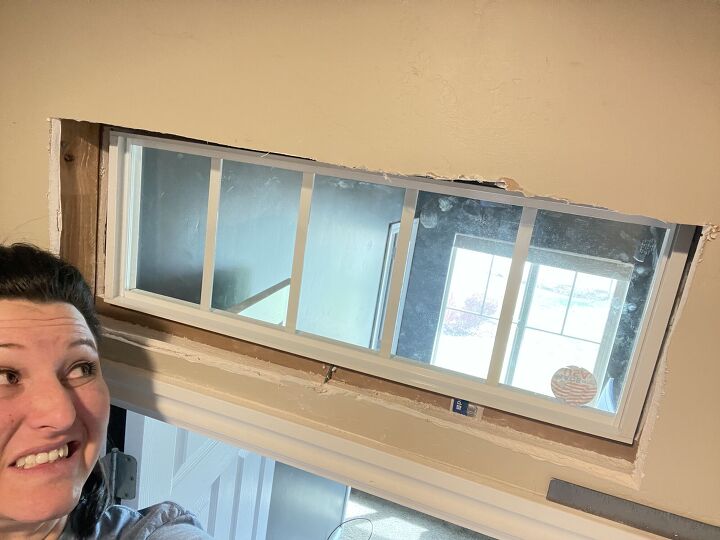
I got the window installed and framed it with flat molding. I didn't do the full door framing. I will make it all match when we redo our flooring and all the door frames. In the mean time I just used the MDF molding that I had on hand. Once it was secured I used putty and wood filler then caulked everything. Sanding everything flat and painting was the last step...well....it would have been, but there were 2 sides I had to work on. The second side was a bit uglier and more complicated.
I used more MDF to frame in the inside of the wall where the studs were showing (top, bottom, and both sides.) Like so...

Then it was simply framing in the rest of the window on this side. Putty, wood filler, caulk, sand and paint. Oh how I wish all the work went as fast as I can type it all out.
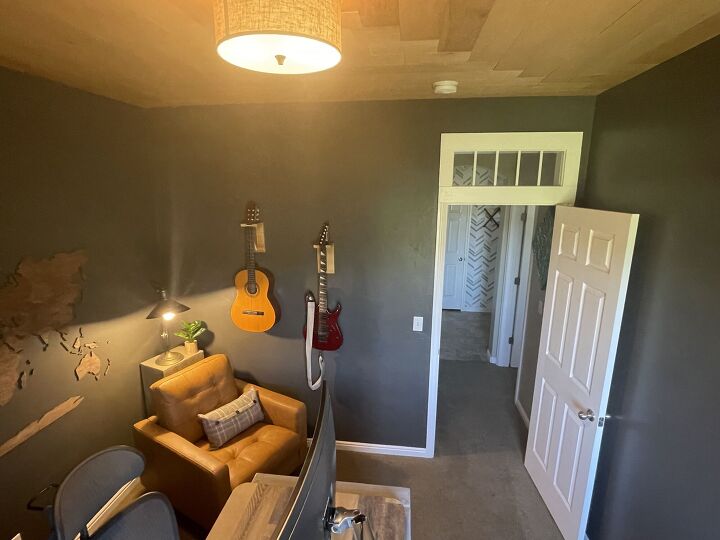
Turned out pretty cute. I did cut my last piece of MDF molding too short (you can see on the bottom left of the window), but I know I'll be redoing the molding sometime down the line, so I didn't worry about buying more molding and redoing it. For now, it's good enough. I love how I ended up with a little shelf above the door way. I think it adds that much more character and charm to the window. And the light that this window lets in when my husband has to close the door to his office is just the right amount! I love when beautiful and functional meet!
Comments
Join the conversation
-
Absolutely love this idea
-
I have wanted to install transoms over every door in my house but that is a lot of work and money. I finally ended up retrofitting my doors with windows in them that I made myself. Curious what others think. Considering making and selling them.


Frequently asked questions
Have a question about this project?
Love it, great job!
Why didn't you make it so it opened. It's a nice effect. And good for air circulation. And typical for that kind of window.
Where did you purchase the window?