


DIY Fire Pit in 2-4 Hours! Bring in the Fall With a Cozy Firepit
How to Build a Fire Pit
Since Fall is brewin’, We thought that it would be timely to show you how to build an outdoor fire pit at home. Lucky for you, we’ve made it easy. Not only can you buy a ready-to-build fire pit kit , we’ve given you step-by-step instructions for how to put it together in one afternoon.
Step 1: Layout
First things first, you’ll want to identify where to put your firepit. It can be in the grass, on a concrete patio, or on an existing hardscape.
Note: Due to building code restrictions, your fire pit should be at least 15’ away from flammable surfaces. If you’re in , they recommend at least a 25’ distance.
In this example, we installed our fire pit in the grass. So the first thing we did was mark where we wanted the center of our fire pit with a stake. Then, we marked a 40” diameter circle around the stake with white marking paint. It’s easiest to scribe a circle when you cut a string to the exact radius of your fire pit kit and use it as a guide. We used a tape measure, but a string is typically easier and only takes one person.
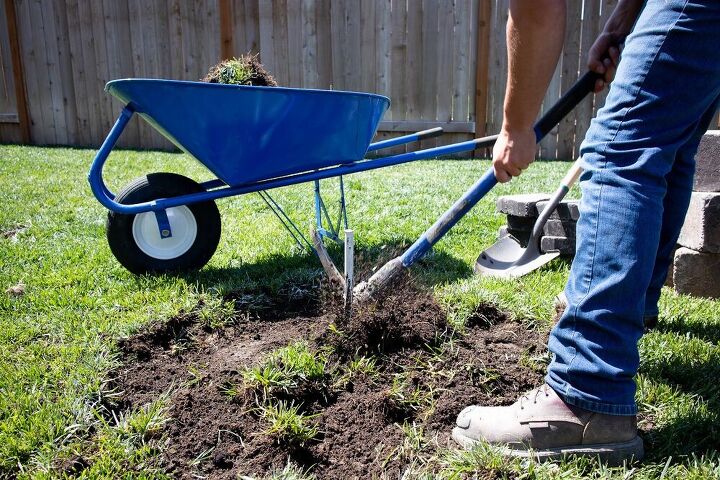
Step 2: Excavate
If you’re building your fire pit on existing hardscape, you can skip this step. The reason we excavated—and we want to show you how as well—is because we built our fire pit on an uneven surface. For most yard installations, you’ll need to excavate and lay a gravel base so that your fire pit is stable and secure.
Here’s how to excavate for a level fire pit: after you’ve marked out your fire pit, you need to remove about 4” of dirt or sod so that you have approximately 3” of base underneath.

The dirt doesn’t have to be perfectly even, but we recommend that you do your best. After we excavated a majority of the sod with a pickaxe and spade, we used a flat shovel to scrape out any dirt clumps or rocks that would disrupt the final product.
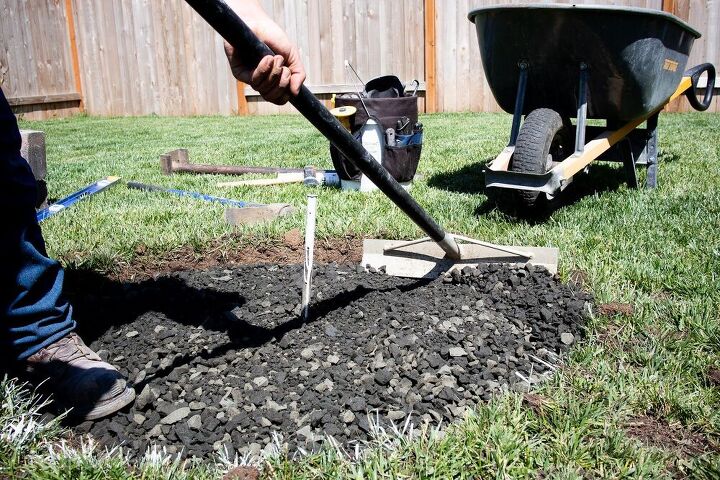
Once your sod is completely excavated, you’ll want to bring in a wheelbarrow (or two) of ¾” minus gravel. Once your gravel is in the hole, you’ll want to spread it. We used a concrete placer and level, but you can use any rake or straight board.
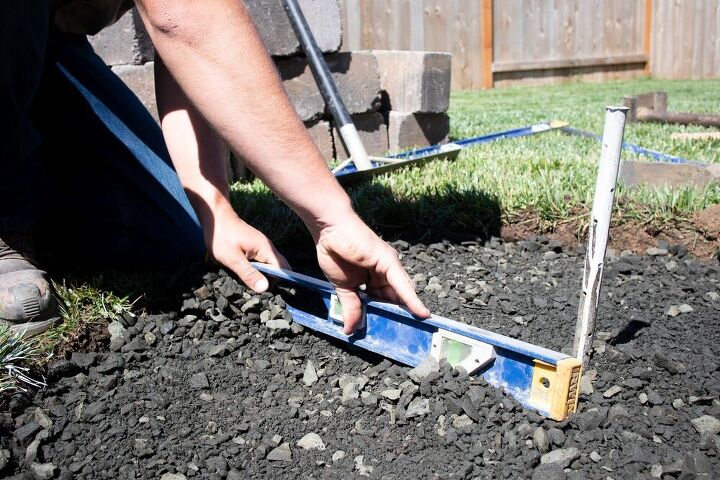
The goal here is to spread your gravel as evenly as possible so that your fire pit sits as level as possible.Next, you’ll compact the gravel using a hand tamper until it’s firm and even.
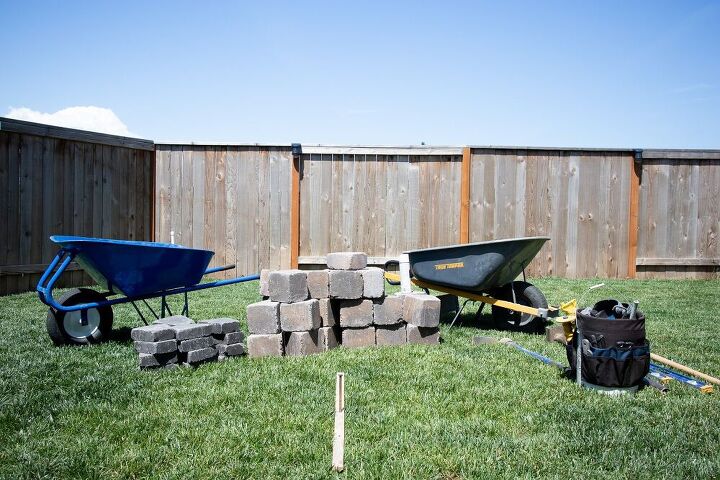
Step 3: Lay your first course
After you have your gravel hand tamped, you’re going to set the first course of your fire pit.
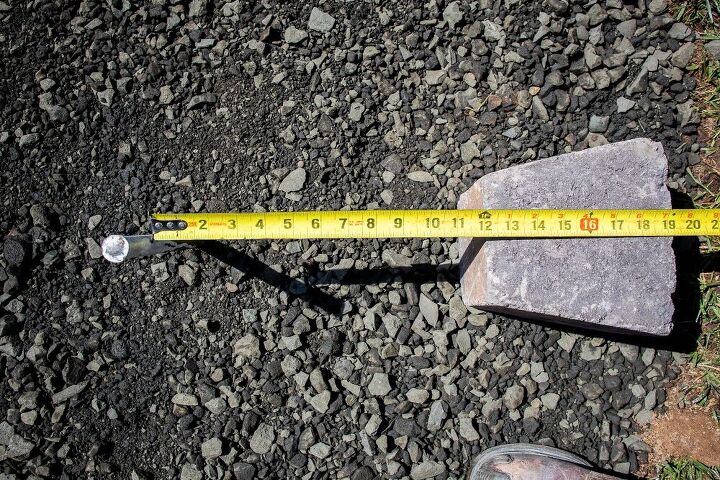
To verify that our base was the right size, we placed a block down and double checked our measurements. Since we’re building a 40” diameter fire pit, we had to make sure the radius from our stake to the outer edge of the block was about 20”.
Since there’s no sand to screed, and the first course doesn’t need to be glued, we went ahead and went to work. The first course is the toughest because you have to set each individual block level, front-to-back and side-to-side.
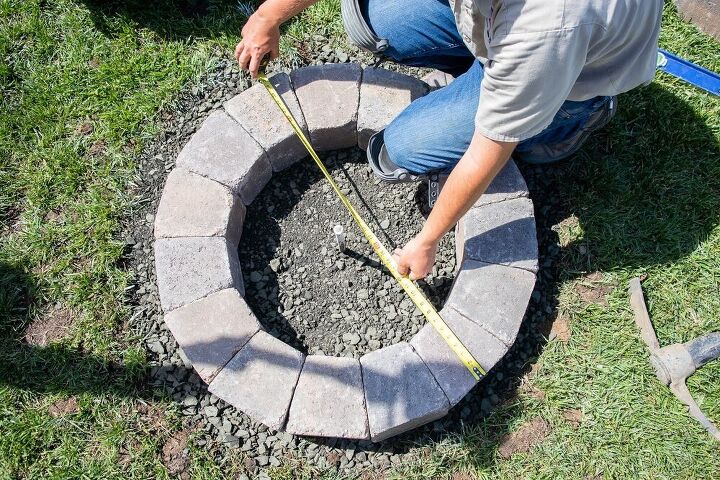
After we laid the first course, we measured the diameter of the course from a few angles to ensure it was a true circle. If you’re using the make sure it’s 50” in diameter.
Step 4: Lay additional courses
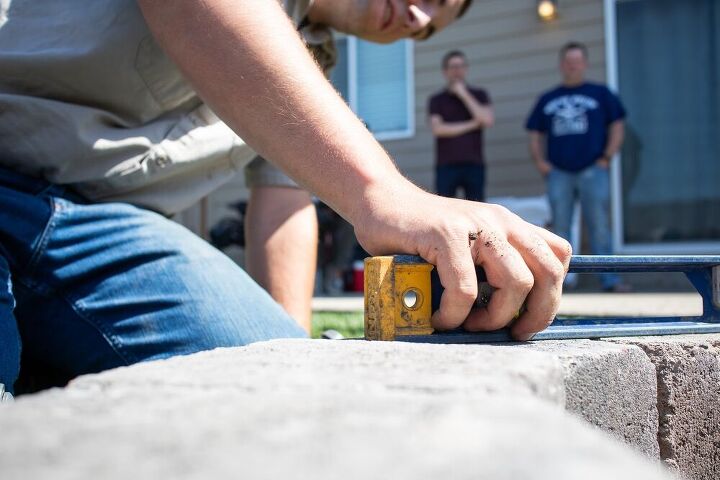
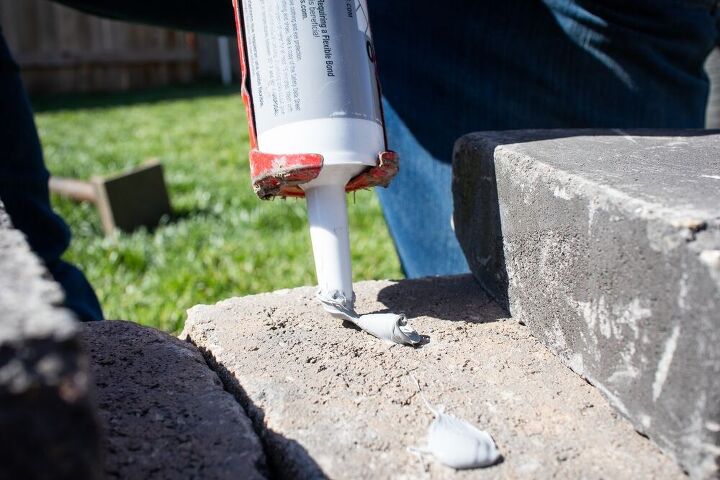
After you set your base course and made sure that it’s perfectly round, you’re going to need to stack and glue your next couple of courses. We suggest that you dry stack each course before gluing. This will allow you to easily check and adjust the alignment of the blocks. Once you have what you want, simply pick up each block, apply the glue and set the block back down. For best results, give each block a good brushing before you glue because the glue works better if the blocks are nice and clean. A good rule of thumb is you want the glue globs to be about the size of a dime.
We recommend a flexible exterior-grade construction adhesive such as . It’s a caulk specifically made for concrete products.
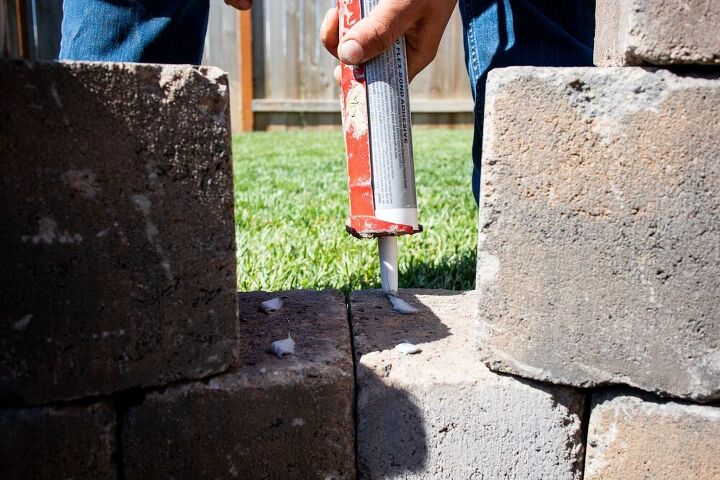
Tuck the globs into the corner because if you make them a little bit too big, the caulk will spill out of the sides. This is important because, unfortunately, construction adhesive doesn’t dry clear like school glue.
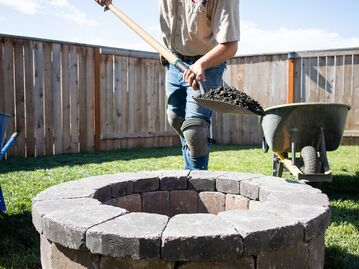
After you set your second or third courses, you can add an additional ring of caps, if desired, using the same method that you used on the blocks.
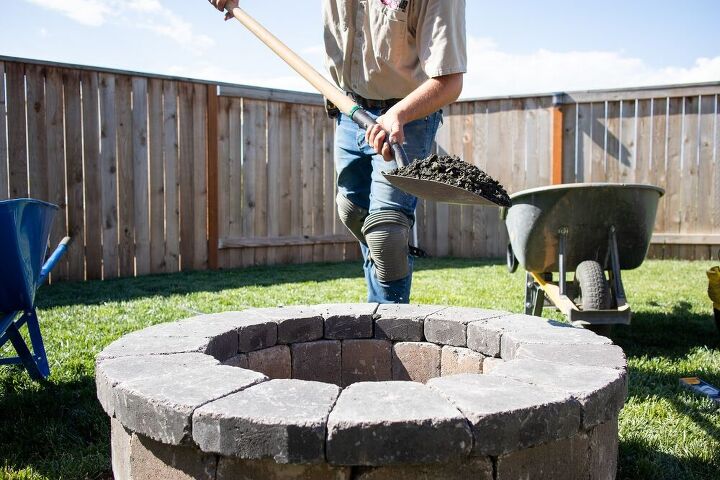
Before lighting a fire, we added some leftover gravel to the bottom of our firepit to raise the interior depth of the pit and provide a base for the coals. This step definitely isn’t required, but we’ve found it helpful.
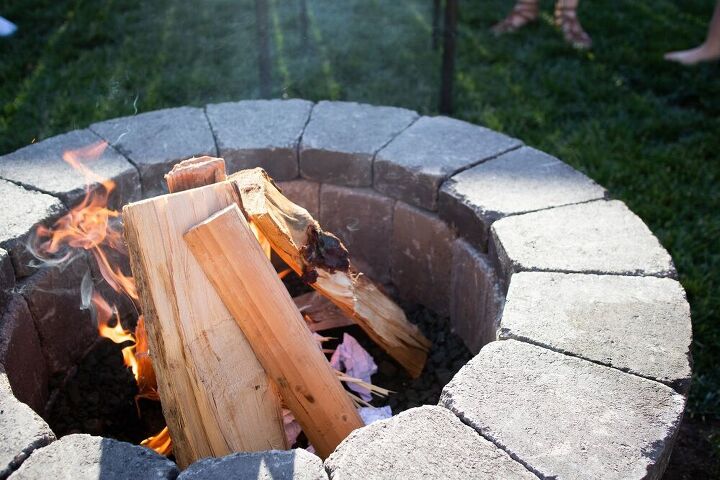
Step 5: Enjoy your firepit
Now, you can enjoy your fire pit! Since you’ll be lighting a blazing fire in your new fire pit, we recommend that you wait at least 24 hours for the glue to dry.
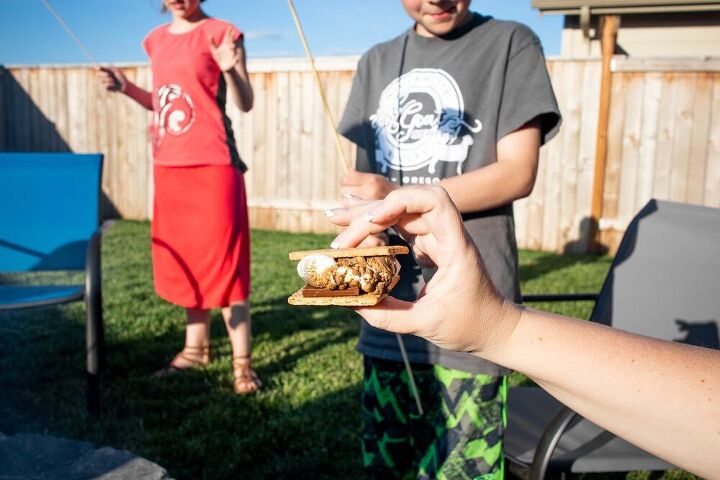
Don’t forget that a fire pit isn’t the same without friends, family, and some tasty s’mores!Learn how to work with paving stones at Western Interlock
Here at Western Interlock, we’re on a mission to take the “hard” out of hardscaping. That’s why we frequently host a seminar for free.


Comments
Join the conversation
-
Nice firepit and I love the instructions, I am Just wondering if the heat will melt the adhesive and fracture the blocks? How is it holding up so far?
Thank you for your nice diy project.
-
Actually FIRE BRICKS need to be used not regular pavers, they are not made to sustain the heat of a fire pit.


Frequently asked questions
Have a question about this project?
In your materials, you list a fire pit kit which doesn’t appear to have been used, and you don’t list the pavers - how many blocks and caps were used?