


Checkers Anyone :) :) :) Summertime Fun for the Whole Family!

7 Materials
$20
2 Hours
Easy
Are you looking for an outdoor activity to do with the family on those warm summer days/evening? Why not try customizing your own family checkerboard game and pieces :)
i first saw this idea from Becky here: http://www.beyondthepicket-fence.com/2017/06/rustic-buffalo-check-table.html
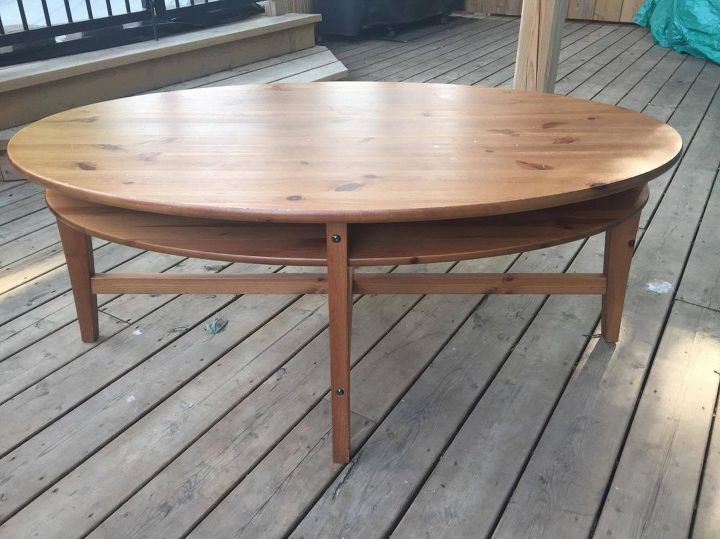
Step 1: We chose to re-purpose this IKEA pine table (it actually turned into two projects...a checkerboard and another project I'll share later :) We bought this little beaut from Kijiji for $15 ! You also purchase a piece of wood from any big box lumber store.
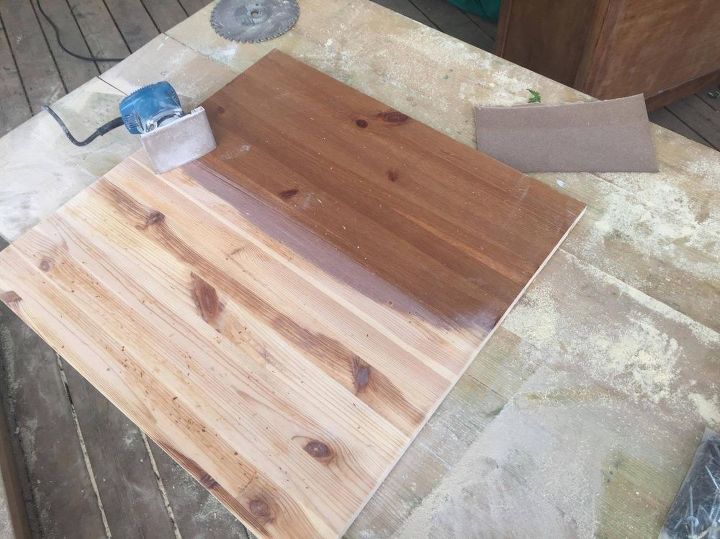
Step 2: Decide what size checkerboard you want. We were able to get a 26" x 26" checkerboard from the top piece of the pine table...sanded it down with an electric sander (80 grit to start and finished off with 220 grit)
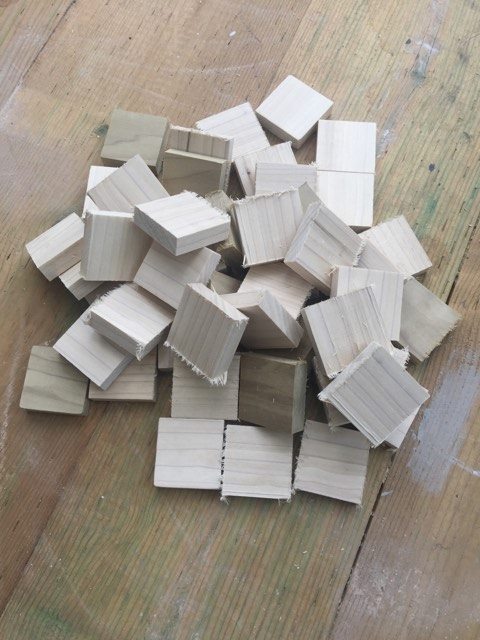
Step 3: This part is optional but we decided to customize our own checker pieces and do something a little funky and make them square instead of round. We used the side support pieces from the table to make a ton of blocks. Again I used the electric sander to quickly sand off any rough edges and then I painted them with Fusion Mineral Paint in Fort York Red & Coal Black. You can also purchase checker pieces at any game or hobby shop too :)
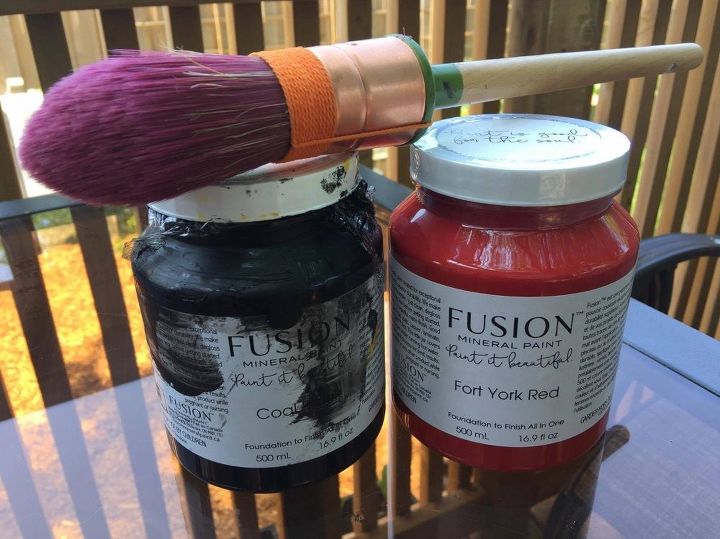
Step 4: My Fusion Mineral Paint jars are well loved as you can see by the looks of my Coal Black jar but trust me...it's Coal Black, I also used Fusion Mineral Paint Fort York Red for the checker pieces and the actual game board. I also am madly in love with the Staalmeester brushes !!! You can purchase these through a Fusion Mineral Retailer (you can go to their website to find a local retailer)
I wanted to include this picture to remind you...it's just paint ! I had finished the board and decided to add the fringe from Funky Junk's Buffalo Check Stencil and additional Fringe stencils (which I LOVE these stencils) but after I was finished I realized I didn't love the fringe for this project and I also realized I screw up the repeating pattern of the checker so...it's all good...sand it down and start over :)
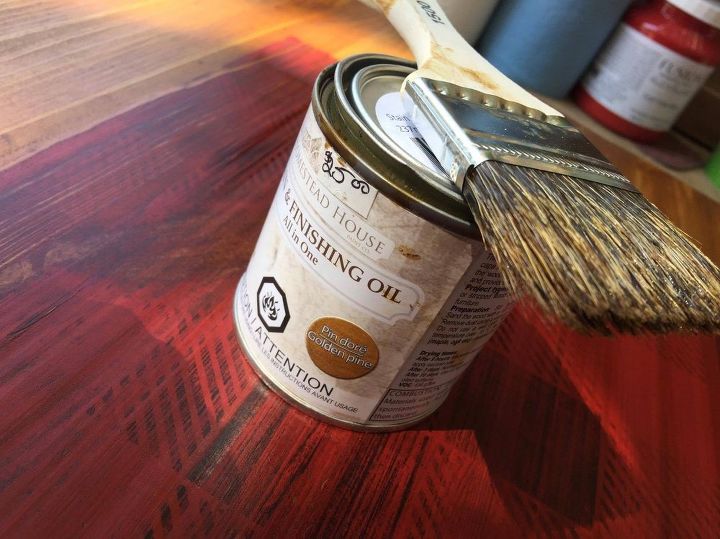
Step 5: It turned out to be a happy mistake as I changed the stain and went with Homestead House All in One Finishing Oil in Golden Pine instead and absolutely loved this new stained look from what I had previously used! Just use a cheap brush to apply the stain and if you're lazy like me...throw it away after :)
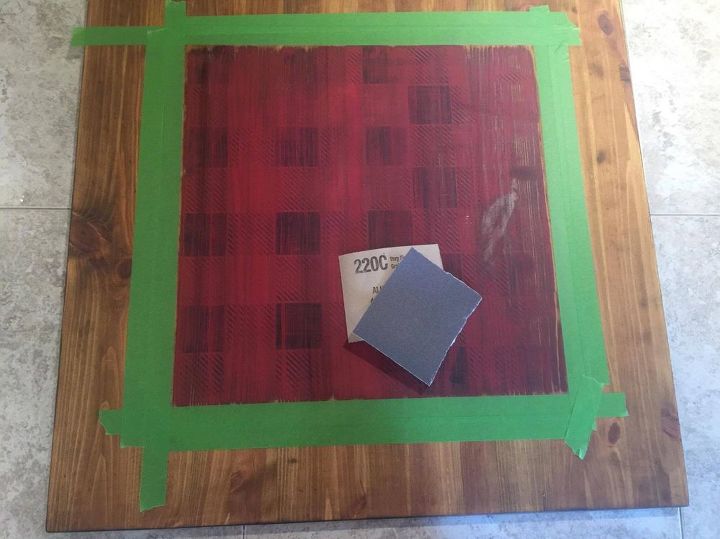
Step 6: Because I had stained the piece with an oil based (albeit natural oils!) it can resist the paint which is acrylic based so after I taped off the section for stenciling the checkerboard I lightly sanded the previously painted area with 220 grit. Then I repainted the inside of the square with a couple coats of Fusion Mineral Paint in Fort York Red and I'm ready for stenciling !
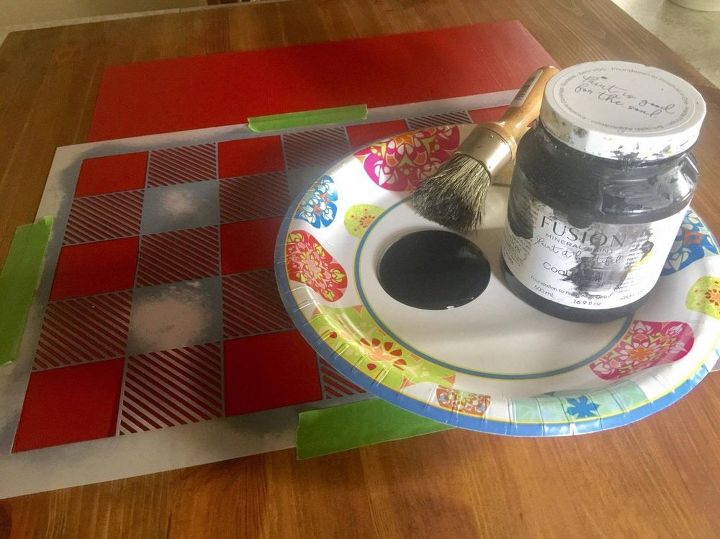
Step 7: Time for stenciling! These stencils by Funky Junk are so high quality that stenciling with them is a breeze! There are usually two styles of stenciling....you're either a pouncer (straight up and down) or a swirler (small circles) I'm a pouncer...both ways work but the secret is less is more...very very little paint on your stench brush is key! The other key is to be sure you are correctly repeating the checker board pattern in proper sequence (trust me on that one...hence my happy mistake hahaha)
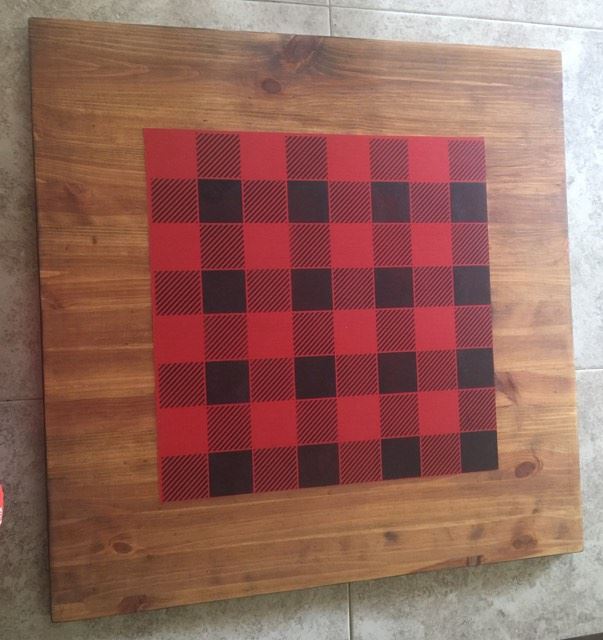
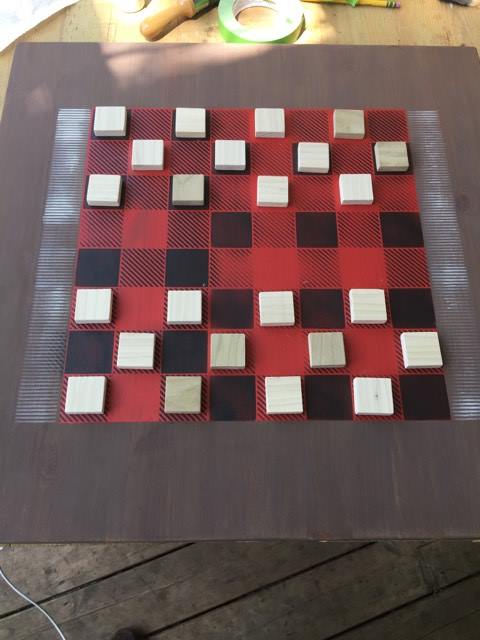
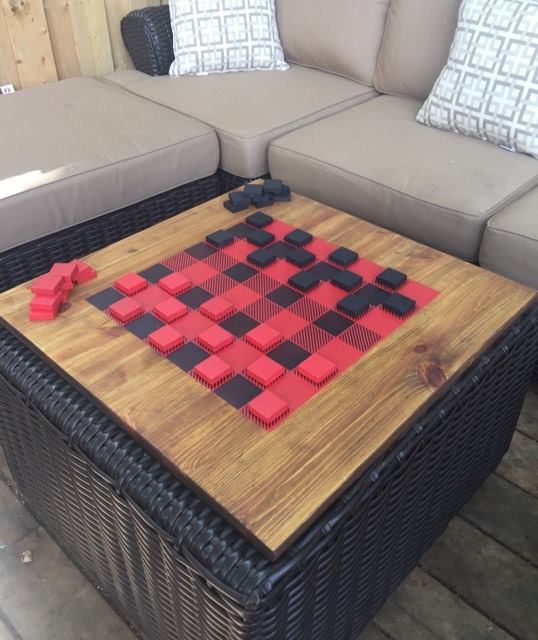
Here's the finished checkerboard and I couldn't be happier with how it turned out!
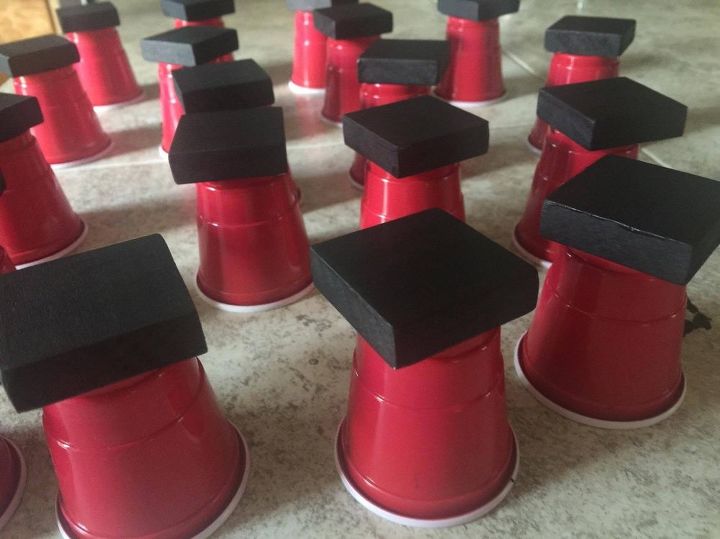
Step 8: Quick tip: Thank you Dollarama for selling plastic shot glasses so that I can use them as stands for my checker pieces as they dry :)
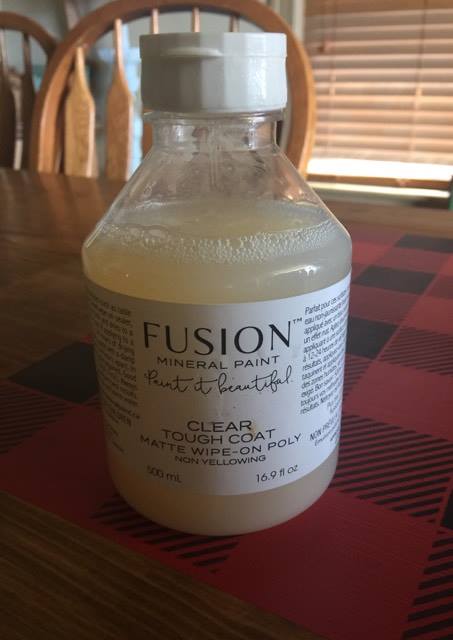
Step 9: The Final Step was to give the board and game pieces a light coat of Clear Tough Coat from Fusion Mineral Paint! Although their paint already has a primer and top coat built into it, we're going to be using the checkerboard on our back deck and although I love my family I'm not naive to think that they'll always remember to bring it in if it rains...Tough Coat just gives me that extra layer of protection and peace of mind. Tip: Don't forget to apply the Tough Coat to the sides and even the back of your checkerboard and pieces for complete protection.
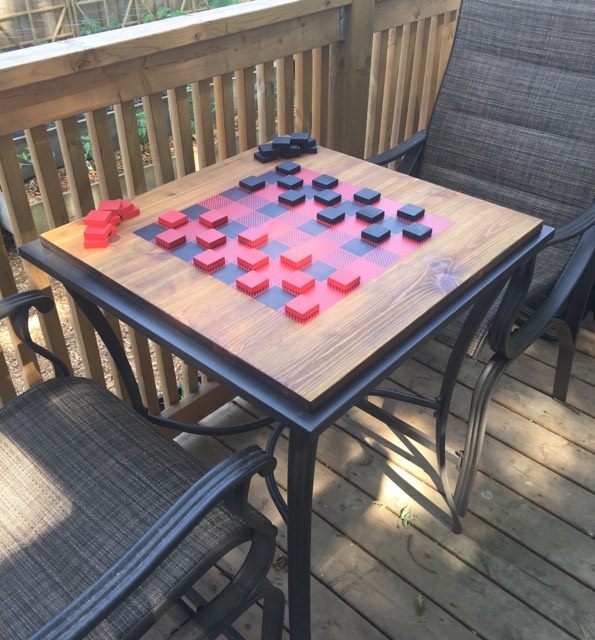
I wanted to make sure the checker board was big enough to fit extra game pieces and also would fit nicely on top of our outdoor deck table and the ottoman of our outdoor sectional set. Which is the gathering place for our family when we're outside :)
We're looking forward to many hours of outdoor family time and because it's so portable it's not a big deal to bring it on a rainy day and keep playing :) :)
Comments
Join the conversation
2 of 6 comments
-
You didn't waste anything.......super!!!
 The checkerboard is so nice, who doesn't like checkers???
-
ah thanks !


Frequently asked questions
Have a question about this project?