


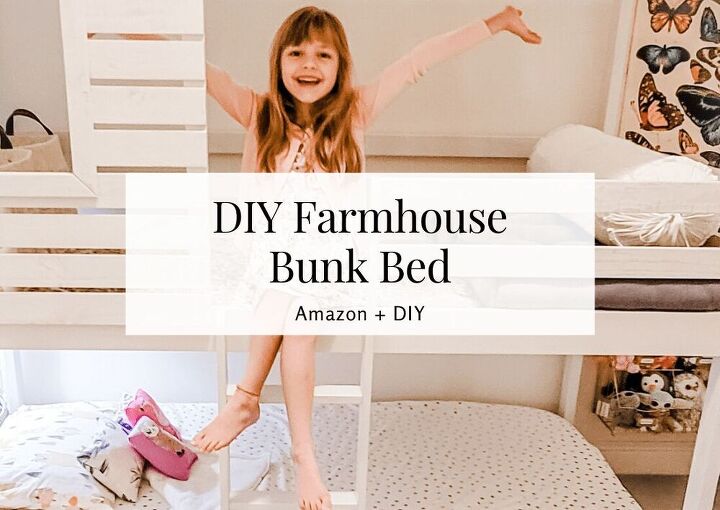
DIY Farmhouse Bunk Bed - 804 Sycamore
In
DIY farmhouse bunk bed
It seems like every kids likes bunkbeds! I love bunkbeds! They are a great space saver and those custom-built ones are so amazing. Plank and Pillow created an amazing bunk for the buyers of their home when they sold it. And Our Faux Farmhouse whipped up farmhouse bunks and desk area like it was nothing. I am not quite at the stage where I’m confident to take on building bunks from scratch, but I did have a vision to embellish an existing bunk bed and create my own DIY farmhouse bunk bed.
My future plans for this DIY farmhouse bunk bed is to add a flower box below the window and my teenaged daughter, Sawyer, suggested adding fairy lights. The fun thing about this bunk bed is that I can add festive holiday garland or change the bedding to give it a quick refresh. I may also add some artwork along the wall space of the upper bunk – we’ll see!
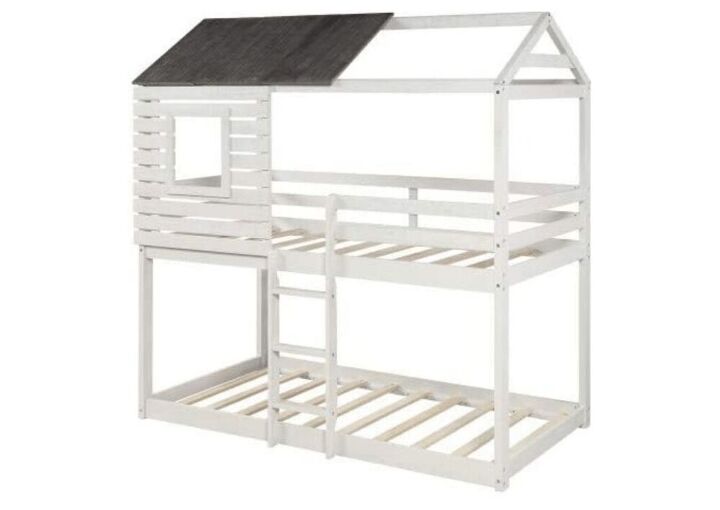
The third and final project for Quinn’s bedroom design is a DIY farmhouse bunk bed. The bunk bed I selected was cute from the start, but I wanted to modify it slightly to give it more of a farmhouse look and coordinate it with the rest of her bedroom. Here is the bunk bed that I purchased from Amazon:
Shop this space:
DIY Farmhouse Bunk Bed – custom steps:
- Assemble the Amazon bunk bed per the instructions – but do not install the 3 roof pieces. See photo below.
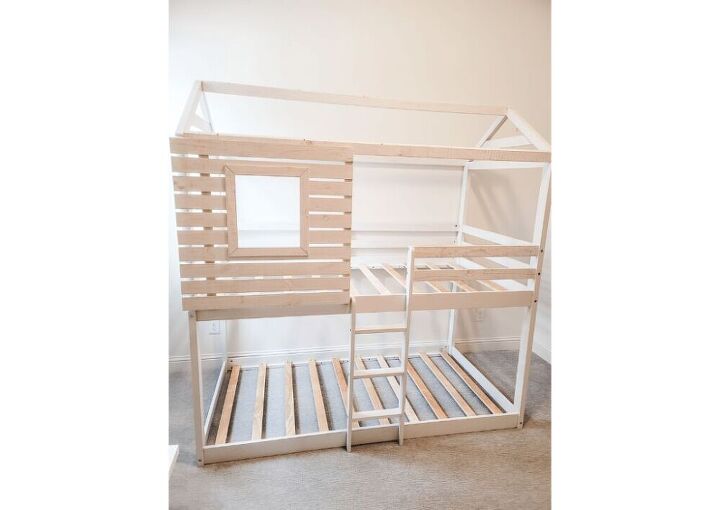
- The Home Depot cut my 1/2″ sheet of plywood to the exact dimensions I requested. The 39″ x 76″ sheet of plywood fit perfectly onto the floor of the top bunk. Be sure to sand the edges and top surface if necessary.
- Measure the width and length of the roof area to calculate how much plywood you’ll need.
- The Home Depot cut my 1/4″ plywood at 27″ so that I would just have to make the vertical cuts.
- I cut seventeen roof shutters at 4.5″ wide. You’ll want to cut the plywood with the pretty-side face down. Be sure to give the edges a sanding.
- These roof shutters are connected to 1″x2″x6′ pine boards using a brad nail gun. I used 3/4″ brad nails. The 6′ pine boards are 12 inches apart.
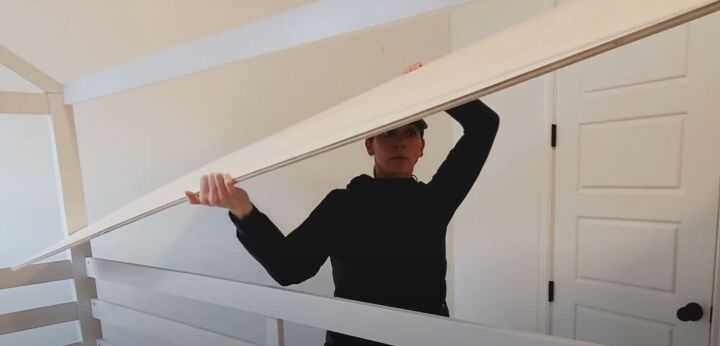
- Once the roof is constructed, use clamps to hold it onto the bunk bed roof frame.
- Finally, brad nail the roof along the top roof frame board and the bottom roof frame board. I used 1.25″ brad nails for this step.
- I also created a video to show each step as well as my daughter’s reaction to her DIY farmhouse bunk bed and new bedroom design.
DIY Farmhouse Bunk Bed
The simple step of creating my own pine roof for this adorable bed transformed it into a sweet farmhouse bunk bed for my youngest daughter, Quinn. The bed coordinates nicely with the huge peg board I made for above her desk. Her desk chair also has a small pine colored accent around the edge as well as the pine midcentury modern desk legs. It’s all very subtle, but it makes me so happy when the details add balance to a space.
Quinn loves her bed, she loves using the top space to get dressed, to relax or “sleep”, and to play. When a bedroom is too small to use the linear footage, consider using the vertical footage to get more function out of the space. Check out the video below to see just how simple it was to create this DIY farmhouse bunk bed and to see Quinn’s reaction to her new bedroom design.
I had The Home Depot cut my plywood to the exact measurements of the top bunk. I just sanded the edges and set it over the upper bunk rails. I also added an accent rug on top of the plywood.
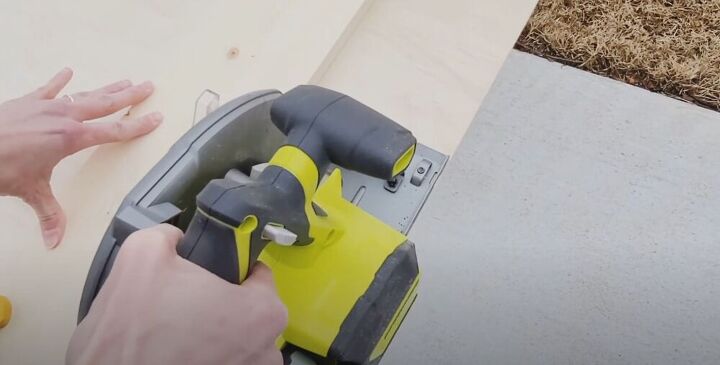
The Home Depot cut my 1/4" plywood to 27" so that I just had to make the vertical cuts for the shingles. I measured, marked, and cut using a circular saw to cut enough shingles to cover the bunk bed roof.
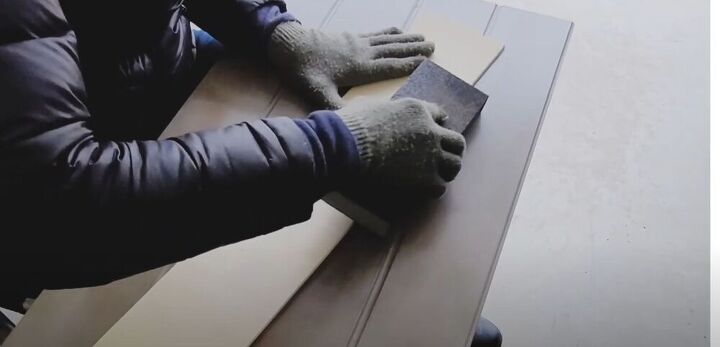
Be sure I sand the edges of the shingles. Each one only took a few seconds. I'm wearing gloves because it was so cold outside!
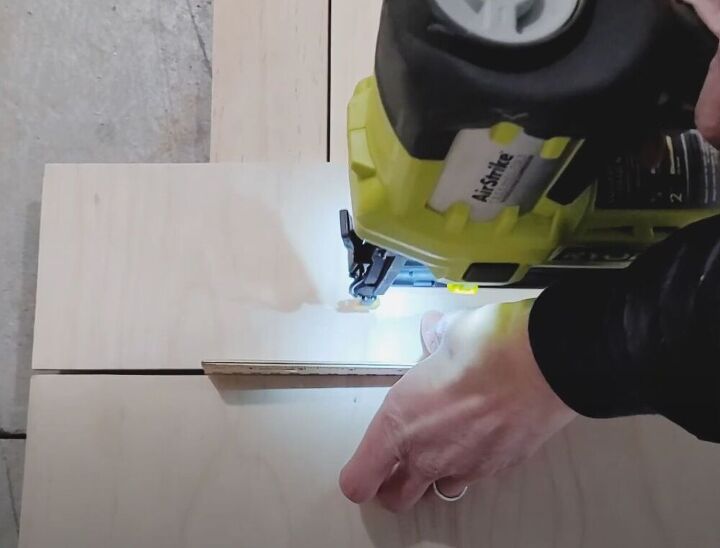
I lined up my 1"x2"x6' pine boards horizontally on the garage floor. I placed them 12" apart so that they'd set inside the bunk bed roof. Then I lined up each shingle and used a 3/4" brad nail to attach it to both 6' boards. I used a wooden ruler to get a uniform space between each shingle. You could use anything, but I liked the look of this amount of space. Make sure to use the ruler to keep the 6' boards at 12" apart.
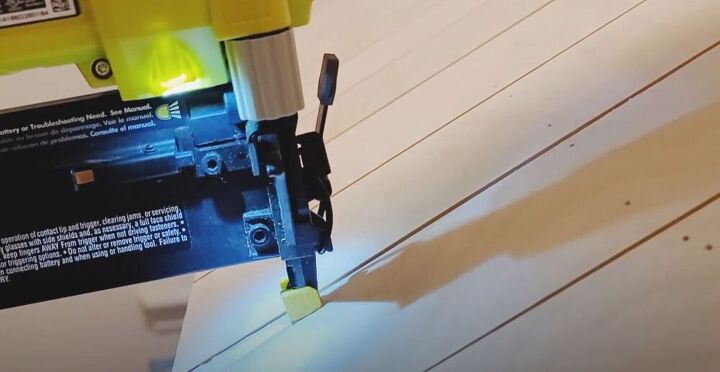
Once the roof was constructed, I got help to set it on top of the bunk bed roof frame. Then I used 4 clamps to hold it in place. You'll want to measure the roof line to make sure it's level across the framing. No crooked roof here!
Then use 1.25" brad nails to attach each shingle to the roof framing board across the top. Then do the same for the shingles along the bottom roof framing board. Remove the clamps and set up the new bunk bed for sleep and play!
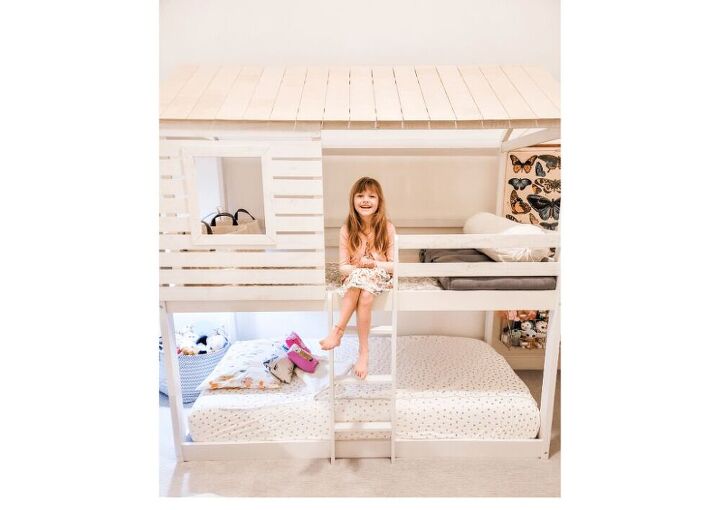
Quinn loves her new bed and it leaves plenty of space on the floor in this small bedroom.
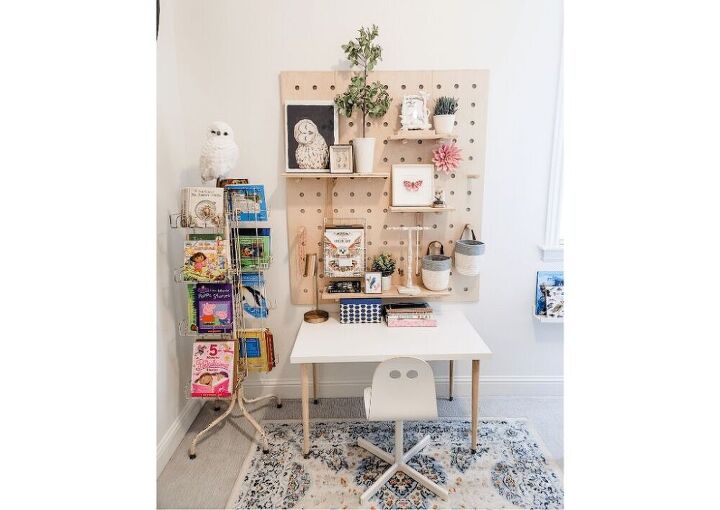
This giant peg board also utilizes the vertical space in this small bedroom. It gathers, displays, and organizes decor and supplies.
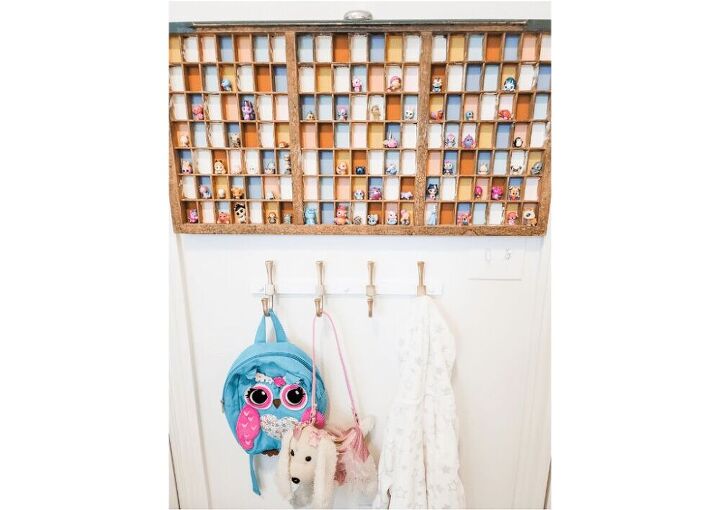
- I used a vintage printers tray to display her little Hatchimal toys. She absolutely loves this and likes to arrange the toys.
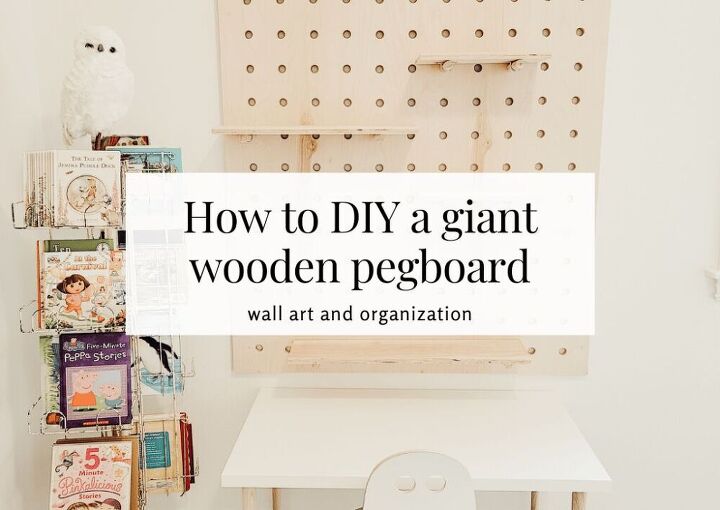
https://804sycamore.com/how-to-diy-a-giant-wooden-pegboard/

https://804sycamore.com/how-to-paint-a-butterfly-wall-mural/

Tags:
diy bunkdiy bunk bedDIY Farmhouse Bunk Beddiy girls bedroomeasy diy bunk bedeasy diy farmhouse bunk bedfarmhouse bunk bedgirls bedroomgirls bedroom decorgirls bedroom inspirationgirls bunk bedgirls roomkids bunk bedour faux farmhouse bunk bedplank and pillow bunk bed


Frequently asked questions
Have a question about this project?