


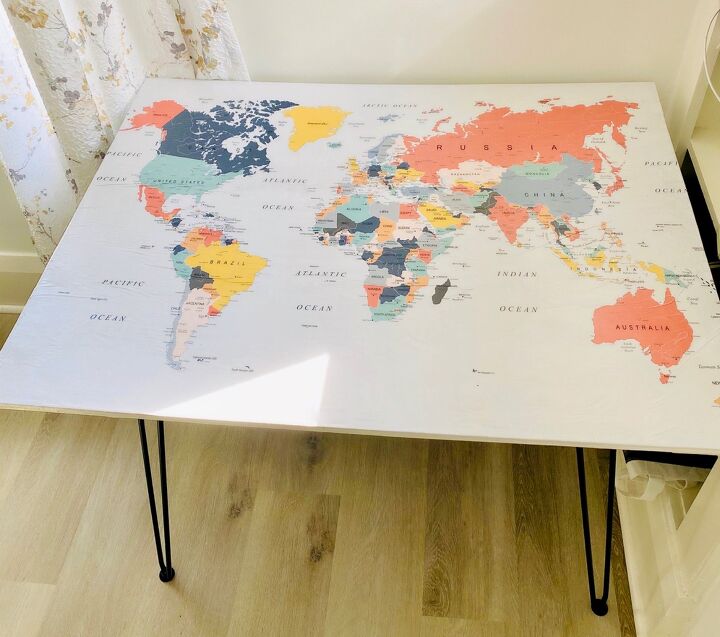
DIY Map Desk

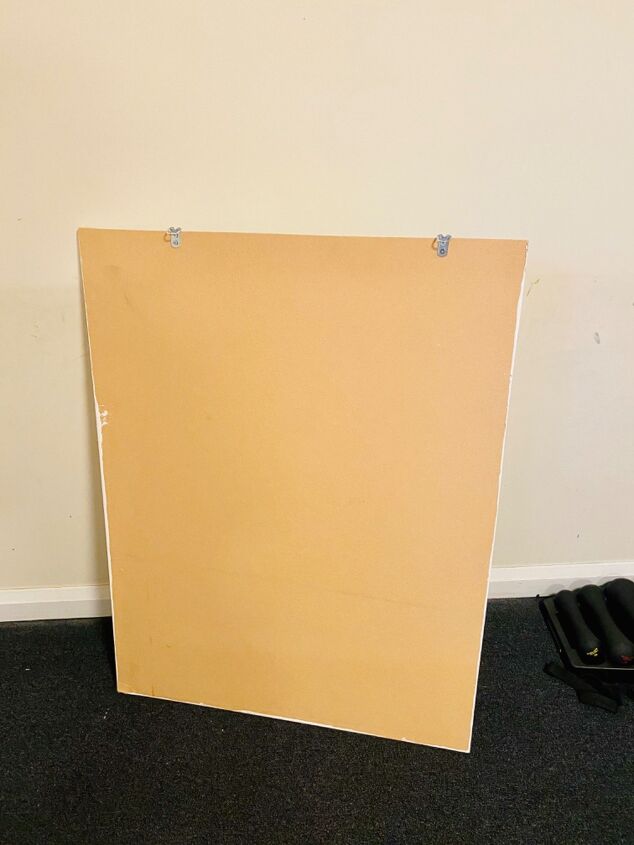
I’ve always had a thing for map! When I saw this piece of hardboard sitting in my house of no use, I decided to turn it into a map desk.
Steps I followed:
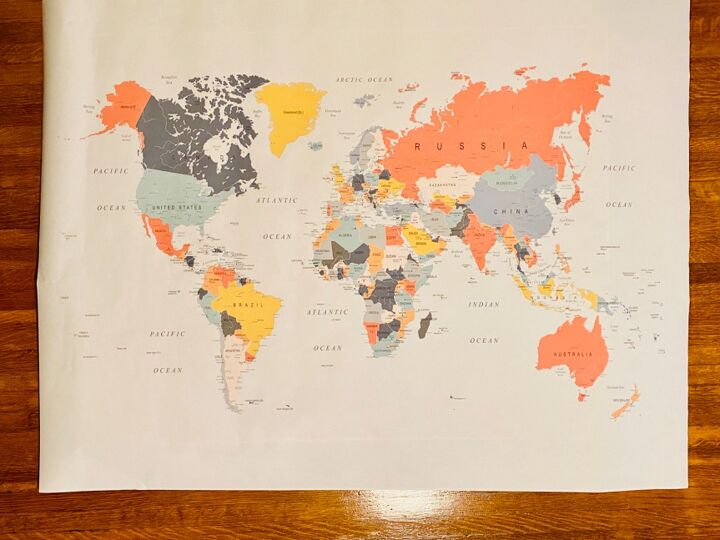
1. Measure the size of the hardboard. Print a map as poster/colored engineering print at Staples .
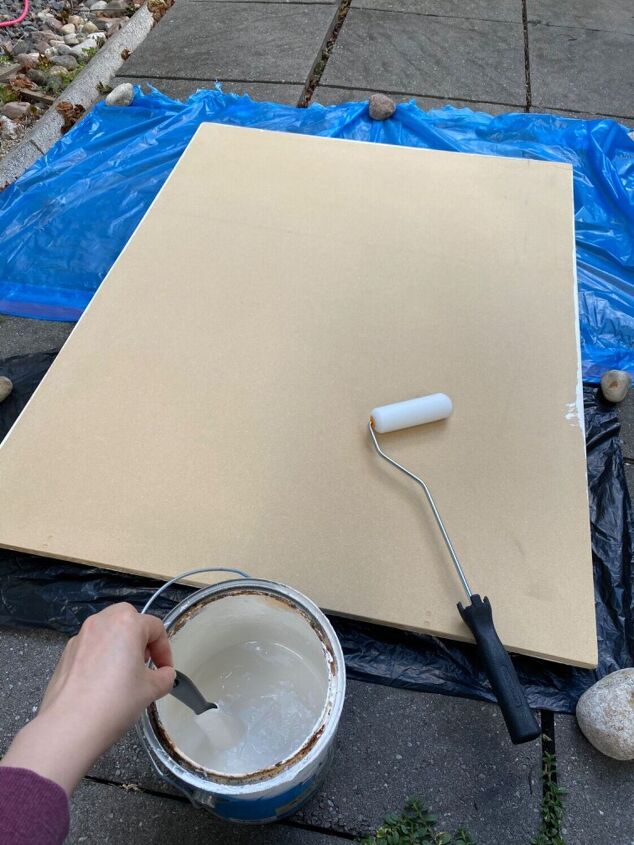
2. Paint the hardboard white to match paper color. Sand before painting if needed.

3. Carefully measure the top of the table. Then, roll out the map and cut out the section that I need using these measurements.
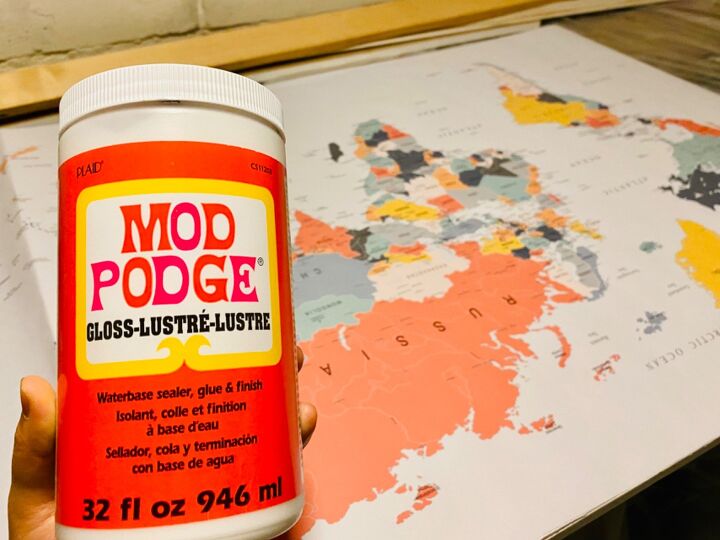
4. Cover the tabletop with a layer of Mod Podge glue. Then, carefully place the cut-out map on top of the glue-covered table. Use a piece of wood or hand to gently squeeze out air bubbles.
5. Brush a layer of Mod Podge using foam brush over the top of the map, leave to dry overnight. This will act as a protective varnish.
6. Install hairpin legs. Then, brush another layer of Mod Podge to enhance the protection.
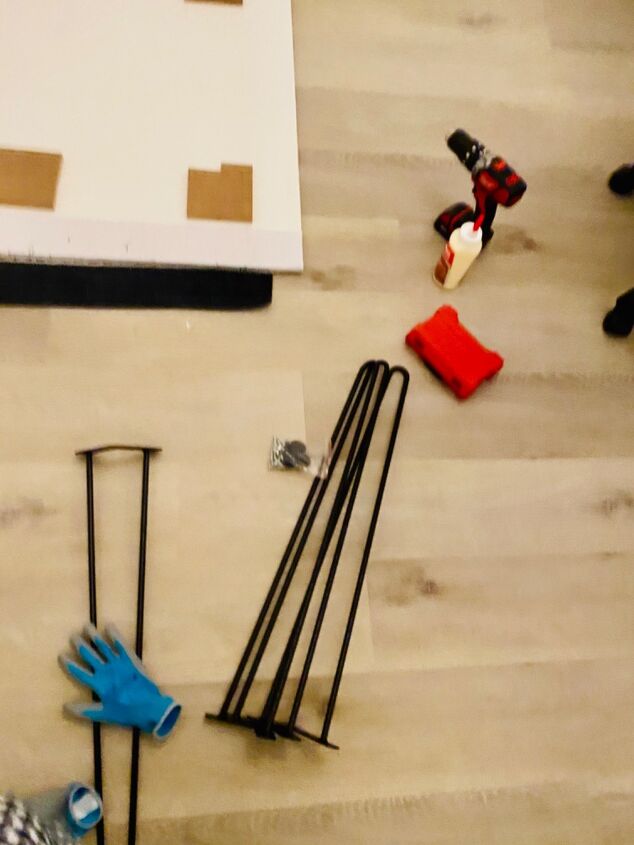
7. Lastly, I added a pullout tray using a piece of scrap plywood for my keyboard.
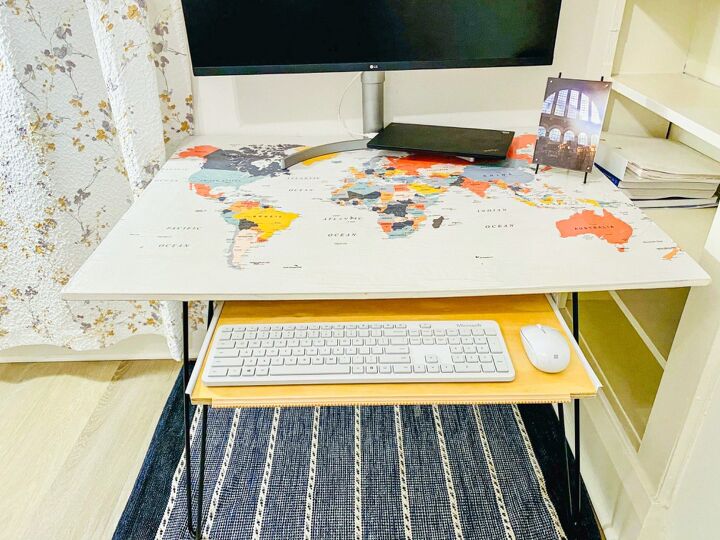
I’m super happy with how it turned out! So excited everyday to be working from home on the desk I created myself!
Find me on Insta: Sibel | DIY & Home (@little.crafter_) • Instagram photos and videos
XOXO
Sibel


Frequently asked questions
Have a question about this project?