


DIY Resin Plant Stand
I know what you’re thinking, you sure like to make plant stands for someone who can’t keep a plant alive. And that’s true, but I won’t get better if I don’t keep trying! Plus yall know I love a good resin project.
Lately, I have been seeing all these amazing resin projects everywhere & I decided it was time to make one of my own. This project is the perfect beginner resin project & Alumilite makes it super simple by providing lots of how-to videos on their website!

- 2-Part Clear Coating & Casting Resin
- Resin Dye
- 9” Cake Plate
- Paint Mixer
- Plastic Containers
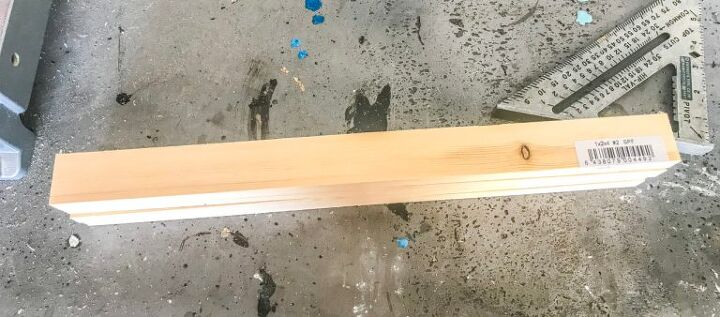
- (2) 1x2x4 Pieces of Pine

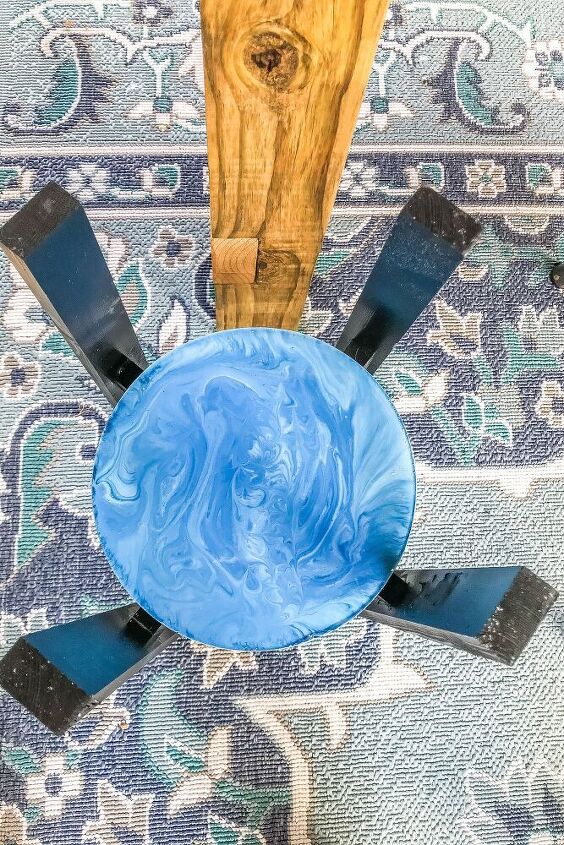
- For my mold, I use a silicone 9” resin cake plate. This has worked in the past for me & is super easy to clean off afterward.
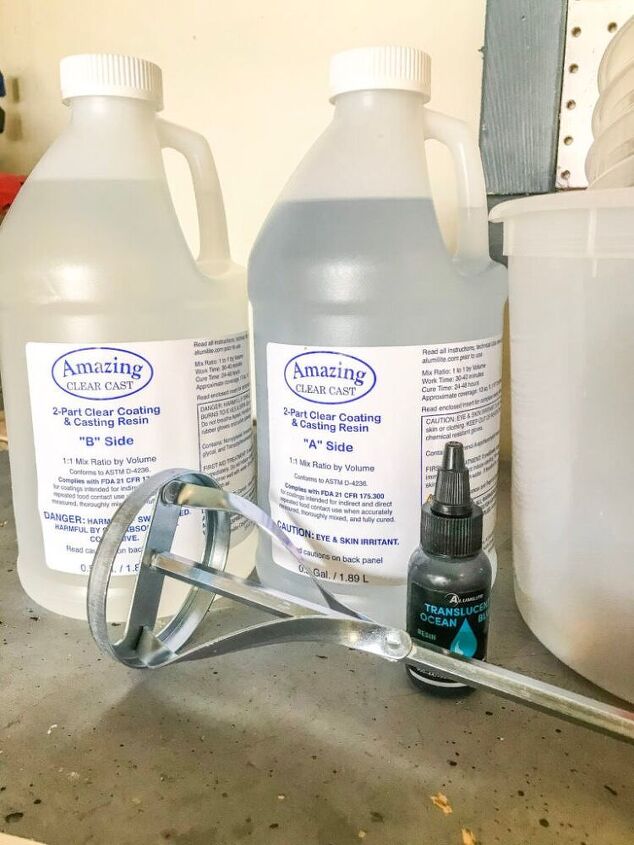
2. The ratio for mixing 2-part resin is 1:1. Measure equal parts of A side & B side resin.
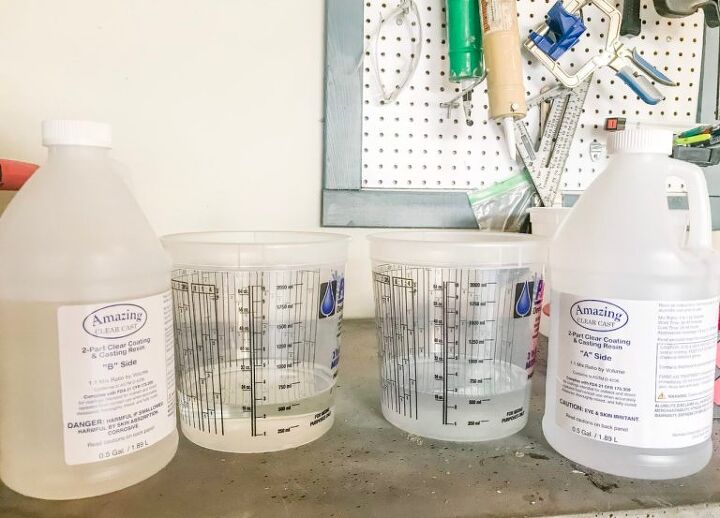
3. If you have a scale that is the best way to make sure you are mixing equal parts. I don’t have a scale yet so I used two plastic containers & poured the same volume of resin into each container.
Tip: If you are unsure of how much resin your mold requires, Alumilite has a calculator on their website

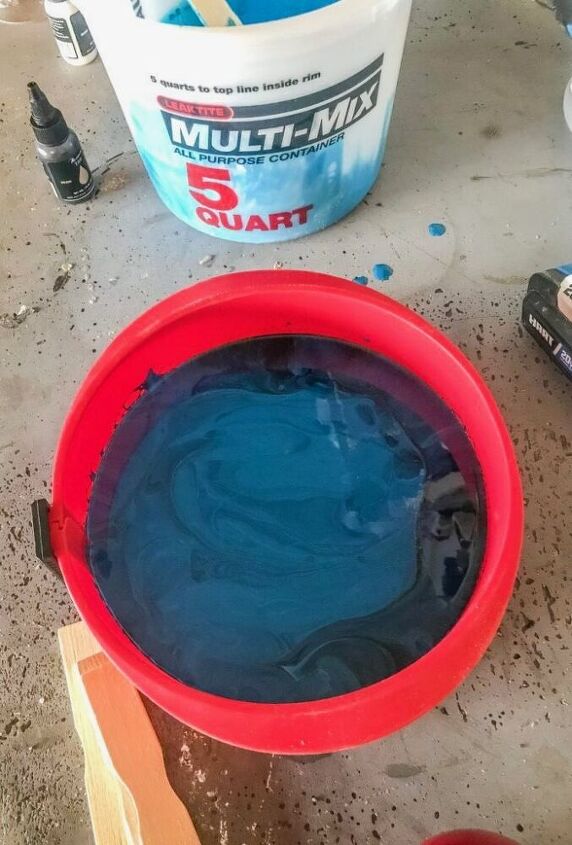
4. Once you have two containers of resin it’s time to combine them together. Pour both into a larger plastic container & use a paint stirrer or metal mixer to combine them well.
Tip: Pour a small amount into an extra container to use later
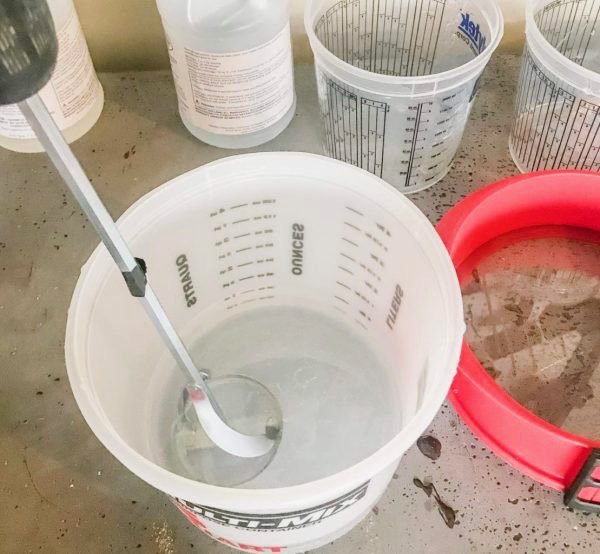
Tip: Pour a small amount into an extra container to use later
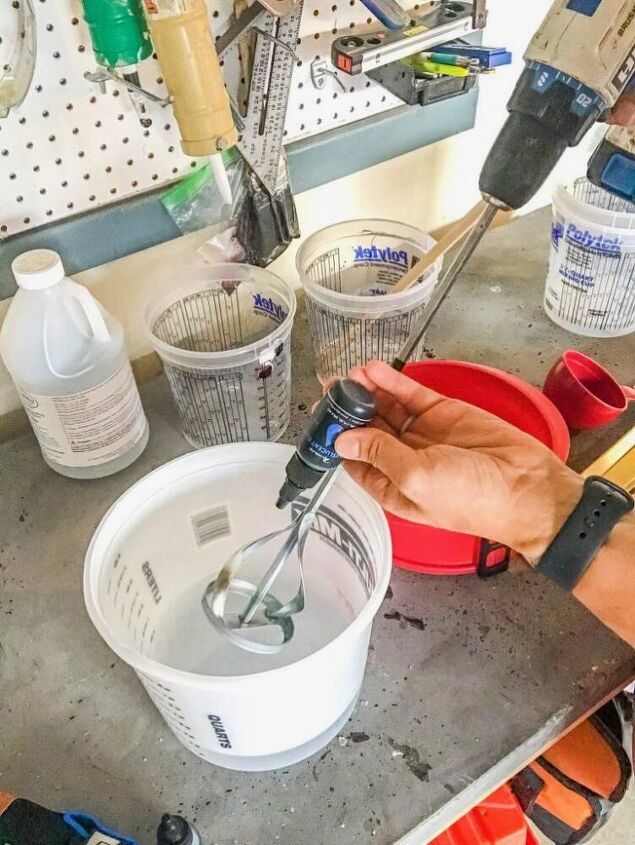
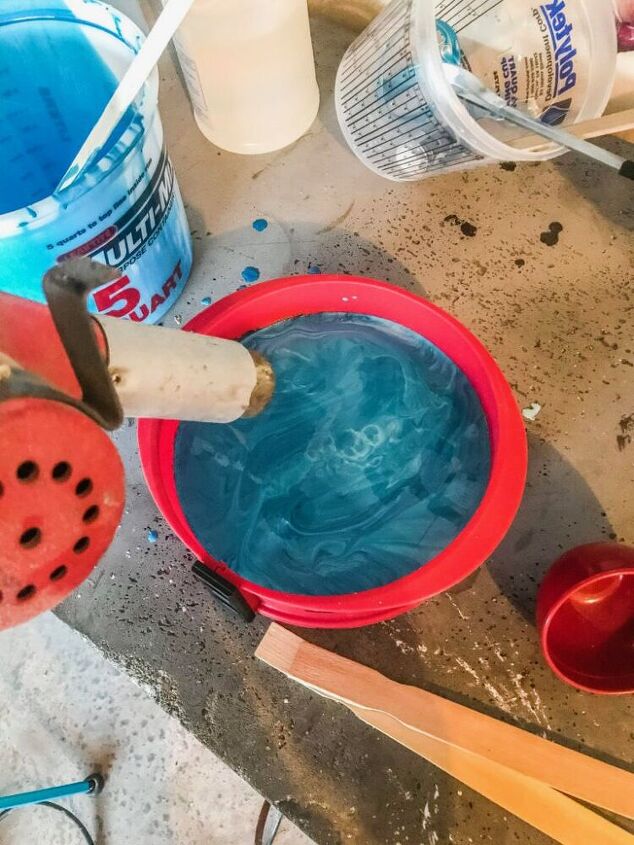
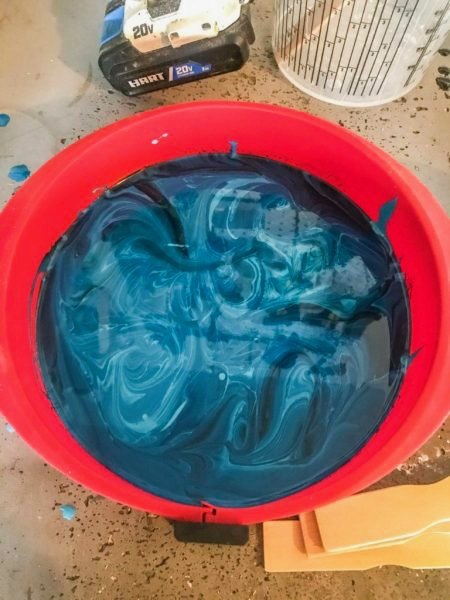
5. After you mix both parts of the resin together it’s time to add the dye! I used the Alimilite Ocean Art set. It has the prettiest blues & is the perfect resin set for wavy looking resin design.
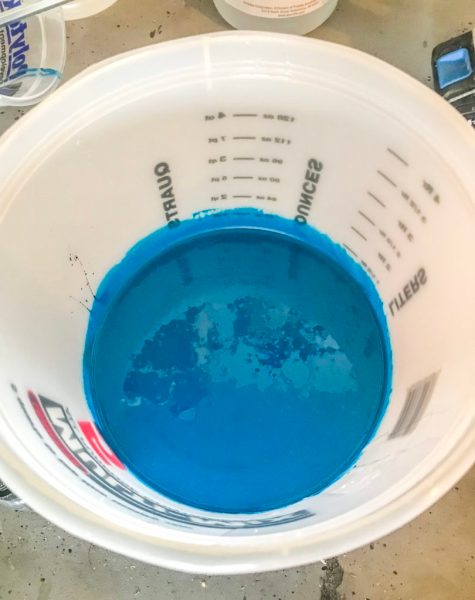
This is not an exact science play around with the dyes until you reach the color combination you want.
6. Now that your base color is done pour the resin into your silicone mold. Once it has settled its time to add your second layer design. This is the resin you set aside, I added the white dye to the extra resin & poured it into the mold for a wave effect.
7. Once you have all the resin added it’s time to heat it a little bit to add texture to the design & also get rid of the bubbles. I used a heat gun but some people use a torch to accomplish this. Justin & I have a no torch policy at our home because we can’t be trusted with that type of thing 😉
8. After the resin is heated it’s time to let it set, I let mine set for a full 48 hours because it was a bit thicker & I didn’t want another concrete fail incident.
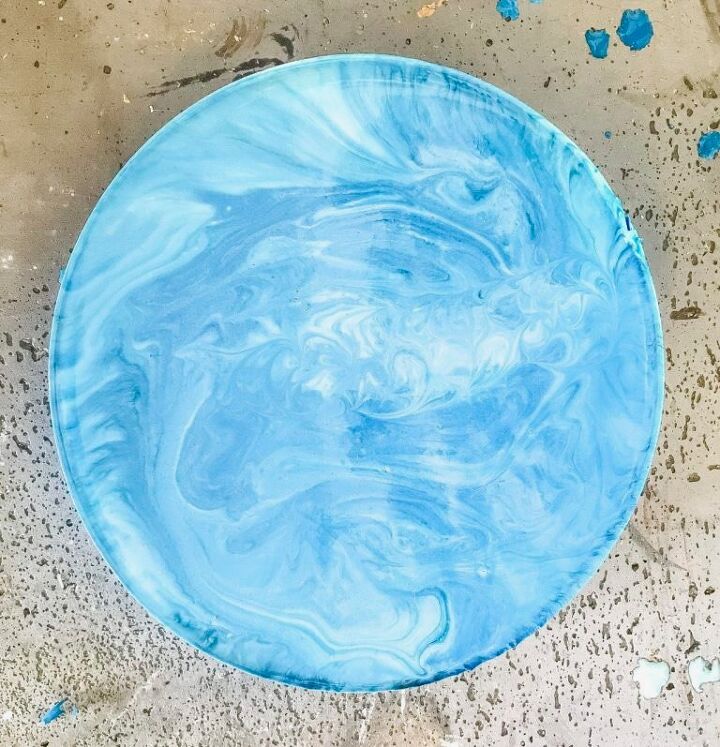
9. When the resin was completely cured (48 hours later) I simply took off the mold & the resin was ready to go! I did sand the edges with a 220 grit sanding block.
Supplies:
1x2x4
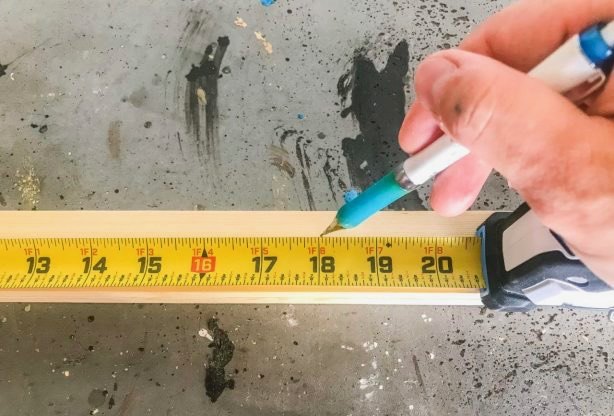
10. For the plant stand, we are going to use 1×2 pieces of pine. Cut 4 pieces at 1 ½’ these will be the legs. Next cut two base pieces at 1’ a piece.

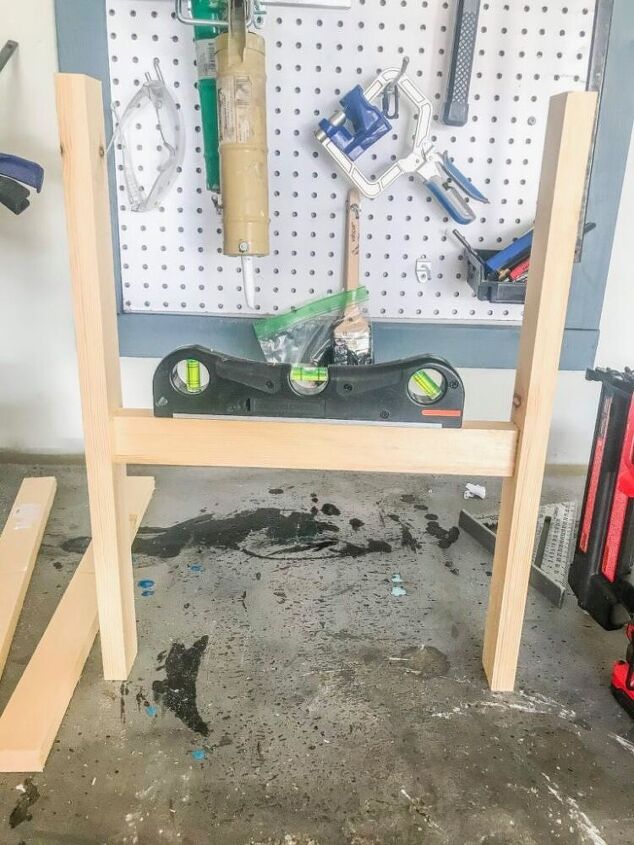
11. Start by attaching one of the base pieces to two of the legs. Use wood glue & nails to attach them.
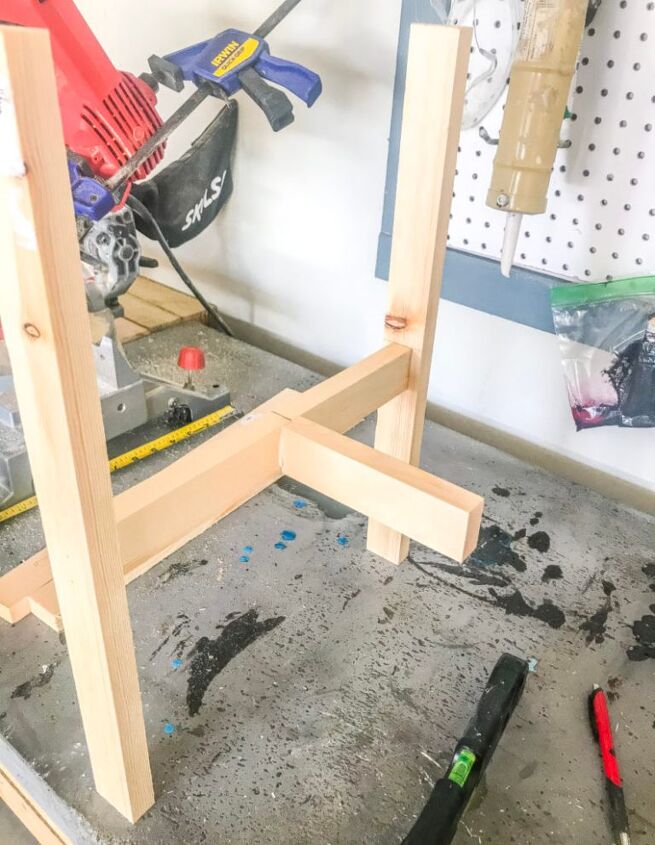
12. For the second base cut off 1” off the end then cut the remainder in half. It will make sense in a minute I pinky promise!
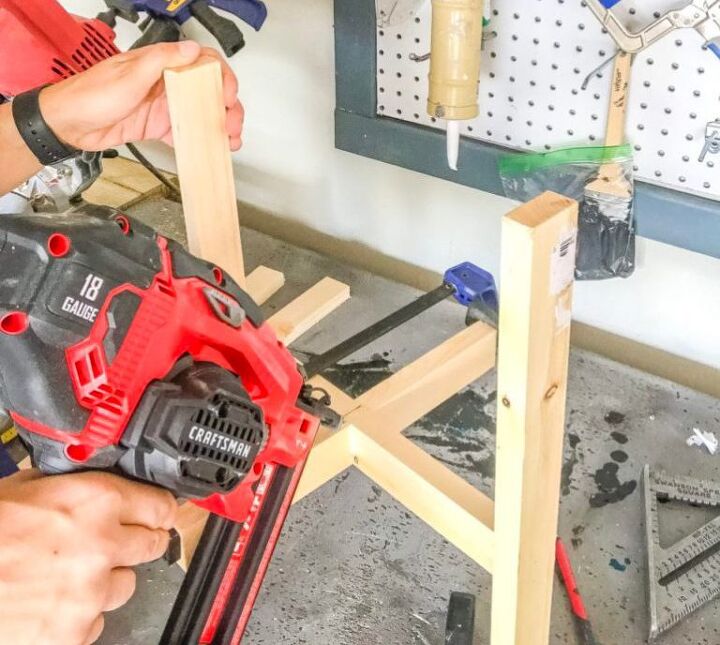
13. This one is just a little bit trickier. One side will be nailed in from the other side of the long base. The other side will need to have nails added at a diagonal angle.
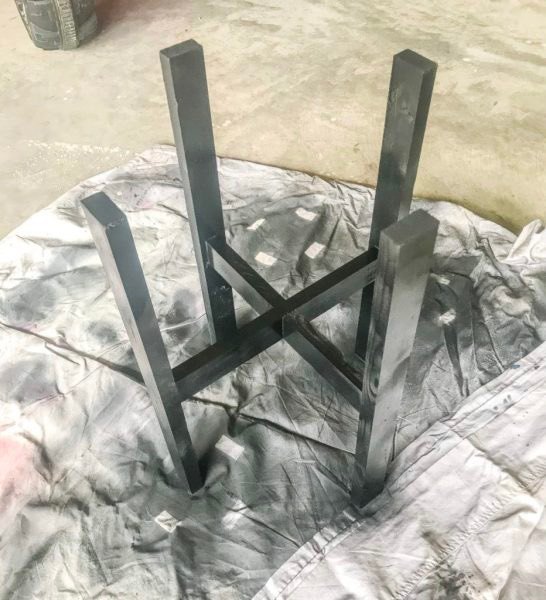
14. Keep in mind if you plan on staining your plant stand you need to use stainable wood filler to fill the nail holes. I decided to go with black spray paint for my stand.
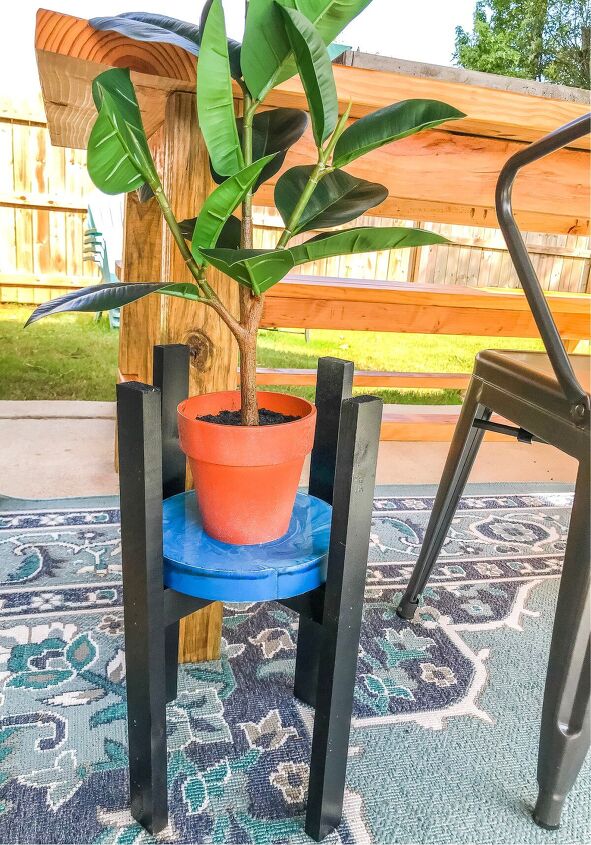
Yall how perfect is this plant stand?! I could not be happier with how this resin project came out. The plate reminds me of the waves at the beach & is the perfect addition to our patio.
The Alumilite resin kit was so simple to work with & has such a smooth finish. The kit includes everything you could possibly need to make an awesome resin project of your own, the possibilities are endless!
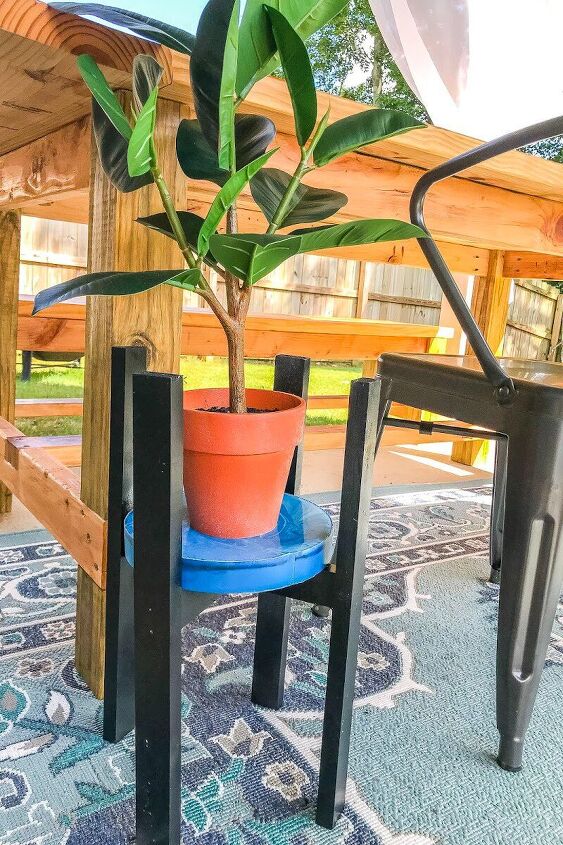
Now the only question is, will I be able to find a plant I can keep alive… So far the only ones that are still with us are faux. Oh well, at least this plant stand will last forever!
Want to see more of my DIY outdoor projects?! Head this way!
Resources for this project:
See all materials


Comments
Join the conversation
-
Love this! So pretty!!
-
The plant stand is really nice. I had allot of trouble getting plant to grow until I joined a garden club they showed me what to do.


Frequently asked questions
Have a question about this project?
Where did you you get that much resin? I have been looking forever ?