


DIY Rolling Dollhouse Stand With Storage

How to make a rolling dollhouse stand out of affordable materials to raise up a dollhouse to adult height and store all your building supplies and decor inside.
I have been working on my upcycled dollhouse project for almost three years now. Recently I built an addition on the side to add two more rooms, and I also built a covered front porch. These additions made the house a lot bigger than it was when I first started, so I needed to upgrade my table in order for it to all fit. It’s also a lot heavier now, which makes it hard for me to turn it around when I need to work on the interior or exterior.
So on a random whim last weekend, I decided to try to build a new stand with enough storage for all my supplies, tall enough that I didn’t have to bend over to work on the lower level and with wheels so I can rotate the whole thing when I need to get to the other side. My goal: to recycle some old cube shelving units to save on lumber costs.

Supplies You Need
- Cube Shelving Units (I used three 6-cube units from Walmart but you can adjust to size)
- 3/4″ or 1″ thick plywood sheet
- 4 heavy duty swivel casters with brakes
- Circular Saw
- Drill
- Screws in a few different lengths
- Caulk or Spackle and plastic spatula
- White paint & paintbrush
Why Cube Shelving Units?
I had three 6-cube units from Walmart already on hand and assembled, so I decided to use them to save on costs and keep them from getting thrown out. This stand could definitely be custom-built with 1-inch plywood all the way around, including the shelves, but I really wanted to recycle those old cubbies.
This is also a great way to build a dollhouse stand if you’re not comfortable building things from scratch yet. It’s a super beginner-friendly project. And if you don’t have a circular saw, you can take measurements ahead of time and ask the nice people at your home improvement store to cut it for you.
How To Turn Cube Shelving Into A Rolling Dollhouse Stand
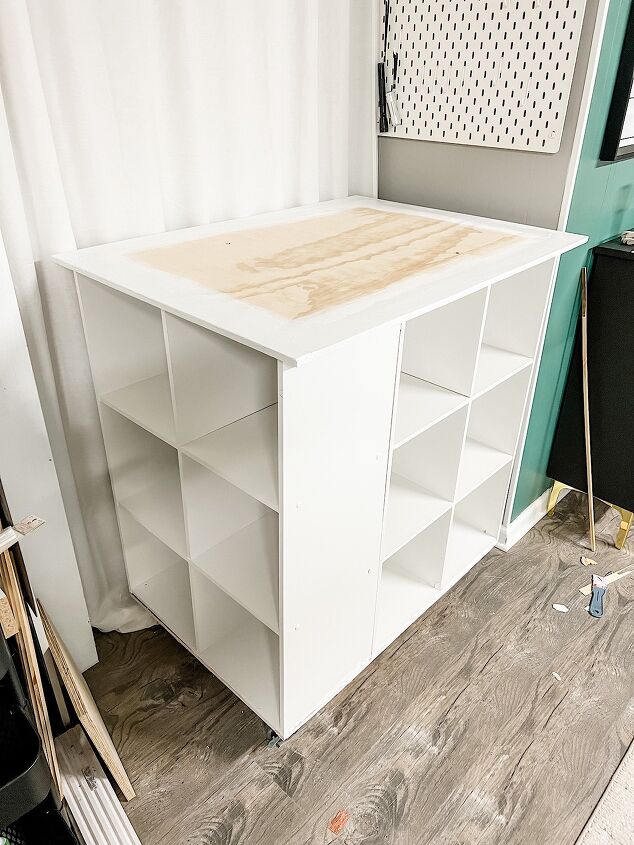
Start by figuring out your layout. I tried a few different designs but ultimately landed on arranging two units back to back with the third on the side.
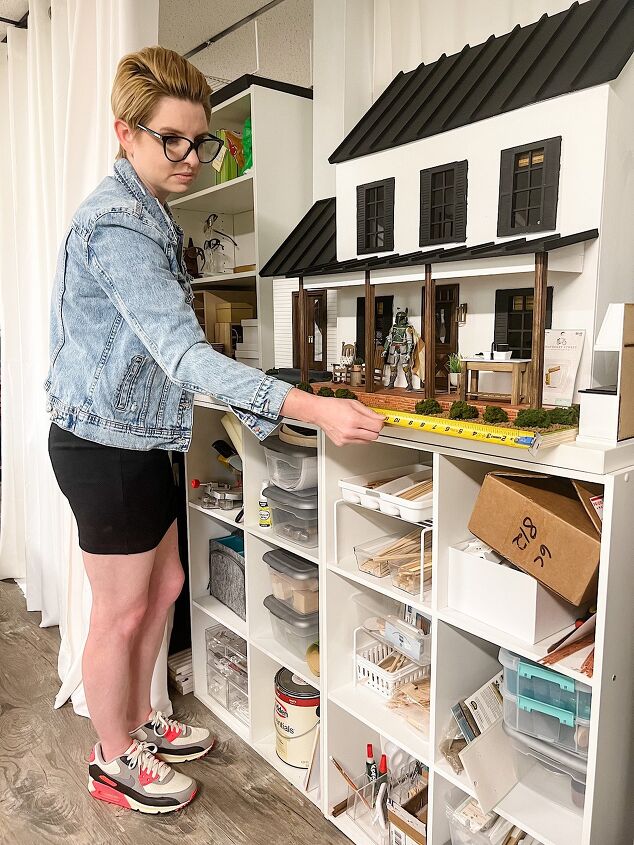
Measure the shelving units together as a whole to get the full dimensions of your dollhouse stand. The “top” you’re measuring right now will actually be the bottom. Write down those measurements so you don’t forget when you’re cutting.
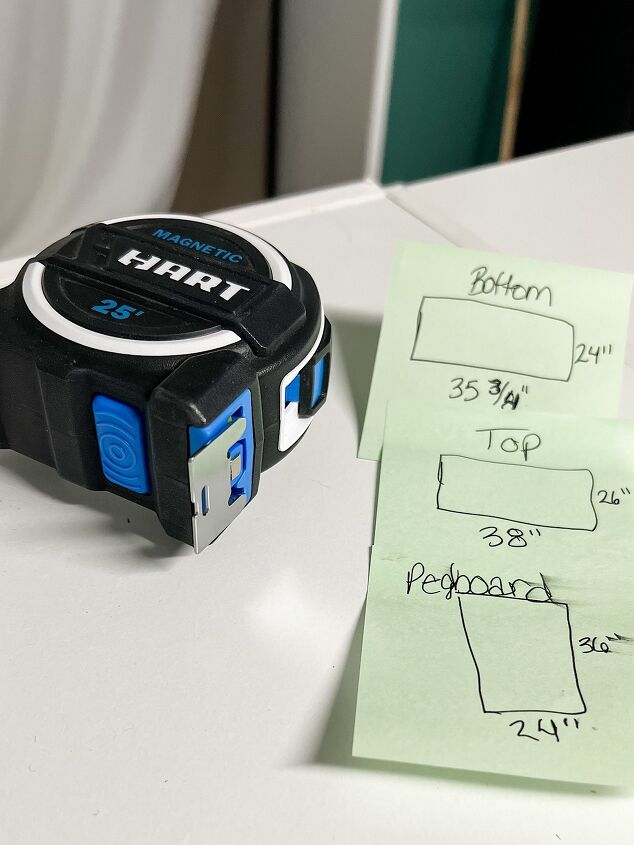
Now take those measurements and add two inches to both the length and the width. This will be your top piece. You want a one-inch overhang on all sides to make the stand look like a finished piece of furniture.
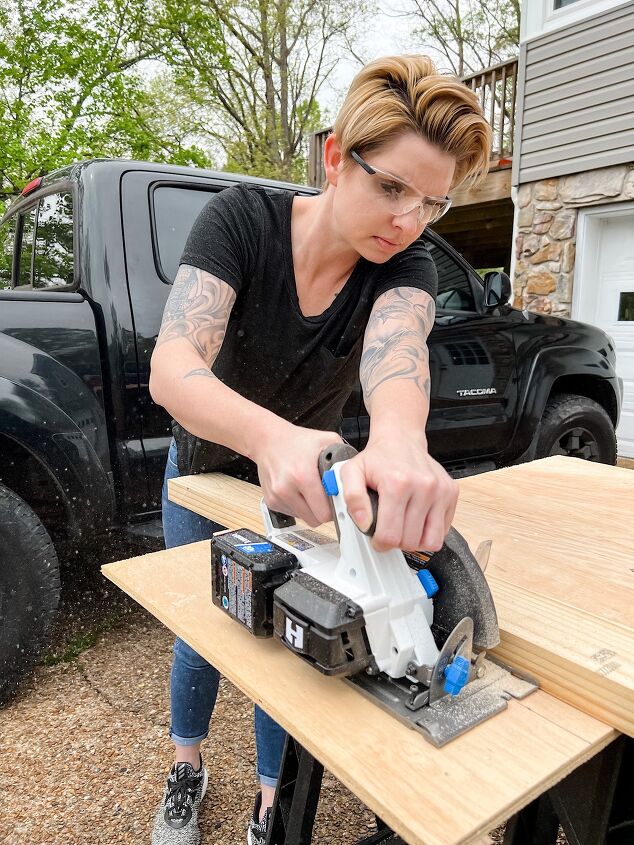
Head outside and cut your top and bottom pieces of plywood with a circular saw. I love this circular saw because it’s cordless and really easy for beginners.
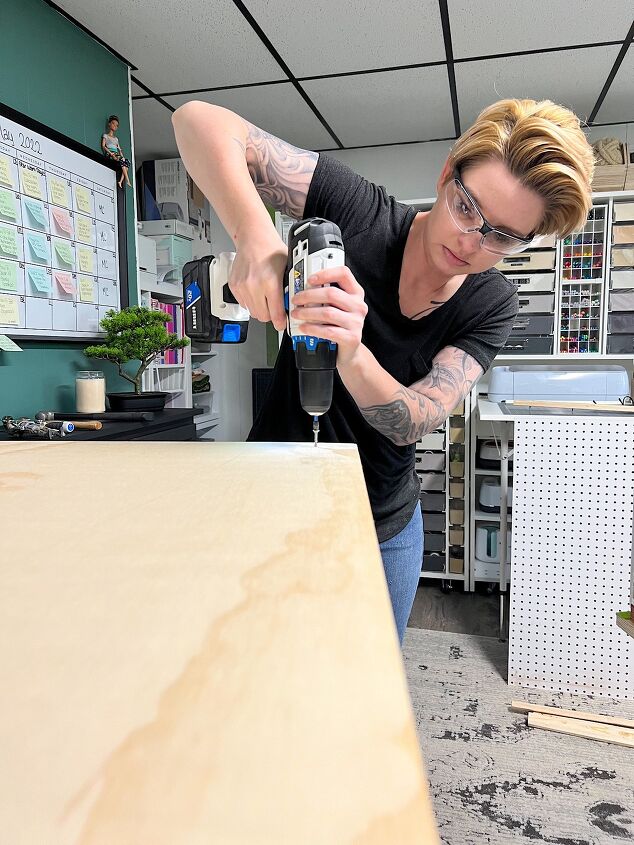
Once your plywood pieces are cut, screw the smaller piece on top of the grouping of cube shelves. It helps to have a partner hold them tightly together or use hand clamps to keep them in place. You want them to be squished together as much as possible while you’re screwing the plywood to the units.
Drive the screws through the edges of the cube shelving units, not the shelf parts. This allows your screw to go through the frame of the shelving and makes it more secure.
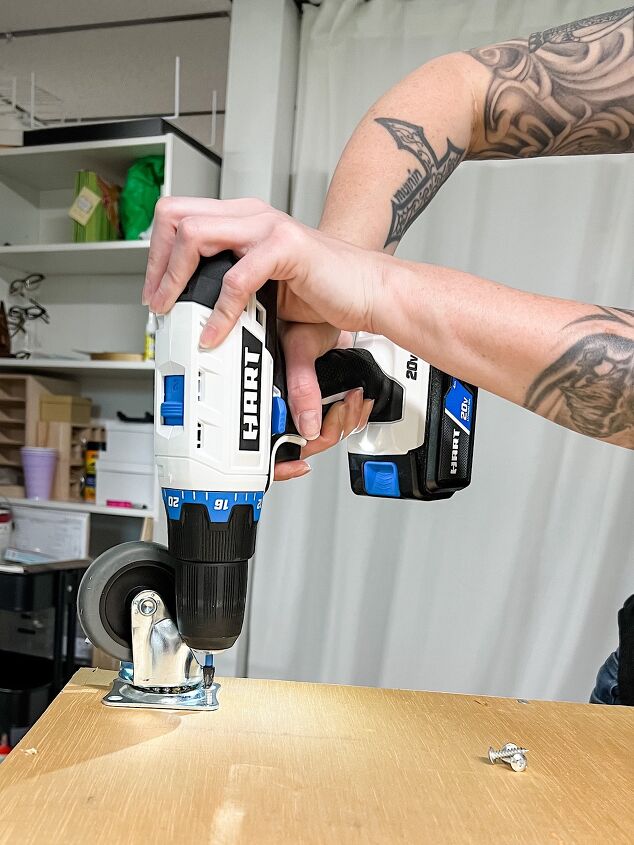
After you’ve screwed the plywood onto the group of cube shelves, attach the four casters to the corners.
With help from a partner, flip over the group of cube shelves. They will flex since they aren’t connected aside from on the bottom, so if you have some hand clamps, now is a good time to use them.
Attach the top piece leaving a 2-inch overhang on all four sides using the same technique as you did for the bottom piece.
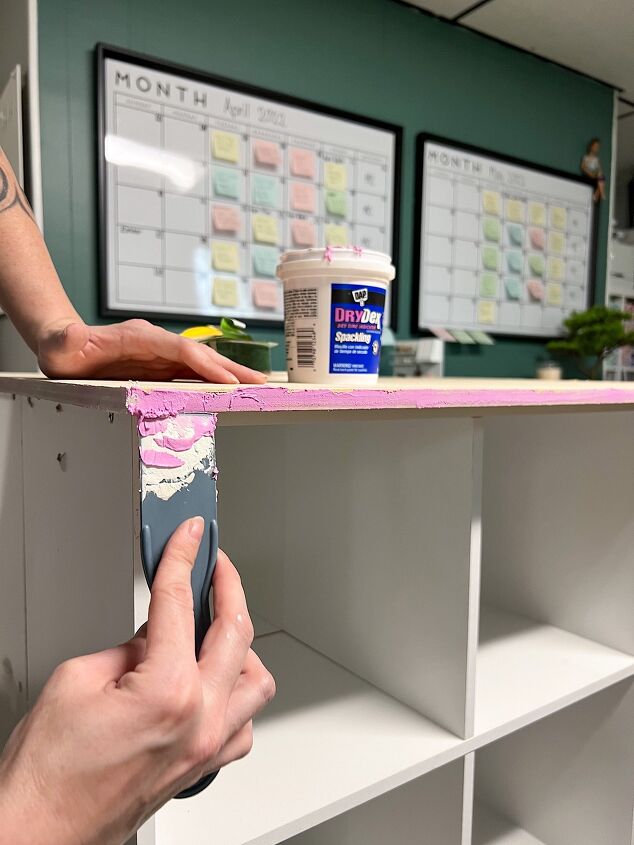
Patch holes and plywood edges using paintable caulk or spackle. (Or you can use wood veneer edge banding if you want a more finished look) Once it’s dry, sand everything down really well.
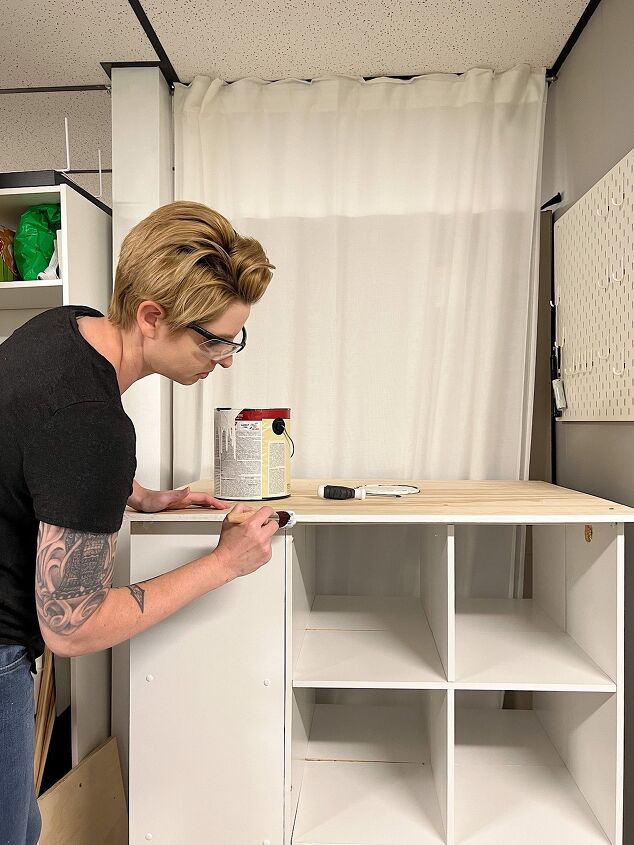
Paint the plywood white to match the cube shelves. If you want to change the color of the cube shelves, you can use this primer before painting. It works really well on laminated furniture.
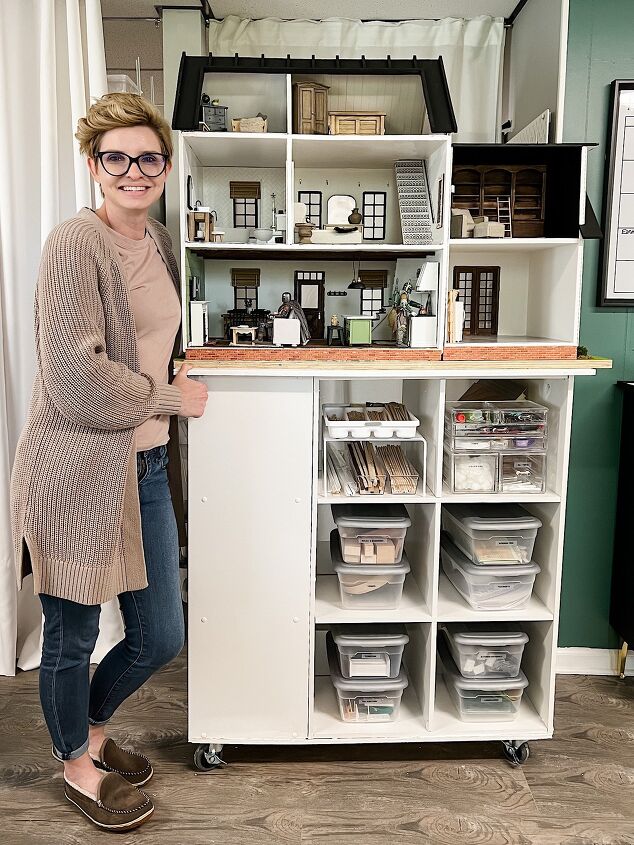
After the paint is dry, it’s time to fill up your new dollhouse stand and get all your supplies organized. To see how I organized my dollhouse stand and all the containers I used, visit my full blog post at https://www.lelaburris.com/diy-dollhouse-stand/


Frequently asked questions
Have a question about this project?