


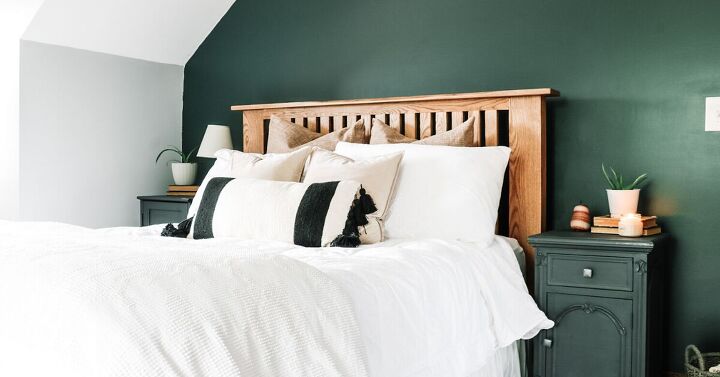
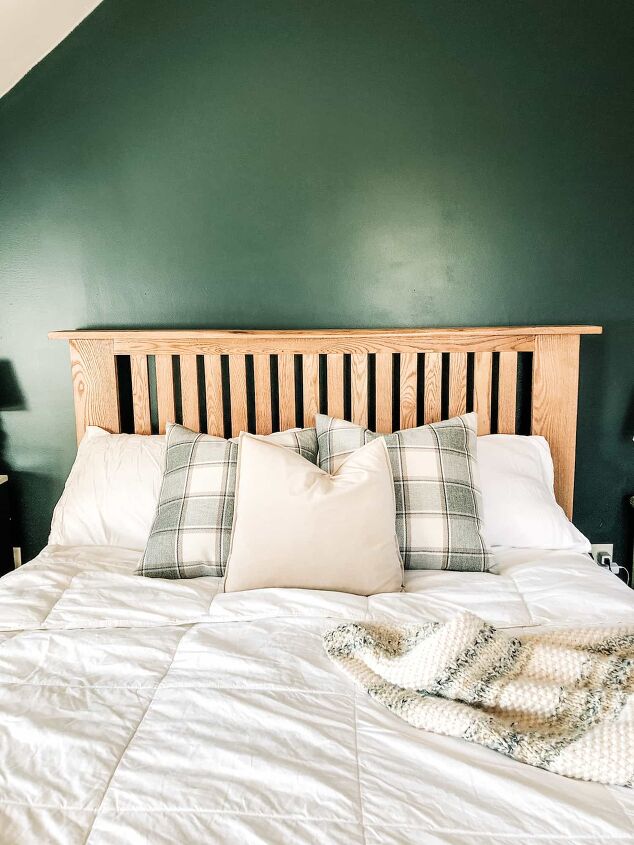
DIY Wood Headboard
How to Make a Headboard from leftover hardwood flooring boards.
Supplies Needed
NOTE: These are plans for a Queen Wood Headboard.
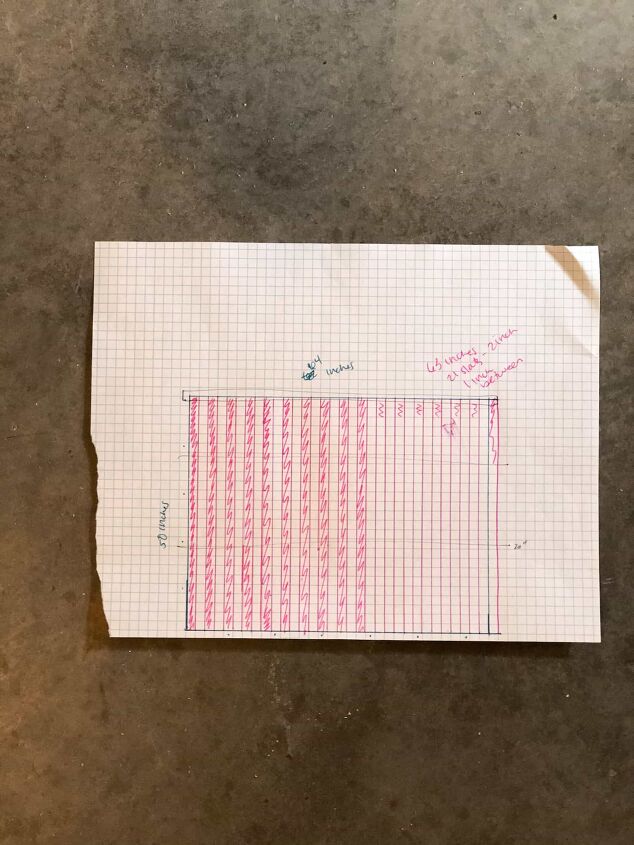
Cut Wood Needed
- (2) – 1×2″ cut to 51” long (middle longboards)
- (2) – 1×6″ boards cut to 5 5/16” 48 inches long (two edge boards)
- (16) – 1×2″ cut to 24” long (middle spindles)
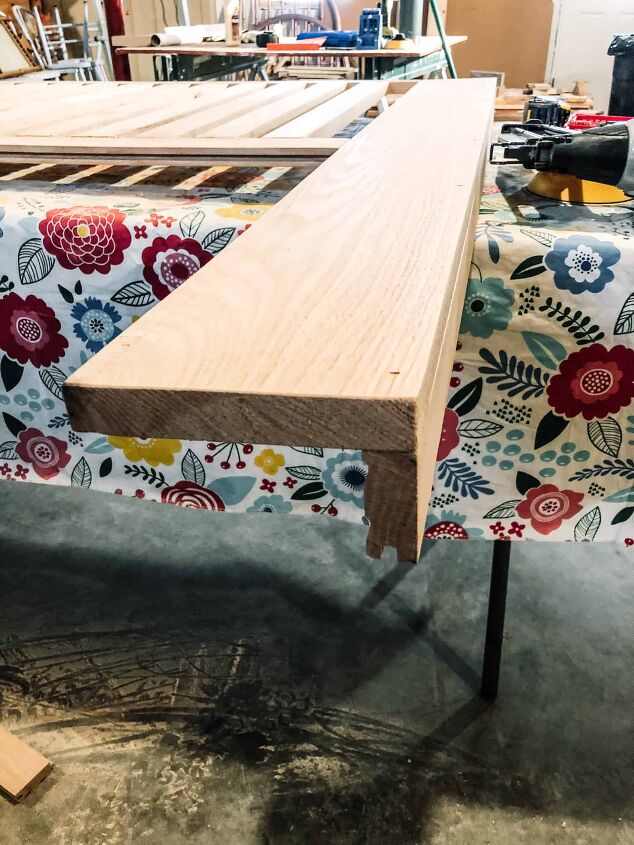
- (1) – 1×6″ board cut to 65 3/4″ (top shelf board)
- (2) – 1×2″ cut to 48in – for support braces
- (4) – 1/4-20 x 1-1/2 inch bolts (with washers and nuts) – support braces
- Queen Bed Frame to attach
Tools Needed
- Kreg Jig Tool
- 1 1/2 fine thread Screws (for hardwood)
- Table saw
- Earmuffs
- Circular Saw
- Drill
- Drill Bit for drilling the hole for the bolts
- Wood glue
- Nail gun
- Clamps
- Extension Cord
- Electric Random Orbital Sander
- Sandpaper 80-120-220 grit
- Wood Filler (make sure to use stainable if planning to stain)
- Putty Knife
- Wood Stain
- Tack Cloth
- Rags for applying stain
- Water-Based Polycrylic
- Paint Brush
Building the Frame
Have all boards cut to the correct length.
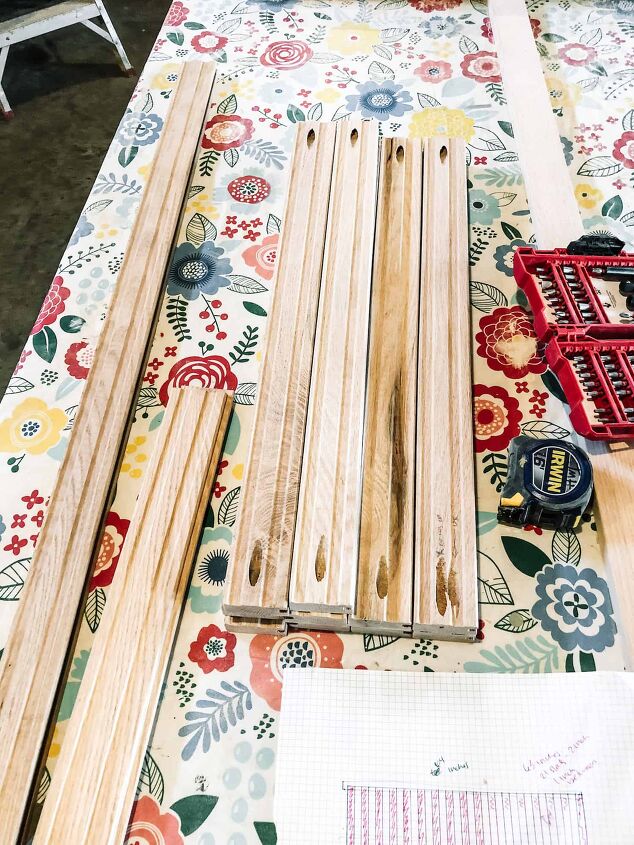
Drill holes into the spindle boards with the kreg jig tool on either end.
Drill holes into the top and bottom support boards of the frame.
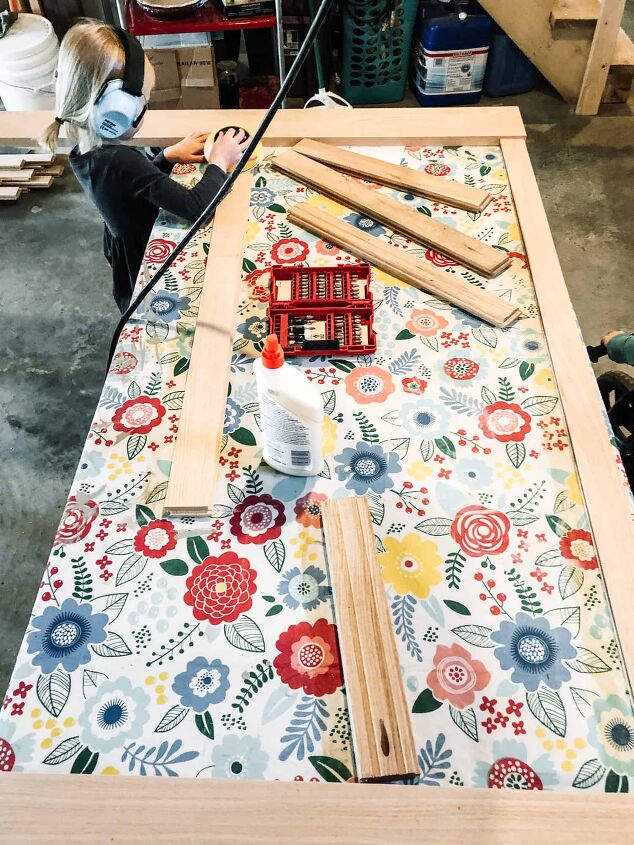
The spindles were lightly sanded because of the rough cut lumber. It was also easier to sand the edges of the spindles prior to putting the bed together.
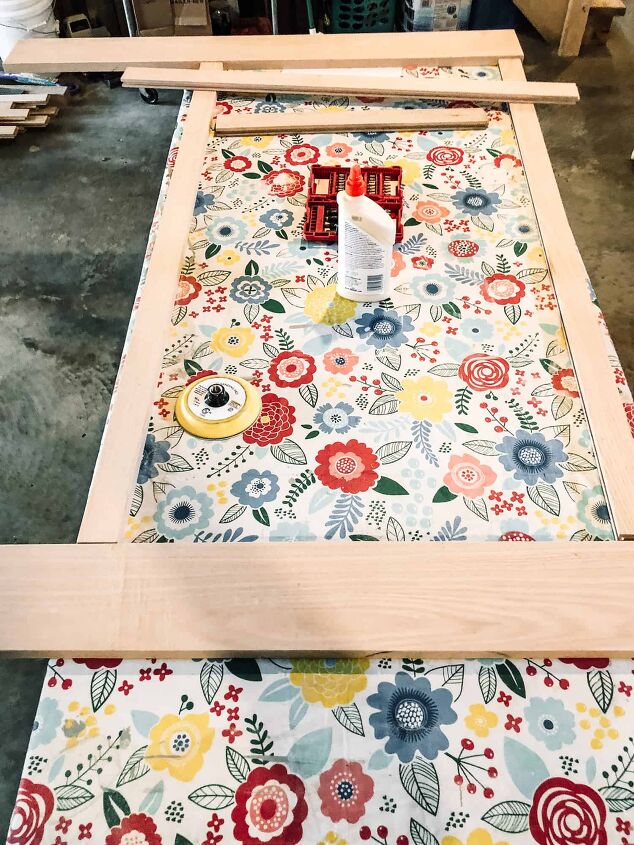
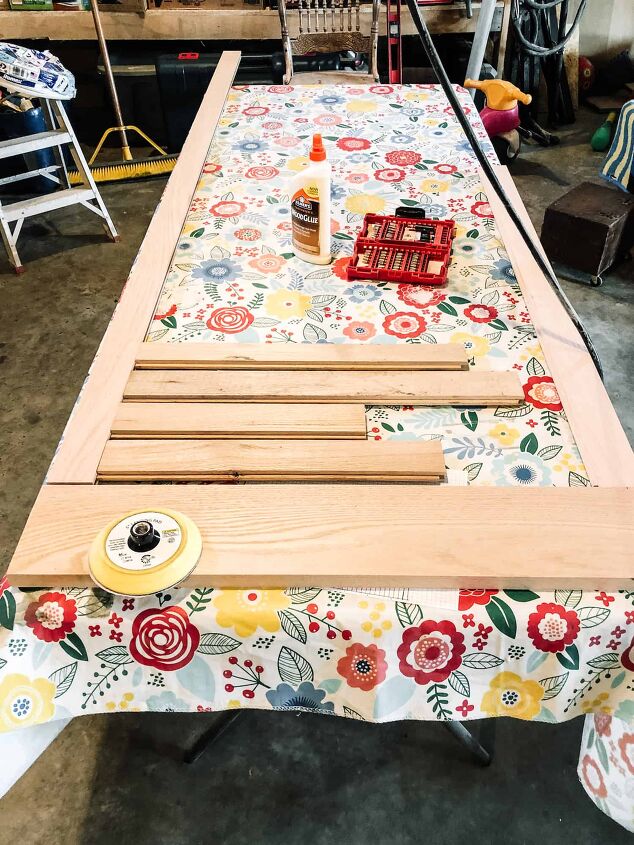
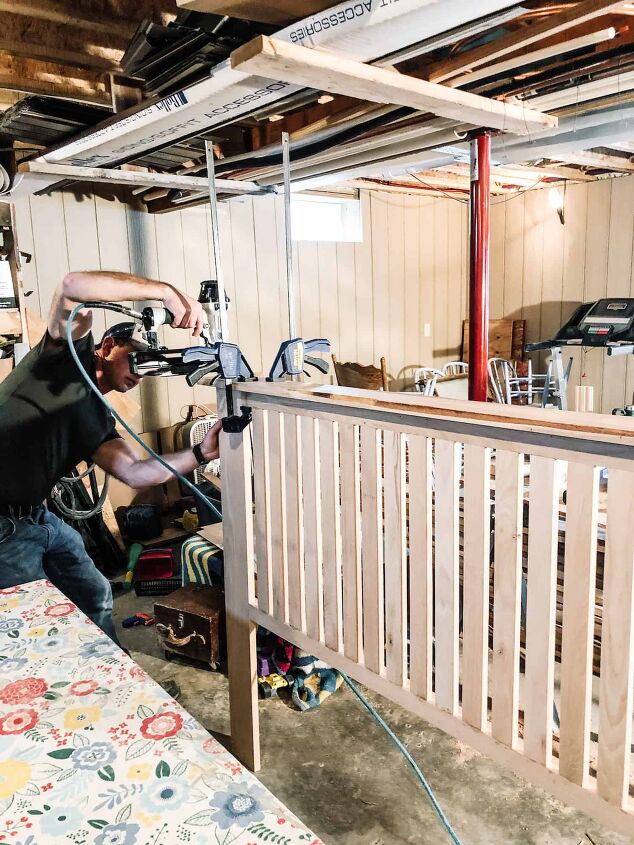
Attach the legs of the of the bed to the top horizontal board.
Begin attaching the spindles (make sure the correct side of the board is facing the correct way) by gluing and screwing to the top horizontal board. The first spindle needs to be spaced 2″ from the leg of the bed.
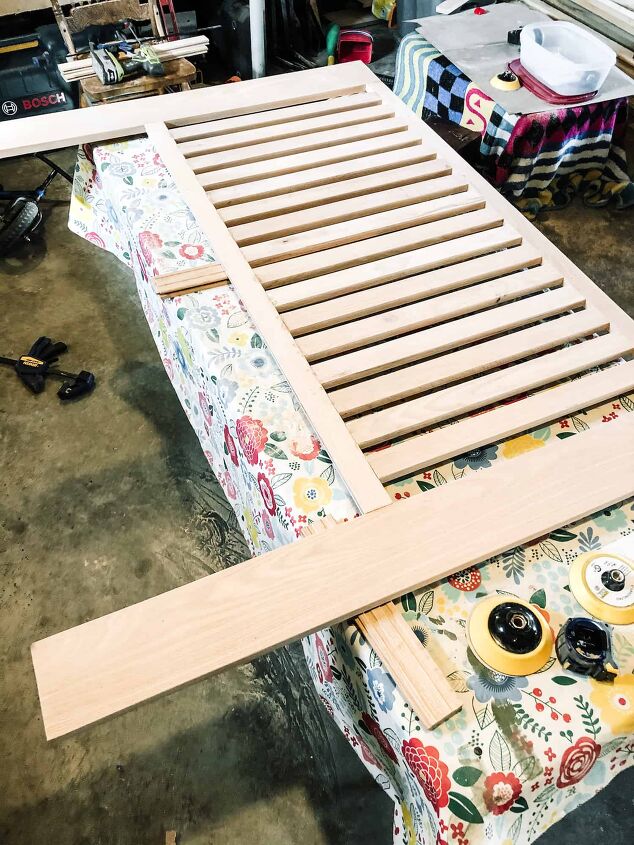
After attaching the first spindle, you can either continue to attach the rest of them with spaces of 1″ between OR you can place the bottom horizontal board and then continue to attach the rest of the spindles.
Building the Support
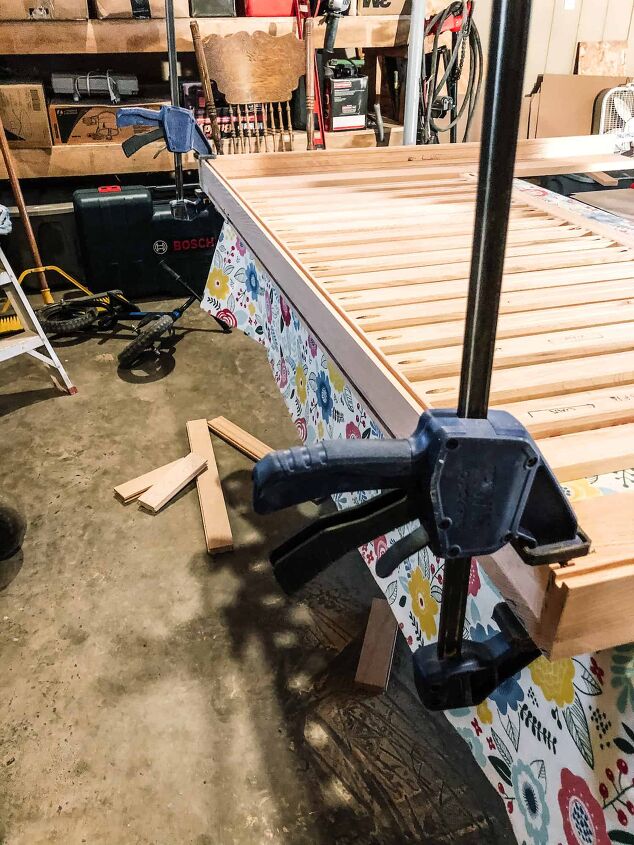
Used Clamps to hold tight while glue dried.

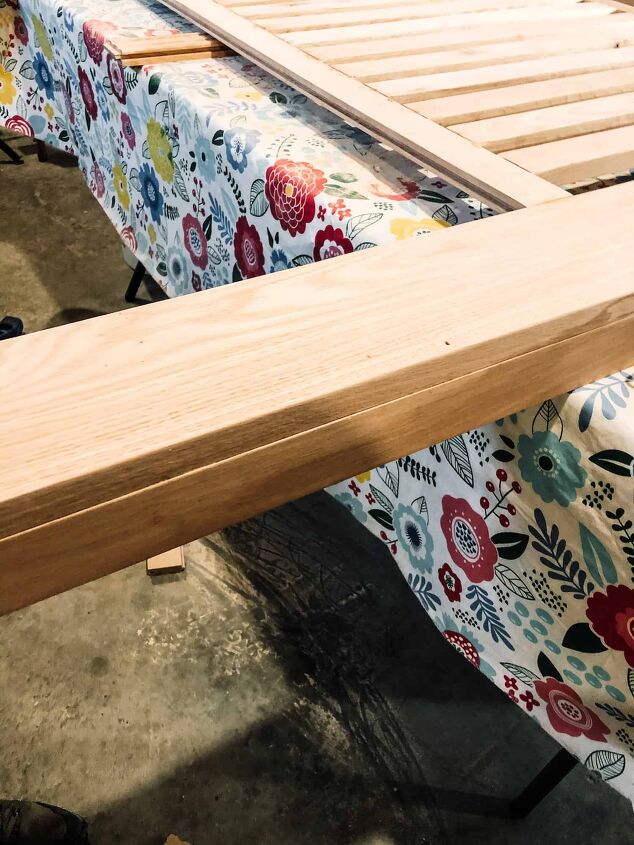
When the main part of the headboard is all put together, lay the headboard so the wrong side is facing up. Attach the support boards to the outside edge of the back of the legs. Use finishing nails and wood glue to attach.
Attaching the top shelf board using wood glue and finishing nails. Use the clamps to make sure the shelf stays in place.
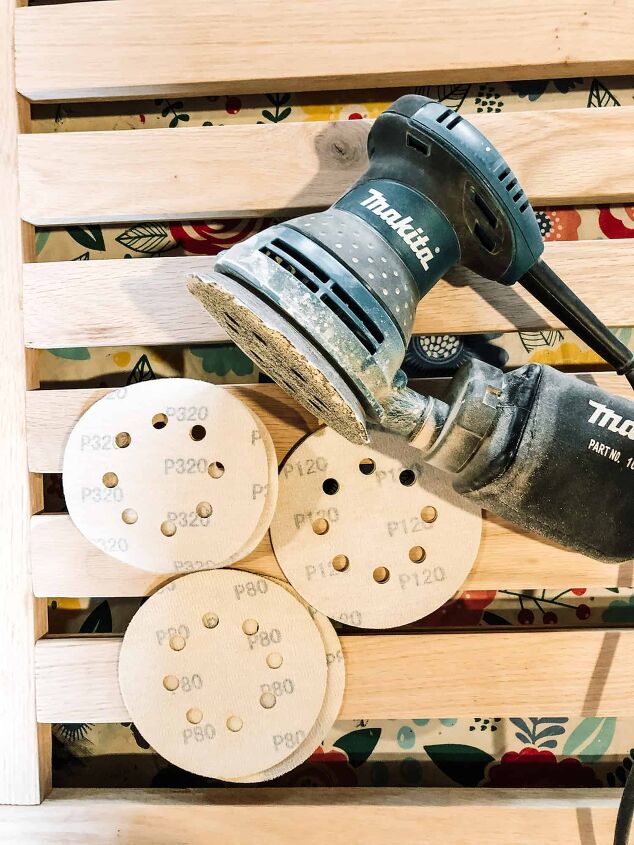
After all the glue is dry, fill in all the nail holes with wood filler. Sanding the headboard can ensure there will be no snags or slivers.
Sandpaper: 80 – 120 – 320 grit sandpaper. Starting with the lowest grit and increasing to the higher grit number.
Make sure to clean the headboard throughly after sanding and prior to staining or painting. Using a microfiber cloth or Tack cloth to clean. I do not recommend using water – as this can raise the grain of your wood.
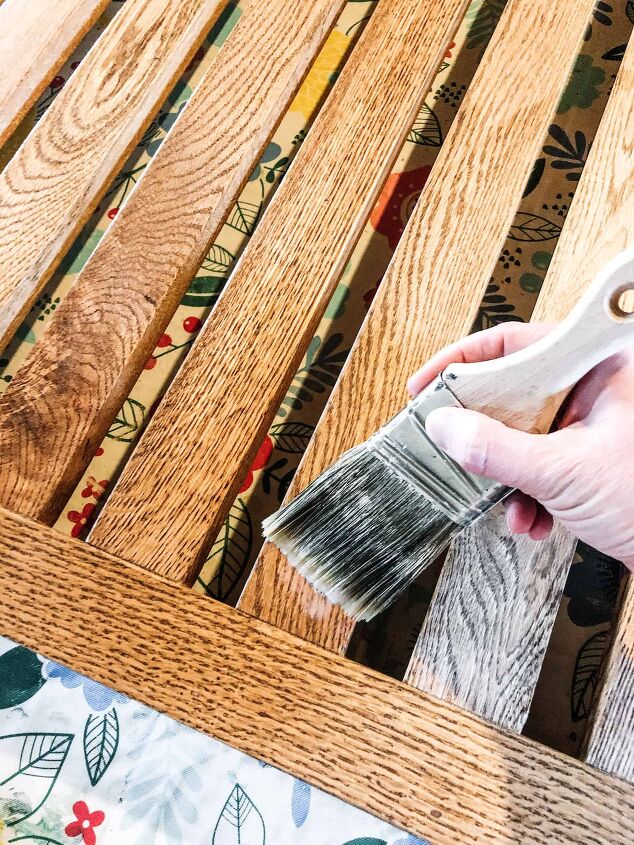
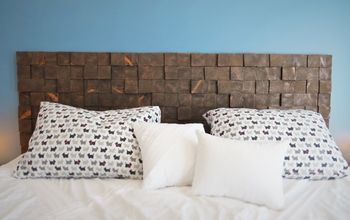
Stain wood with preferred stain – the stain used is a mixture of 1/2 Minwax Special Walnut + 1/2 Minwax Weathered Oak. The stain dried for a few hours and then a top coat of Minwax Polycrylic was brushed on.
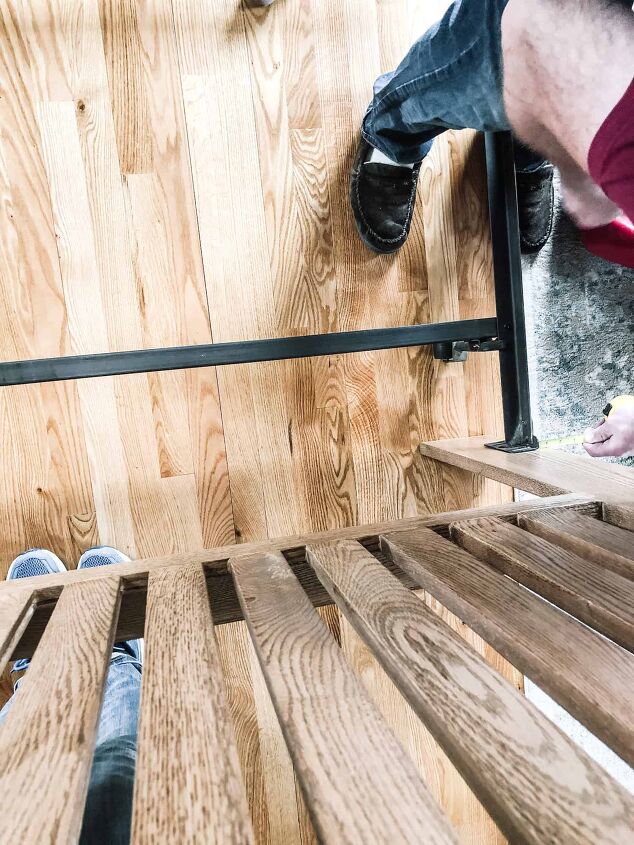
After the headboard was completed, the headboard was lined up to the bed frame, and marks were made so the holes could be drilled. Once the headboard was in place, it was bolted to the bed frame. You can then place the box spring and mattress and make the bed accordingly.
Check out the blog post to see more pictures of the project!
Resources for this project:
See all materials


Comments
Join the conversation
-
Beautiful job. Pictures and directions a bit confusing. Looks like the tongue and groove wood showing in some pictures but not in the assembled pictures. I could build this from the final picture only without instructions, but was not sure what you did between photo and instructions.
-
Holy Moly, this is beautiful. You will love it forever.


Frequently asked questions
Have a question about this project?
Beautiful! I love your wall color, could you tell me the brand and paint name or number please? Thanks for the inspiring project.