


Dual-monitor Shelving

by
NerdyKat
Dual-monitor Shelving Made Out of Spare Laminate Flooring
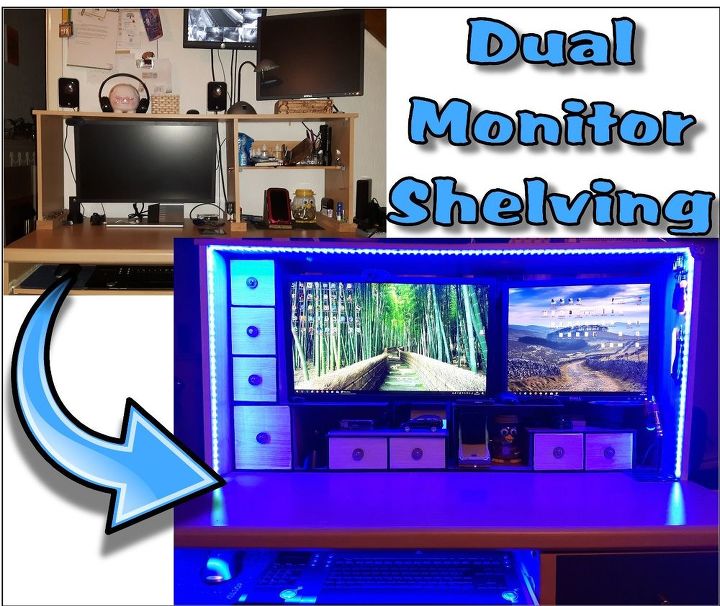
So back in November it was my other half's birthday and I wanted to do something "special" for him. Then it came to me... What couldn't be more special than to completely mess up his desk and place of work for few days :-D
He uses a second monitor that lived on the top shelf of his desk, positioned inconveniently way too high above line of sight for everyday comfort.
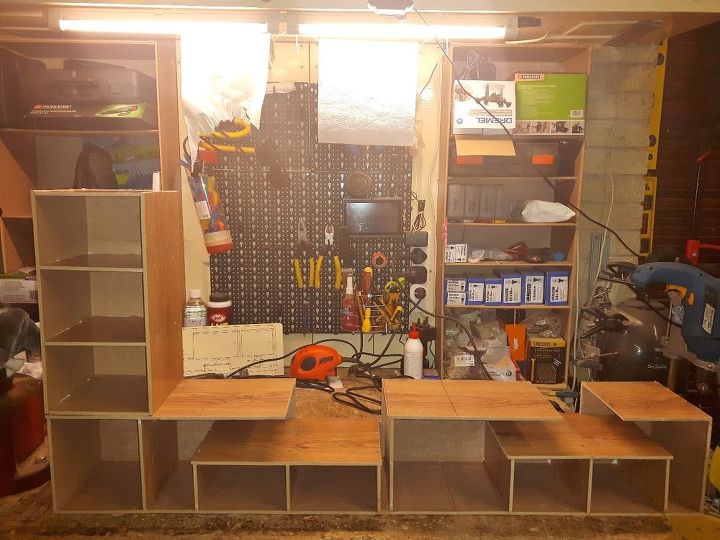
I've already made a similar shelf for my desk and I absolutely love it, you can see it on the last photo in this step.
The best thing about a shelf like this is that it costs almost nothing, I already had lots of leftover laminate flooring, so the only thing I had to purchase additionally was the LED strip lighting. It took about 18 hours to finish and he really really loves it!
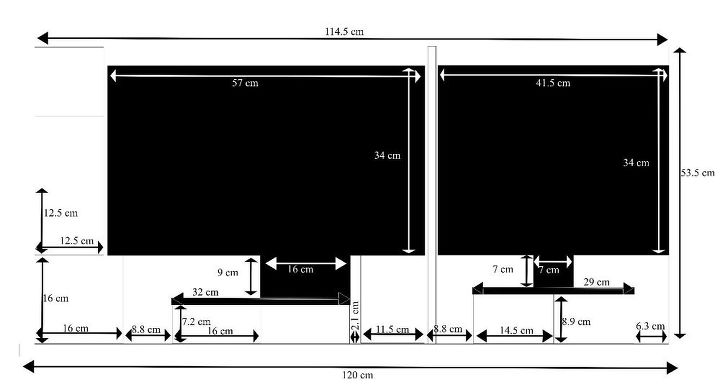
First of all take the measurement of the desk and do a little drawing.It will make things a little easier. Saying that it's optional and I made my first shelf without any planning at all ;-)
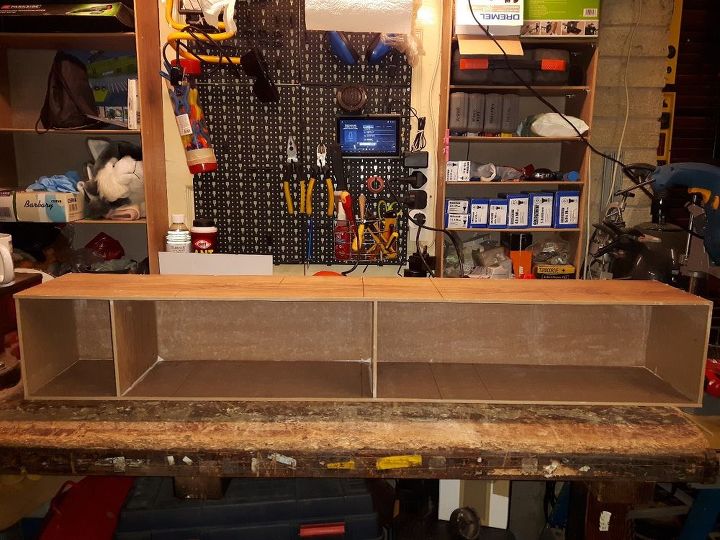
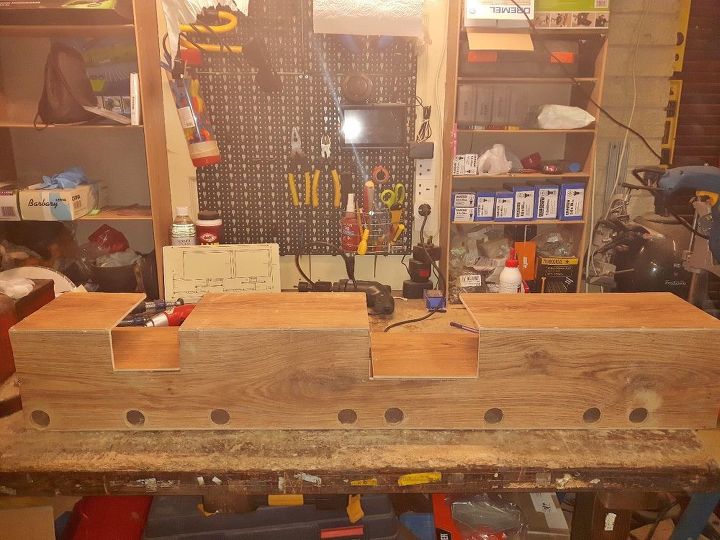
Mark the laminate flooring and start cutting, since I don't have anything better, I used a jigsaw. Once you have three long pieces and four smaller ones, mark and predrill screw holes. The laminate flooring is 6mm thick, the drill I used was 2mm and the screws were 3.0x16mm. If you skip the pre-drilling part, the laminate flooring will bulge and the joint won't be as strong. Apply wood glue along the edge of a small cutout, place it onto the longer bottom piece and screw them together. Do the same with the rest of the pieces, until you build yourself a large rectangle.
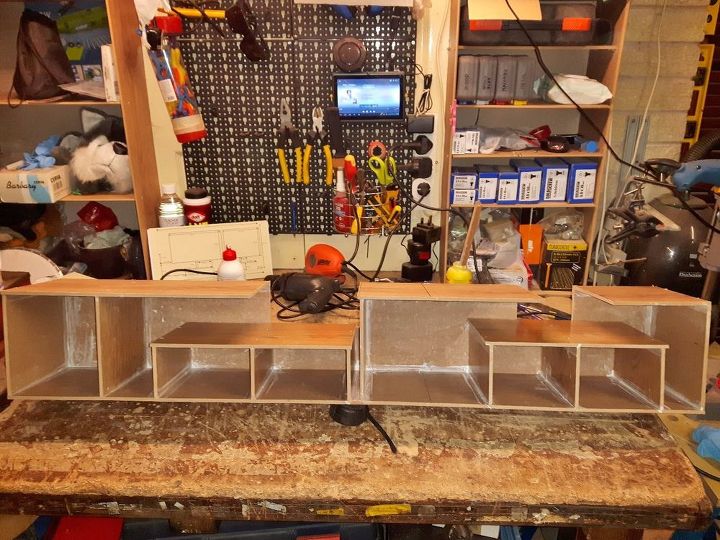
Place your monitors onto the shelf, mark where the monitor stand will pass through the top platform of the shelf and cut out the unwanted pieces. Outline the monitor bases onto a piece of paper and cut out. You can use this to help you visualise what it will look like when the shelf is finished.
With the help of the monitor base templates, cut out pieces for the second (lower) platform where the monitors will stand. Cut out three supports for each of the two platforms, these will be glued to the base of the shelf.
If the width of your combined monitors doesn't exceed the width of the desk, you can additionally build extra shelving for more storage spaces using the same technique.
If the width of your combined monitors doesn't exceed the width of the desk, you can additionally build extra shelving for more storage spaces using the same technique.
Sand the shelf and round off all of the edges (they can be pretty sharp and you wouldn't want to accidentally cut yourself as you are carrying it / using it later). Clean away the pencil marks with some rubbing alcohol.
I decided to have a hole big enough to fit a USB cable through in each larger compartment. To do this draw where you would like them to be and drill the holes. Let your hole saw rest and cool after every hole, otherwise you will generate quite a bit of heat / smoke build up that could become dangerous.
Sand the holes down with a piece of sandpaper. I wanted to use the leftover circles cutouts from hole sawing as drawer handles later, so I sanded those as well.
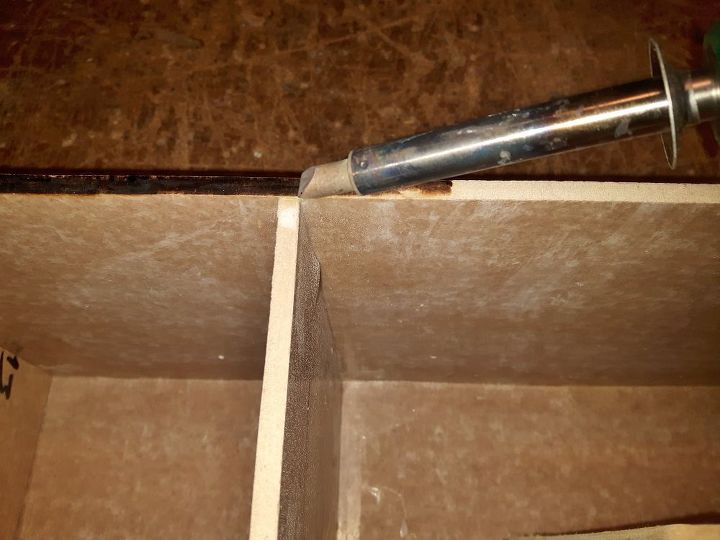
Set your soldering iron with a wide tip on a high temperature and start burning the visible edges. You might want to do this in well ventilated room and wear a face mask. It will take quite a while so make yourself comfortable ;-)
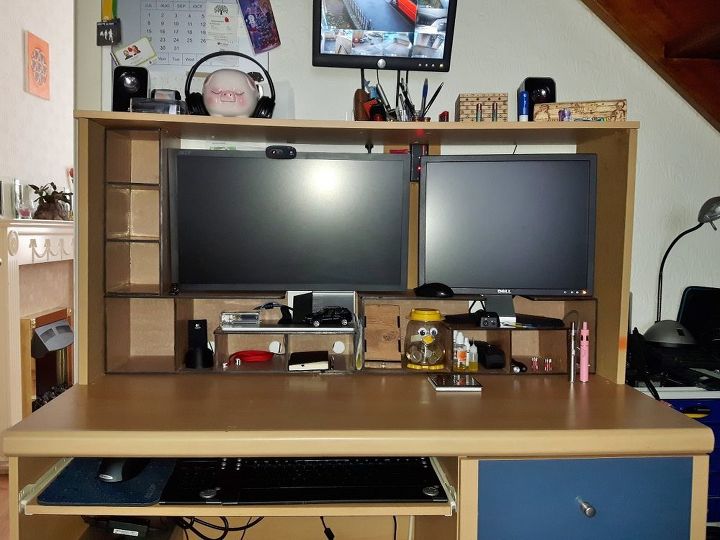
The old setup of the original desk already had a shelf covering the monitor, but it was too low, so I cut two longer side supports out of MDF board and screwed them onto the desk. I used some hot glue to secure the monitor shelf onto the desk (I'm planning to tinker with it some more in future, so didn't want to have it permanently fixed on).
I bought some fablon from Ebay, that was unfortunately a completely different colour then the desk, but it will do for now (hard to judge colour just by looking at the screen) and I stuck it onto the side supports of the shelf.
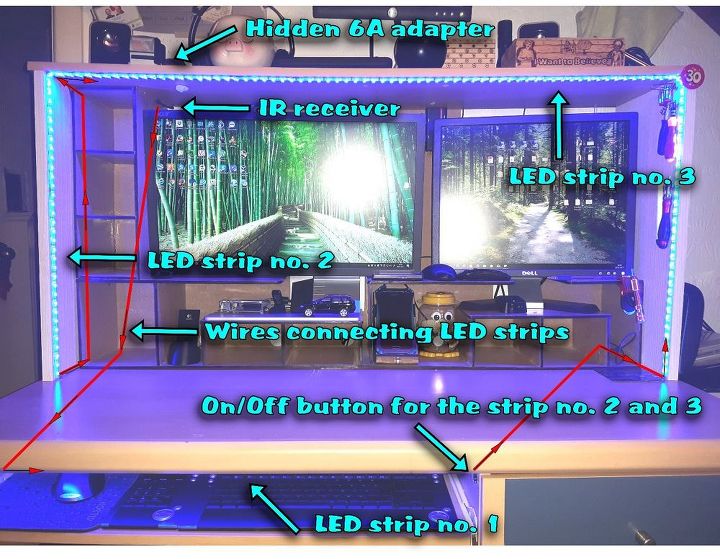
For this step you will need an LED strip.
Measure how long you need the strips to be and cut at the nearest cutoff point. If you have the waterproof LED strip type, remove the silicon from all of the ends where you need to solder wires to. I wanted to have one shorter strip illuminating the keyboard, that would stay turned on all the time, another strip that would cover both sides and the top of the shelf and a third strip that would only run the length of the shelf for additional illumination. I added an on/off switch to the circuit so that both the longer second and third strips could be turned on or off independently to the keyboard strip. I glued the switch just above the keyboard with hot glue for easy access (I plan to replace it with a nicer switch later). Every time I stick these lights anywhere they eventually become unstuck, so I applied lots of little dots of hot glue along each strip.
You will need few meters of 4 core wire, depending on the size of your desk. Joining the strips together shouldn't be a problem since most of the LED strips have marks at each cutoff point showing where the positive/negative, red, green and blue connections go. Solder the wires onto the strips and apply some hot glue over the solder for protection.
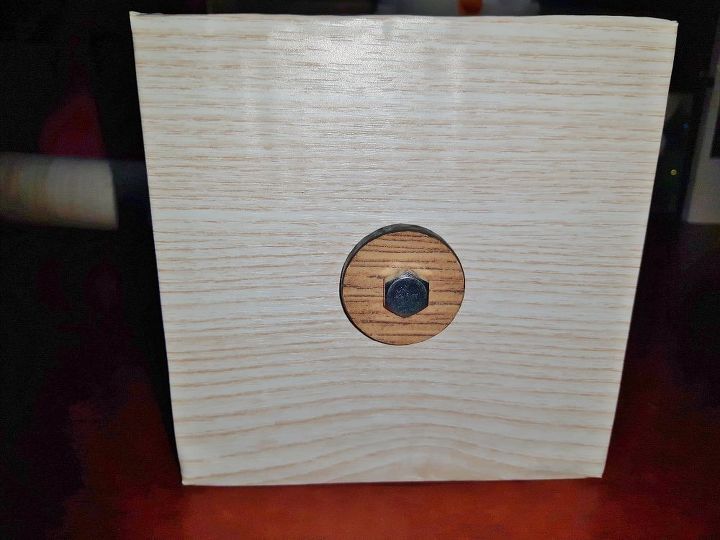
Measure each compartment where you wish to have a drawer, cut the pieces out of a cardboard box and glue together with hot glue. For handles I used the cut out circles from earlier and burned the sides to match the decor and design of the structure. Next I applied more of the fablon onto each drawer's front, made a hole in the middle and attached the handles using bolts and nuts.
For the little handles you can also use string or ribbon.
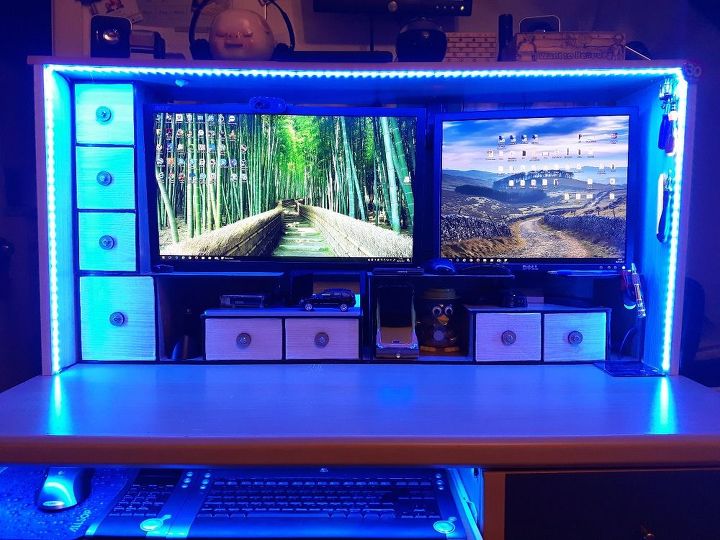
My other half is really enjoying the shelf and additional lighting and even thought it's not perfect I'm relatively happy with it too (even though my sawing skills still have a lot to be desired :D)
{
"id": "3799408",
"alt": "",
"title": "",
"video_link": "https://www.youtube.com/embed/eFoScfVglQ0",
"youtube_video_id": "eFoScfVglQ0"
}
{
"width": 634,
"height": 357,
"showRelated": true
}
For more photos go to: https://www.instructables.com/id/Dual-monitor-Shelving-Made-Out-of-Spare-Laminate-F/


Frequently asked questions
Have a question about this project?